 by
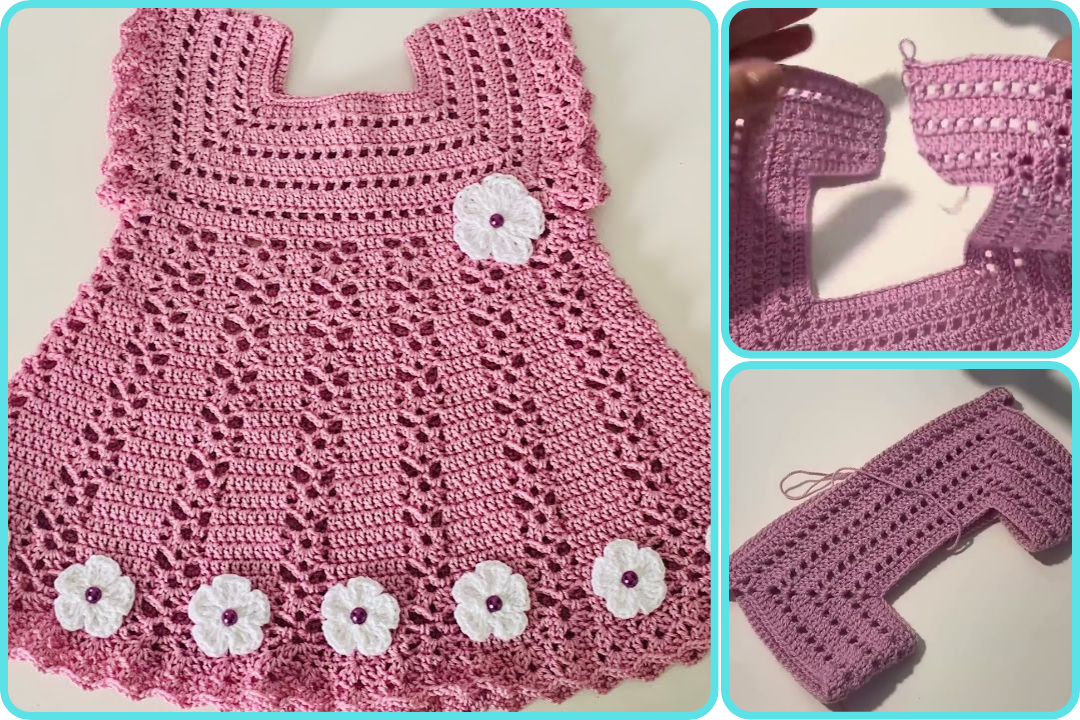
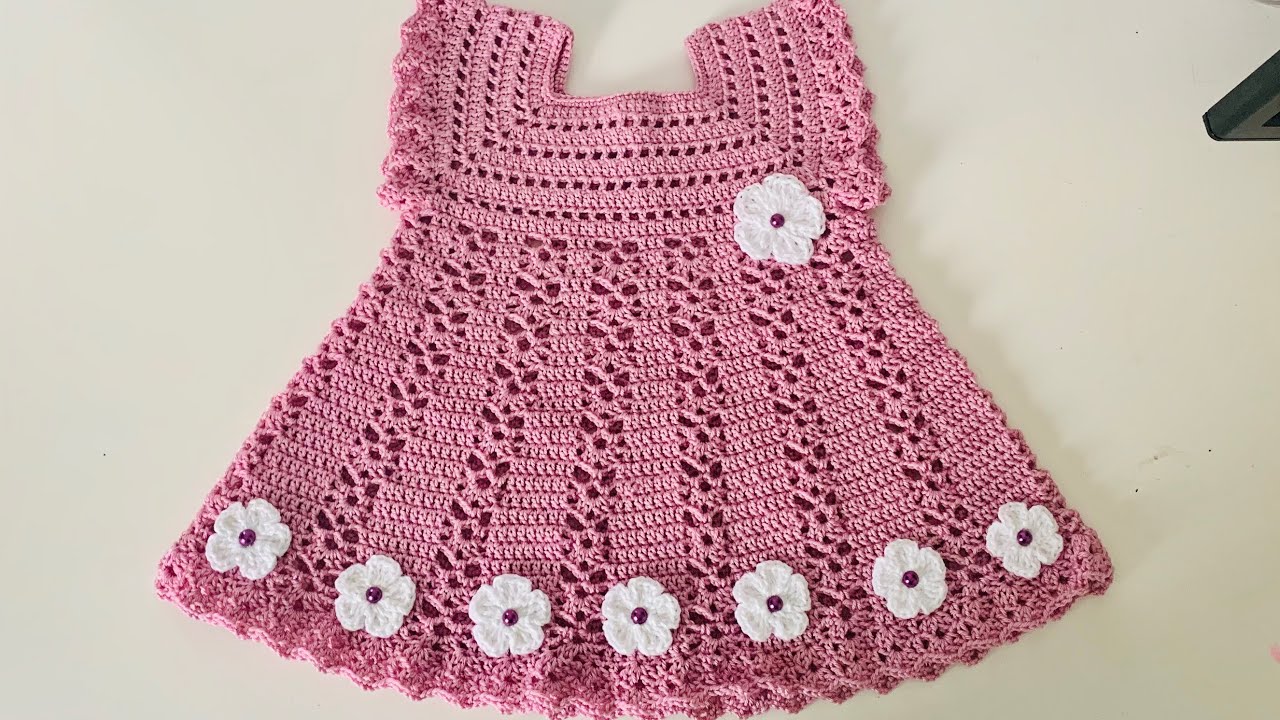
by Sure! Here’s a detailed step-by-step guide on how to crochet a baby dress for 0 to 3 months. This pattern is beginner-friendly and walks you through everything from materials to assembly.

🧶 How to Make a Crochet Baby Dress (0–3 Months)
Skill Level: Easy – Intermediate
Estimated Time: 4–6 hours (depending on your speed)
Size: 0–3 months
🧵 Materials Needed:
-
Yarn: Soft baby yarn (size 3 or light worsted weight) — approx. 200–250 yards
-
Hook: 4.0 mm (G-6) crochet hook
-
Tapestry needle (for weaving in ends)
-
Scissors
-
2 small buttons (for back closure)
-
Measuring tape (optional)
📏 Measurements (approximate for 0–3 months):
-
Chest circumference: 16 inches (40.5 cm)
-
Length: 12 inches (30.5 cm)
🪡 Stitches Used (US Terms):
-
CH – Chain
-
SC – Single Crochet
-
DC – Double Crochet
-
HDC – Half Double Crochet
-
SL ST – Slip Stitch
-
V-Stitch – (DC, CH 1, DC) in same stitch
-
Shell Stitch – 5 DC in same stitch
🧤 Step-by-Step Instructions:
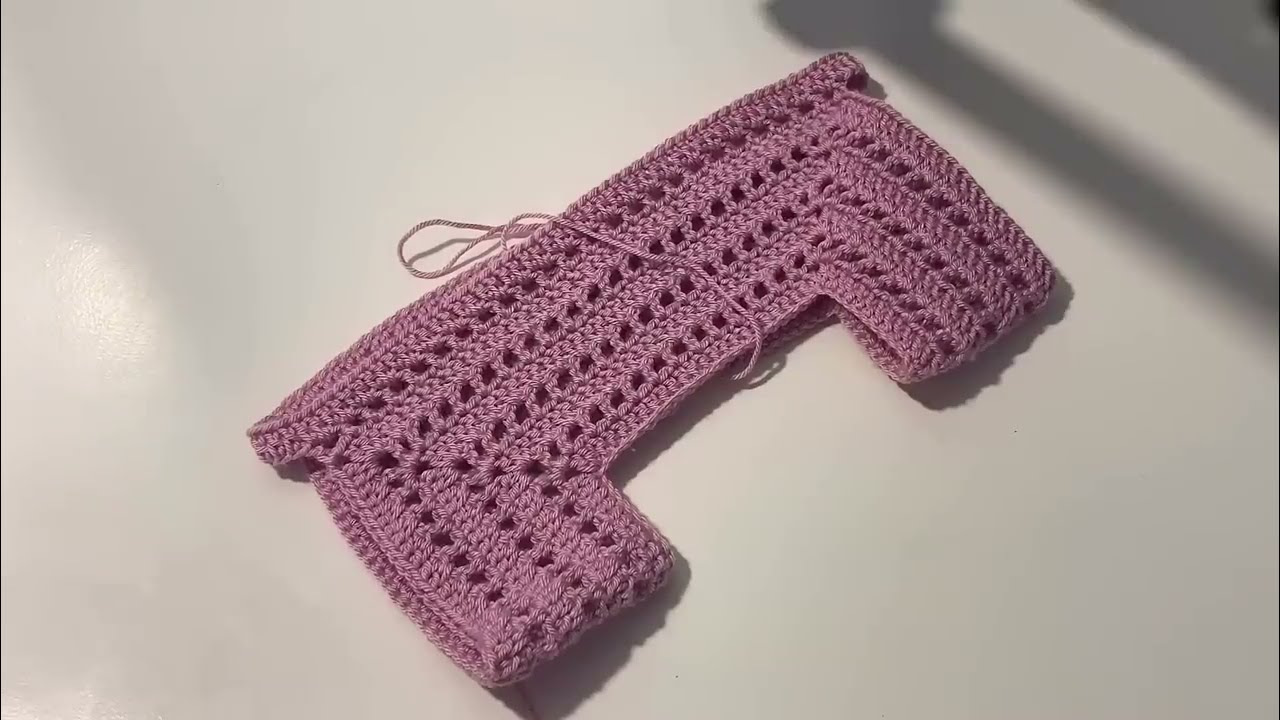
🧩 Part 1: Yoke (Top Bodice)
-
Foundation:
-
CH 60 (this will fit a 16″ chest; adjust in multiples of 10 if needed).
-
Join with a SL ST to the first CH to form a ring (be careful not to twist it).
-
-
Round 1:
-
CH 2 (counts as DC), DC in each CH around. Join with SL ST to top of CH 2.
-
Total: 60 DC
-
-
Round 2 – Yoke Increase:
-
CH 2, DC in next 9 STs, 2 DC in next ST; repeat * around. Join.
-
Total: 66 DC
-
-
Round 3:
-
CH 2, DC in next 10 STs, 2 DC in next ST; repeat * around. Join.
-
Total: 72 DC
-
-
Rounds 4–5:
-
Continue increasing similarly until you have about 84–90 DC.
-
You want 4 points of increase for raglan sleeves if you prefer that shaping.
-
🧩 Part 2: Armhole Separation
-
Round 6:
-
CH 2, DC in next 12 STs (front), CH 5 (armhole), skip next 18 STs (sleeve),
DC in next 24 STs (back), CH 5, skip next 18 STs (other sleeve), DC in last 12 STs.
-
-
Round 7:
-
CH 2, DC in every ST and CH space across — this forms the base of the skirt.
-
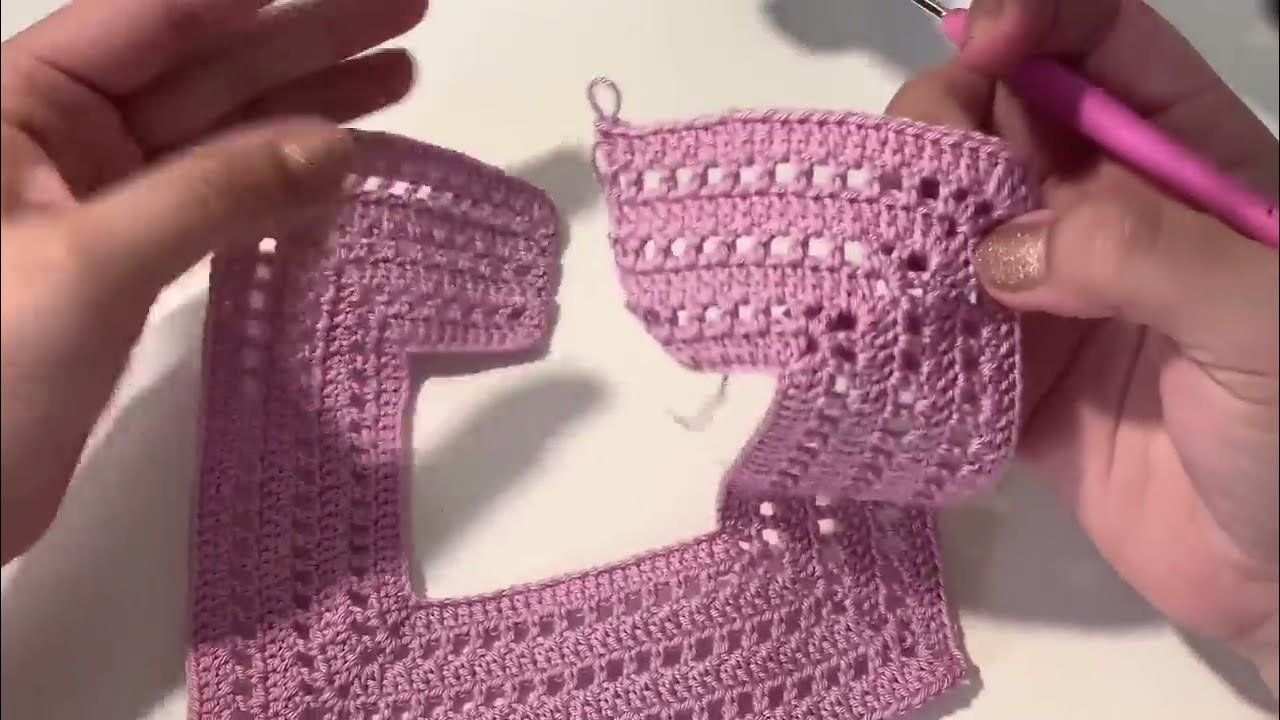
👗 Part 3: Skirt
Now that you’ve joined the sleeves, work on the skirt portion. You can customize this with different stitch patterns (shell, V-stitch, etc.).
Option A: Shell Stitch Skirt
-
Round 8:
-
CH 2, skip 2 STs, 5 DC in next ST (shell), skip 2 STs, SC in next; repeat around.
-
-
Round 9–20:
-
Repeat Round 8, placing shells into the center of each shell from the previous row.
-
Continue until desired length (approx. 12 inches from shoulder).
-
🪡 Finishing:
-
Edging (optional):
-
SC or picot edging around armholes and neck for a finished look.
-
-
Back Closure:
-
Leave a small slit at the top back. Sew on 2 small buttons and use CH loops as buttonholes.
-
-
Weave in all ends using the tapestry needle.
🎨 Customization Ideas:
-
Add ribbon around the waist.
-
Use contrasting color for the yoke or skirt.
-
Add a small crocheted flower or bow for decoration.
📷 Optional Visual Help:
If you’d like, I can help create visual diagrams or stitch charts to guide you. Just let me know!
Watch video: