 by
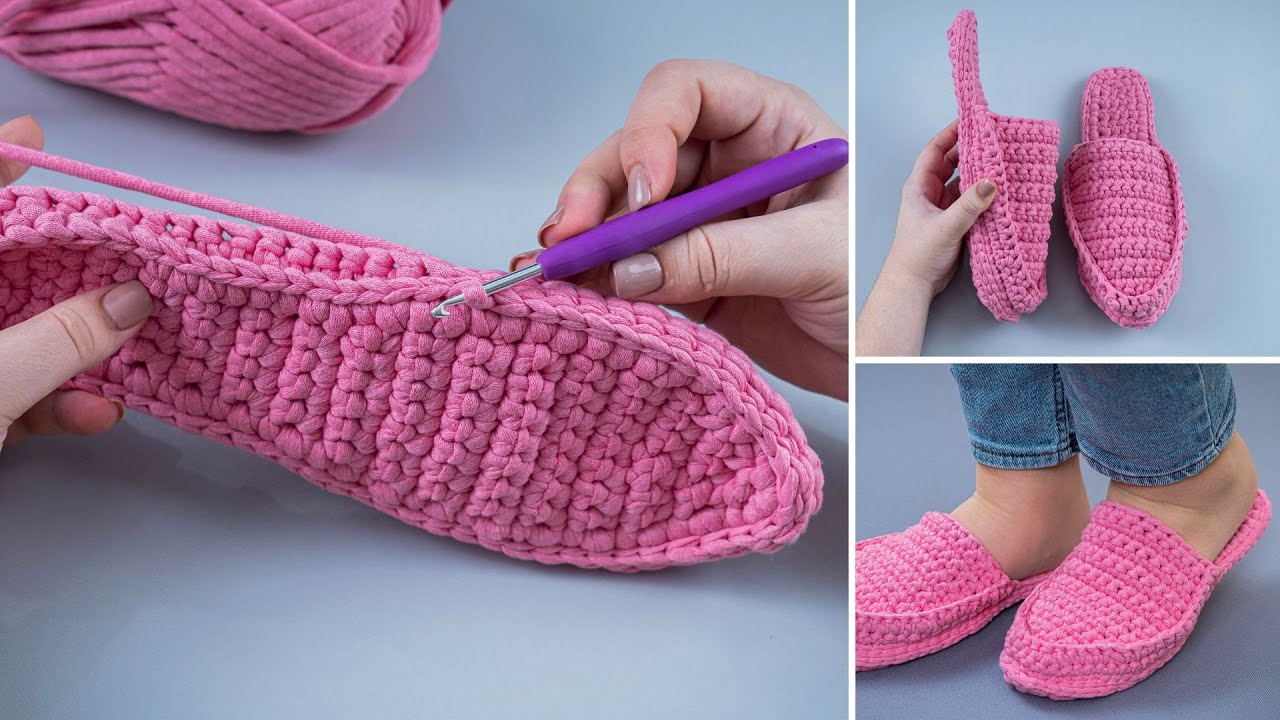
by Here’s a detailed, beginner-friendly tutorial on How to Make Simple Slippers Out of Chunky Yarn.
This pattern is fast, cozy, and perfect for beginners, and using chunky yarn makes the slippers warm and quick to complete. 🧶✨
How to Make Simple Slippers Out of Chunky Yarn – Step-by-Step Tutorial
These slippers are knitted flat on 2 needles or crocheted in a single piece (depending on preference), then folded and sewn. Using chunky yarn makes them thick, warm, and perfect for winter, and they can be completed in just a few hours.
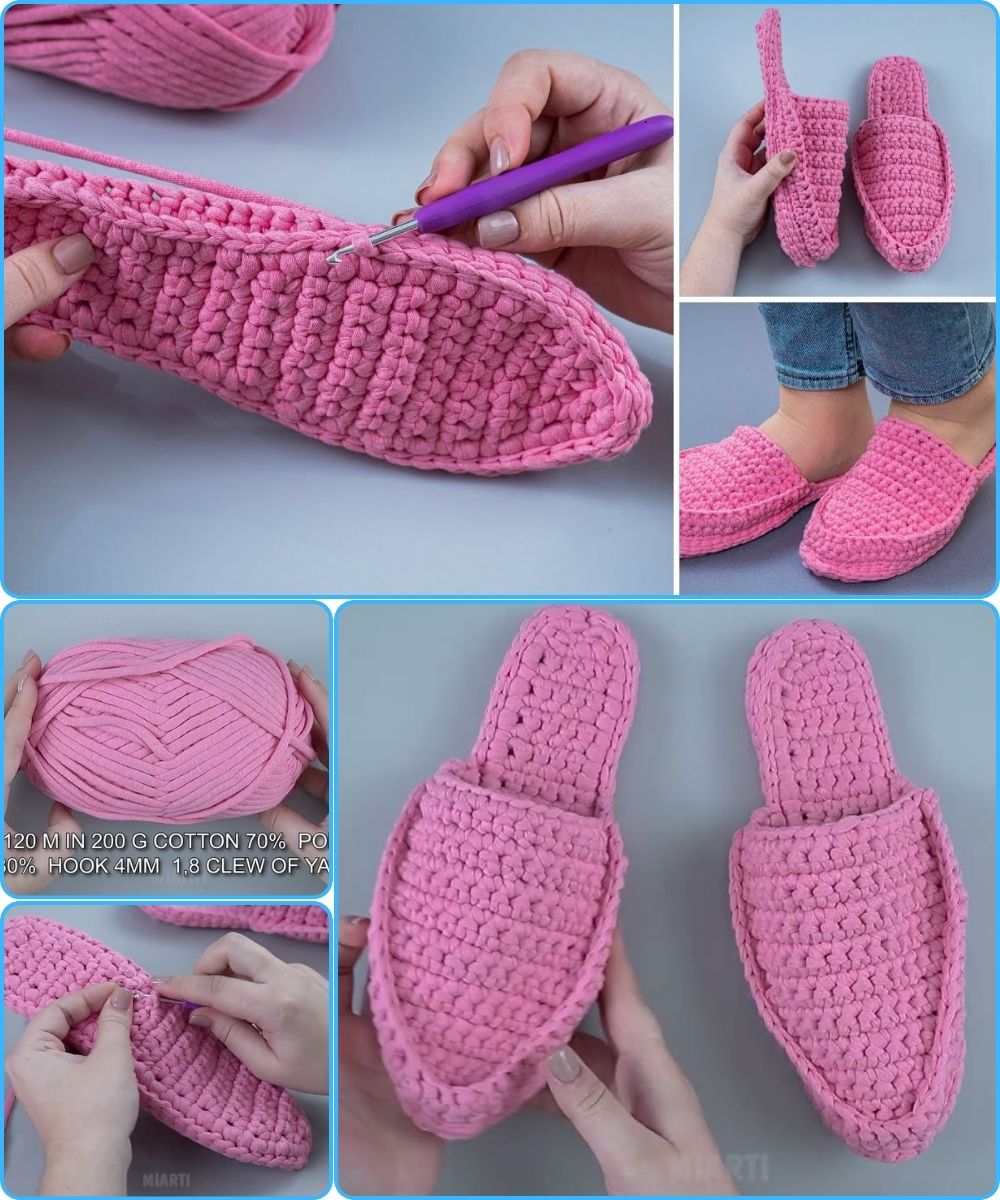
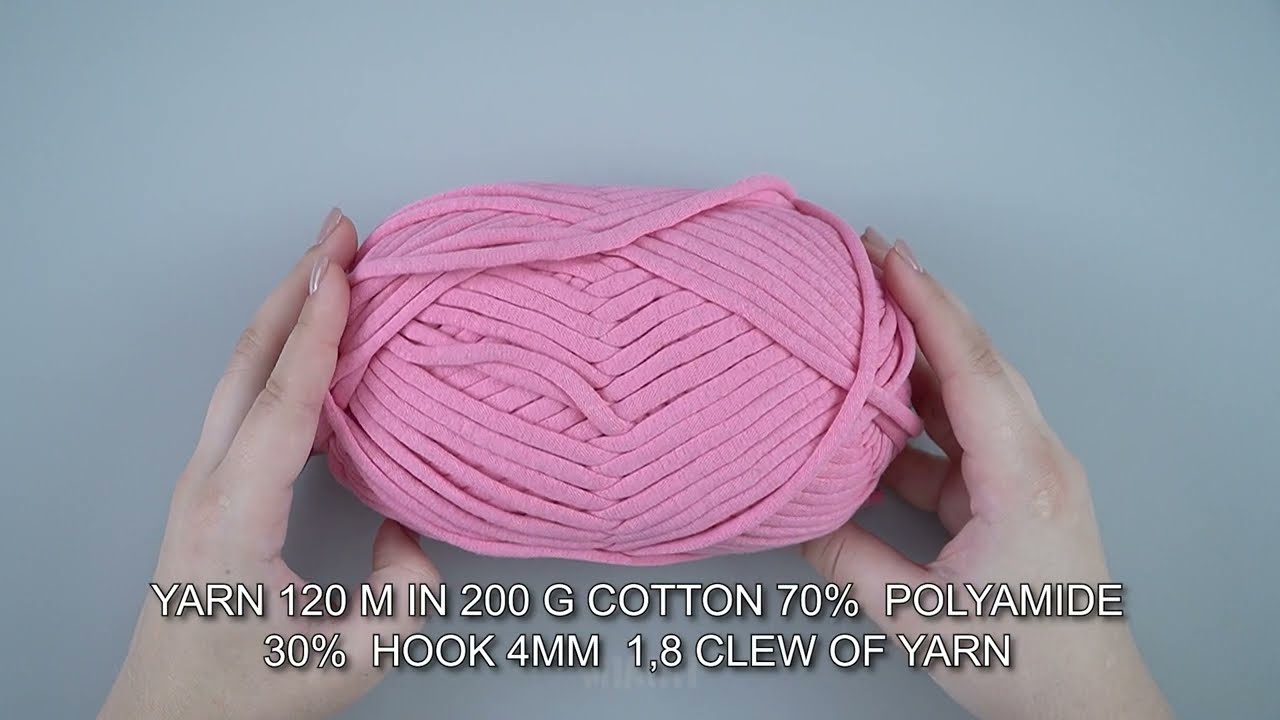
Materials You’ll Need
-
Yarn:
-
Chunky/bulky weight yarn (Category 5)
-
Soft wool blend or acrylic for comfort
-
-
Knitting Needles or Crochet Hook:
-
Knitting: 6–8 mm (US 10–11) straight needles
-
Crochet: 6–8 mm (J–L) hook
-
-
Scissors
-
Yarn needle
-
Measuring tape
✅ Chunky yarn is key for speed and extra warmth.
Stitches Used
Knitting Version:
-
Knit (K)
-
Purl (P)
-
Knit two together (K2tog)
-
Cast on & Bind off
Crochet Version:
-
Chain (ch)
-
Half Double Crochet (hdc)
-
Slip Stitch (sl st)
✔ No complicated shaping required.
Step 1: Make the Base
Knitting:
-
Cast on 20–24 stitches for children, 36–40 stitches for adults (adjust for foot size).
-
Knit 4–6 rows in garter stitch for a stretchy base.
Crochet:
-
Chain enough stitches for the length of the foot.
-
Work hdc rows until the rectangle is wide enough to wrap around the foot.
📏 The base should cover the sole comfortably.
Step 2: Knit or Crochet the Body
-
Continue in stockinette stitch (knit/purl) for knitting or hdc for crochet.
-
Work until the piece reaches the length of the foot minus 2 cm.
💡 Try the piece on your foot before finishing to ensure a good fit.
Step 3: Shape the Toe
Knitting:
-
On right-side rows, K2tog at the beginning and end.
-
Purl wrong-side rows normally.
-
Continue until 12 stitches remain.
Crochet:
-
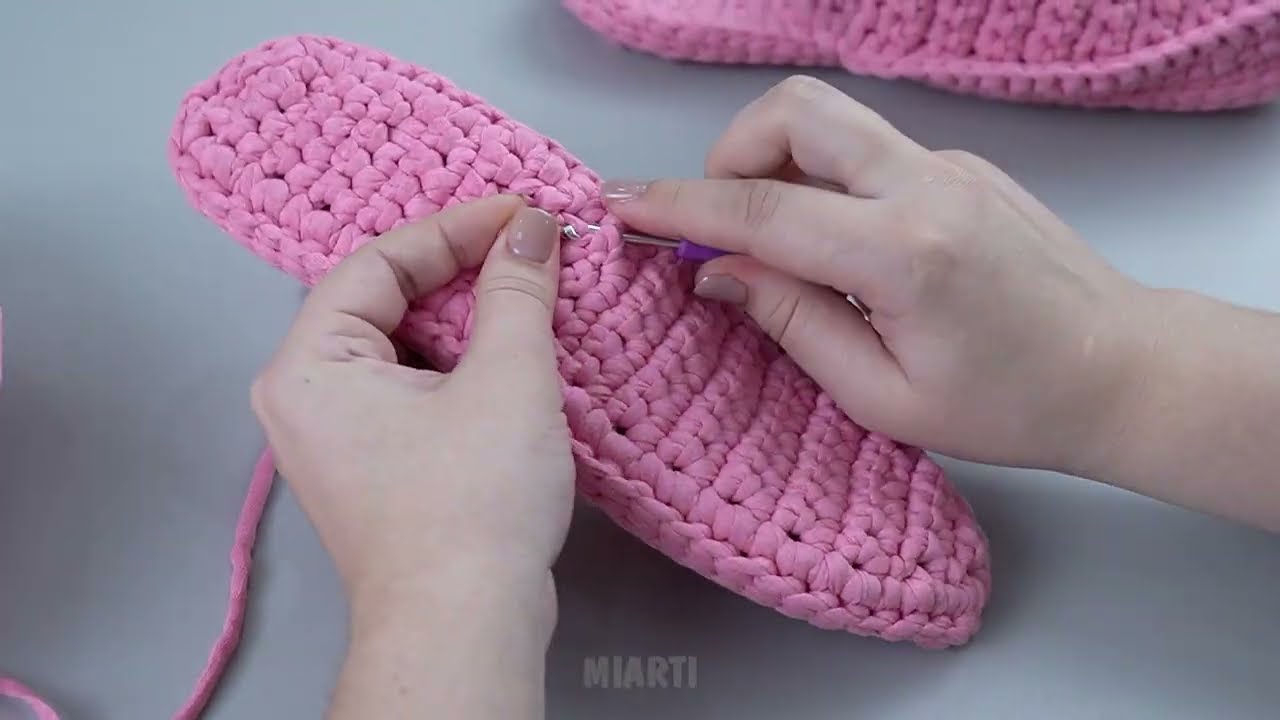
Fold the rectangle at the toe.
-
Sew along the short edge to round the toe.
This creates a simple rounded toe without complicated shaping.
Step 4: Form the Heel
-
Fold the rectangle lengthwise.
-
Sew the back seam about 5–6 cm to create a heel cup.
-
Leave the top opening for the foot.
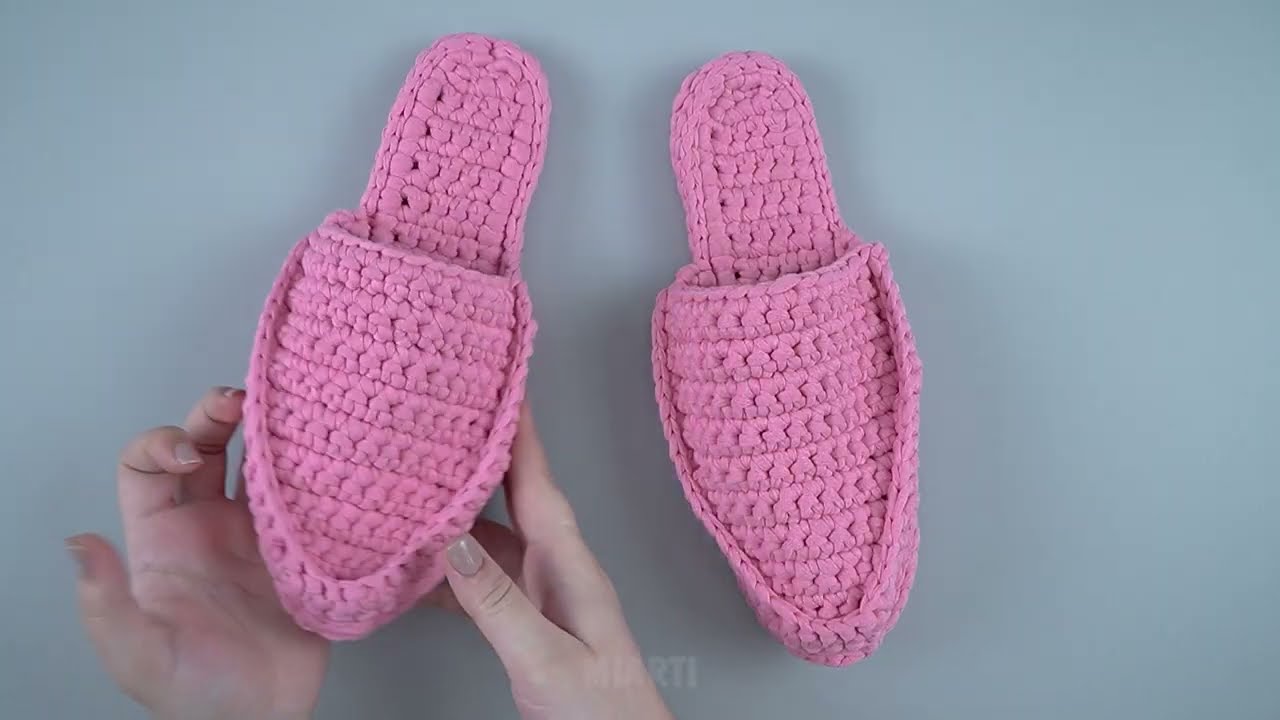
✨ The slippers are ready to wear with a warm, thick sole.
Step 5: Finish
-
Weave in all yarn ends.
-
Optionally, add a ribbed cuff or decorative edge:
-
Knit K1, P1 ribbing for 4–6 rows, then bind off.
-
Or crochet 3–5 rounds of hdc around the opening.
-
Tips for Working with Chunky Yarn
-
Chunky yarn works up very quickly—perfect for gifts.
-
Keep stitches even; chunky yarn shows uneven tension more easily.
-
Use a yarn needle with a large eye for sewing.
-
Check the length and width before folding and sewing.
Optional Customizations
-
Add stripes or color blocks while working the rectangle
-
Crochet a decorative edge or ribbed cuff
-
Attach a pom-pom or bow at the toe or back
-
Apply non-slip dots or felt to the sole for safety
Why Chunky Yarn Slippers Are Ideal
-
✔ Warm and cozy
-
✔ Quick to knit or crochet
-
✔ Thick and cushioned for comfort
-
✔ Beginner-friendly pattern
-
✔ Perfect for gifts or personal use
Final Thoughts
Making simple slippers with chunky yarn is one of the fastest and most satisfying projects for beginners. You can complete a pair in 1–2 hours, they are warm, soft, and stylish, and the pattern is easily customizable for any foot size.
I can also create a full size chart with exact stitch counts and rows for children, women, and men so you can make slippers that fit perfectly every time.
Watch video: