by
by Here’s a clear, beginner-friendly, detailed guide you can use as a blog post, tutorial, or handout.
How to Make the Simplest Knitted Slippers in an Hour (Perfect for Beginners!)
Knitted slippers are one of the easiest and most satisfying projects for beginners. With basic stitches and simple shaping, you can create warm, cozy slippers in about one hour, even if you’re new to knitting. This project uses straight needles and minimal sewing, making it ideal for first-time knitters.
What You’ll Need
Materials
-
Yarn:
-
Medium or bulky yarn (worsted or chunky works best)
-
About 100–150 grams
-
Wool or wool blend is ideal for warmth
-
-
Knitting needles:
-
Size 8–10 mm (US 11–15), straight needles
-
-
Tapestry needle (for sewing)
-
Scissors
Skill Level
-
Absolute beginner
-
Only basic stitches required
Time Required
-
Approximately 1 hour per pair
Basic Stitches You’ll Use
Before starting, make sure you know:
-
Cast on
-
Knit stitch
-
Purl stitch
-
Cast off (bind off)
That’s it—no complex patterns or shaping!
Step 1: Cast On
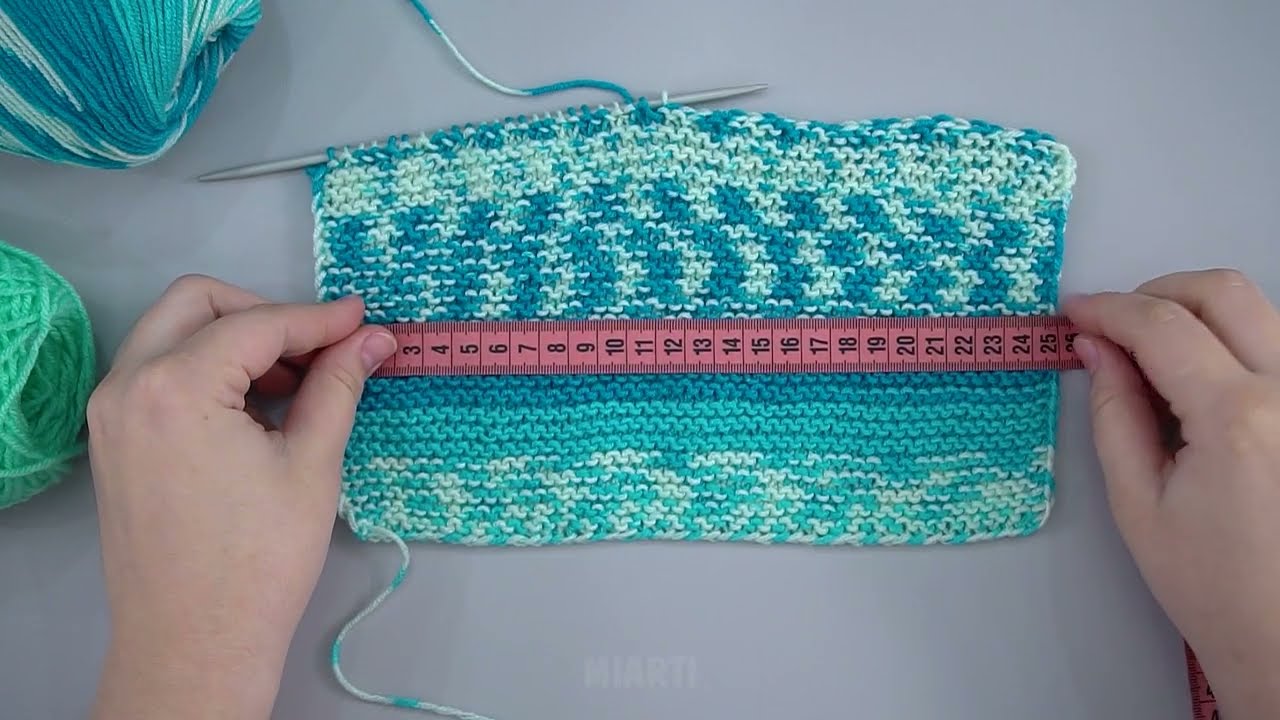
Cast on 30–40 stitches, depending on foot size and yarn thickness.
-
Small foot: 30 stitches
-
Medium foot: 34 stitches
-
Large foot: 38–40 stitches
Keep your stitches loose, so the slippers stay comfortable.
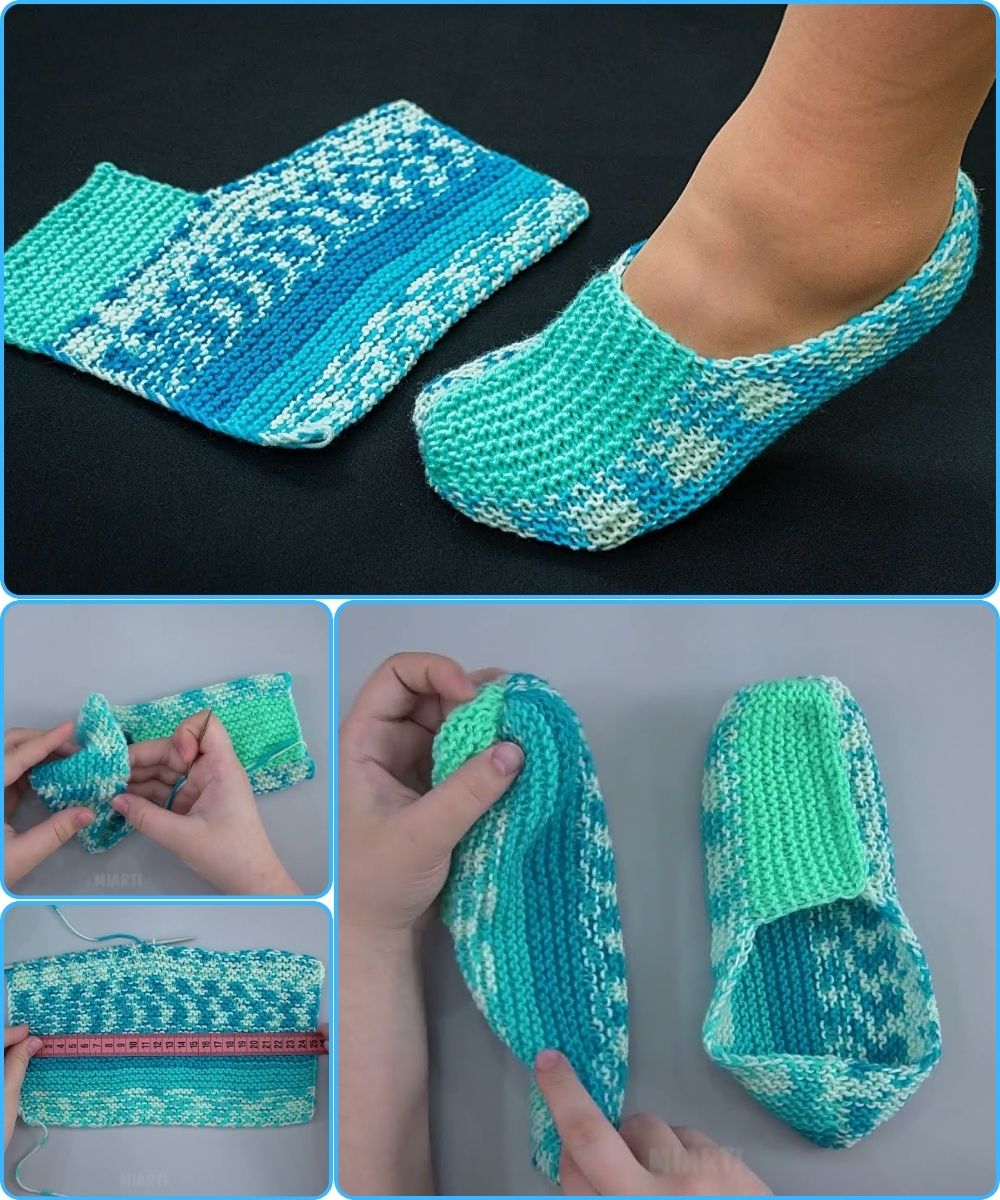
Step 2: Knit the Sole (Flat Rectangle)
You’ll knit a simple rectangle, which will later be folded into a slipper shape.
-
Knit every row (this is called garter stitch)
-
Continue knitting until the piece measures:
-
About 8–10 inches (20–25 cm) long
-
Long enough to fit from heel to toe
-
Garter stitch is perfect for beginners because:
-
It doesn’t curl
-
It’s stretchy and soft
-
It hides small mistakes
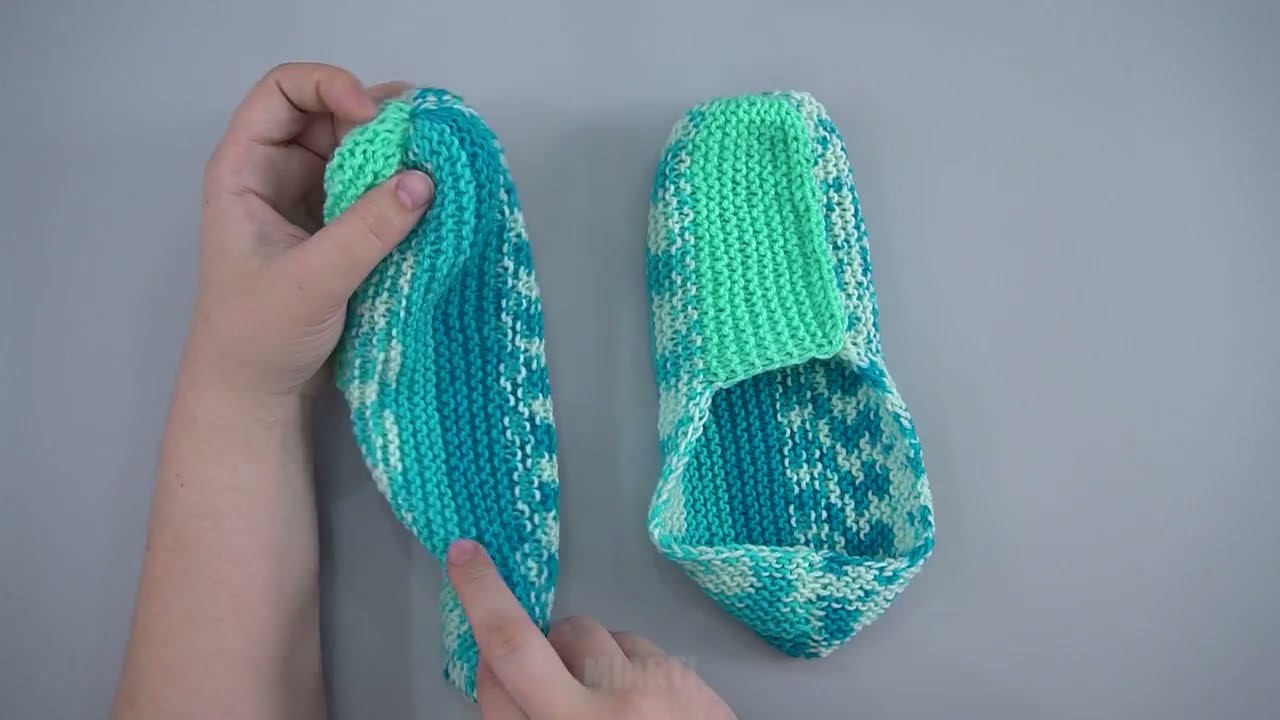
Step 3: Shape the Slipper
Now comes the fun part—turning the rectangle into a slipper!
Fold the knitted piece:
-
Fold it in half lengthwise
-
The cast-on edge will become the toe
-
The cast-off edge will become the heel
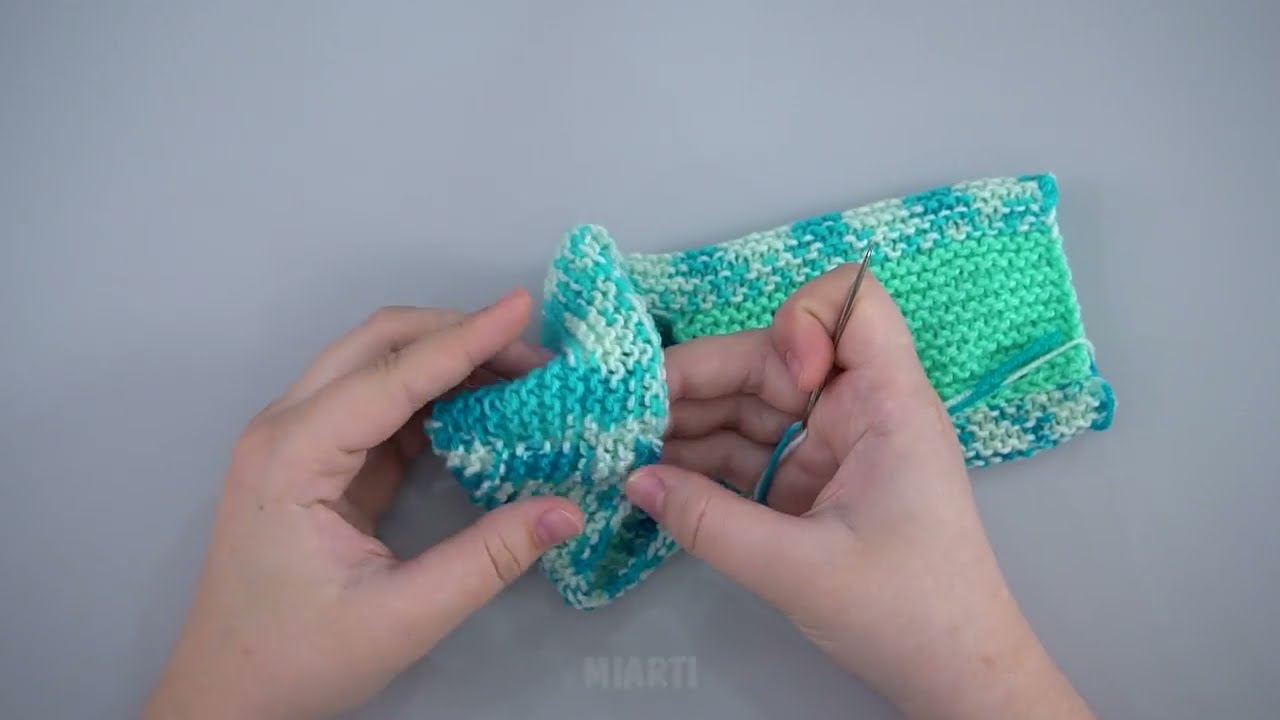
Step 4: Sew the Toe
-
Thread your tapestry needle with yarn
-
Sew along one short edge (the toe)
-
Pull gently to create a rounded toe shape
-
Secure with a knot
Step 5: Sew the Heel
-
Sew up the back edge halfway
-
Leave the top open for your foot
-
Adjust the opening to fit snugly but comfortably
You can try it on as you sew to get the perfect fit.
Step 6: Finish and Repeat
-
Weave in all loose ends
-
Turn the slipper right side out
-
Repeat the same steps for the second slipper
Congratulations—your slippers are done!
Optional Customizations (Beginner-Friendly!)
Once you’re comfortable, try:
-
Adding a ribbed cuff at the opening
-
Sewing on buttons or pom-poms
-
Using two colors of yarn
-
Adding a non-slip sole with fabric paint or rubber dots
Tips for Success
-
Use chunky yarn for faster results
-
Don’t worry about mistakes—slippers are forgiving!
-
Make them slightly snug; yarn stretches with wear
-
Practice tension by knitting slowly
Why This Project Is Perfect for Beginners
✔ No complicated patterns
✔ Uses basic stitches only
✔ Fast and rewarding
✔ Great handmade gift idea
✔ Builds confidence in knitting
If you’d like, I can also:
-
Simplify this into a short pattern
-
Adapt it for children or men
-
Add photos or diagrams descriptions
-
Turn it into a YouTube script or blog post
Watch video: