 by
by Absolutely! Let’s make this super clear and detailed so you can crochet your own simple slippers with a sole. I’ll break it down step by step, with tips along the way. I’ll assume you’re using medium worsted weight yarn (like acrylic or cotton) and a 5 mm (H) crochet hook.
Materials Needed
-
Medium worsted weight yarn (approx. 150–200 g)
-
5 mm (H) crochet hook
-
Scissors
-
Yarn needle for weaving ends
-
Stitch markers (optional but helpful)
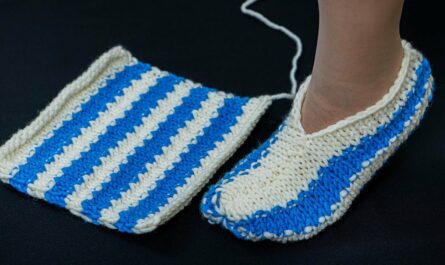
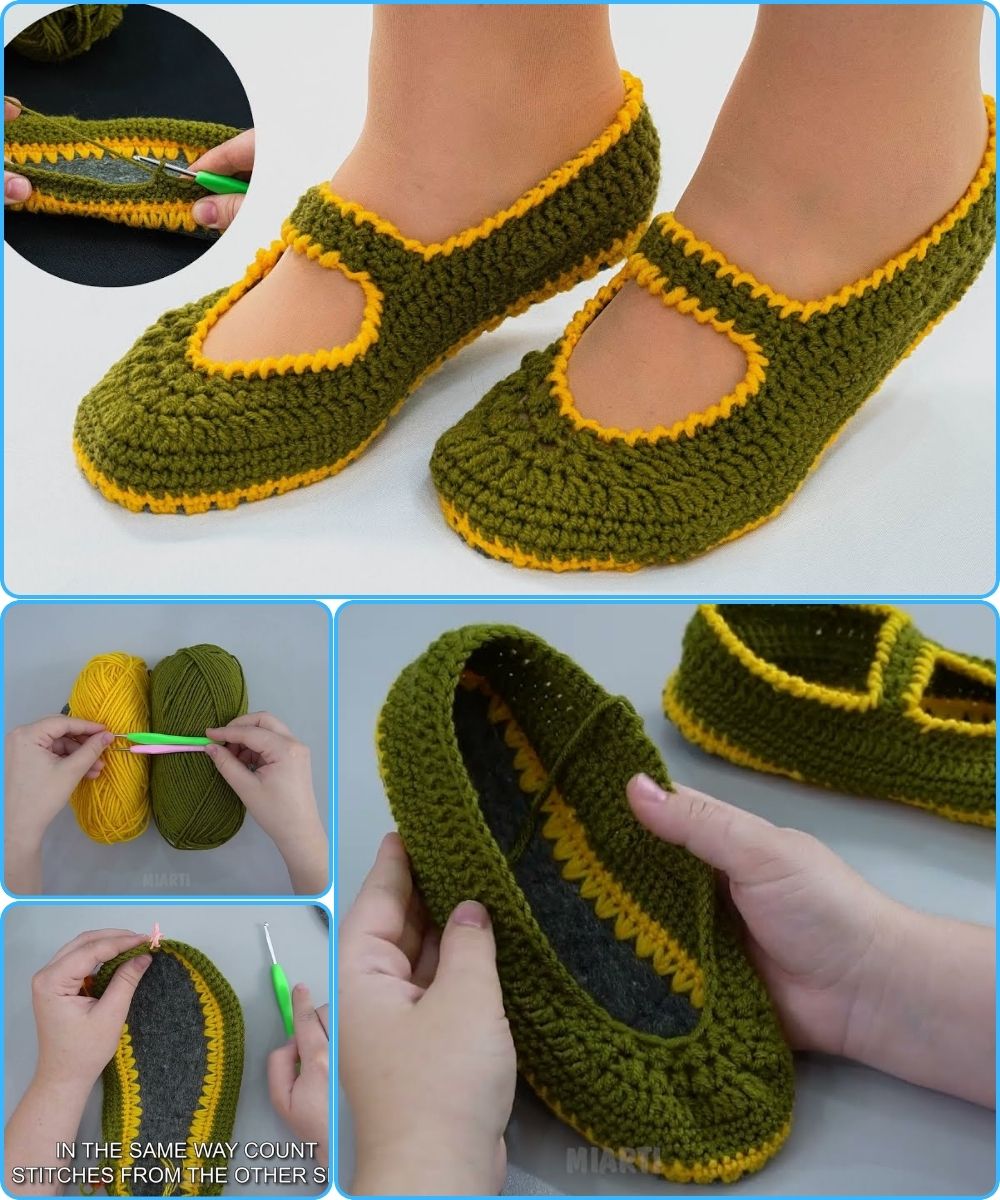
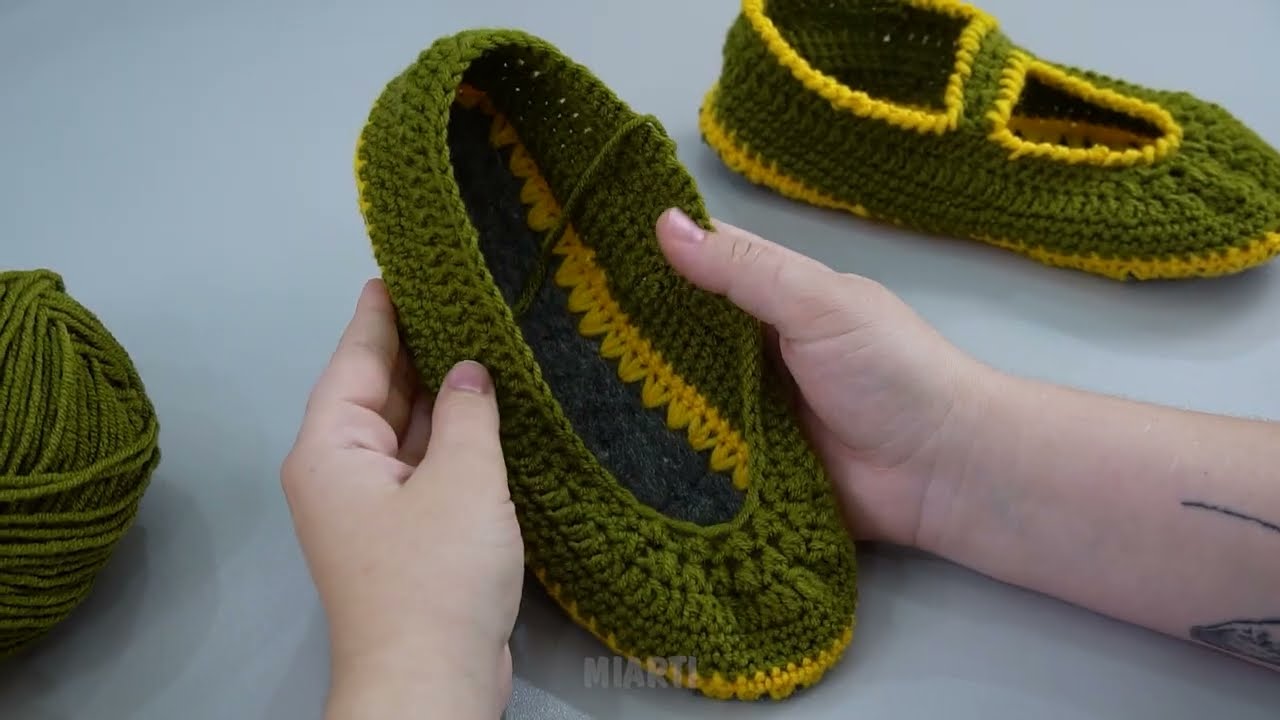
Step 1: Make the Sole
The sole is the base of your slipper. We’ll crochet an oval sole using single crochet (sc) stitches.
Instructions:
-
Chain 11 (or desired width). This is the width of the slipper sole.
-
Row 1: 1 sc in 2nd chain from hook and in each chain across. Turn.
-
You should have 10 sc.
-
-
Row 2: Chain 1, 2 sc in the first stitch (increase), sc in next 8 stitches, 2 sc in last stitch (increase). Turn.
-
Now you have 12 stitches.
-
-
Row 3: Chain 1, sc in first stitch, 2 sc in next stitch, sc in next 8 stitches, 2 sc in next stitch, sc in last stitch. Turn.
-
You are slowly increasing to make the sole oval.
-
-
Continue increasing at the ends until your sole reaches the length you want for your foot.
-
Example: for a teen/adult, aim for about 25 cm / 10 inches long.
-
-
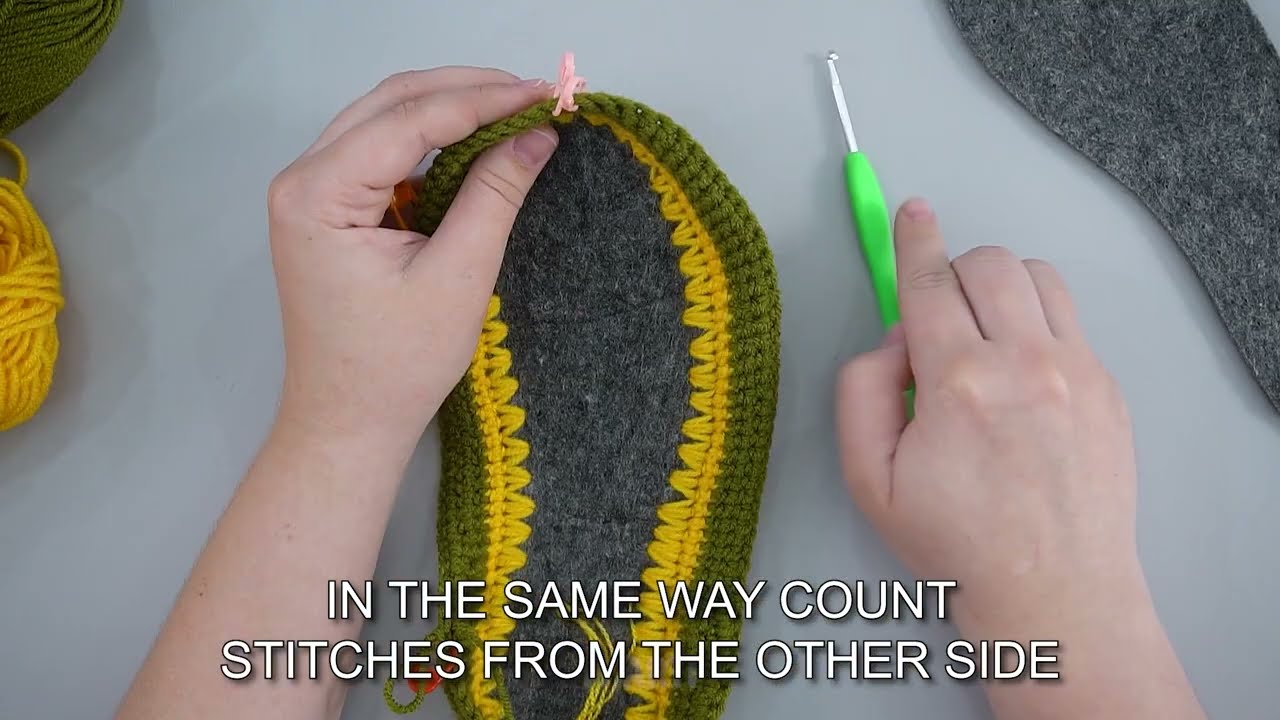
Once the sole is the right length, sc evenly around the edges for 1–2 rounds without increasing. This makes a smooth edge for the slipper upper.
✅ Tip: Place stitch markers at the ends of the sole to remember where to increase each round.
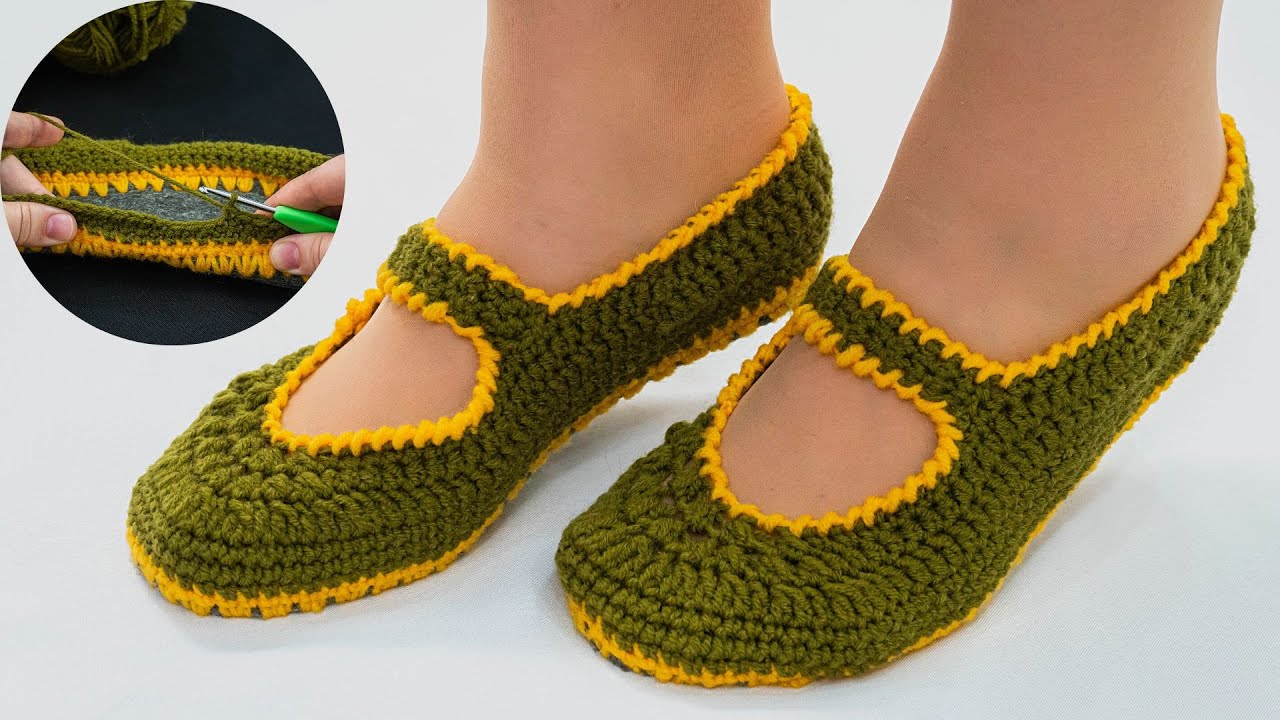
Step 2: Make the Upper Part of the Slipper
We’ll create a simple vamp/top for the slipper.
Instructions:
-
Start at the center front of the sole. Attach yarn with a slip stitch.
-
Chain 1, sc across about 2/3 of the sole’s front (or less if you want a peep toe style). Turn.
-
Row 1: Chain 1, sc2tog (decrease) at each end, sc across the middle stitches, sc2tog at each end. Turn.
-
Repeat this row until the top opening fits your foot snugly.
-
Usually 4–6 rows for teen/adult size.
-
-
When the top is the right size, fasten off and weave in ends.
Step 3: Create the Heel
-
Attach yarn at the back of the sole.
-
Chain 1, sc evenly across the heel. Turn.
-
Continue sc in each stitch for 3–4 rows until the heel reaches the back of your foot.
-
Optional: You can decrease 1 stitch at each end for a more fitted heel.

Step 4: Edge Finishing
-
Crochet 1 round of single crochet around the entire slipper (sole edge, top, and heel) for a clean look.
-
Optional: Add a slip stitch border or scalloped edge for decoration.
Step 5: Try On & Adjust
-
Try the slipper on. If it feels loose, add another row to the upper or tighten with a row of slip stitches around the opening.
-
Weave in all loose ends with the yarn needle.
Step 6: Optional Extras
-
Add a pom-pom or crochet flower to the top.
-
Use non-slip grips: You can sew on some puffy paint or fabric glue dots on the sole for traction.
-
Double-layered sole: Crochet another sole and sew it to the bottom for extra thickness.
Summary of the Technique
-
Sole: Oval, increased at ends for shape.
-
Upper: Decreases at front for a snug fit.
-
Heel: Rows of single crochet to cover the back.
-
Edges: Single crochet round for finishing.
-
Optional: Decoration & non-slip grip.
If you want, I can draw a visual step-by-step diagram showing the sole, upper, and heel placement. It makes it way easier to follow than just words.
Watch video: