by
by Here’s a clear, beginner-friendly, step-by-step guide you can use as a blog post, class handout, or personal notes.
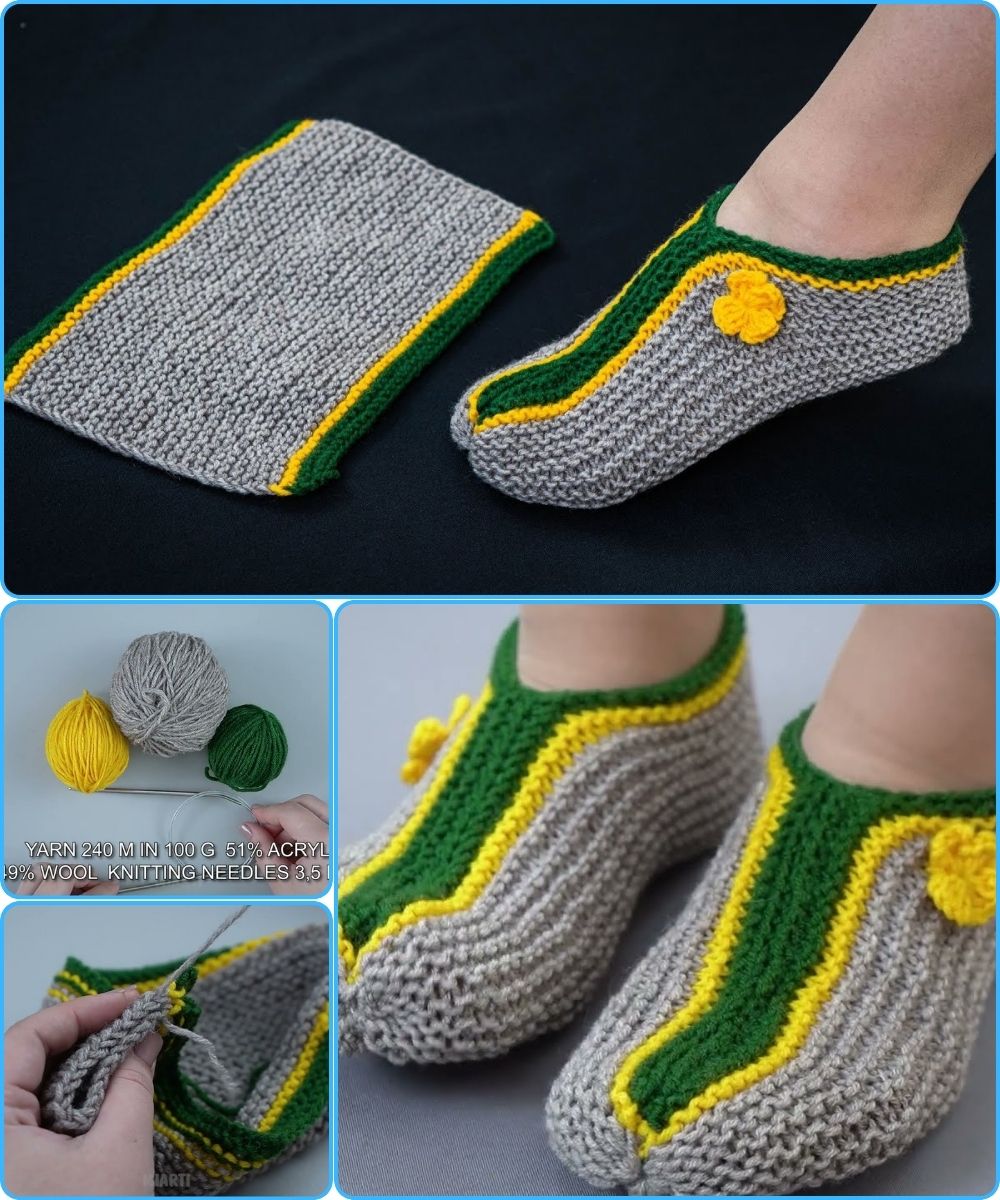
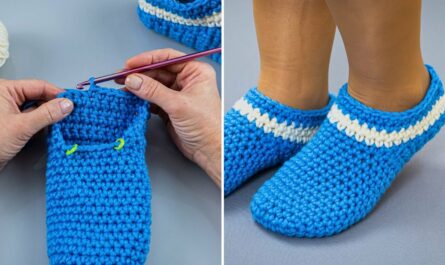
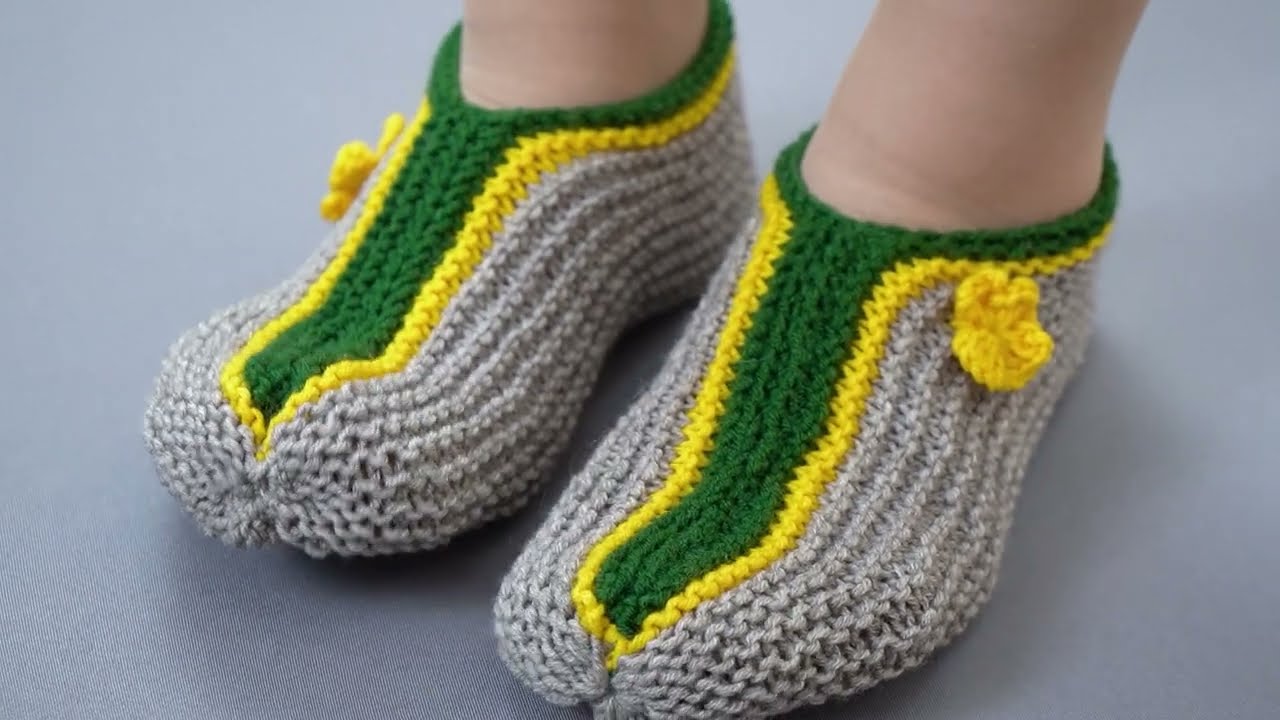
How to Make Simple Slippers with One Swatch
Even a beginner can handle it!
Making slippers doesn’t have to be complicated. With just one simple swatch, basic stitches, and a little folding, you can create cozy handmade slippers—perfect for beginners who want quick and satisfying results.
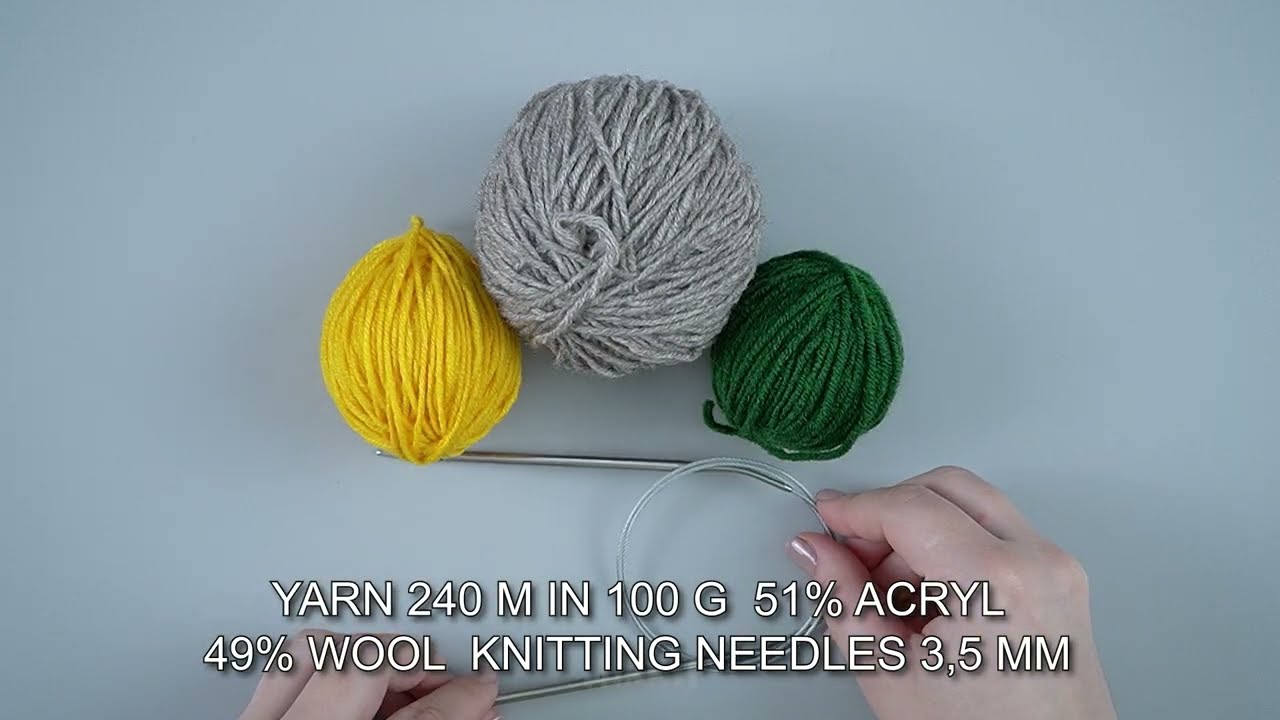
What You’ll Need
-
Yarn: Medium-weight (worsted) yarn works best
-
About 100–150 grams
-
-
Needles or Hook:
-
Knitting needles: Size US 7–9 (4.5–5.5 mm)
-
or Crochet hook: Size 5–6 mm
-
-
Scissors
-
Yarn needle (for sewing seams)
-
Measuring tape
Step 1: Make One Simple Swatch
This swatch will become your entire slipper.
Knitted Version (Beginner-Friendly)
-
Cast on 30 stitches (for an average adult foot)
-
Knit every row (this is called garter stitch)
-
Continue knitting until the piece measures 9–10 inches long
-
Bind off loosely
Tip: If you want larger slippers, cast on more stitches. For smaller slippers, cast on fewer stitches.
Crochet Version (Optional)
-
Chain 30 stitches
-
Single crochet in every stitch
-
Turn and repeat rows until the rectangle is 9–10 inches long
-
Fasten off
You now have one flat rectangle—that’s it!
Step 2: Fold the Swatch into Slipper Shape
Lay your rectangle flat on a table.
-
Fold the swatch in half lengthwise (hotdog-style)
-
Sew the long edge together—this forms the sole
-
Leave one end open (this will be the toe opening)
Step 3: Shape the Toe
-
On the closed end, sew about 2–3 inches across
-
Pull the yarn gently to slightly round the toe
-
Secure tightly and weave in ends
This creates a comfortable, rounded toe without shaping stitches.
Step 4: Create the Heel
-
At the open end, fold the corners inward
-
Sew the back seam straight up
-
This forms a simple heel cup
Try the slipper on and adjust if needed before tightening the yarn.
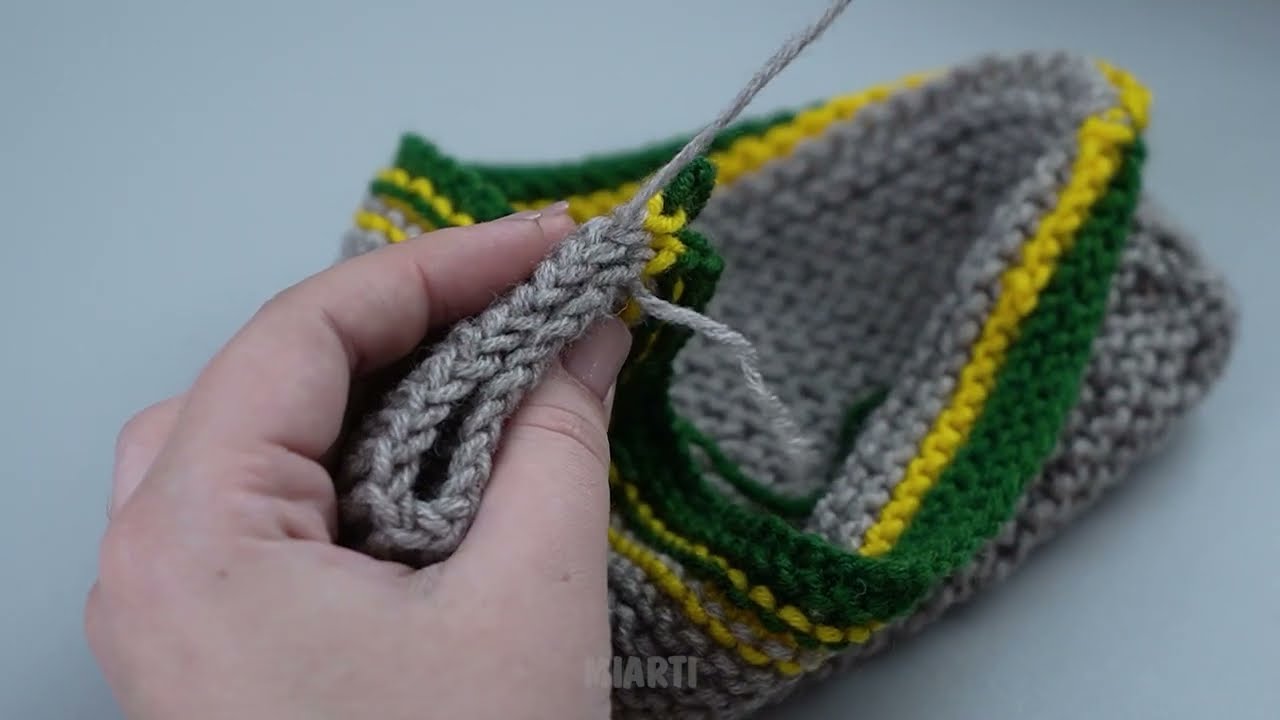
Step 5: Finish the Slipper
-
Weave in all loose ends
-
Turn the slipper right-side out
-
Optional: Add a single crochet or knit border around the opening for a neat finish
Repeat the same steps to make the second slipper.
Customization Ideas
-
Add a ribbed cuff or folded edge
-
Sew on buttons or bows
-
Use thicker yarn for warmer slippers
-
Attach a non-slip sole (fabric paint or rubber dots)
Why This Project Is Perfect for Beginners
✔ Only one swatch
✔ No shaping stitches
✔ Minimal sewing
✔ Quick results
✔ Easy to resize
Final Thoughts
These simple slippers prove that you don’t need advanced skills to create something practical and cozy. With one rectangle and a few seams, even a complete beginner can make warm, handmade slippers in just a few hours.
If you’d like, I can also:
-
Rewrite this for kids’ slippers
-
Turn it into a PDF pattern
-
Adapt it for knitting only or crochet only
Just let me know! 🧶
Watch tutorial: