 by
by Here is a clear, friendly, beginner-friendly guide on how to make a warm hood-scarf (snood) with a button, written in detailed, easy-to-follow steps. No sewing experience needed!

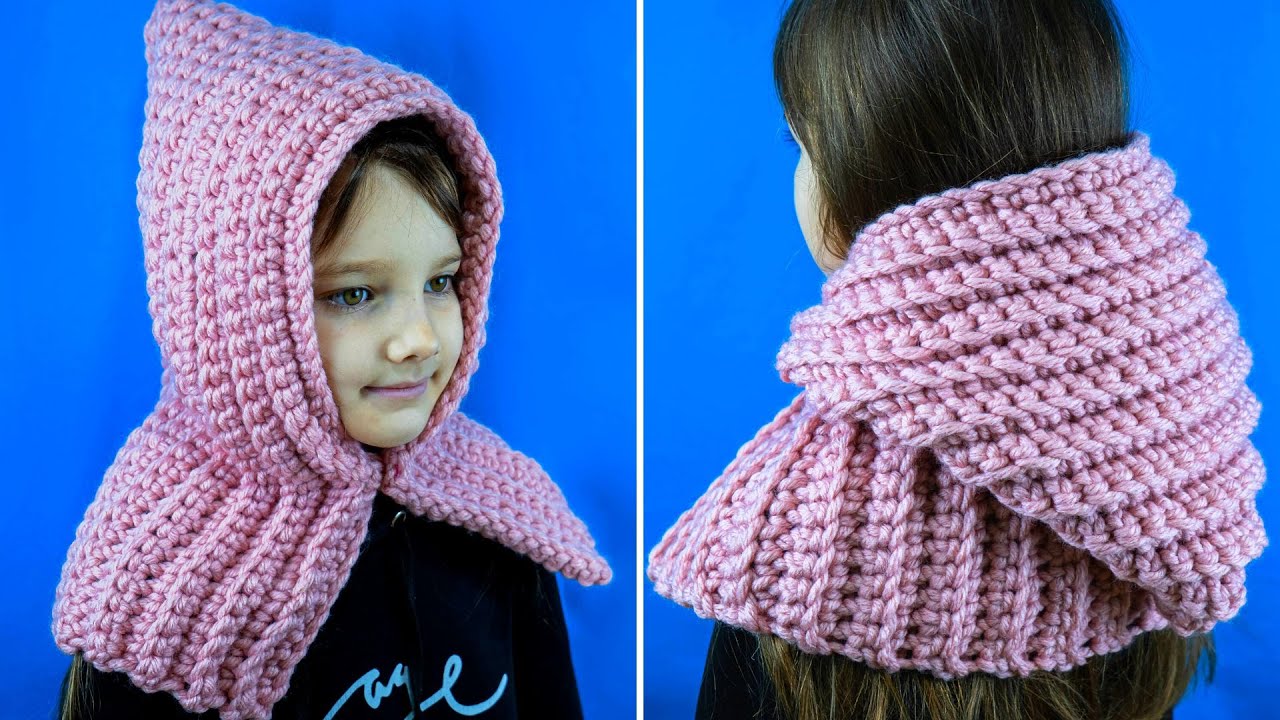
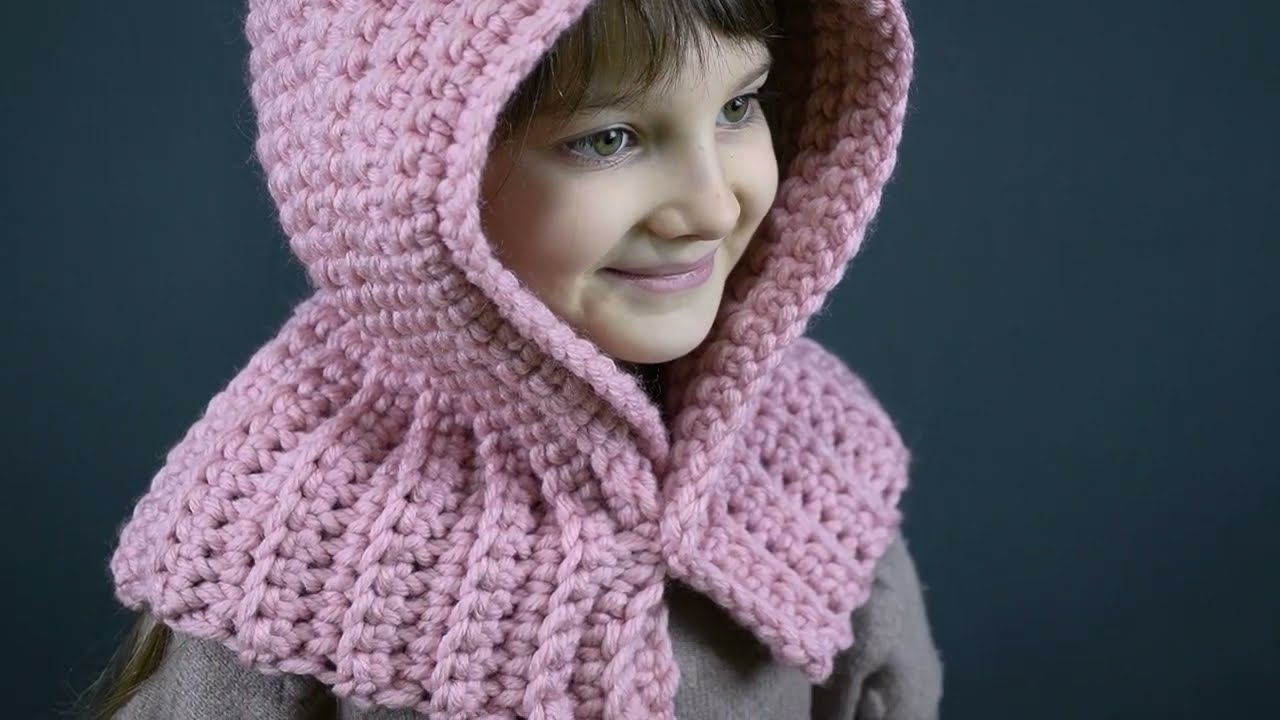
How to Make a Warm Hood-Scarf (Snood) With a Button — Beginner Friendly
A hood-scarf (sometimes called a “snood”) is a cozy, all-in-one accessory that keeps both your neck and head warm. This version closes with a button, so it’s easy to put on, comfortable, and adjustable — and you can make it even if you’ve never sewn anything before.
⭐ What You Need
Materials
-
1 yard (1 meter) of soft, warm fabric
-
Best options: fleece, flannel, minky, sweatshirt knit, or wool-blend
-
-
1 large button (1–1.5 inches / 2.5–4 cm)
-
Matching or contrasting thread (optional if using fabric glue)
Tools
-
Scissors or rotary cutter
-
Pins or clips
-
Sewing machine or needle for hand sewing
-
Fabric marker or chalk
-
Measuring tape
-
Fabric glue (optional if you don’t want to sew the button loop)
💡 Cutting Your Fabric
You will cut just two pieces:
1. Hood Piece
-
Size: 26 inches wide × 15 inches tall (66 × 38 cm)
-
This will fold to make the top and back of the hood.
2. Scarf/Snood Piece
-
Size: 34 inches long × 12 inches tall (86 × 30 cm)
-
This wraps around your neck and has the button closure.
(The measurements are flexible—make it longer for extra wrap or taller for more neck warmth.)
🧵 Step-by-Step Sewing Instructions
Step 1: Form the Hood
-
Fold the hood piece in half with the right sides facing each other.
-
The fold should be at the top; the open edges are at the back.
-
Sew along the curved back edge (or straight if you prefer a pointed hood).
-
Tip: If you’re afraid of curves, sew a straight line — the hood will simply have a cute elf-style point!
-
Turn the hood right-side out.
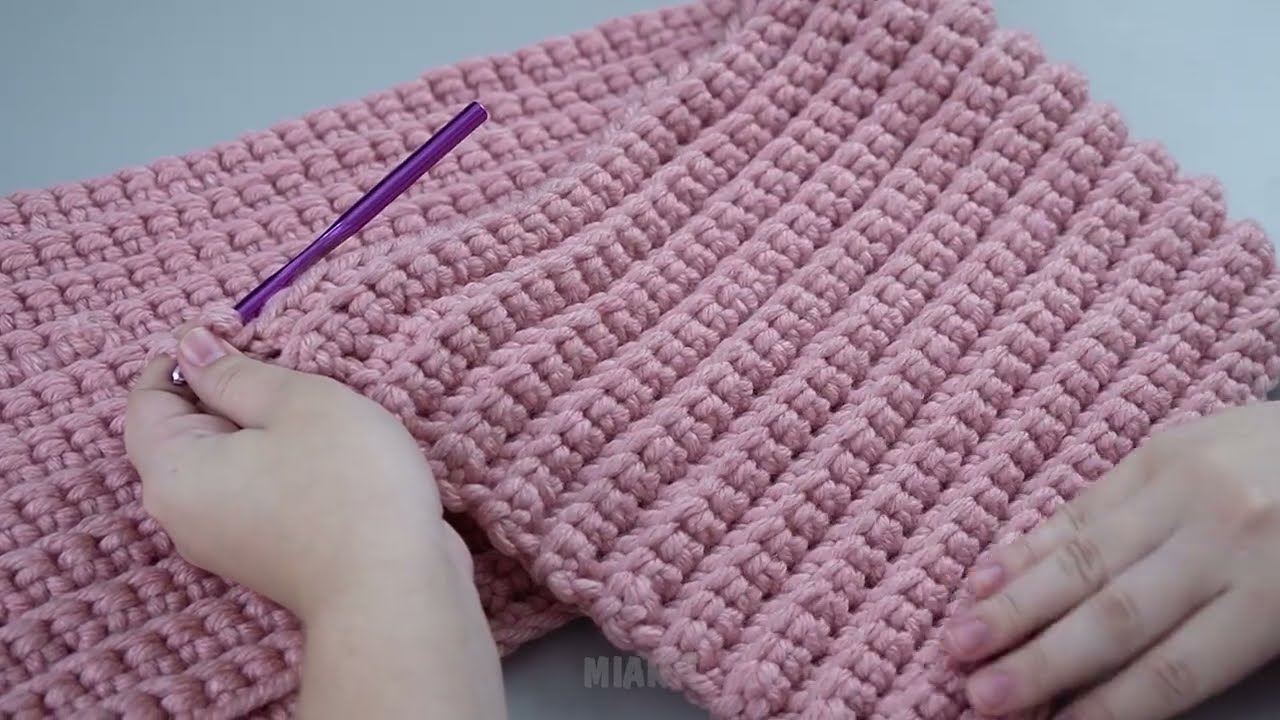
Step 2: Make the Snood (Scarf Portion)
-
Fold the long scarf piece in half lengthwise (long ways), right sides together.
-
Sew the long edge to make a long tube.
-
Turn the tube right-side out.
-
Tuck the raw short edges about ½ inch (1 cm) inside and sew them closed neatly.
Step 3: Attach the Hood to the Snood
-
Find the center of the snood by folding it in half.
-
Do the same with the bottom of the hood.
-
Match the centers and clip or pin the hood edge to the snood edge.
-
Sew them together slowly — this is the only “curve” connection, but beginners handle it easily with clips holding the fabric in place.
You now have a hood attached to a warm neck wrap!
Step 4: Add the Button
-
Put the hood-snood on and wrap the neck part around you.
-
Decide where the button should sit comfortably.
-
Sew the button onto the outer layer of the snood.
Step 5: Make the Button Loop
You can choose one of these easy methods:
A) No-Sew Loop (Easiest!)
-
Cut a small strip of matching fabric (1 × 5 inches / 2.5 × 12 cm).
-
Fold it into a loop and secure it with fabric glue under the opposite edge of the snood.
B) Sewn Loop
-
Fold a thin strip of fabric in thirds and sew along the edge to make a mini strap.
-
Attach it securely to the snood where the button meets.
C) Use an Existing Elastic Hair Tie
-
Stitch an elastic hair tie in place—fast, stretchy, and beginner-friendly.
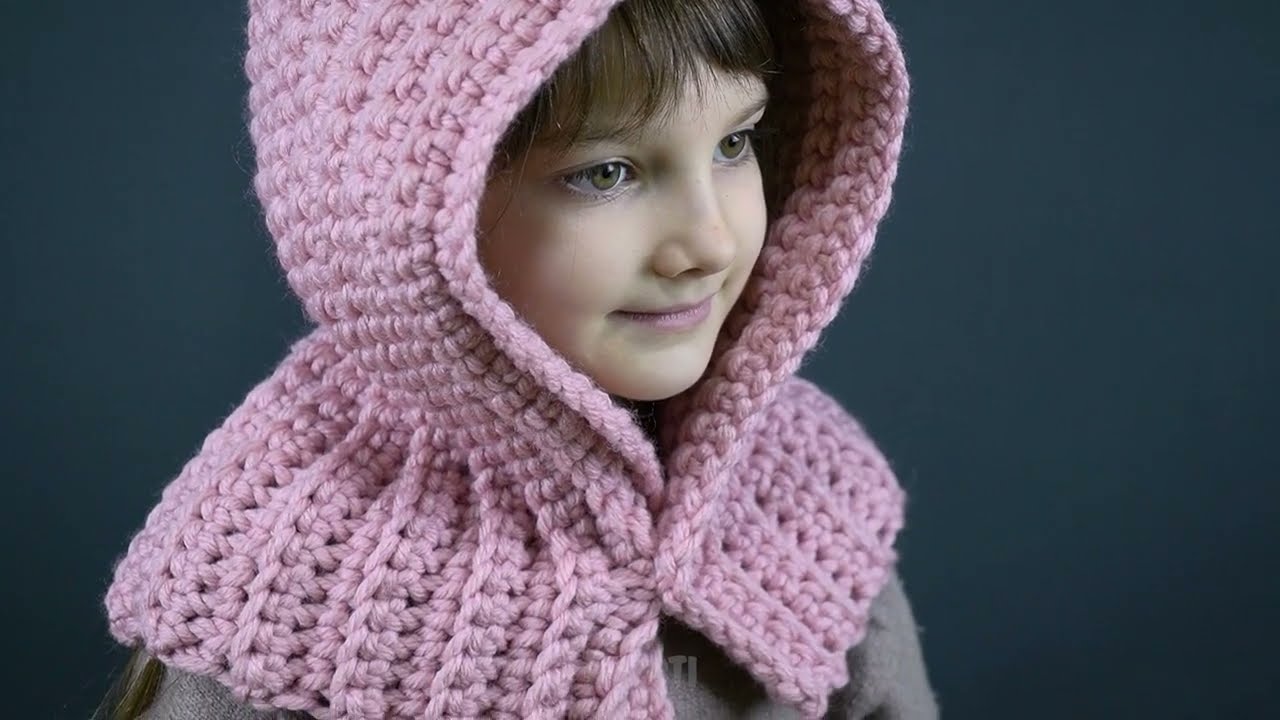
🎉 You’re Done!
You now have a soft, warm, stylish hood-snood that:
-
Covers your head and neck
-
Closes securely with a button
-
Is completely customizable (add faux fur trim, embroidery, pom-poms, etc.)
-
Can be made in under an hour even by a total beginner
✨ Optional Add-Ons
-
Faux fur edging for a winter look
-
Lining fabric inside the hood for extra warmth
-
Reversible design (just use two layers in the hood and scarf)
-
Oversized button or wooden button for a rustic touch
-
Hidden pocket on the scarf portion
If you’d like, I can also create:
✔ Printable step-by-step PDF
✔ Illustrated diagram of each step
✔ A beginner video script
✔ A pattern sheet with exact measurements
Just tell me!
Watch video: