 by
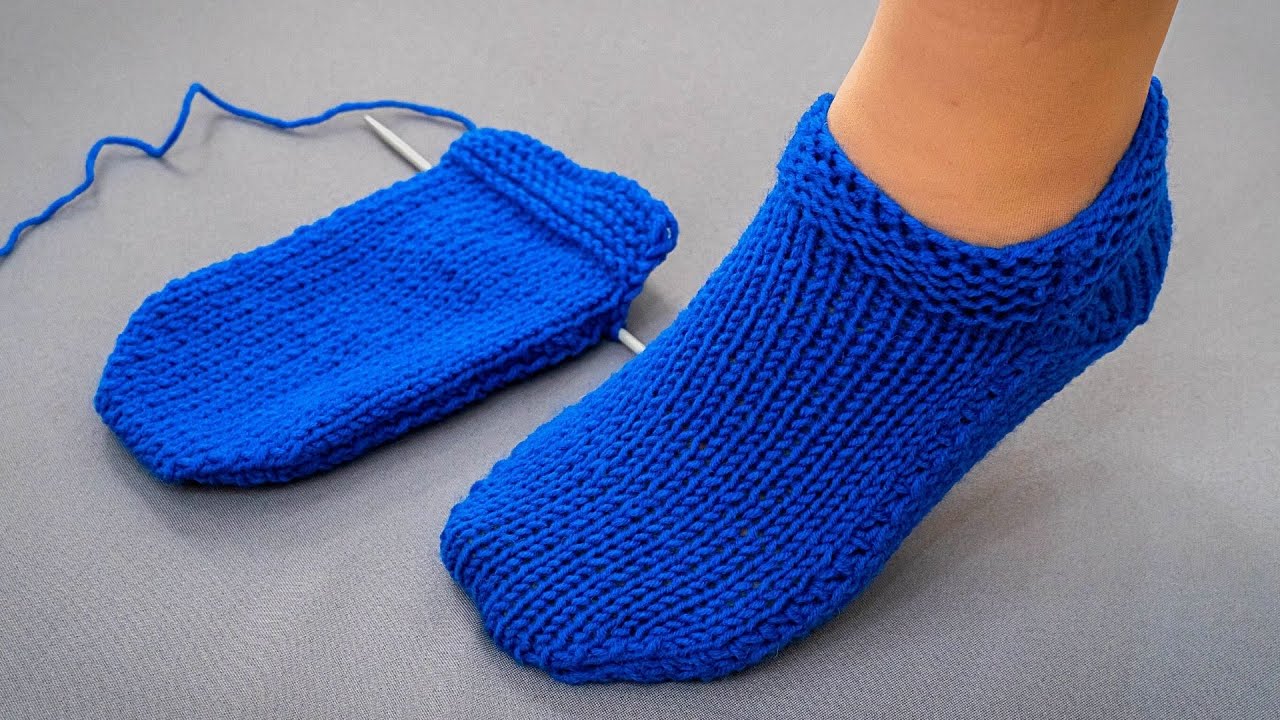
by Below is a clear, beginner-friendly, step-by-step guide for making slippers knitted on 2 needles without any sewing.
This method works by knitting the slipper in one continuous piece using shaping (increases/decreases) so no seam is needed.

🧶 How to Make Seamless Slippers on 2 Knitting Needles (Beginner-Friendly Guide)
What You Need
-
Yarn: Medium weight (category 4) or bulky (category 5). Wool blends are warm and stretchy.
-
Knitting needles: Straight needles that match your yarn (usually 4–5 mm for medium yarn, 6–7 mm for bulky).
-
Tapestry needle: Only for weaving in ends (not for sewing seams).
-
Scissors
-
Stitch markers (optional)
🧵 Construction Overview
These slippers are made in one piece:
-
Start at the heel
-
Knit flat while increasing to form the sides
-
Knit the foot section straight
-
Decrease at the toe
-
Gather the very tip of the toe (not considered sewing)
-
Bind off
There are no side seams, and no sewing of edges together.
👣 Sizing Guide
Use these as a starting point:
| Size | Cast On | Foot Length (before toe decreases) |
|---|---|---|
| Small (US 5–6) | 10 stitches | 7 inches / 18 cm |
| Medium (US 7–8) | 12 stitches | 8 inches / 20 cm |
| Large (US 9–10) | 14 stitches | 9 inches / 23 cm |
If using bulky yarn, cast on fewer stitches. If using thinner yarn, add a few more.
🧶 Step-by-Step Instructions
1️⃣ Cast On the Heel
Cast on 12 stitches (or your chosen size).
These stitches form the back of the heel.
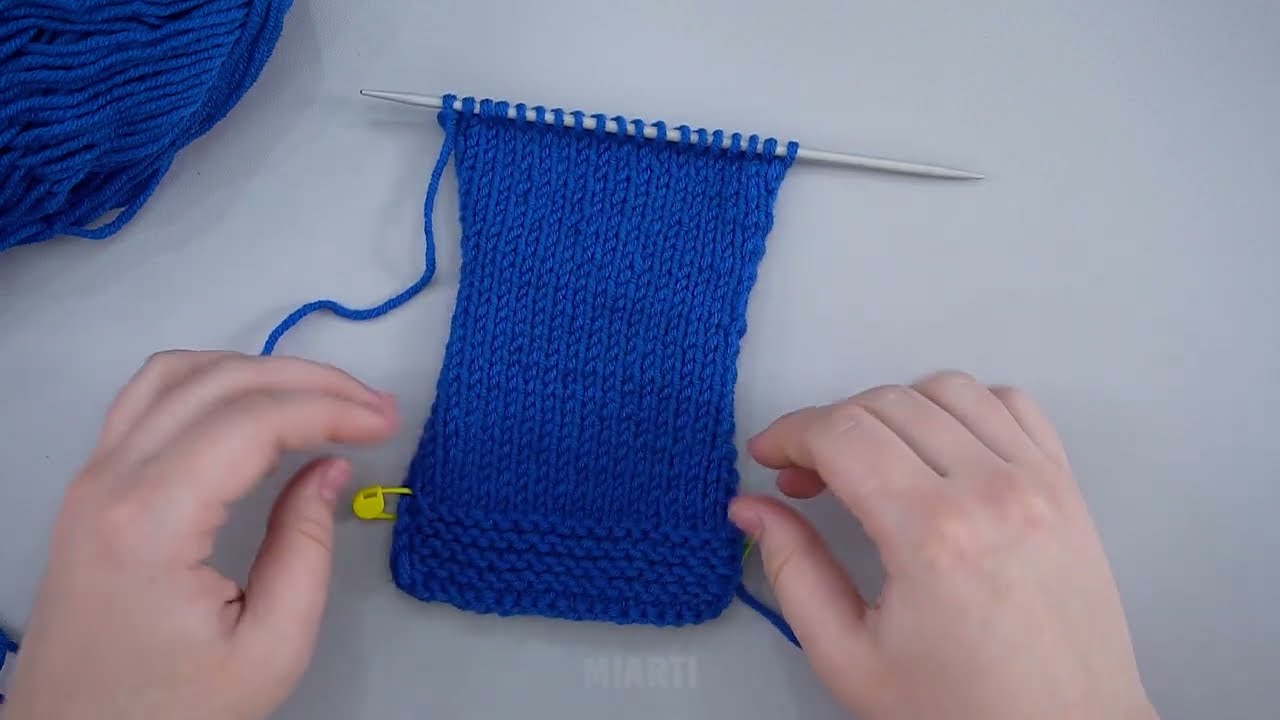
2️⃣ Knit the Heel Section
Knit in garter stitch (knit every row) for 10–16 rows, depending on how deep you want the heel.
-
Small heel: 10 rows
-
Medium heel: 12 rows
-
Large heel: 14–16 rows
This makes a soft, stretchy heel cup.
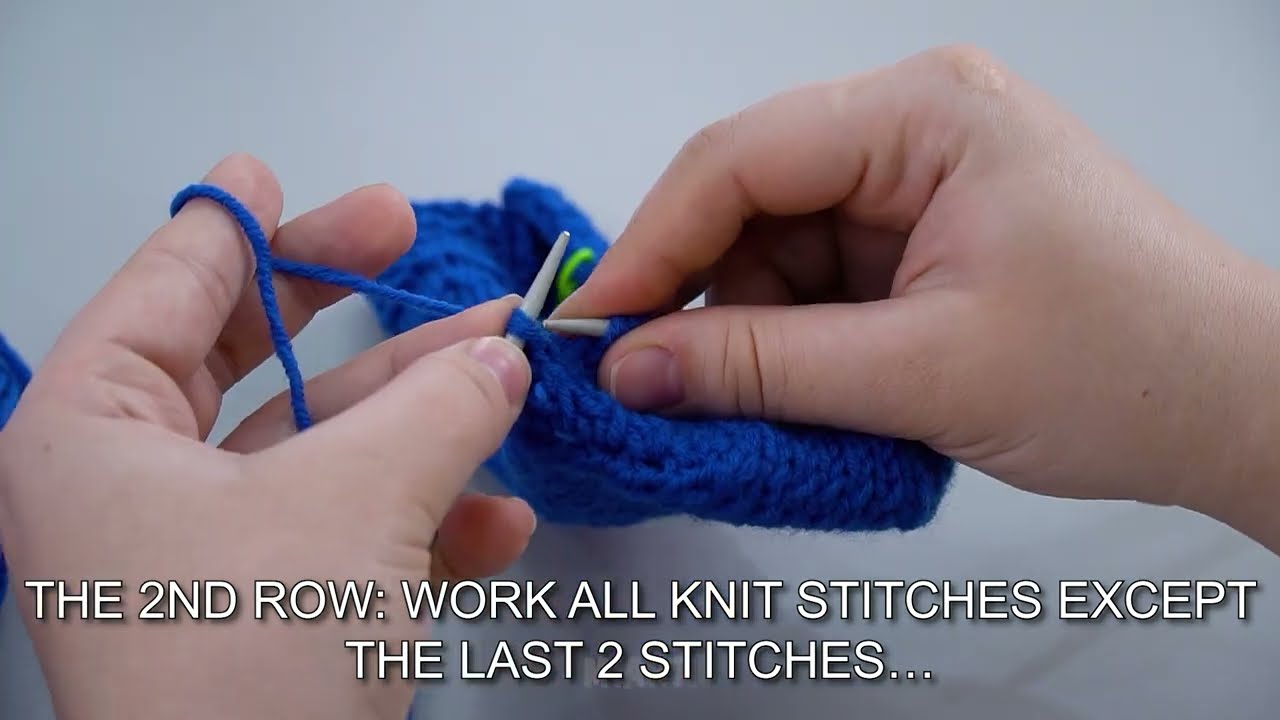
3️⃣ Increase to Form the Sides
You will now increase at BOTH ends of the row to shape the slippers so they come up around your foot.
Row pattern:
-
Row A: Knit 1, increase (KFB or M1), knit to last stitch, increase, knit the last stitch.
-
Row B: Knit all stitches.
Repeat Rows A + B until you have:
-
Small: 28 stitches
-
Medium: 32 stitches
-
Large: 36 stitches
These stitches now wrap around the sides of the foot.
4️⃣ Knit the Foot Section (No increases)
Knit in garter stitch (every row knit) until the foot length equals:
-
4–5 inches for small
-
5–6 inches for medium
-
6–7 inches for large
This should reach the base of your big toe.
Tip: You can slip your foot inside to test the length!
5️⃣ Shape the Toe (Decreasing)
Decrease at both ends:
Row C: Knit 1, K2tog, knit to last 3 stitches, K2tog, knit 1
Row D: Knit all stitches
Repeat until you have:
-
Small: 12 stitches
-
Medium: 14 stitches
-
Large: 16 stitches
6️⃣ Gather the Toe (No sewing required)
Cut your yarn leaving a long tail (about 12 inches).
Thread it through a tapestry needle.
Run the needle through all remaining stitches and pull tightly to close the toe.
This is NOT considered sewing a seam—it’s just drawing the stitches together like the top of a hat.
Weave in the yarn end inside the slipper.
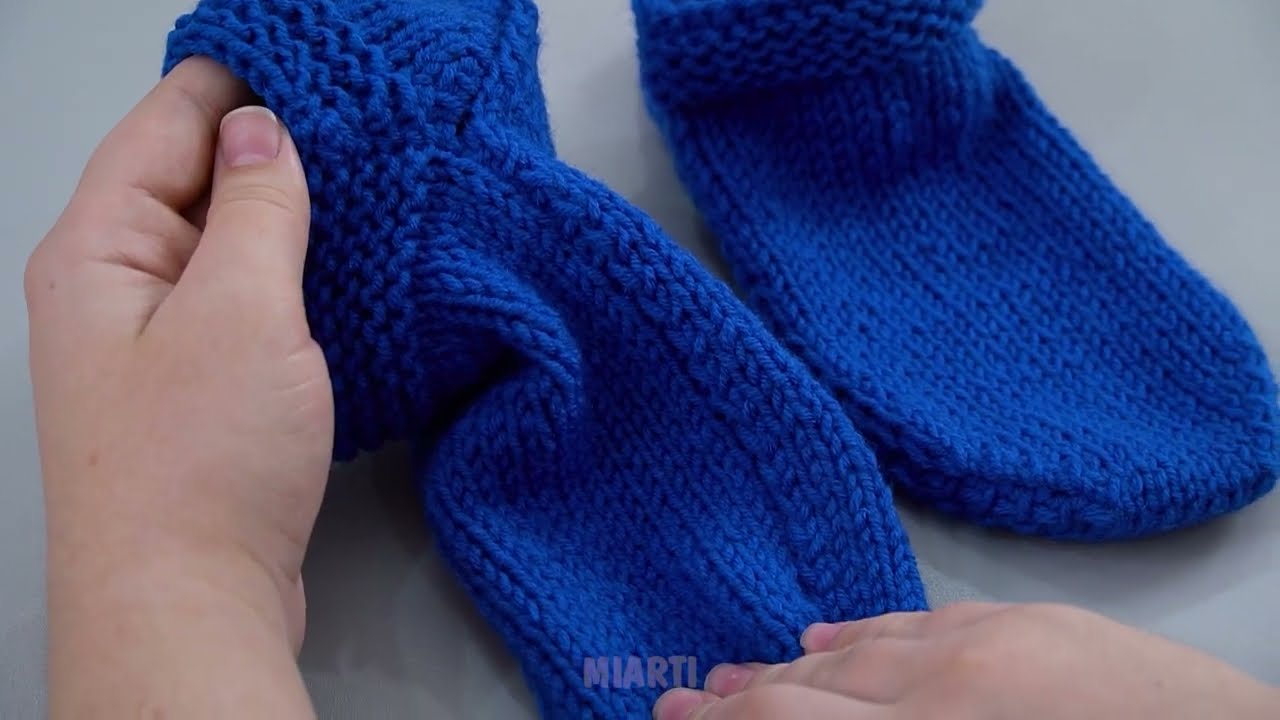
7️⃣ Bind Off and Finish
Bind off the last stitches if any remain.
Weave in ends.
Turn the slipper right-side out.
You now have a seamless slipper!
🧵 Optional Customizations
-
Add a ribbed cuff (K1P1 or K2P2) for 1–2 inches before the toe decreases.
-
Change colors for stripes.
-
Add non-slip dots on the bottom using puffy fabric paint.
🎉 You’re Done!
You just made a pair of knitted slippers on 2 needles with NO seams—perfect for cozy wear, gifts, or beginner practice.
If you’d like, I can also create:
✅ a printable PDF version
✅ a visual diagram
✅ a simple video-style written script
Or
✅ instructions for a child’s size or men’s size
Just tell me!
Watch video: