 by
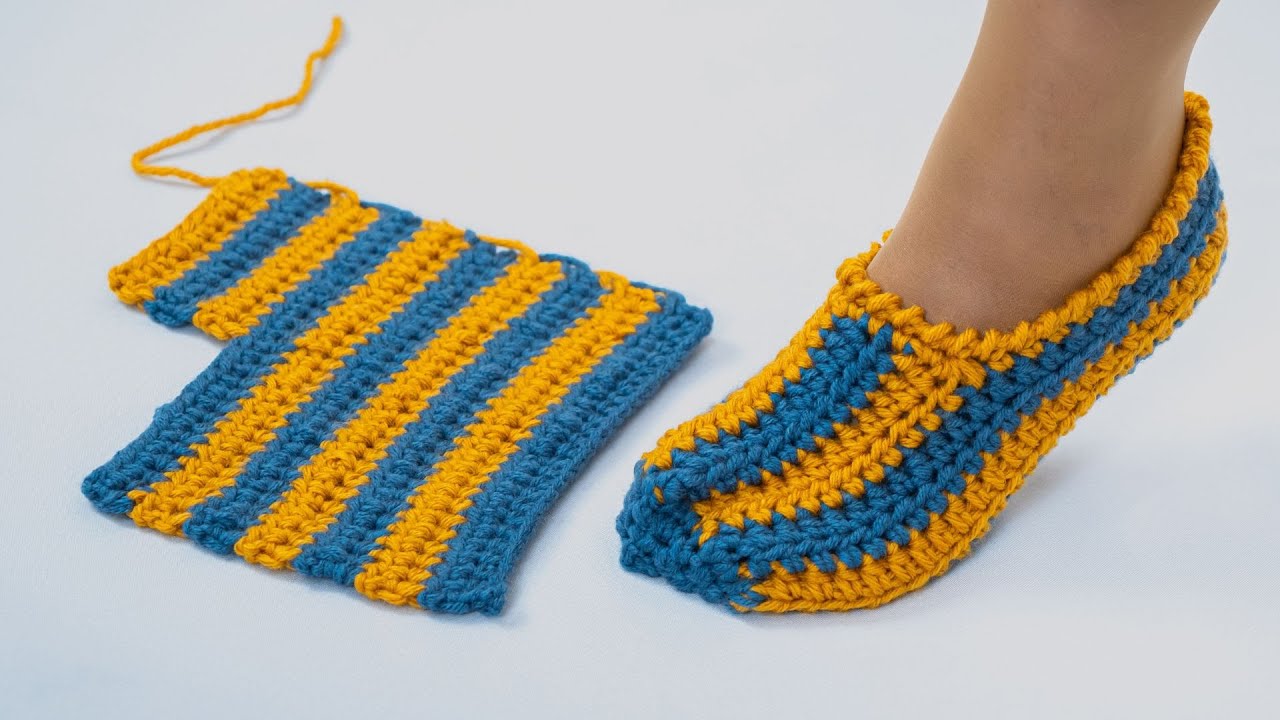
by Here’s a clear, beginner-friendly detailed guide on How to Make the Fastest Crochet Slippers using an easy, quick pattern. This method is perfect for beginners because it uses simple stitches, minimal shaping, and works up in under an hour per slipper (sometimes even 20–30 minutes depending on yarn size).
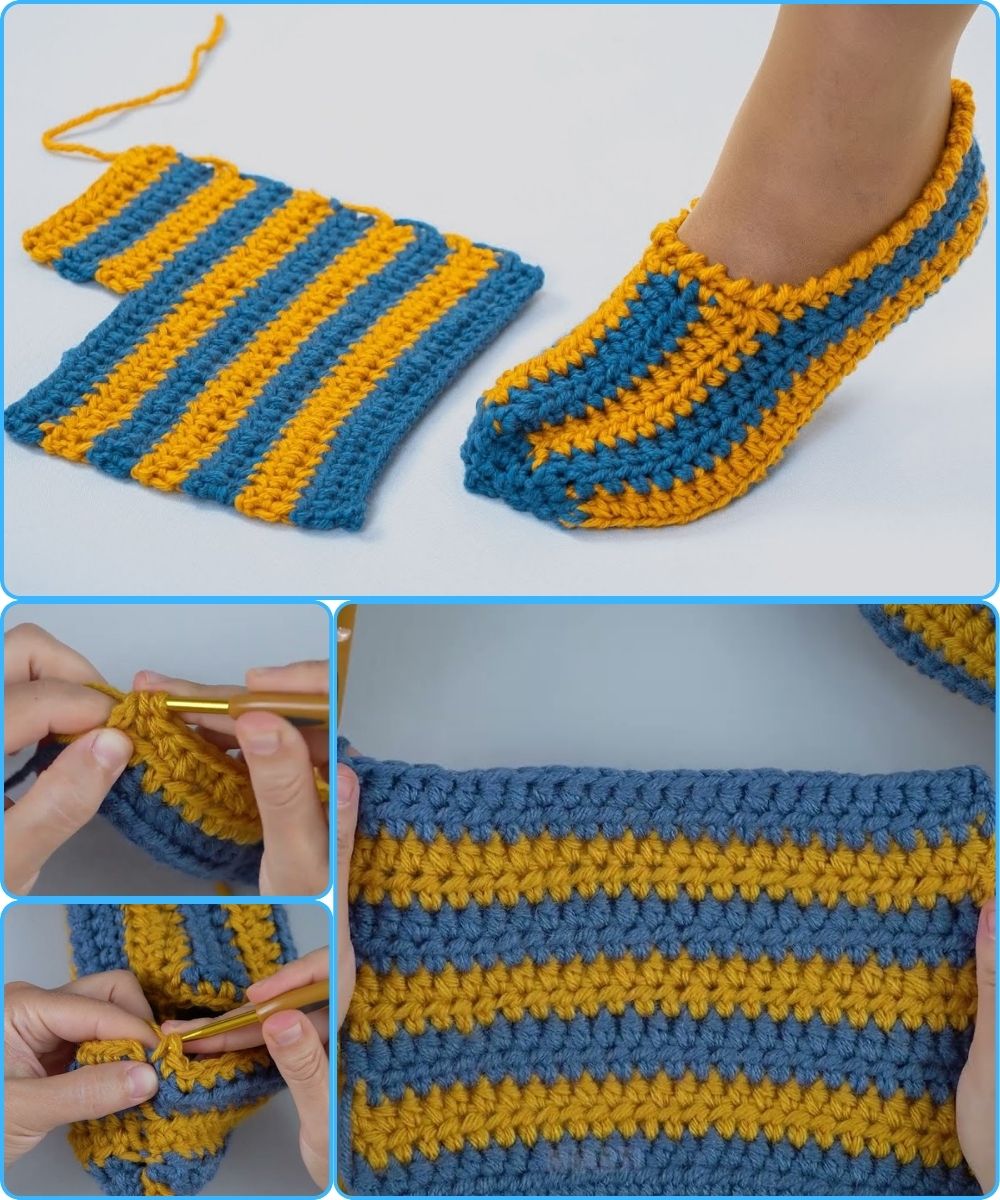
🧶 Fastest Crochet Slippers for Beginners – Easy Step-by-Step Pattern
Skill Level: Beginner
Time: 20–60 minutes per slipper
Construction: Flat rectangle (no complicated shaping!)
✅ Materials You Need
-
Yarn: Chunky/ Bulky Weight (#5) or Super Bulky (#6) — makes the project faster
-
Hook:
-
6.5 mm (K) for bulky yarn
-
8–9 mm (L/M) for super bulky yarn
-
-
Scissors
-
Yarn needle (for sewing edges)
-
Measuring tape
✨ Why This Pattern Is So Fast
✔ Made from a simple rectangle
✔ Uses only single crochet (SC) or half double crochet (HDC)
✔ Minimal sewing
✔ Easily adjustable to any foot size
🧵 Step-By-Step Instructions
1️⃣ Measure & Chain Foundation
You’ll start by making the length of the slipper sole.
Measure the length of the foot from heel to big toe.
Then:
Foundation Chain:
Chain until the length equals the foot length.
-
For most adults: 18–22 chains
-
For kids: 12–16 chains
Tip: Add one extra chain for turning.
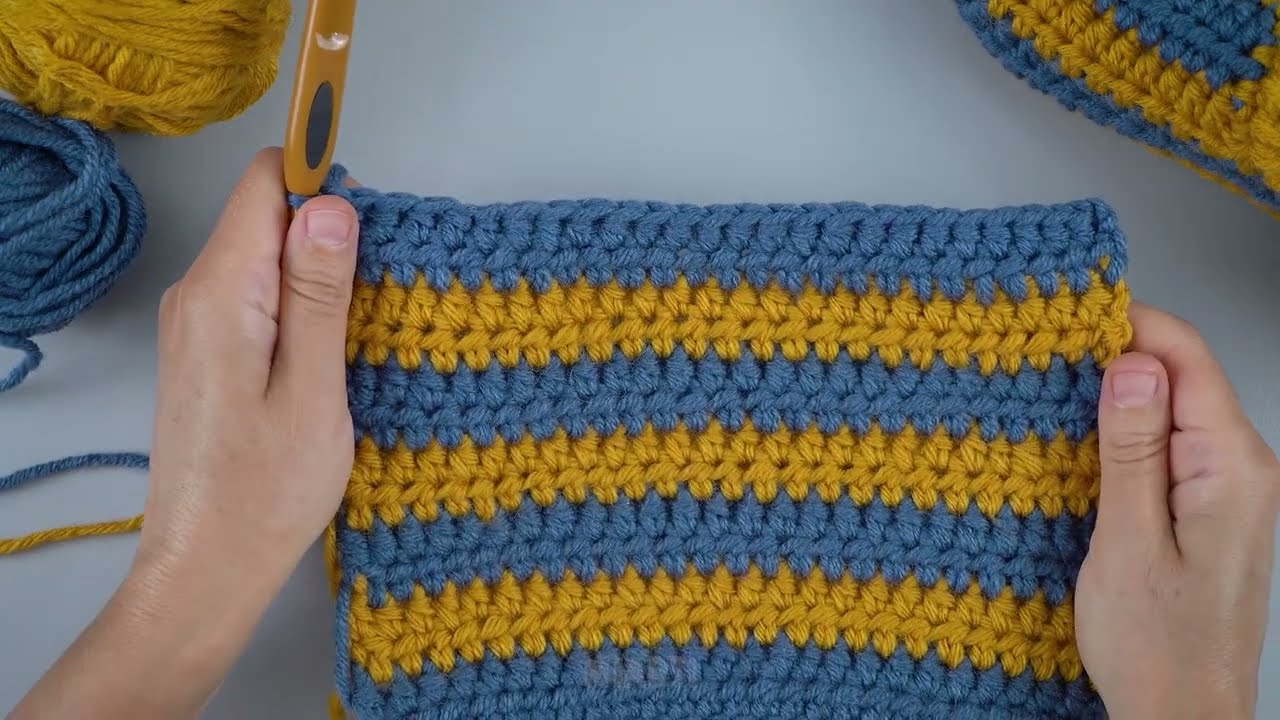
2️⃣ Work the Body of the Slipper (Crochet a Rectangle)
Now you’ll crochet rows to create the fabric that will wrap around the foot.
Row 1:
Single crochet (SC) or half-double crochet (HDC) in each chain across.
Turn.
Rows 2–20 (approx.):
SC or HDC in each stitch across, turn.
You’re creating a rectangle that’s wide enough to wrap around the foot.
How tall should the rectangle be?
-
For adults: 6–8 inches tall (15–20 cm)
-
For kids: 4–6 inches (10–15 cm)
Tip: The tighter the rectangle, the snugger the slipper will fit.
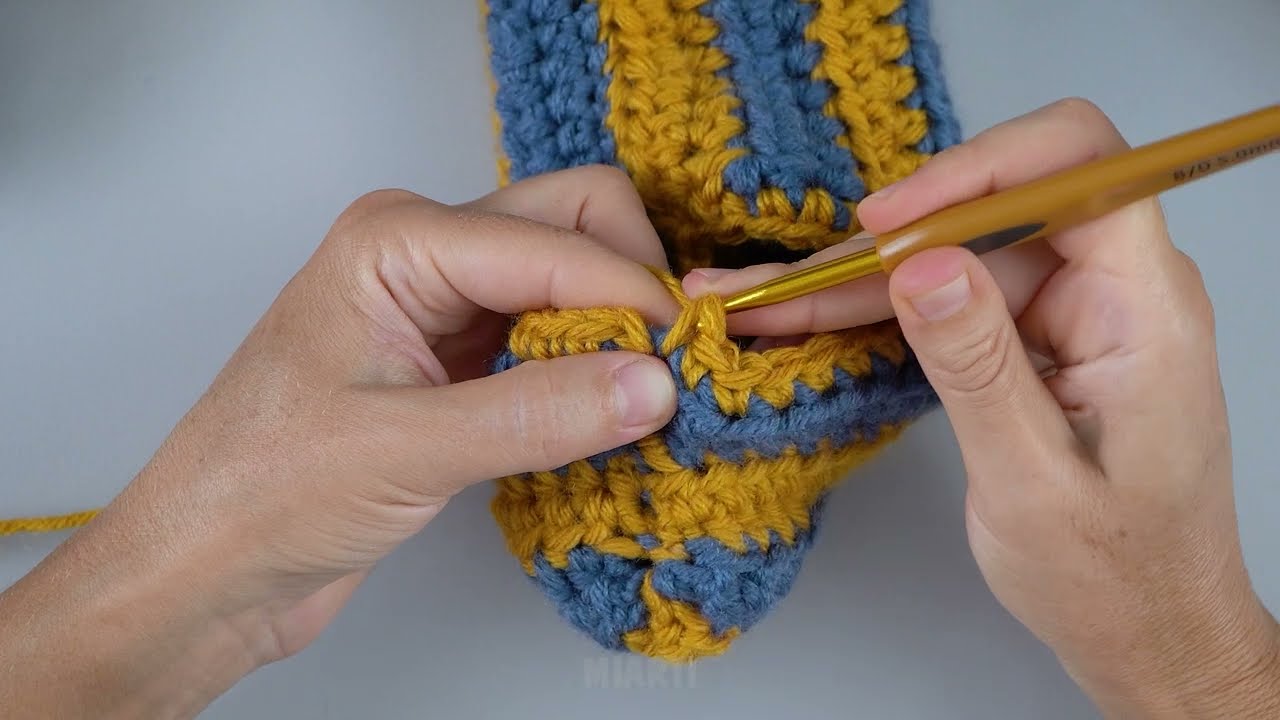
3️⃣ Shape the Toe (Easy Gathering Method)
Lay the rectangle flat. Choose one narrow end — this will be the toe end.
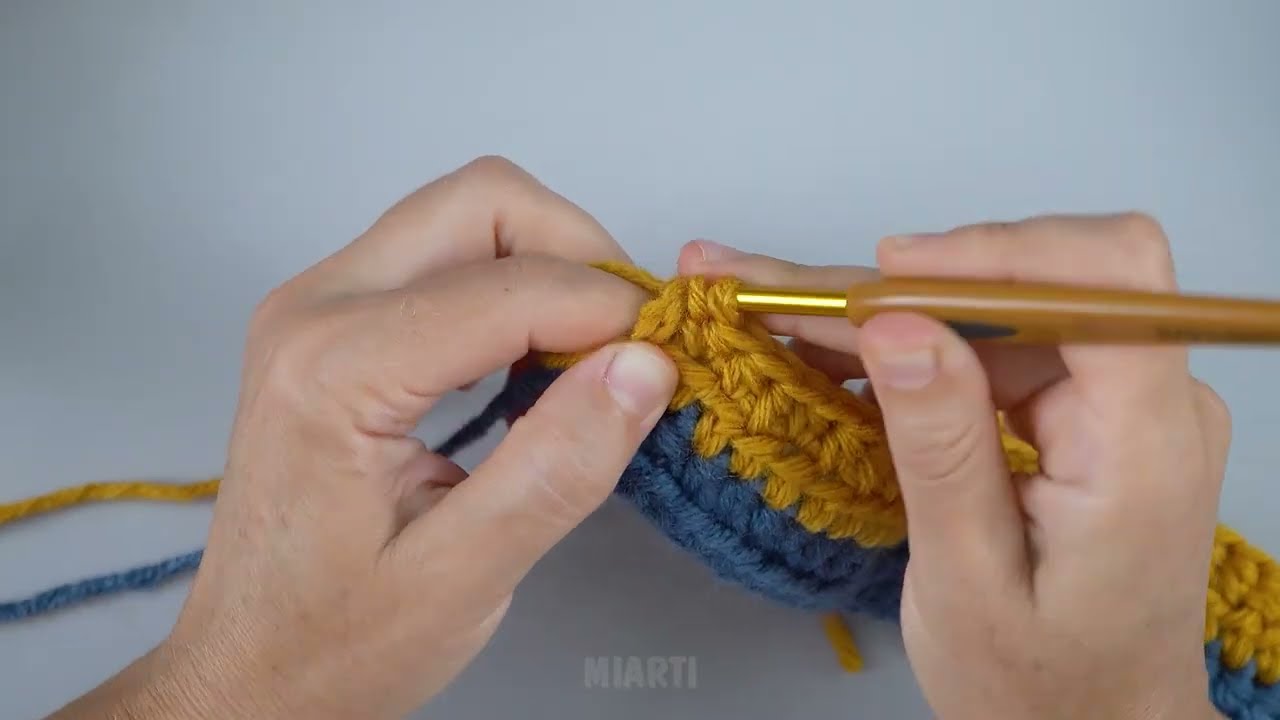
Sew the Toe:
-
Thread the yarn needle with a long tail.
-
Stitch around the edge of one narrow side.
-
Pull the yarn to gather the end closed, like a drawstring.
-
Secure tightly and weave in.
This creates the rounded toe shape.
4️⃣ Sew the Top of the Foot
With the toe already closed:
-
Fold the rectangle lengthwise.
-
Sew the top half of the slipper together starting from the toe toward the ankle.
-
Stop when the slipper opening is wide enough for the foot to slide in.
This creates the foot opening.
5️⃣ Make the Heel (Optional for a Snug Fit)
At the opposite end (heel end):
-
You can either leave it open (makes a slip-on style)
or -
Sew 1–2 inches up the back to create a more secure heel.
6️⃣ Add Finishing Touches
Optional:
-
Add a single crochet border around the ankle opening
-
Add pompoms, buttons, or straps
-
Use non-slip fabric paint or shelf liner on the bottom for traction
🧩 Size Adjustments (Super Easy)
To adjust length:
Add or subtract chains from the foundation chain.
To adjust width:
Add or remove rows.
Because the slipper is a rectangle, size adjustments are extremely beginner-friendly.
📌 Quick Pattern Summary (For Easy Reference)
-
Chain to the length of the foot.
-
SC/HDC rows until the width wraps around the foot.
-
Sew one short end shut (toe).
-
Sew top center seam halfway (foot top).
-
Close heel slightly if needed.
-
Finish edges (optional).
🧶 Tips for Absolute Beginners
-
Use bulky yarn — the thicker the yarn, the faster the slipper.
-
Use HDC — it works up quicker than SC and stays soft/stretchy.
-
Keep your tension loose for a stretchy, comfortable fit.
-
Make both slippers at the same time (alternate rows) to ensure they match.
🎉 You’re Done!
This is one of the fastest and easiest crochet slipper patterns for beginners and can be completed in under an hour. Once you make one pair, you’ll be making these as gifts for everyone — they’re that quick!
If you want, I can also create:
✅ A printable PDF
✅ A diagram / chart
✅ A video-style written tutorial
✅ A child, toddler, or men’s sizing guide
Just tell me!
Watch video: