 by
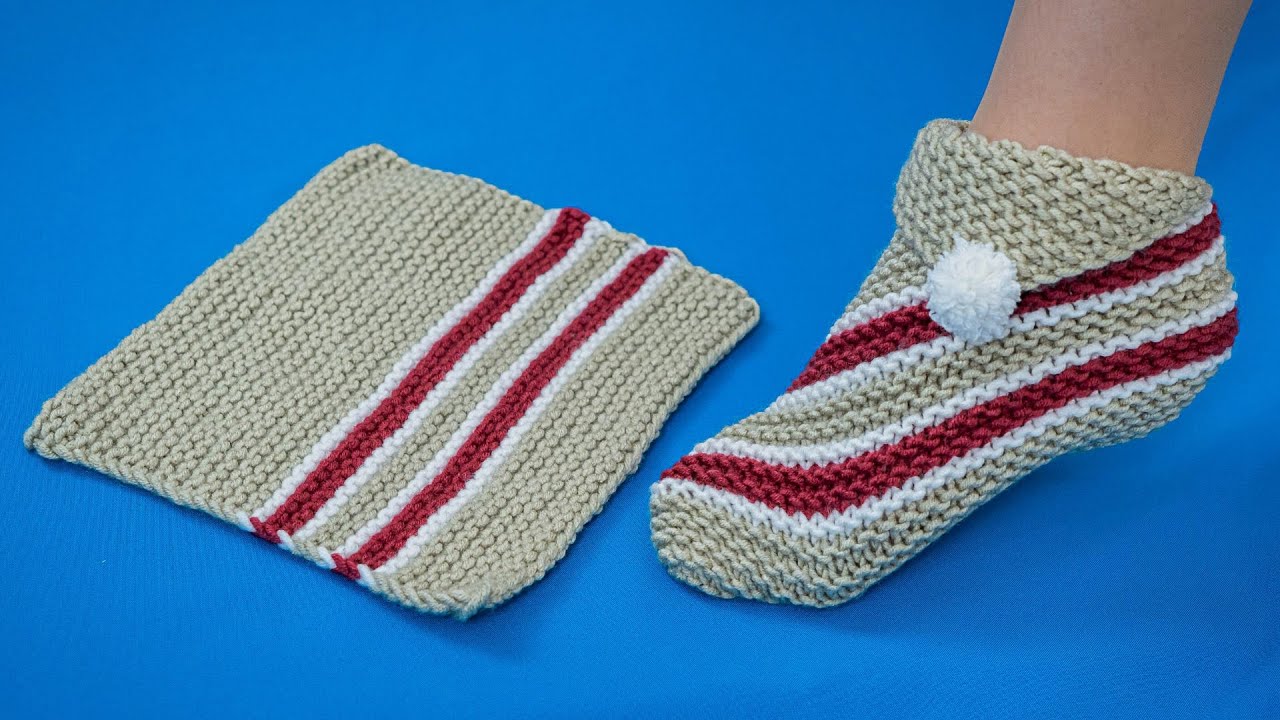
by Below is a friendly, beginner-friendly, step-by-step tutorial: “How to Make Beautiful Slippers in an Hour – Perfect for a Last-Minute Gift!”
(Uses simple materials, no advanced sewing needed.)
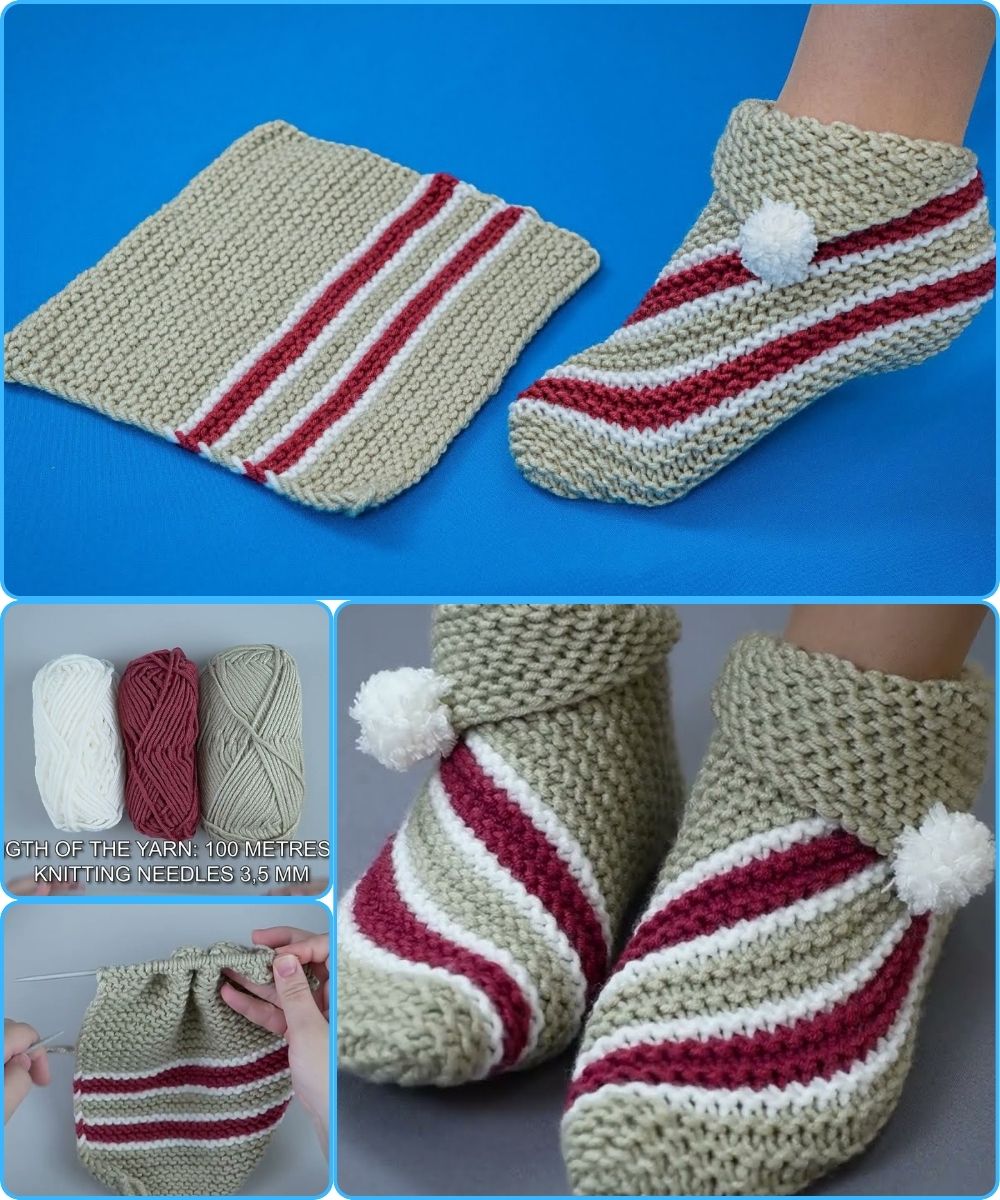
🌼 How to Make Beautiful Slippers in an Hour
A Quick & Easy Beginner Tutorial for a Handmade Gift
Homemade slippers are a thoughtful, cozy present—and YES, you really can make them in about an hour! This tutorial uses fleece or felt (easy to cut and doesn’t fray), basic stitching or hot glue, and a simple pattern you can create from your own foot.
✂️ Materials You’ll Need
-
Fleece or thick felt (½ yard is plenty for 1 pair)
-
A piece of cardboard (for making the pattern)
-
Fabric scissors
-
Pins or clips
-
Needle + thread or hot glue gun
-
Optional:
-
Faux fur trim
-
Buttons, ribbon, or pom-poms
-
Non-slip fabric paint or hot-glue dots for the soles
-
🧵 Step-by-Step Tutorial
Step 1 — Make Your Pattern (5 minutes)
-
Stand on a piece of cardboard.
-
Trace around your foot or a shoe you like.
-
Add ½–¾ inch extra all around for seam allowance.
-
Cut out the sole shape.
-
For the top part, cut a rectangle wide enough to cover the top of your foot and long enough to reach from one side of the sole to the other.
-
Oval shapes also work for a snug fit.
-
💡 Tip: If making these as a gift, use the recipient’s shoe size and trace the outline of a shoe with similar shape.

Step 2 — Cut the Fabric (5–10 minutes)
-
Place your cardboard sole on the fabric.
-
Cut 2 pairs (left and right):
-
2 soles for padding
-
2 upper pieces
-
-
If you want extra comfort, cut an extra layer of fleece as padding for inside the sole.
Step 3 — Assemble the Upper Part (10 minutes)
There are two easy methods:
Method A: Sewing
-
Fold the upper piece around the top of your foot shape.
-
Pin the edges to the sides of the sole.
-
Hand-stitch using a basic whip stitch.
Method B: No-Sew / Hot Glue
-
Fold the upper piece and glue the edges to the sole.
-
Hold for a few seconds until it sets.
-
Reinforce inside edges with another glue line for durability.
Step 4 — Attach Sole Layers (10 minutes)
If using multiple layers:
-
Stack the layers: outer sole → padding → inner sole.
-
Sew or glue around the perimeter.
💡 Tip: Make glue lines thick for cushiony feel.
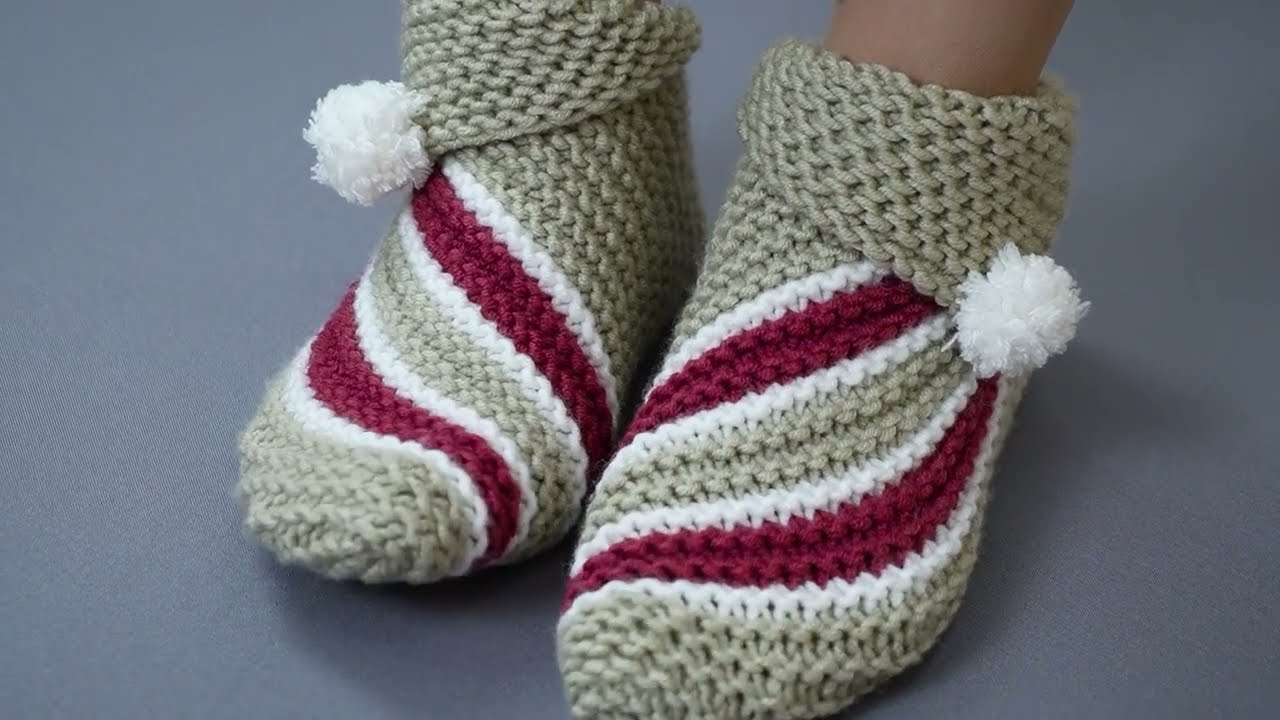
Step 5 — Customize (10 minutes)
Here’s where they become beautiful:
Ideas:
-
Add faux fur trim around the opening for a luxury look.
-
Glue on a bow or small fabric flower.
-
Use buttons or beads for accents (sew for security).
-
Add pom-poms to the front.
-
Decorate with fabric paint patterns (stars, hearts, initials).
-
Add non-slip dots on the bottom using hot glue or puffy paint.

🎁 Gift-Ready in Under an Hour!
Wrap your handmade slippers with:
-
A ribbon,
-
A small gift tag,
-
(Optional) A matching fleece headband or scrunchie from leftover fabric.
🌟 Beginner Tips for Success
-
Fleece is the easiest fabric—it doesn’t fray and feels soft.
-
Don’t worry about perfection—handmade charm is part of the gift!
-
Try a practice version with scrap fabric for confidence.
-
If you want a tighter fit, sew or glue elastic inside the upper part.
If you’d like, I can also create:
✅ A printable pattern template
✅ A photo-style step guide
✅ A video-script version
Just tell me!
Watch video: