 by
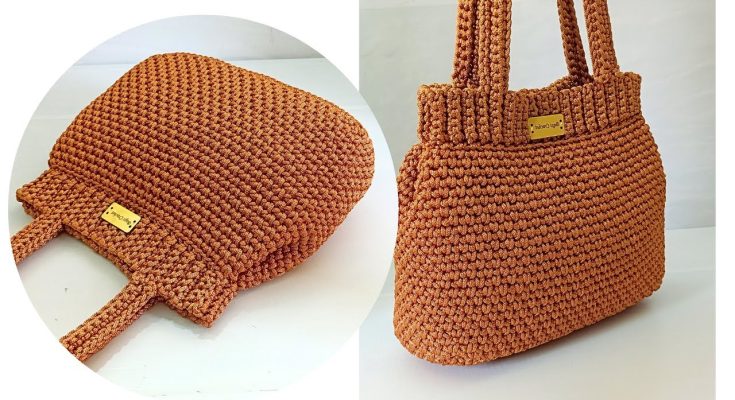
by Hello, fellow makers! Are you ready to create a large, lightweight, and incredibly stylish tote that’s perfect for a trip to the market, a day at the beach, or just for your everyday errands? I’m excited to share this detailed pattern for the Sunset Shopper Bag, a beautiful crochet tote made with a simple stitch pattern that gives it a unique, open texture. The bag is worked from the bottom up, creating a seamless, sturdy design that’s as practical as it is beautiful.
This pattern is a fantastic project for all skill levels. We’ll start with a rectangular base and then work in a continuous round to create the body, which means no joining seams! The unique single crochet and chain pattern gives the bag a lovely drape and makes it surprisingly quick to work up. Let’s grab our hooks and yarn and get ready to create something beautiful!
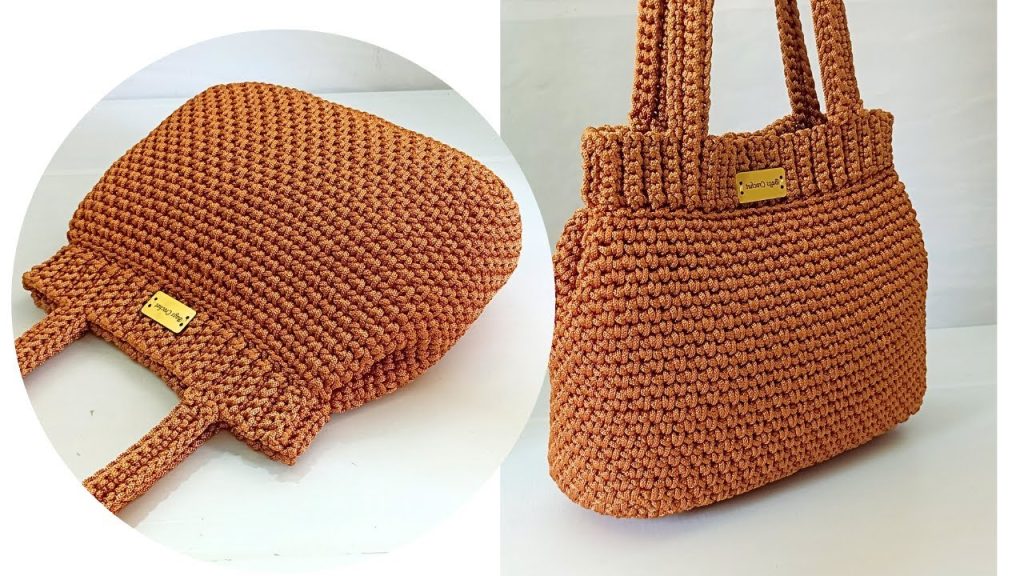
Why You’ll Love Crocheting This Bag:
- Lightweight and Sturdy: The stitch pattern creates a bag that’s both durable and easy to carry.
- Beginner-Friendly: The pattern uses a simple two-round repeat that’s easy to master.
- Seamless Design: The bag is worked in a continuous spiral, so there are no unsightly seams on the sides.
- Customizable: Easily adjust the size by changing the number of initial chains or the number of rounds.
- Versatile: Perfect for groceries, beach days, or as a chic everyday accessory.
What You’ll Need:
- Yarn: Polyester macrame yarn or any sturdy yarn of a similar weight.
- Crochet Hook: A 5mm crochet hook.
- Yarn Needle (Tapestry Needle): For weaving in all those ends and seaming the sides.
- Scissors:
- Stitch Markers (optional): To mark your rows and corners.
Essential Crochet Abbreviations:
- ch: chain
- sl st: slip stitch
- sc: single crochet
- st(s): stitch(es)
- FO: fasten off

The Pattern: The Sunset Shopper Bag
This bag is worked from the bottom up, starting with a flat rectangular base.
Part 1: The Base
- Starting Chain:
Ch 36. Scin the 2ndchfrom the hook and in each of the next 34 chains.Ch 1, turn.Scin each of the next 35 stitches.- Repeat Row 3 until the base measures approximately 11 cm in width. (The video shows 14 rows total).
- Do not turn after the last row.
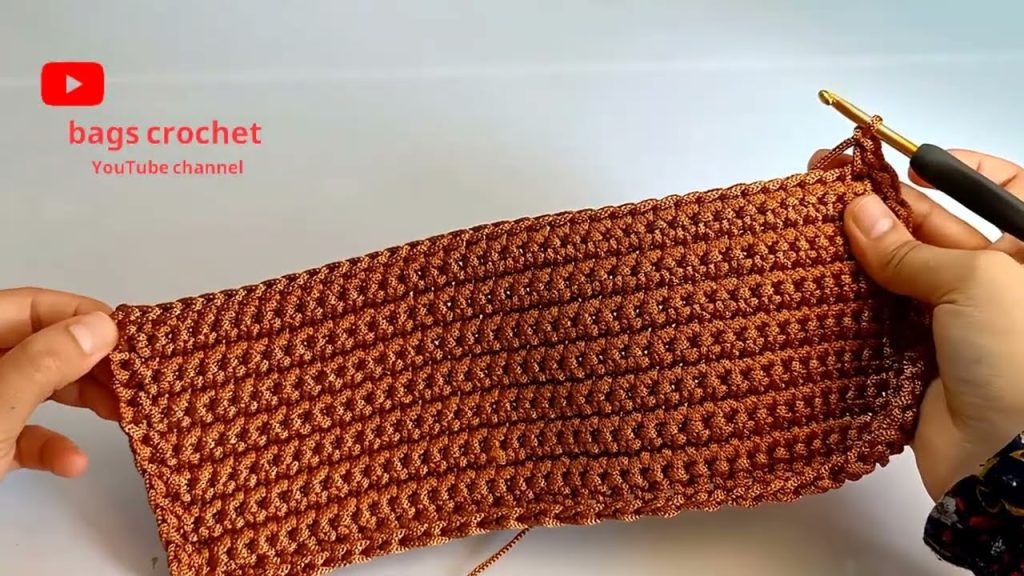
Part 2: The Sides
- Round 1:
Ch 1. Now, working along the side edge of the base, workscfollowed by ach 1, skipping one row between each single crochet. When you reach a corner,scin the last stitch,ch 1, and thenscin the first stitch of the next row. Continue this pattern around the entire base. - Round 2:
Ch 1. Workscunder eachch 1space from the previous round, followed by ach 1. - Repeat Round 2 for a total of 24 rounds to create the main body of the bag. You will be working in a continuous spiral, so there is no need to join with a
sl stat the end of each round.
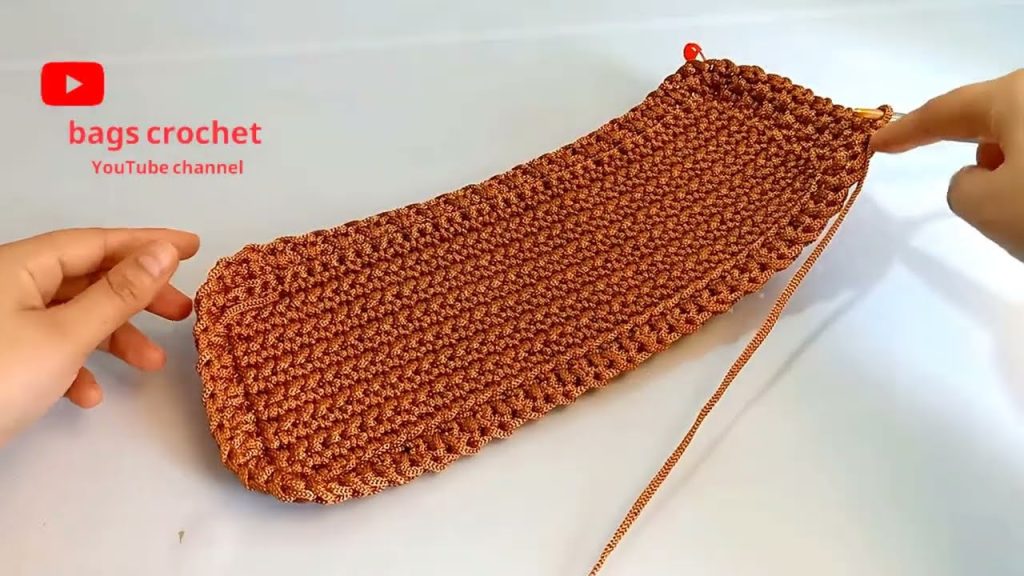
Part 3: The Straps
- Mark the Strap Placement: Fold the bag in half and mark the center point on each side. From the center, measure and mark a 12-stitch section on each side. Then, mark again after 7 stitches, leaving 23 stitches between the two center markers. These markers will guide your strap placement.
- Create the First Strap:
Ch 6.Scin the 2ndchfrom the hook and in each of the next 5 chains.Sl stinto the back loop of the lastscon the side of the bag.Ch 1.Scin the back loop of each of the 5 stitches of the strap.- Repeat this process until the strap reaches the first marker on the bag.
Ch 71(or your desired length for the strap).Scin the 2ndchfrom the hook and in each of the next 75 stitches (the 70 chains plus the 5 base stitches).- Work
scin each of the 5 base stitches until you reach the second marker on the bag.
- Create the Second Strap: Repeat the entire process for the second strap on the other side of the bag.
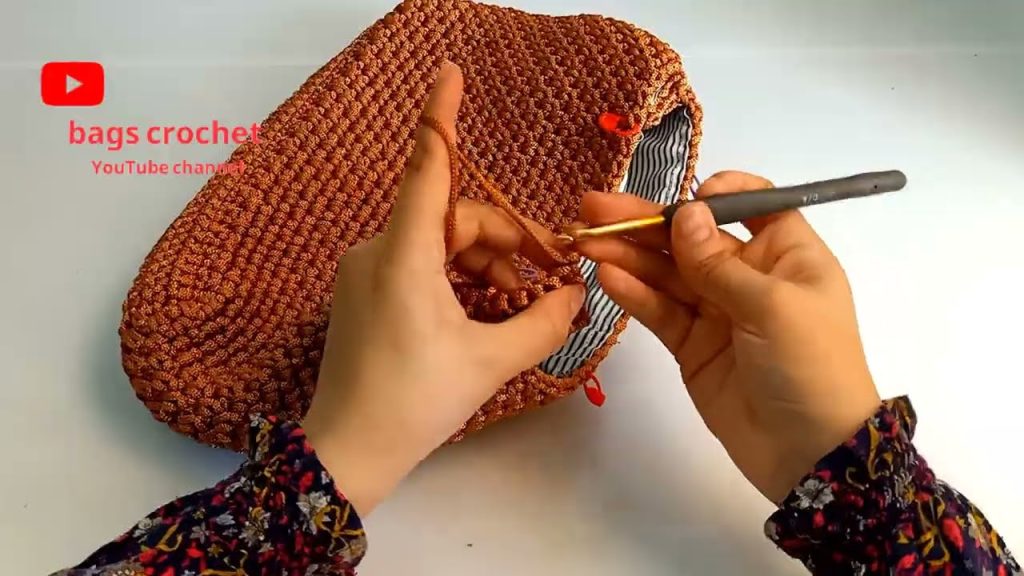
Part 4: Assembly and Finishing Touches
- Close the Sides: Turn the bag inside out and use a needle to sew and close both sides of the bag.
- Close the Last Stitch: When you reach the last
scof the body, cut the yarn and use your needle to sew the two ends together to finish the bag. - Weave in All Ends: Use your yarn needle to weave in any remaining loose ends for a clean, professional finish.
Congratulations, you’ve created a beautiful and unique Sunset Shopper Bag! It’s now ready to be filled with all your favorite things. Happy hooking!
Video tutorial: