 by
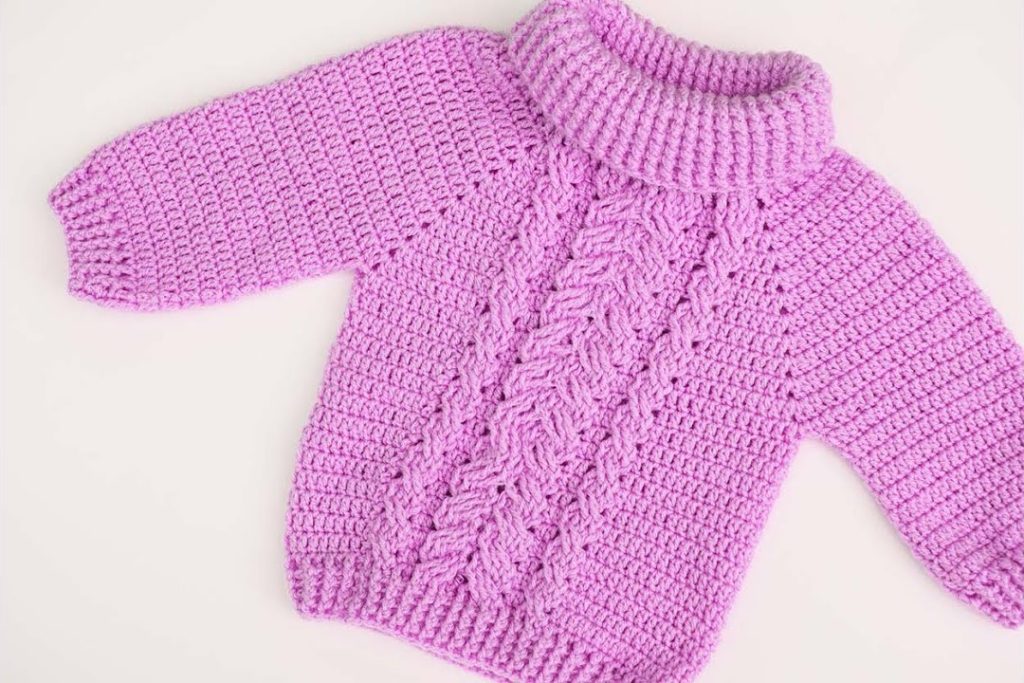
by Wrap your little one in cozy luxury with this gorgeous Royal Orchid Crochet Cable Sweater! Featuring a prominent center cable panel that mimics classic knitwear and a wonderfully plush cowl neck, this garment is a timeless piece. The main body stitch (half double crochet) provides dense warmth, making this the perfect choice for the cooler seasons.
This detailed pattern is designed for the 6-12 Month size and is suited for the Advanced Intermediate crocheter due to the post stitch cable work and garment construction.
Materials Needed 
- Yarn: Approximately 450-500 yards of Worsted Weight (Aran / #4) yarn. A soft, warm fiber like merino or a bulky acrylic blend is ideal for the cowl neck and cable definition.
- Main Color (MC): Vivid Orchid/Purple (Solid)
- Crochet Hook: 5.0 mm (US H-8), or the size needed to obtain gauge.
- Tapestry Needle: For seaming and weaving in ends.
- Cable Needle or Locking Stitch Marker: Helpful for holding the stitches during the cable crosses.
Skill Level & Notes 
- Skill Level: Advanced Intermediate. You should be comfortable working post stitches (FPDC), creating ribbing in the back loop, and sewing garment pieces together.
- Construction: This sweater is worked in three main flat panels (Front, Back) up to the shoulder shaping, and two sleeves worked in the round. All pieces are then seamed.
- Main Body Stitch: The body is primarily worked in HDC for density and warmth.
- Chains: Ch 2 at the beginning of HDC rows always counts as the first HDC unless noted otherwise.
Gauge 
In Half Double Crochet (HDC) using a 5.0 mm hook: 14 HDC stitches and 10 rows = 4 inches (10 cm) square.
Abbreviations 
| Abbreviation | Description |
| ch | chain |
| sl st | slip stitch |
| sc | single crochet |
| hdc | half double crochet |
| dc | double crochet |
| st(s) | stitch(es) |
| rep | repeat |
| BLO | Back Loop Only |
| FPDC | Front Post Double Crochet |
| BPDC | Back Post Double Crochet |
| CCPC | Crocheted Cable Panel Cross |
Export to Sheets
Special Stitches 
Crochet Cable Panel Cross (CCPC)
This stitch creates the cable twist across 6 stitches.
- Skip 3 sts. FPDC in the next 3 sts. Work FPDC in the 3 skipped stitches in front of the newly made posts (crossing the posts).
Ribbing
- HDC-BLO: Half Double Crochet worked into the Back Loop Only.
Part 1: Back Panel (HDC) 
We start with the ribbed hem and work up to the shoulders.
Hem (Ribbing): Ch 11. Sc in the 2nd ch from hook and in each ch across. (10 sc) Row 2: Ch 1, turn. Sc in the BLO of each st across. (10 sc) Rows 3-42: Repeat Row 2 until piece measures approximately 13 inches (33 cm) long, slightly stretched. Do not fasten off.
Body (HDC): Row 1 (Body Setup): Ch 2, turn 90 degrees. Work 70 hdc evenly across the long edge of the ribbing (work 1 hdc at the end of every sixth rib row, and 2 hdc along the next, approx. ratio of 1.7 hdc per rib row). (70 hdc) Rows 2-25: Ch 2, turn. Hdc in each st across. (70 hdc)
Armhole Shaping (Armscye): Row 26: Ch 2, turn. Sl st in the next 3 sts, hdc in the next 64 sts. Leave last 3 sts unworked. (64 hdc) Rows 27-36: Ch 2, turn. Hdc in each st across. (64 hdc) Fasten off after Row 36.
Part 2: Front Panel (HDC & CCP) 
Work the hem and body setup exactly as for the Back Panel (70 hdc total).

Row 2 (Cable Setup): Ch 2, turn. Hdc in the first 30 sts. Dc in the next 10 sts (Cable Panel). Hdc in the last 30 sts. (70 sts)
- The cable panel is 10 sts wide: 2 FPDC borders + 6 CCP sts + 2 FPDC borders.
Rows 3-25 (Body with Cable): Ch 2, turn. Hdc in the 30 sts before the cable panel.
- Cable Panel: FPDC in the next 2 sts (Border). Work the CCPC (6 cable sts: skip 3, FPDC 3, FPDC 3 in skipped sts). FPDC in the next 2 sts (Border).
- Hdc in the remaining 30 sts.
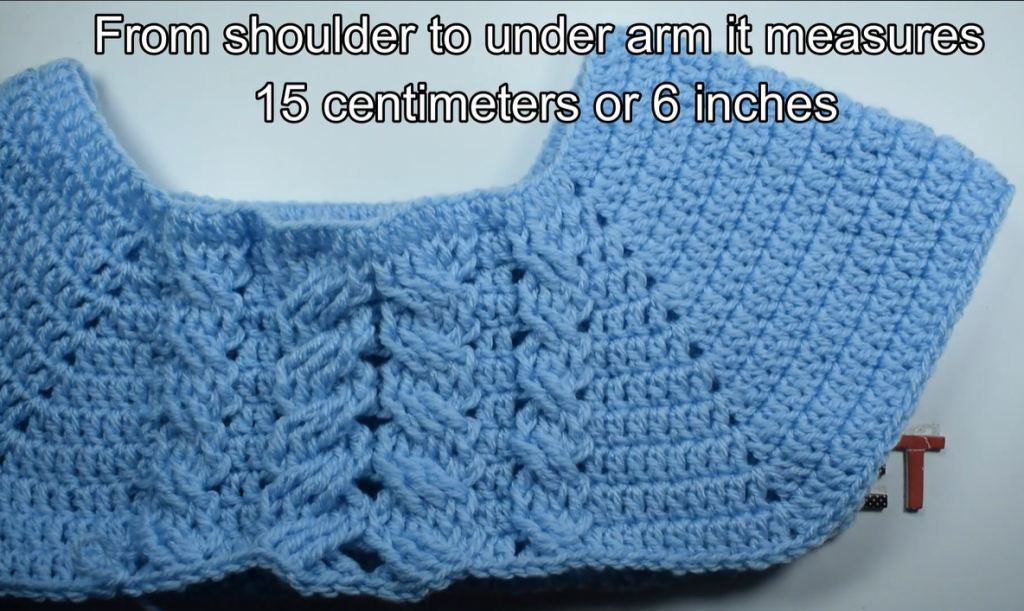
Armhole Shaping (Armscye): Row 26: Sl st in the first 3 sts, hdc to the cable panel. Work the cable panel sts. Hdc to the last 3 sts. Leave last 3 sts unworked. (64 sts) Rows 27-31: Hdc in the side panels, continuing the cable pattern across the center. (64 sts)
Neck Shaping (Divide for Neck): Row 32 (Right Shoulder): Ch 2, turn. Hdc in the first 23 sts (side panel and half the cable). Leave remaining sts unworked. (23 sts) Row 33: Ch 2, turn. Hdc2tog (decrease) at the neck edge. Hdc across. (22 sts) Rows 34-36: Hdc in each st across. Fasten off.
Left Shoulder: Attach yarn to the 23rd st from the end of Row 31. Ch 2, hdc across the 23 sts. Row 33: Ch 2, turn. Hdc across, hdc2tog (decrease) at the neck edge. (22 sts) Rows 34-36: Hdc in each st across. Fasten off.
Part 3: Sleeves (HDC & Ribbing) 
Make 2 sleeves, worked in the round.
Ribbing: Ch 11. Sc in the BLO for 26 rows (approx. 6.5 inches wide), then sl st the ends together to form a tube.
Sleeve Body (HDC): Rnd 1 (Setup): Ch 2 (counts as hdc). Work 48 hdc evenly around the edge of the ribbing. Sl st to join. (48 hdc) Rnds 2-25: Ch 2. Hdc in each st around. Sl st to join.
- Decrease 1 hdc on each side on Rnds 10 and 20 (44 hdc remaining). Fasten off.
Part 4: Assembly & Cowl Neck 
A. Assembly:
- Shoulder Seams: Sew the 22-st shoulder edges of the Front and Back together using the mattress stitch.
- Side Seams: Sew the side edges of the Front and Back together from the hem to the armpit.
- Sleeve Seams: Insert the sleeve tubes into the armholes, centering the seam at the bottom. Sew around using the mattress stitch.
B. Cowl Neck (Ribbing):
- Attach yarn to the back center of the neck opening. Rnd 1: Ch 2. Work 78 hdc evenly around the neck opening (adjusted to be a multiple of the rib count). Sl st to join.
- Rnds 2-20 (Ribbing): Ch 2. Hdc in the BLO of each st around. Sl st to join.
- Work until the cowl measures approximately 8-9 inches (20-23 cm) in height. Fasten off, leaving a long tail.