 by
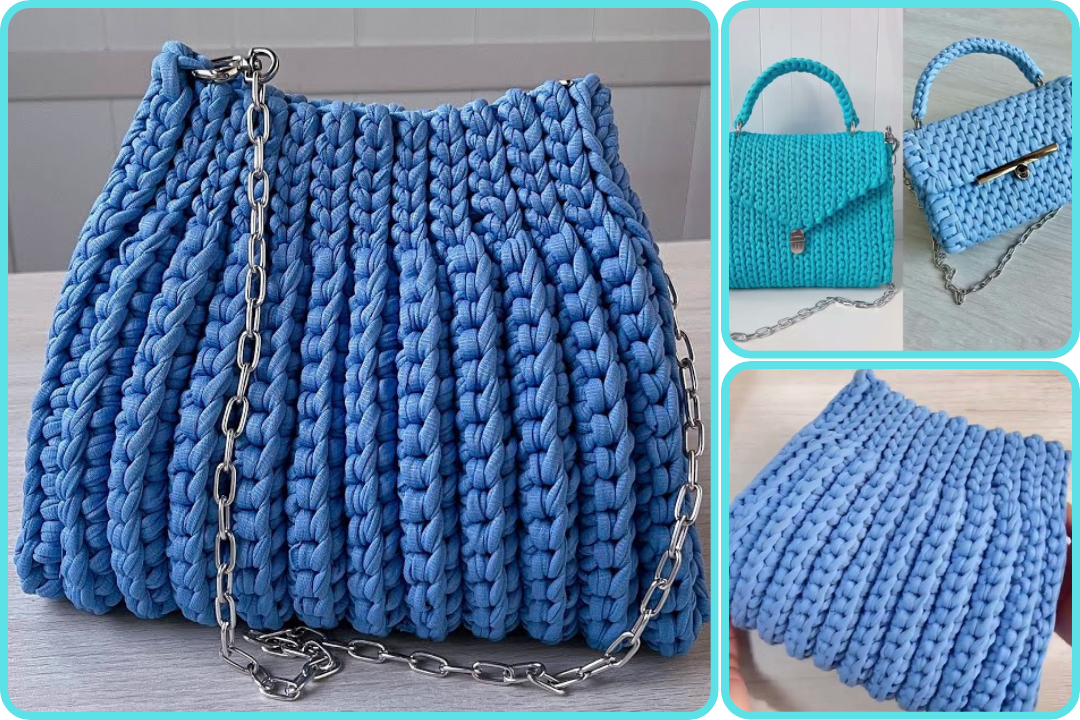
by Sure! Here’s a detailed guide on how to make an elegant bag, from planning and materials to sewing and finishing touches. This guide assumes basic sewing skills but aims to walk you through each step clearly.
🎒 How to Make an Elegant Bag: Step-by-Step Guide
🧵 Step 1: Plan Your Bag Design
Determine:
-
Type: Clutch, tote, shoulder bag, crossbody, etc.
-
Style: Formal, minimalist, vintage, modern, etc.
-
Size: Dimensions based on usage (e.g., 12″x10″ for a small elegant shoulder bag)
-
Features: Inner pockets, zippers, magnetic snap, flap, chain strap, etc.
Sketch your design or find a pattern online. You can also modify existing bag patterns for a personal touch.
🧵 Step 2: Gather Materials
Essential Materials:
-
Outer Fabric: Choose something luxurious like satin, velvet, brocade, faux leather, or suede.
-
Lining Fabric: Use cotton, satin, or silk for an elegant inside finish.
-
Interfacing: Medium to heavy fusible interfacing for structure.
-
Thread: High-quality matching thread.
-
Closure: Magnetic snap, zipper, or clasp.
-
Handles/Straps: Chain, leather strap, or fabric strap.
-
Decorations (optional): Embroidery, lace, pearls, rhinestones, tassels.
Tools:
-
Sewing machine
-
Fabric scissors
-
Pins/clips
-
Ruler or measuring tape
-
Iron and ironing board
-
Chalk or fabric marker
🧵 Step 3: Cut and Prepare Fabric
-
Cut the Fabric:
-
Outer fabric: Cut front and back panels, sides/bottom if needed.
-
Lining fabric: Same shapes as outer pieces.
-
Interfacing: Same size as the outer pieces.
-
-
Fuse Interfacing:
-
Iron interfacing to the wrong side of outer fabric. This helps the bag hold its shape and look professional.
-
🧵 Step 4: Sew the Body
-
Outer Bag:
-
Sew side seams, bottom, and corners (if applicable).
-
For a boxy shape, create boxed corners by sewing across the corners and trimming.
-
-
Lining:
-
Sew in the same way as the outer bag.
-
Leave a 3–4 inch opening at the bottom for turning later.
-
-
Add Inner Pockets (Optional):
-
Sew pockets to the lining before assembling.
-
🧵 Step 5: Add Closure and Straps
-
Closure:
-
Attach magnetic snap or zipper to the outer bag before sewing it to the lining.
-
-
Straps:
-
If using fabric straps, sew and turn them inside out.
-
For chain or leather straps, attach hardware like D-rings or eyelets.
-
🧵 Step 6: Assemble the Bag
-
Place Outer and Lining Together:
-
Right sides facing each other.
-
Align and pin at the top edges.
-
-
Sew Around the Top Edge:
-
Stitch the top opening all the way around.
-
-
Turn the Bag Right Side Out:
-
Pull the bag through the hole left in the lining.
-
Stitch the opening in the lining closed by hand or machine.
-
-
Press and Topstitch:
-
Press the top edge with an iron.
-
Topstitch around the edge for a neat, professional look.
-
🧵 Step 7: Add Finishing Touches
-
Add decorative trims, beading, or embroidery.
-
Attach brand tag or label if desired.
-
Use a lint roller and iron for a polished final look.
👜 Tips for an Elegant Look:
-
Stick to high-end fabrics and clean lines.
-
Use neutral or classic colors (black, navy, beige, burgundy).
-
Minimalist design with fine details often looks more elegant.
-
Quality hardware (like gold/silver clasps) elevates the bag’s appearance.
Watch video: