 by
by Absolutely! 🧶✨
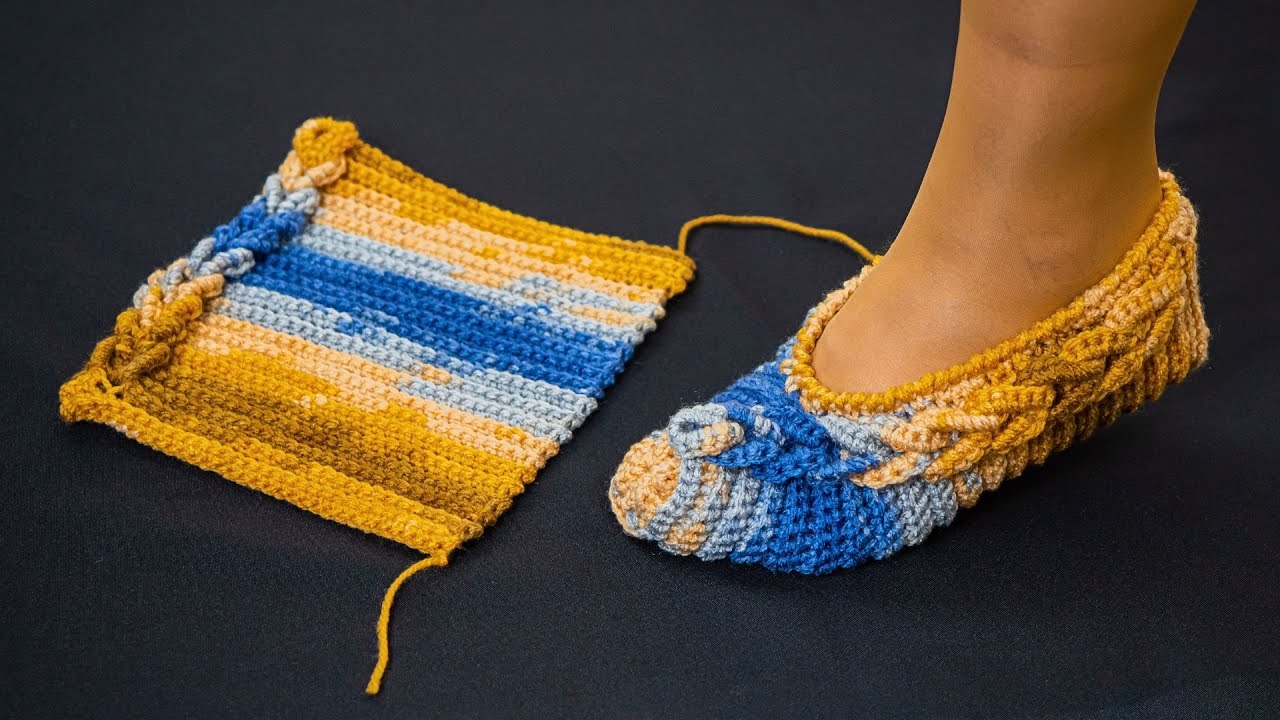
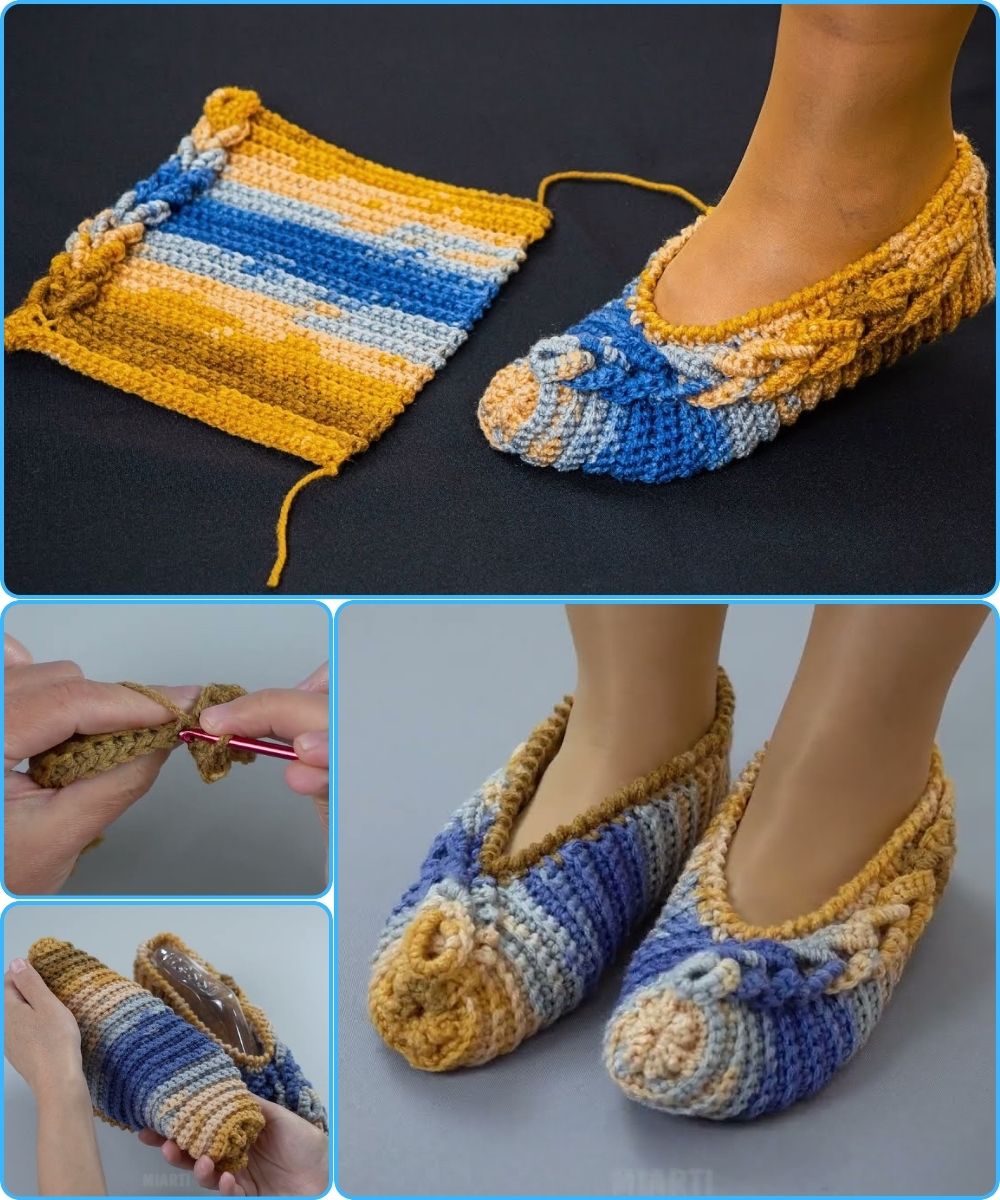
Here’s a clear, detailed, beginner-friendly guide for crocheting easy slippers from a rectangle. This is one of the simplest slipper projects out there—no shaping, no counting stress, and perfect for beginners.
How to Crochet Easy Slippers from a Rectangle
Beginner Friendly – Fast & Cozy!
These slippers are made by crocheting one simple rectangle, then folding and sewing it into a slipper shape. If you can crochet straight rows, you can make these!
1. What You’ll Need
🧶 Materials
-
Yarn:
-
Medium (worsted) or bulky yarn
-
Wool or wool blend for warmth
-
About 100 g
-
-
Crochet hook:
-
Size 5 mm–6 mm (H/8–J/10)
-
-
Other tools:
-
Yarn needle
-
Scissors
-
2. Size Guide (Adult – Easy to Adjust)
Finished rectangle size (before folding):
-
Length: 24–26 cm (9.5–10.5 in)
-
Width: 18–20 cm (7–8 in)
To resize:
-
Longer rectangle = longer foot
-
Wider rectangle = wider slipper
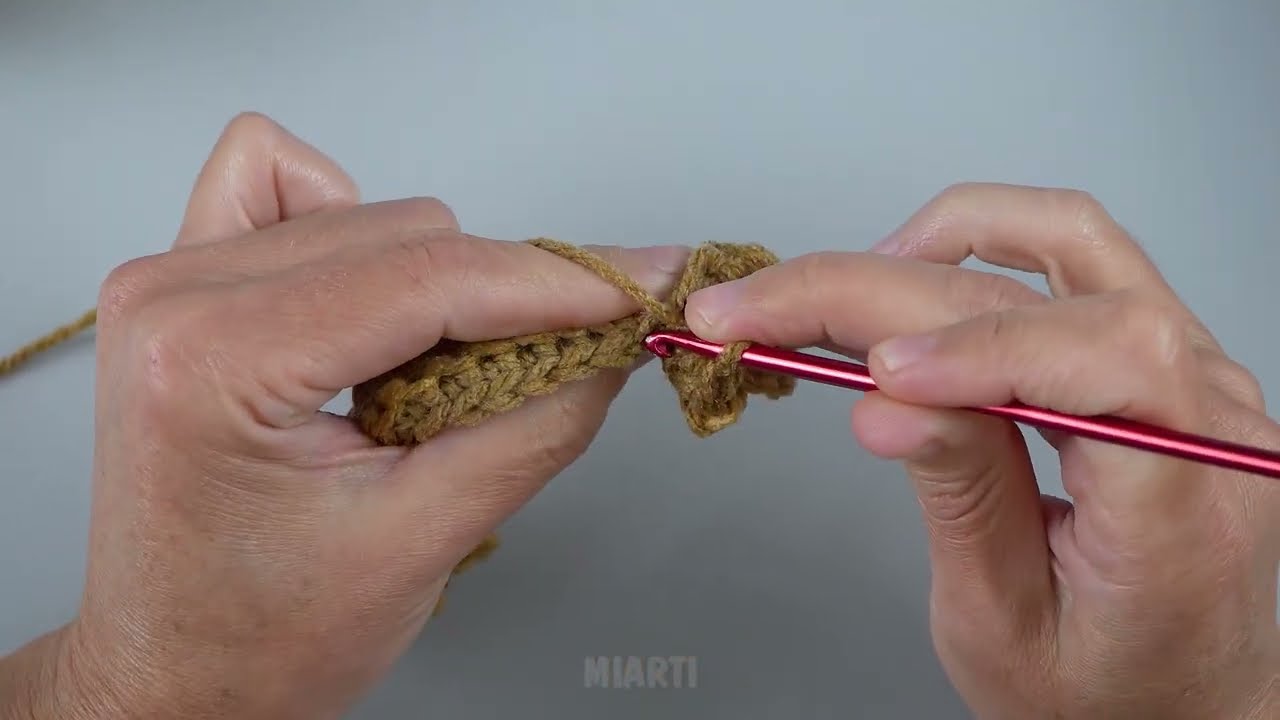
3. Stitches Used (Perfect for Beginners)
You only need:
-
Chain (ch)
-
Half double crochet (hdc) or double crochet (dc)
-
Slip stitch (sl st)
That’s it! 🙌
4. Gauge (Not Critical!)
As long as your stitches are even and not too loose, your slippers will work just fine.
5. Step-by-Step Instructions
STEP 1: Crochet the Rectangle
-
Chain 31 (or enough for desired width)
-
Hdc (or dc) in the third chain from the hook
-
Continue across
-
Chain 2, turn
You should have 29 stitches.
STEP 2: Build the Rectangle
-
Crochet hdc (or dc) in every stitch
-
Chain 2, turn at the end of each row
-
Repeat until the piece measures 24–26 cm (9.5–10.5 in) long
This flat rectangle is the entire slipper!
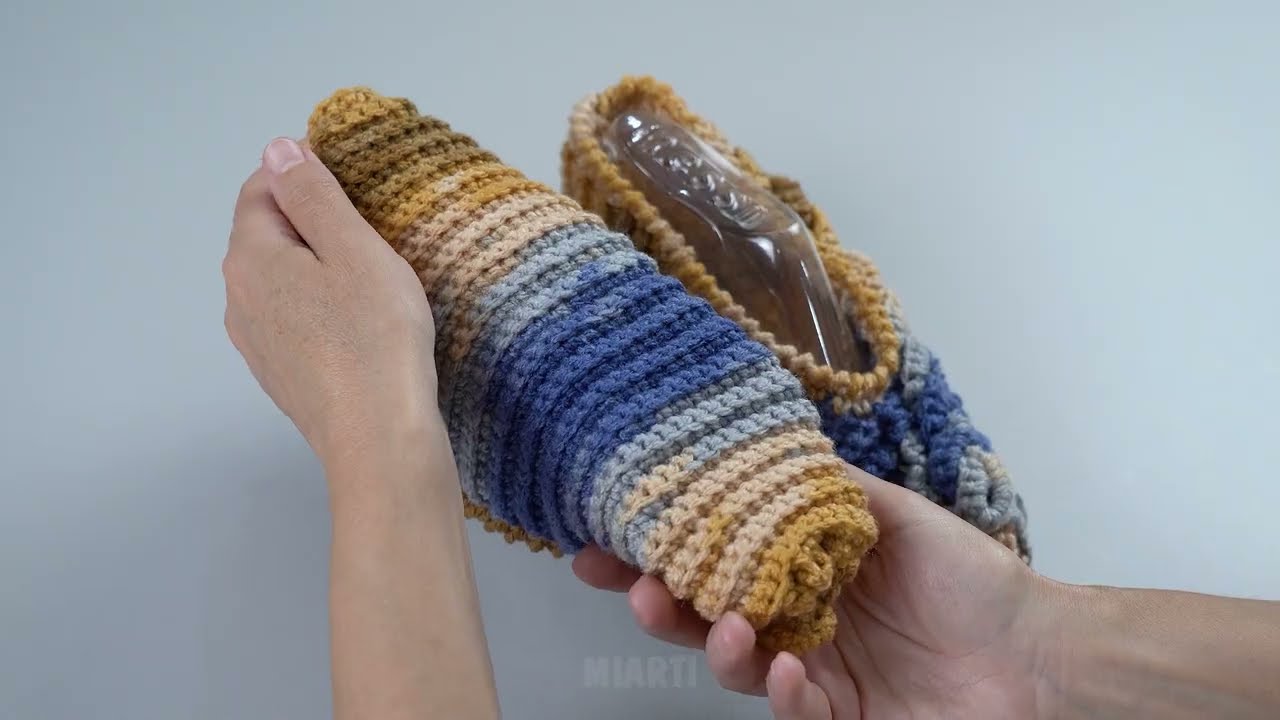
STEP 3: Fold into Slipper Shape
Lay the rectangle flat:
-
Fold it lengthwise in half
-
Sew along one short edge (this becomes the toe)
-
On the opposite end, sew halfway up to form the heel
👉 Leave the top open for your foot.
STEP 4: Shape the Heel
-
Fold the heel edges inward slightly
-
Sew them together to form a snug heel cup
Try it on and adjust if needed.
STEP 5: Finish Off
-
Weave in all yarn ends
-
Turn slipper right side out
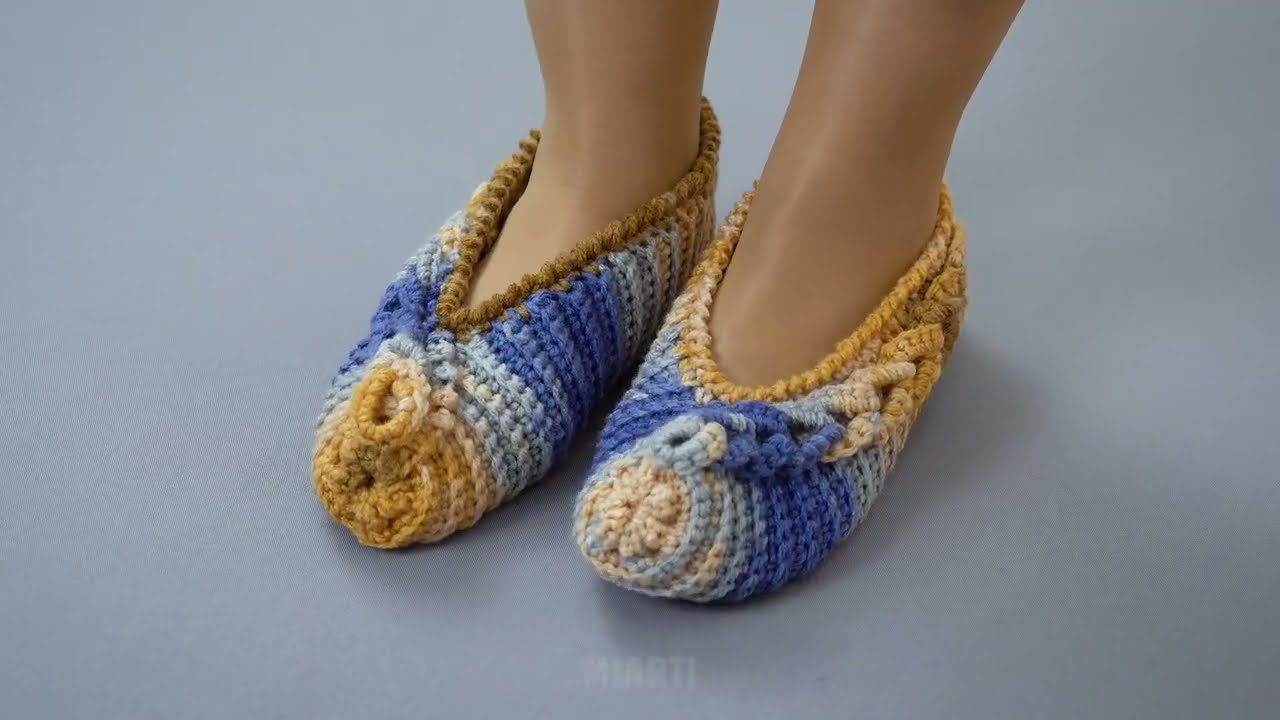
🎉 Your slipper is ready!
6. Optional Edging (Easy Upgrade!)
For a neat finish:
-
Single crochet evenly around the opening
-
Or add a scalloped or picot edge
7. Beginner Tips 🌱
-
Use chunky yarn for fast results
-
Keep stitches tight for durability
-
Make a test rectangle and try it on
-
If slipper feels loose, sew a deeper heel seam
8. Customization Ideas ✨
-
Add pom-poms or buttons
-
Crochet stripes or color blocks
-
Sew on non-slip sole patches
-
Add a ribbed cuff around the ankle
9. Why This Pattern Is So Popular 💕
✅ One rectangle only
✅ No shaping skills needed
✅ Fast and beginner-approved
✅ Easy to resize
✅ Perfect gift project
Final Thoughts
Crocheting slippers from a rectangle is magic-level easy—you’ll be amazed how a flat piece turns into a cozy slipper. This is a fantastic confidence-builder for beginners!
If you’d like, I can:
-
Adjust this for kids or baby sizes
-
Make a one-hour chunky version
-
Add a no-sew option
-
Turn it into a printable pattern
Watch video: