 by
by Here’s a detailed, engaging guide you can use as a blog post, tutorial, or pattern description.
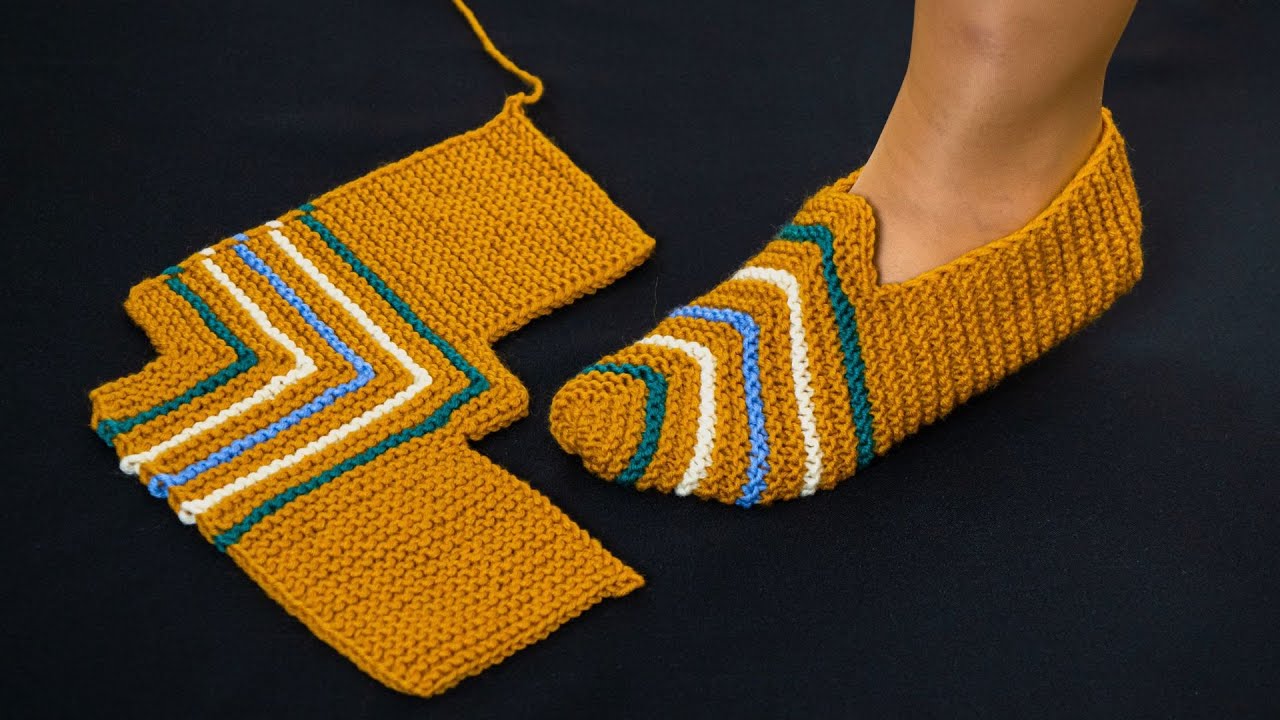
How to Make Simple Knitted Slippers – A Very Interesting Style!
Knitted slippers are one of the most satisfying projects for knitters of all skill levels. They’re quick to make, wonderfully cozy, and perfect as handmade gifts or personal comfort wear. This simple yet stylish slipper design uses basic knitting techniques, but the finished look is charming, modern, and surprisingly professional.
Why You’ll Love This Slipper Style 🧶
-
✔ Beginner-friendly pattern
-
✔ Minimal shaping, no complex techniques
-
✔ Works with leftover yarn
-
✔ Customizable for any foot size
-
✔ Comfortable, warm, and durable
This style is knit mostly flat, then shaped with easy decreases and simple seaming.
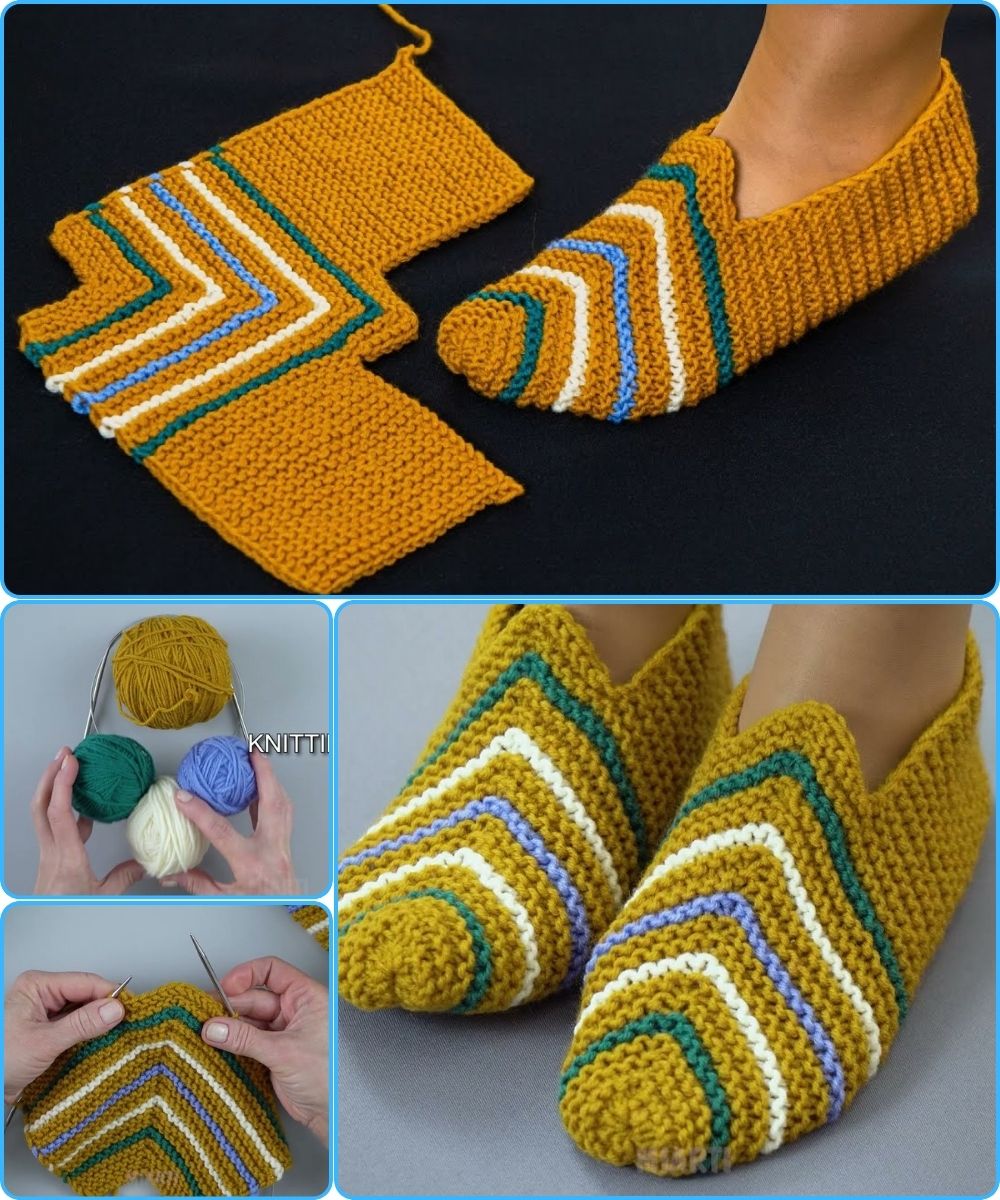
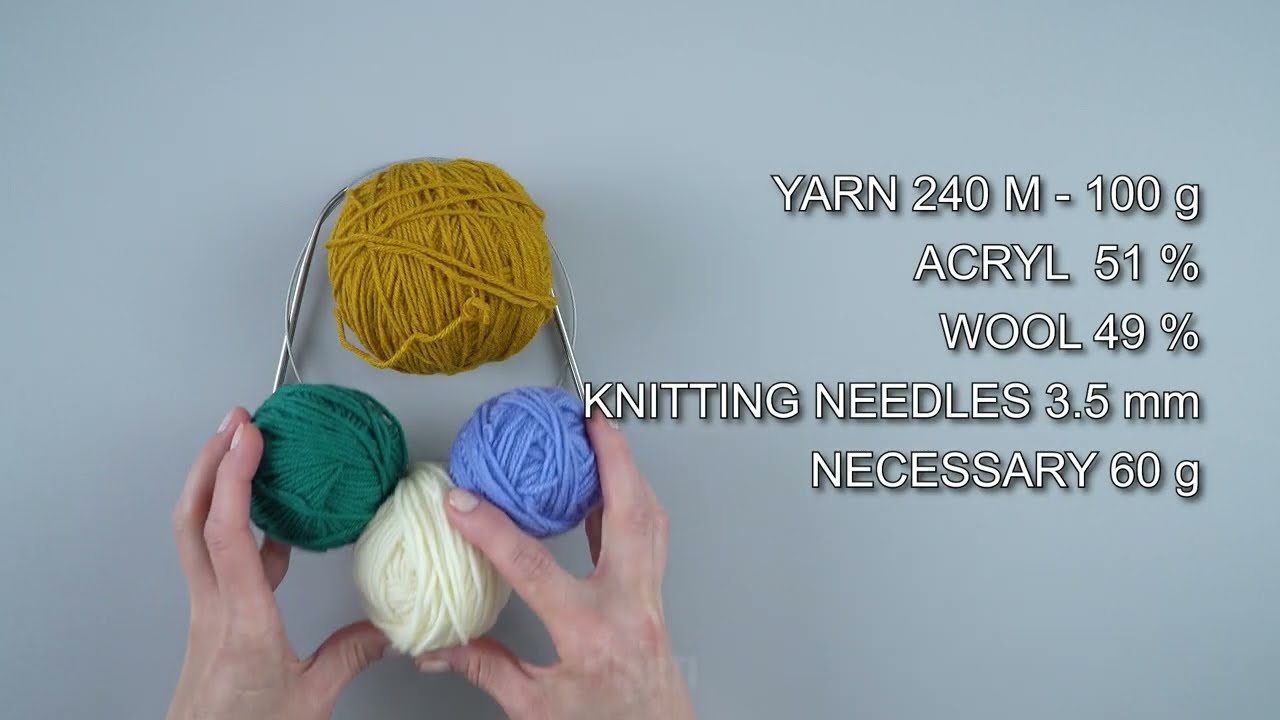
Materials You’ll Need
-
Yarn: Medium-weight (worsted) yarn – wool or wool blend works best
-
Knitting needles: Size 5 mm (US 8) or size needed to match gauge
-
Tapestry needle: For seaming
-
Scissors
-
Optional: Non-slip fabric paint or leather sole for grip
Basic Knitting Skills Required
-
Cast on
-
Knit stitch
-
Purl stitch
-
Knit two together (k2tog)
-
Bind off
-
Simple seaming
If you know how to knit and purl, you’re ready!
Step-by-Step Instructions
Step 1: Cast On
Cast on 36–40 stitches (adjust based on foot size).
-
Small: 36 stitches
-
Medium: 38 stitches
-
Large: 40 stitches
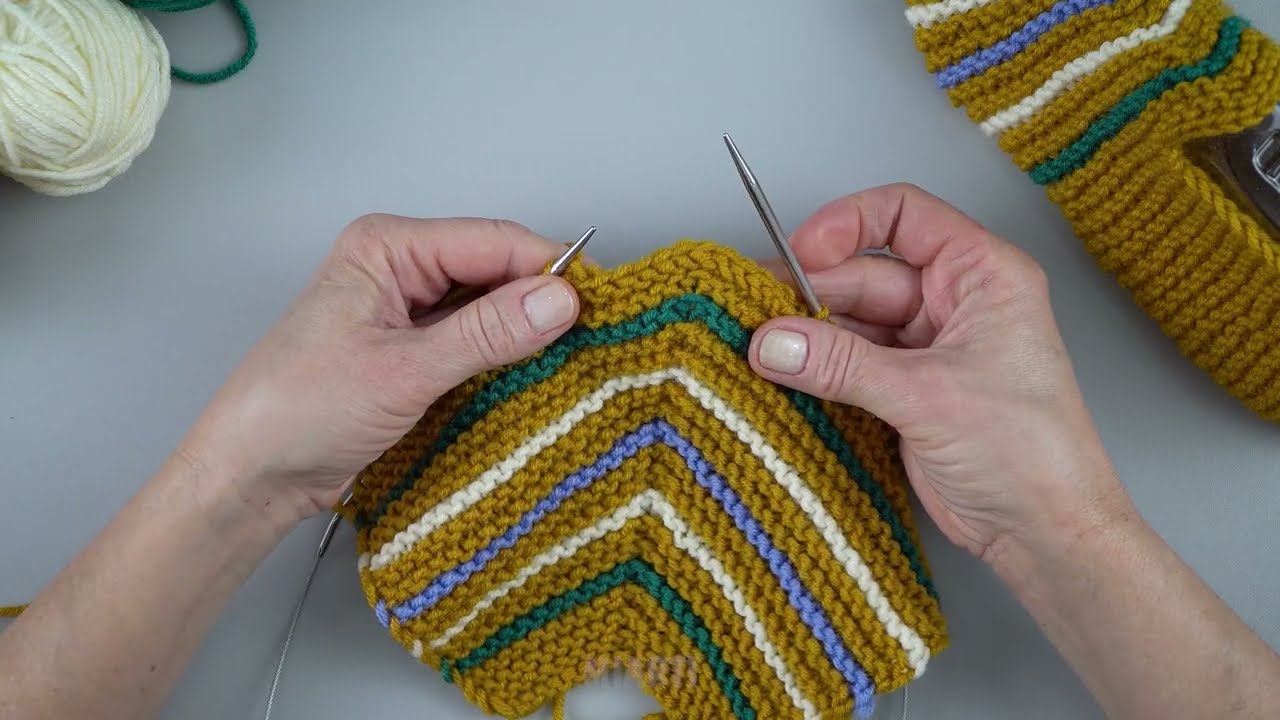
Step 2: Knit the Sole
Work in garter stitch (knit every row) for about 18–22 cm (7–9 inches).
This section forms the sole of the slipper and should reach from heel to toe.
Tip: Check the length by placing it against your foot.

Step 3: Shape the Toe
Now we shape the front of the slipper:
-
Knit 2 together at the beginning and end of every row
-
Continue decreasing until 10–12 stitches remain
This creates a gently rounded toe shape that fits comfortably.
Step 4: Bind Off
Bind off loosely to avoid tightness around the toes.
Step 5: Assemble the Slipper
-
Fold the knitted piece in half lengthwise
-
Sew the toe seam neatly
-
Sew the heel seam, leaving a snug but comfortable opening
Turn the slipper right-side out—your slipper shape is complete!
Optional Finishing Touches ✨
-
Add a ribbed cuff or folded edge for extra warmth
-
Attach a pom-pom or knitted flower for decoration
-
Apply non-slip dots to the sole for safety
-
Use contrasting yarn for a stylish border
Sizing & Customization Tips
-
For wider feet, cast on 2–4 extra stitches
-
For longer feet, knit more rows before shaping the toe
-
Try using bulky yarn for ultra-warm winter slippers
Final Thoughts
This simple knitted slipper pattern proves that you don’t need complicated techniques to create something beautiful and practical. With just basic stitches and a little creativity, you can make stylish, cozy slippers that everyone will love.
Perfect for relaxing evenings, thoughtful gifts, or even small handmade businesses—these slippers are a joy to knit and wear 💙
If you’d like, I can also:
-
Simplify this for absolute beginners
-
Turn it into a printable pattern
-
Adapt it for children or men
-
Add photos or diagrams descriptions
Watch video: