 by
by Absolutely! Let’s create a detailed, step-by-step tutorial for making simple knitted slippers with just one swatch. I’ll keep it beginner-friendly but thorough, so even if you’re new to knitting, you can follow along.

Materials Needed
-
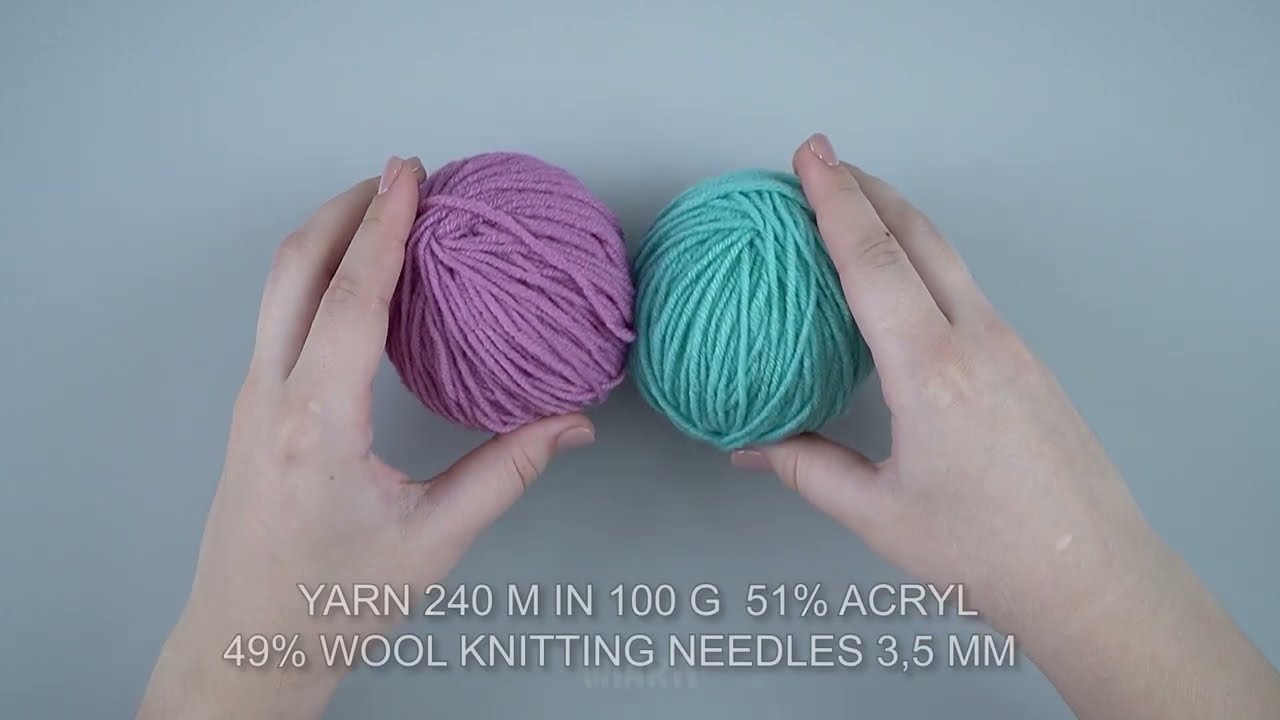
Yarn – Worsted weight (medium #4) is ideal for cozy slippers.
-
Knitting needles – Size US 8 (5 mm) is standard; adjust according to yarn.
-
Tapestry needle – For weaving in ends and seaming.
-
Scissors
-
Measuring tape
-
Optional: Non-slip fabric paint or grips for the soles.
Step 1: Take Measurements
You need to know:
-
Foot length (heel to toe)
-
Foot width (widest part)
-
Foot circumference (around the arch, optional if you want snug fit)
Example:
-
Foot length: 25 cm (10 in)
-
Foot width: 8 cm (3.2 in)
Step 2: Make a Gauge Swatch
-
Knit a small swatch (e.g., 10×10 cm / 4×4 in) in stockinette stitch (knit one row, purl one row).
-
Measure how many stitches per cm (or inch) and how many rows per cm.
This will help you calculate how many stitches you need for the foot width and length.
Example:
-
Gauge: 20 stitches = 10 cm (4 in) → 2 stitches/cm
-
Rows: 28 rows = 10 cm → 2.8 rows/cm
Step 3: Calculate Stitches
-
Width (number of stitches to cast on):
Foot width × stitches/cm = 8 cm × 2 = 16 stitches (adjust to nearest even number if needed) -
Length (number of rows for slipper body):
Foot length × rows/cm = 25 cm × 2.8 ≈ 70 rows
Step 4: Cast On
-
Cast on the number of stitches for the foot width using a stretchy cast-on (like long-tail cast-on).
Step 5: Knit the Swatch (Slipper Body)
-
Knit in stockinette stitch until your piece reaches the desired foot length (from toes to heel).
-
You can knit flat (back and forth) for a simple seam.
-
Optionally, knit in garter stitch (knit every row) for extra squishiness.
-
-
Keep track of the total rows.
Step 6: Shape the Toe (Optional)
-
If you want a rounded toe:
-
Knit a few decrease rows before reaching the full length.
-
Example:
-
Row 1: K2tog across → decreases stitches evenly
-
Row 2: Purl back
-
Repeat until 4–6 stitches remain.
-
-
-
If you want a simple rectangle, skip decreases.
Step 7: Bind Off
-
Bind off loosely so the edge is stretchy enough for your foot.
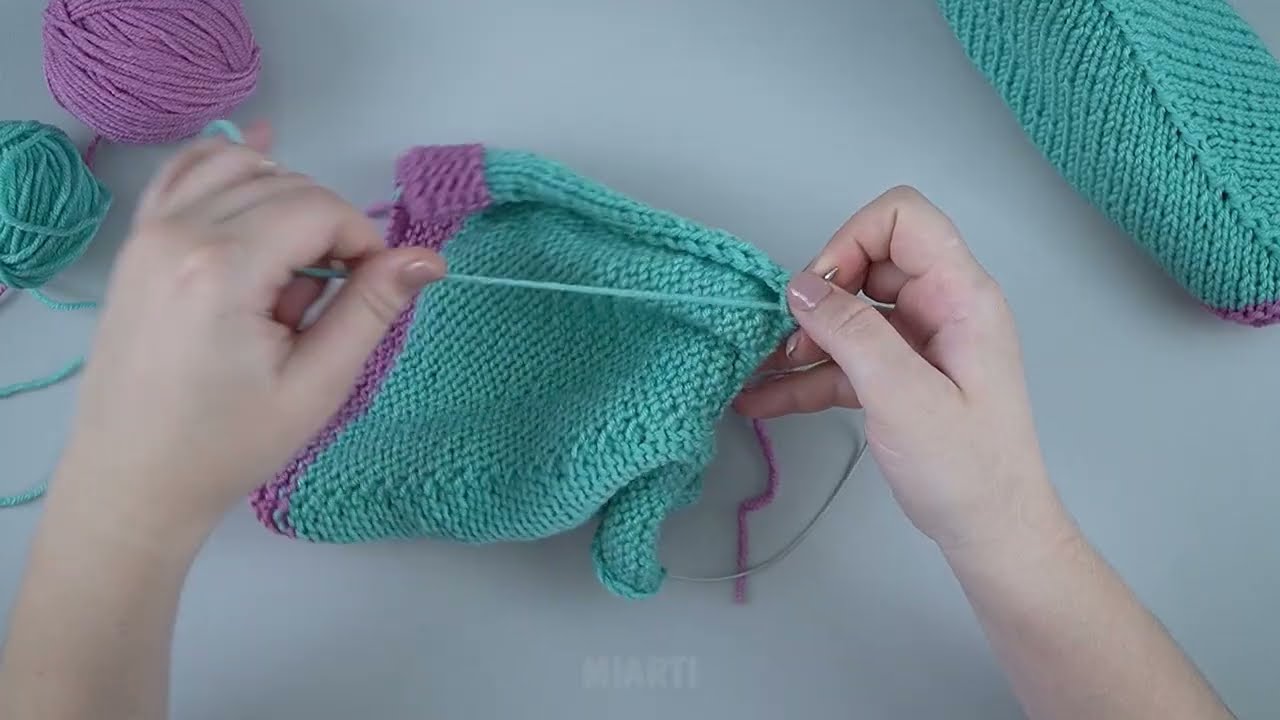
Step 8: Seam the Slipper
-
Fold the swatch in half so the right side is on the outside.
-
Seam the back and toe using mattress stitch or whip stitch:
-
Start at the toe, stitch along the edges until you reach the back.
-
-
Leave the top open to slide your foot in.
Step 9: Finishing
-
Weave in all yarn ends neatly with the tapestry needle.
-
Optional: Add non-slip dots or fabric paint to the sole.
Step 10: Try Them On
-
Check for fit and comfort.
-
Adjust next pair by adding/subtracting a few stitches or rows if needed.
Tips for a Perfect Single-Swatch Slipper
-
Stretchy Yarn: Wool or wool blends make slippers cozy and slightly elastic.
-
Customization: Use ribbing (K2, P2) at the top edge to make it snug around the ankle.
-
Thickness: For warmer slippers, use double strands of yarn or thicker yarn.
-
Fun Variations: Knit stripes, use multiple colors, or add a small pompom on top.
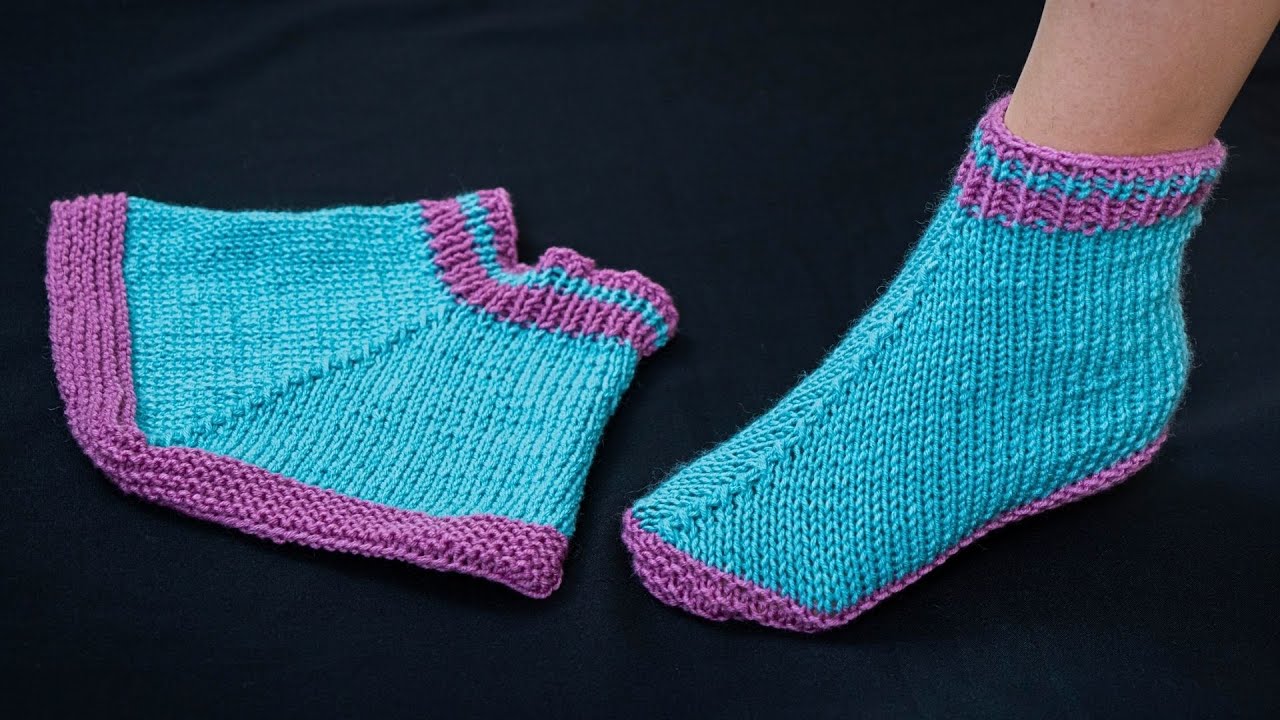
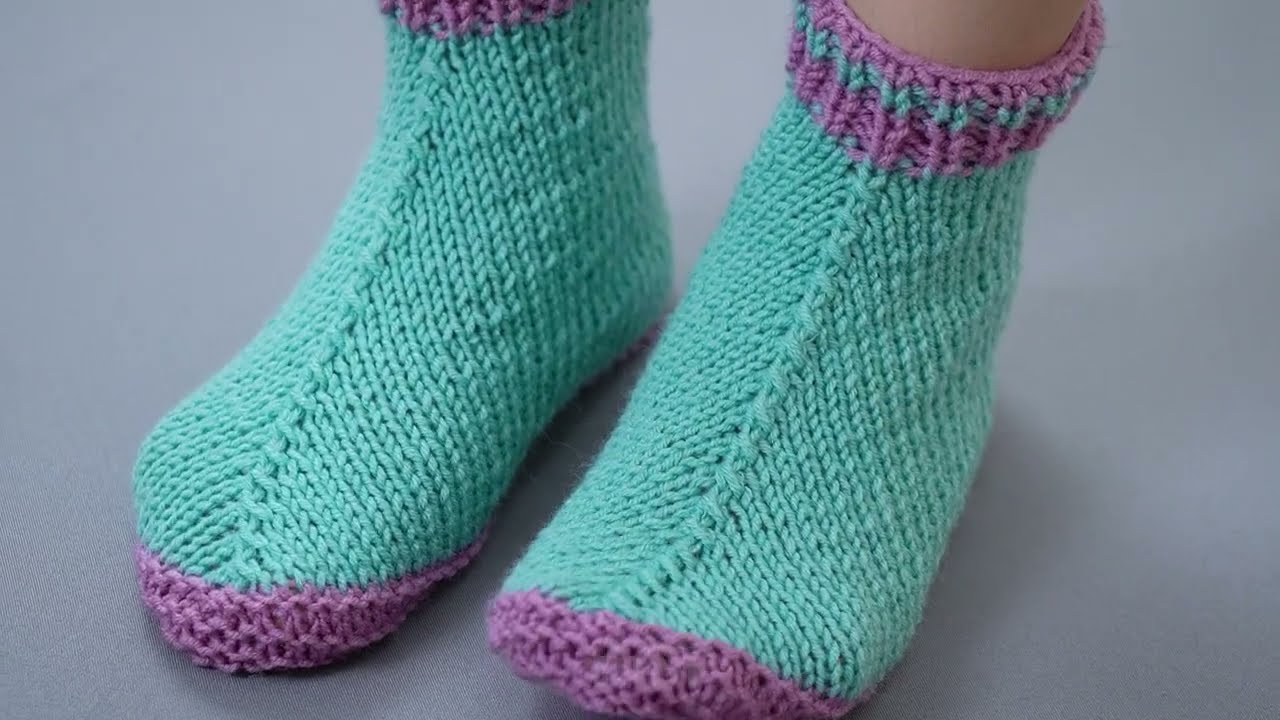
✅ Result: One simple knitted rectangle transformed into a cozy, wearable slipper with just a single swatch!
If you want, I can draw a step-by-step diagram showing exactly how to fold and seam the swatch—it makes this project even easier to visualize.
Do you want me to do that?
Watch video: