 by
by Absolutely! Let’s make this beginner-friendly. I’ll break it down step by step, including materials, basic techniques, and instructions. These slippers will be simple, cozy, and easy to knit.
Materials You’ll Need
-
Yarn: Medium weight (worsted) yarn is easiest for beginners. Soft acrylic or wool blends work well.
-
Knitting needles: Size recommended on the yarn label (usually US 8 / 5mm for worsted yarn).
-
Tapestry needle: For weaving in ends and sewing pieces together.
-
Scissors
Optional: Stitch markers to help keep track of rows.
Basic Knitting Skills Needed
-
Casting on – starting your stitches.
-
Knit stitch (k) – the basic stitch.
-
Purl stitch (p) – optional depending on design.
-
Binding off – finishing your work.
-
Sewing pieces together – for shaping the slipper.
If you know how to cast on, knit, purl, and bind off, you’re ready!

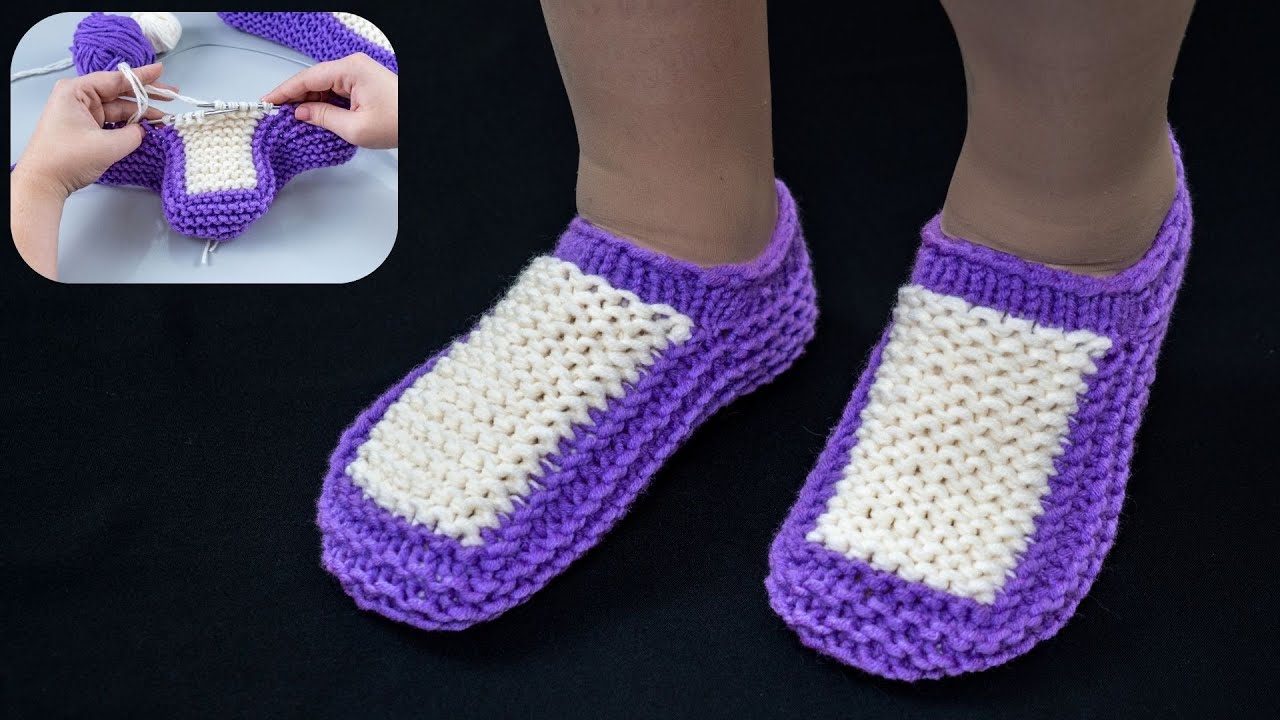
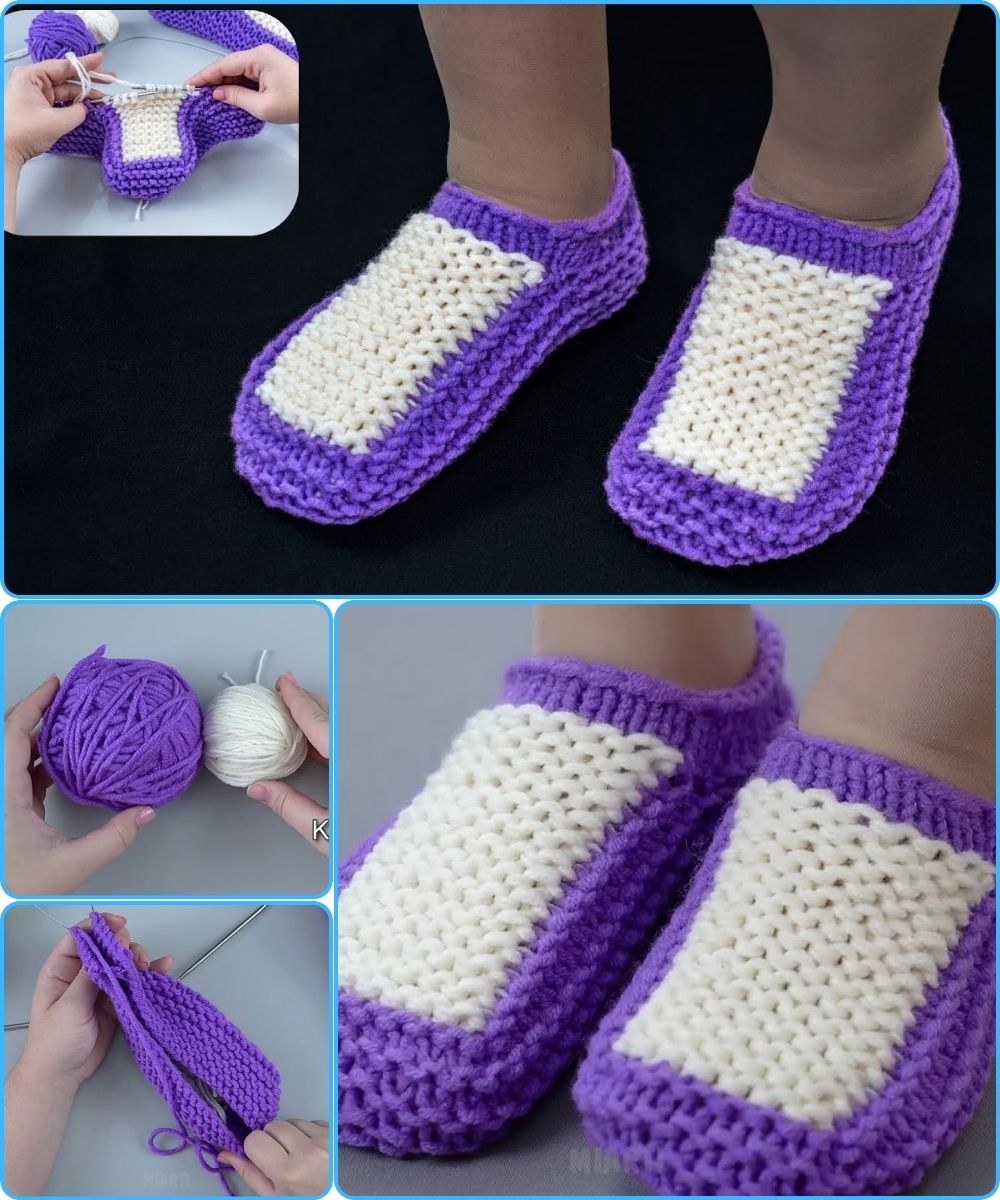
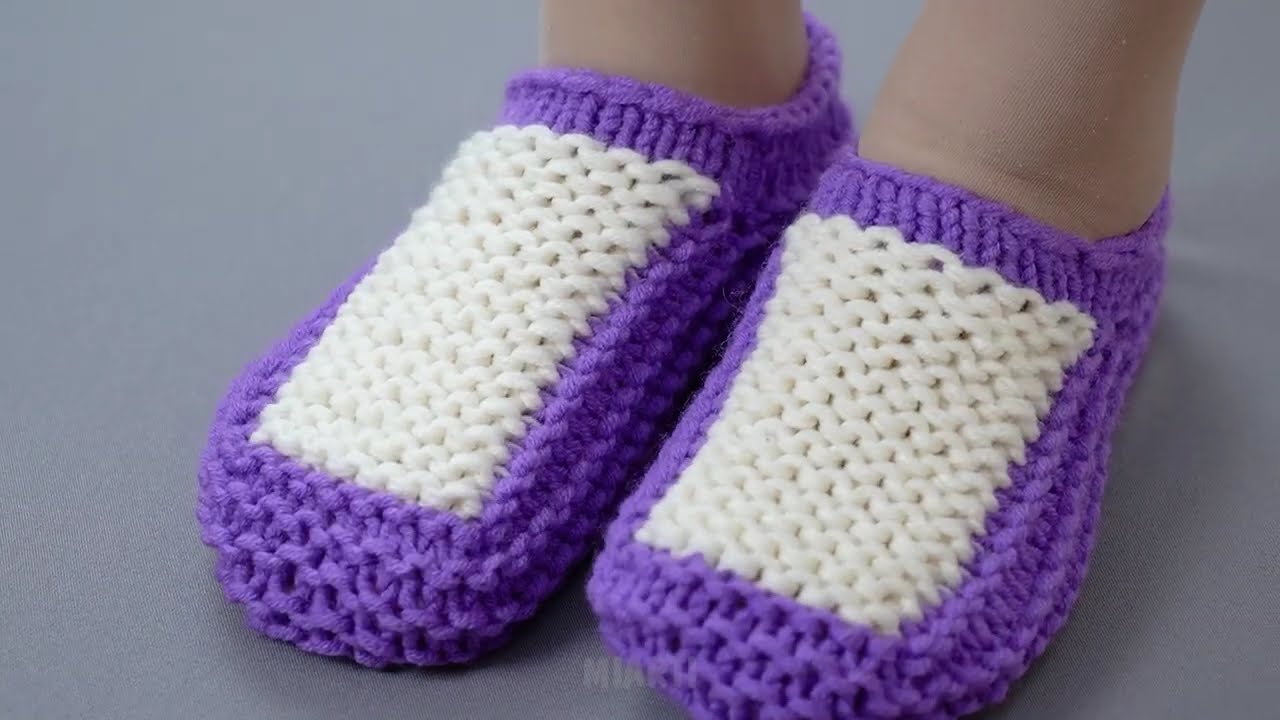
Simple Knitted Slippers Pattern (Beginner Version)
This is a one-piece slipper worked flat and then sewn.
Step 1: Measure Your Foot
-
Measure the length of your foot from heel to toe.
-
Your slipper will need to be slightly larger for comfort.
Step 2: Cast On
-
Cast on stitches equal to the width of your foot.
For adults: about 30–40 stitches depending on your yarn and gauge.
Step 3: Knit the Foot
-
Work in garter stitch (knit every row) or stockinette stitch (alternate knit and purl rows) until the piece measures the length of your foot minus about 2 inches.
-
This will be the sole of the slipper.
Step 4: Shape the Toe
-
Start decreasing to shape the front:
-
Row 1: Knit 2 together (k2tog) at the beginning and end of the row
-
Row 2: Knit across
-
Repeat these 2 rows until 6–8 stitches remain.
-
-
Bind off the remaining stitches.
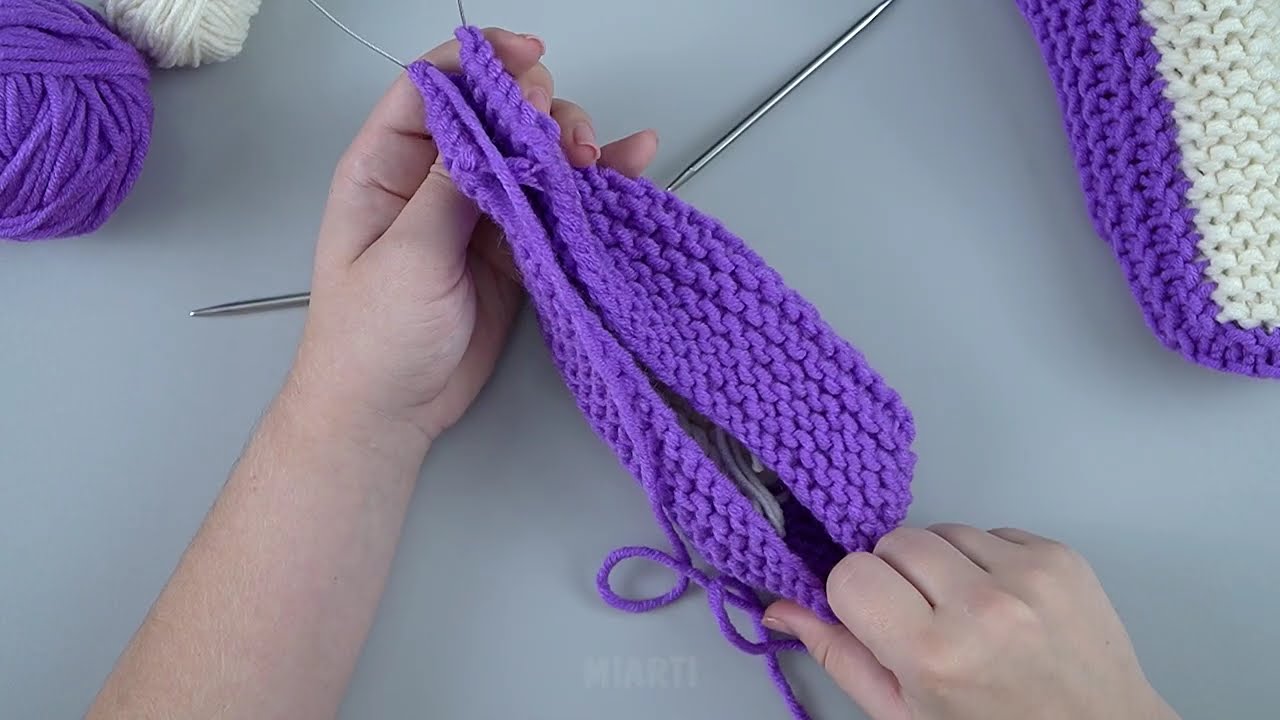
Step 5: Make the Heel
-
Fold the slipper so the edges meet.
-
Use a tapestry needle to sew up the back seam (heel) using whip stitch or mattress stitch.
Step 6: Optional Cuff
-
If you want a cuff to keep the slipper snug:
-
Pick up stitches along the slipper’s opening and knit 6–10 rows in ribbing (k1, p1)
-
Bind off loosely.
-
Step 7: Finishing
-
Weave in any loose yarn ends.
-
Try on your slippers, and adjust if needed.
Tips for Beginners
-
Use chunky yarn if you want the project to be faster.
-
Keep your tension even to avoid uneven stitches.
-
Don’t worry about exact size on your first attempt; you can adjust with more/less stitches next time.
-
Garter stitch is easiest because it doesn’t curl.
These slippers are simple, customizable, and perfect for cozy winter nights!
If you want, I can make a super visual step-by-step guide with a simple diagram, so you can see exactly where to fold and sew. It’s beginner-friendly and really helps visualize the process.
Do you want me to do that?
Watch video: