 by
by Here is a detailed, easy-to-follow guide for making crochet granny square slippers, perfect for beginners!
🧶 How to Make Easy Crochet Granny Square Slippers
A step-by-step guide for beginners
Crochet granny square slippers are one of the simplest wearable projects you can make. They use basic stitches, work up quickly, and are customizable in size and color.
🌟 Materials You Will Need
-
Worsted weight yarn (medium/size 4) – 2–3 colors if desired
-
5.0 mm (H) crochet hook
-
Yarn needle for sewing
-
Scissors
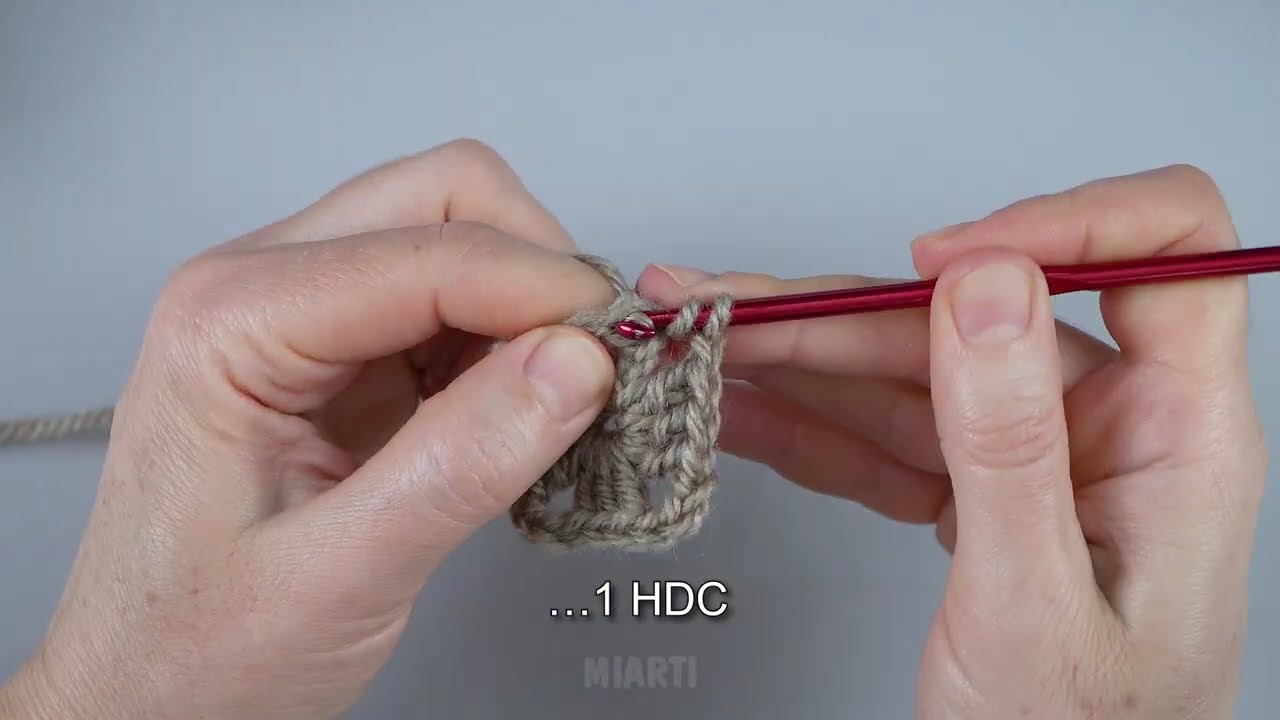
🪡 Skills You Should Know
If you can do these, you can make the slippers:
-
Chain (ch)
-
Slip stitch (sl st)
-
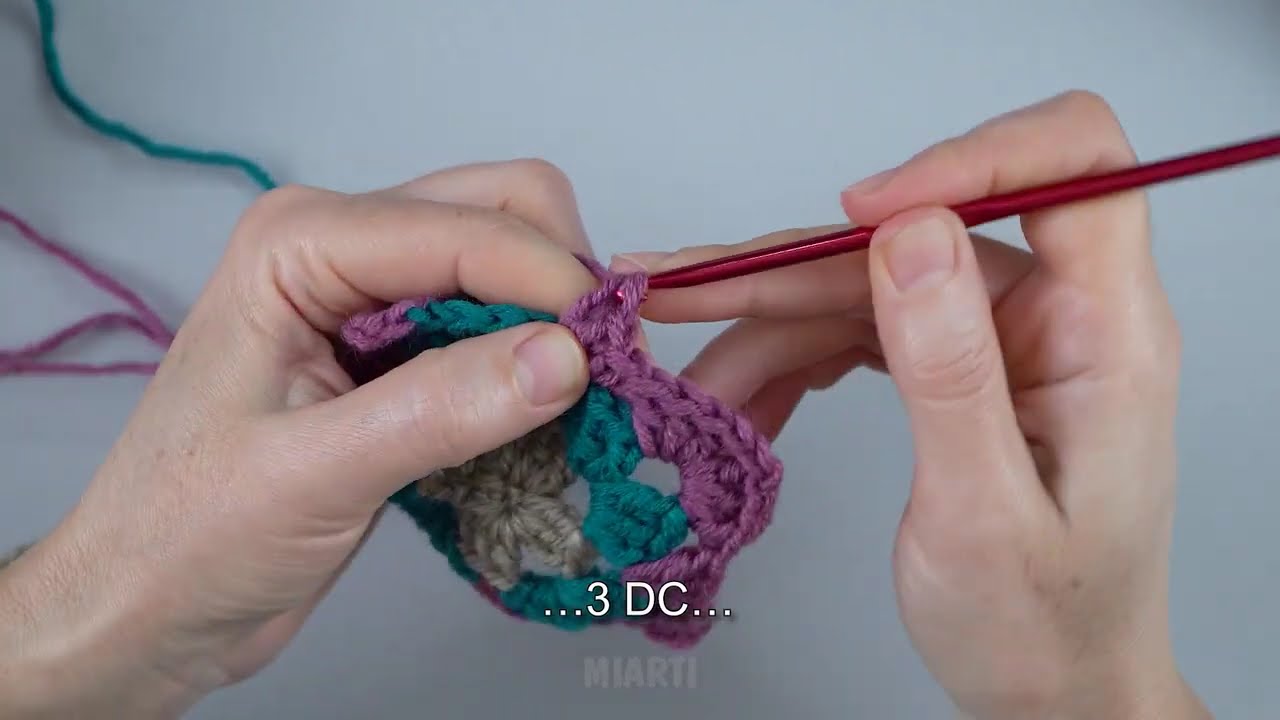
Double crochet (dc)
-
Work in rounds
If any stitch is unfamiliar, ask and I’ll explain!
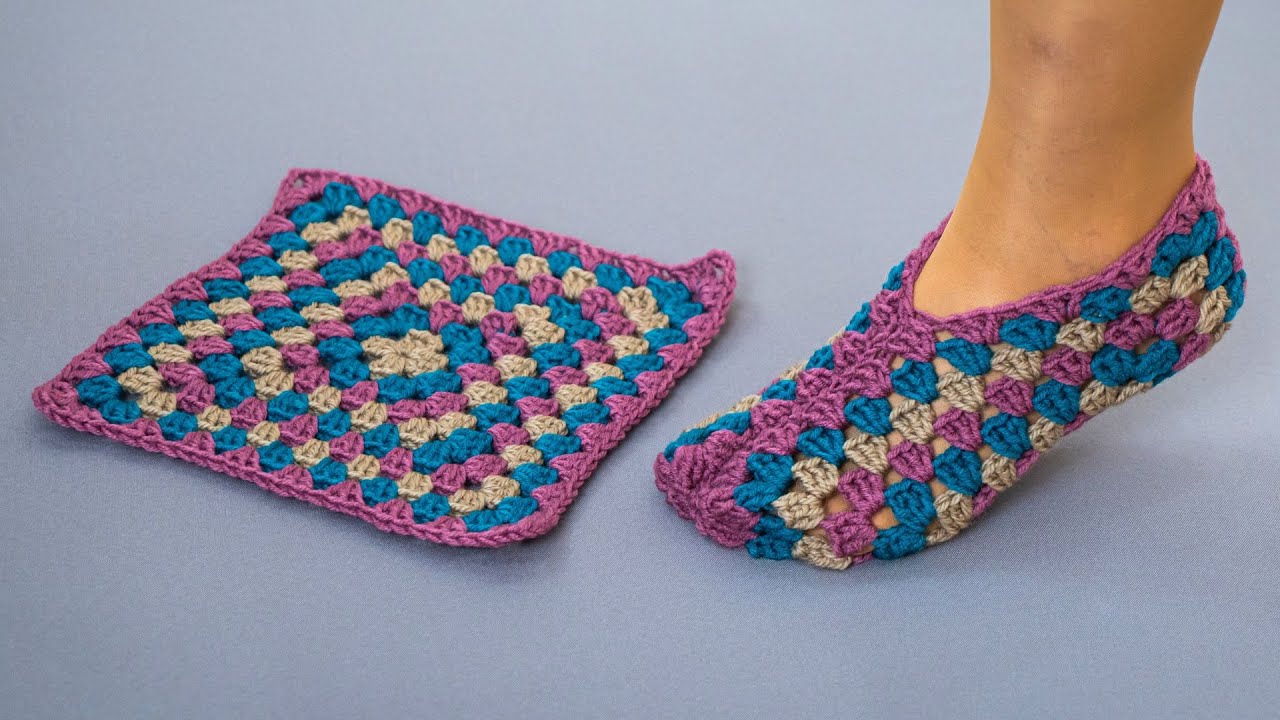
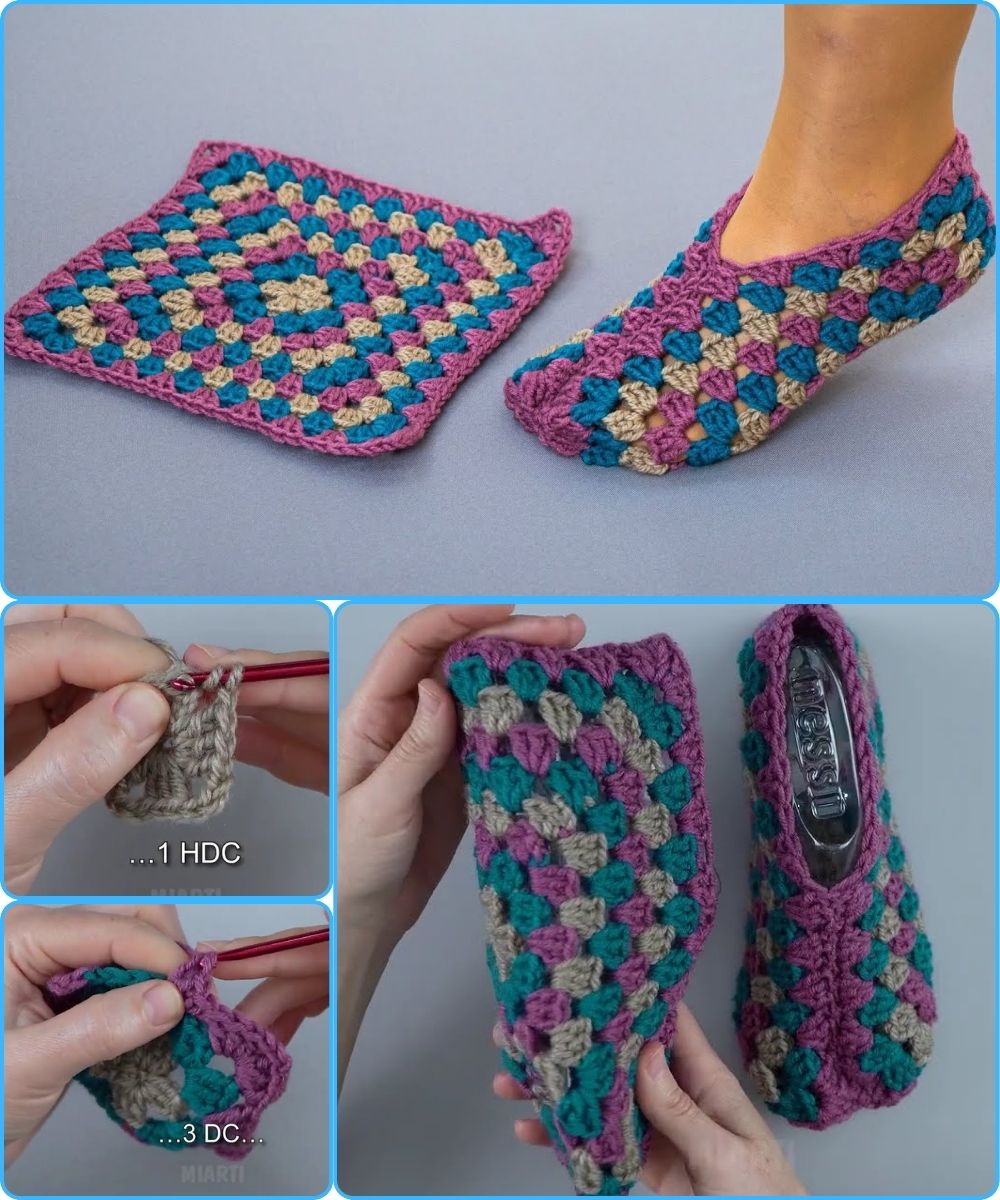
🟥 Step 1: Make 6 Basic Granny Squares
You need six squares total—three for each slipper.
Simple Granny Square Pattern (each square):
-
Magic ring (or ch 4, join to form a ring).
-
Round 1:
-
Ch 3 (counts as dc),
-
2 dc into the ring,
-
(Ch 2, 3 dc) × 3 times,
-
Ch 2, join with sl st to top of ch-3.
(You now have 4 corner clusters.)
-
-
Round 2:
-
Sl st to corner space,
-
In each corner: (3 dc, ch 2, 3 dc),
-
In each side space between corners: 3 dc.
-
-
Round 3: repeat Round 2 until your square is about 4.5–5 inches wide.
-
Slippers for larger feet = bigger squares
-
Child sizes = smaller squares
-
Make 6 squares in total.
🟥 Step 2: Arrange the Squares
You will use three squares per slipper:
Layout (very important):
-
Square 1: Toe/top of the foot
-
Square 2: Bottom of the foot
-
Square 3: Heel/back of the foot
To visualize:
-
Square 1 attaches to the top/front of Square 2
-
Square 3 attaches to the back and sides of Square 2
🪡 Step 3: Sew the Slipper Together
Use a yarn needle or slip-stitch crochet to join edges.
Joining Instructions
-
Place Square 1 (toe) centered on top of Square 2.
-
Sew ⅔ of the edges together, leaving space for the ankle.
-
-
Position Square 3 (heel) on the back side of Square 2.
-
Fold up slightly to create the heel cup.
-
Sew along the sides to connect it firmly.
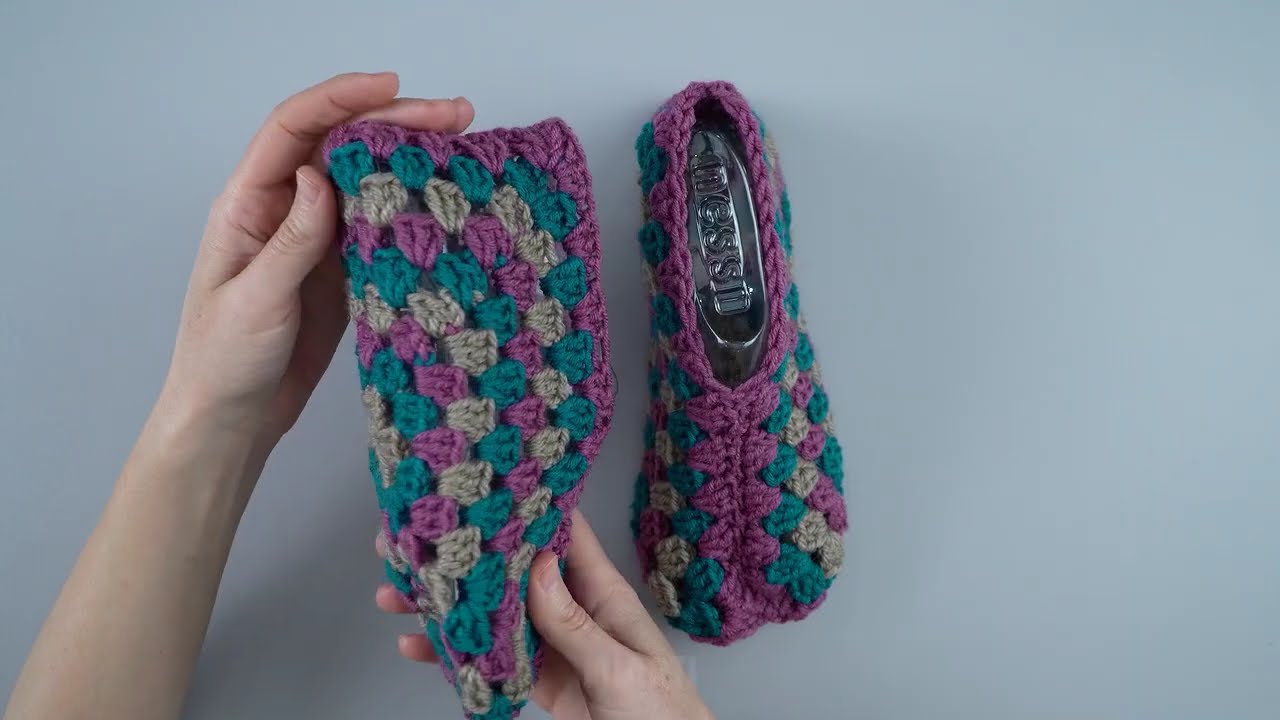
-
When sewn correctly, the shape will form a foot pocket with a toe, sole, and heel.
🧵 Step 4: Add Finishing Touches
-
Weave in all yarn ends
-
Add a border around the opening (optional):
-
Round of sc or hdc for a clean edge
-
-
Add a pom-pom, button, or decorative flower if you like
🦶 Sizing Tips
-
Larger Feet: Make the squares bigger
-
Smaller Feet: Use fewer rounds per square
-
Narrow Feet: Sew seams tighter
-
Wide Feet: Leave slightly larger openings
The beauty of this project is how customizable it is!
🎨 Design Ideas
-
Go classic with traditional multi-color granny squares
-
Match squares for a minimalist look
-
Make a “scrap yarn” pair with leftover yarn pieces
-
Use two or three coordinated colors in repeating rows
🎉 You’re Done!
You now have a cozy pair of handmade granny square slippers.
If you’d like, I can also create:
-
A printable PDF pattern
-
A step-by-step illustrated diagram
-
A beginner-friendly video script
-
Child/men’s/women’s sizing charts
Just tell me!
Watch video: