by
by Below is a clear, beginner-friendly, step-by-step guide on how to make beautiful slippers using only 2 straight knitting needles. This method is very simple and perfect if you’re new to knitting!
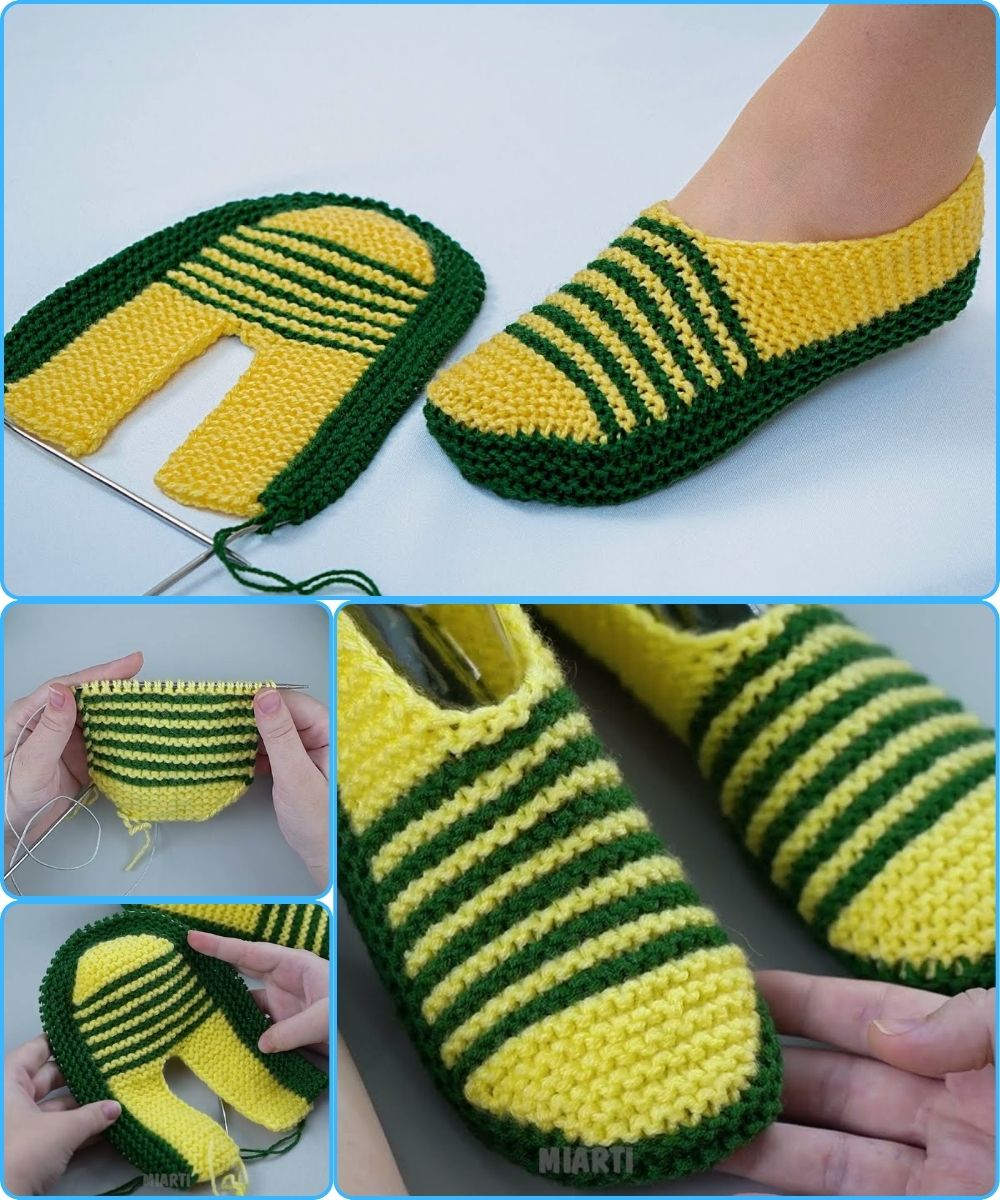
🧶 How to Make Beautiful Slippers on 2 Knitting Needles – Simple Method for Beginners
⭐ What You’ll Need
-
2 straight knitting needles (size 4.5–5.5 mm works well, depending on your yarn)
-
Medium-weight yarn (Acrylic or wool blend)
-
Yarn needle for sewing
-
Scissors
👣 Basic Idea of the Pattern
These slippers are knitted flat in one rectangular (or L-shaped) piece, then folded and sewn to form the toe and heel. No shaping is needed—just knit stitch and purl stitch.
Great for beginners!
🧵 Step-by-Step Instructions
1. Cast On
Choose the size based on foot length:
| Foot Size | Cast On |
|---|---|
| Small | 28 stitches |
| Medium | 32 stitches |
| Large | 36 stitches |
Use a stretchy cast-on, such as the long-tail cast-on.
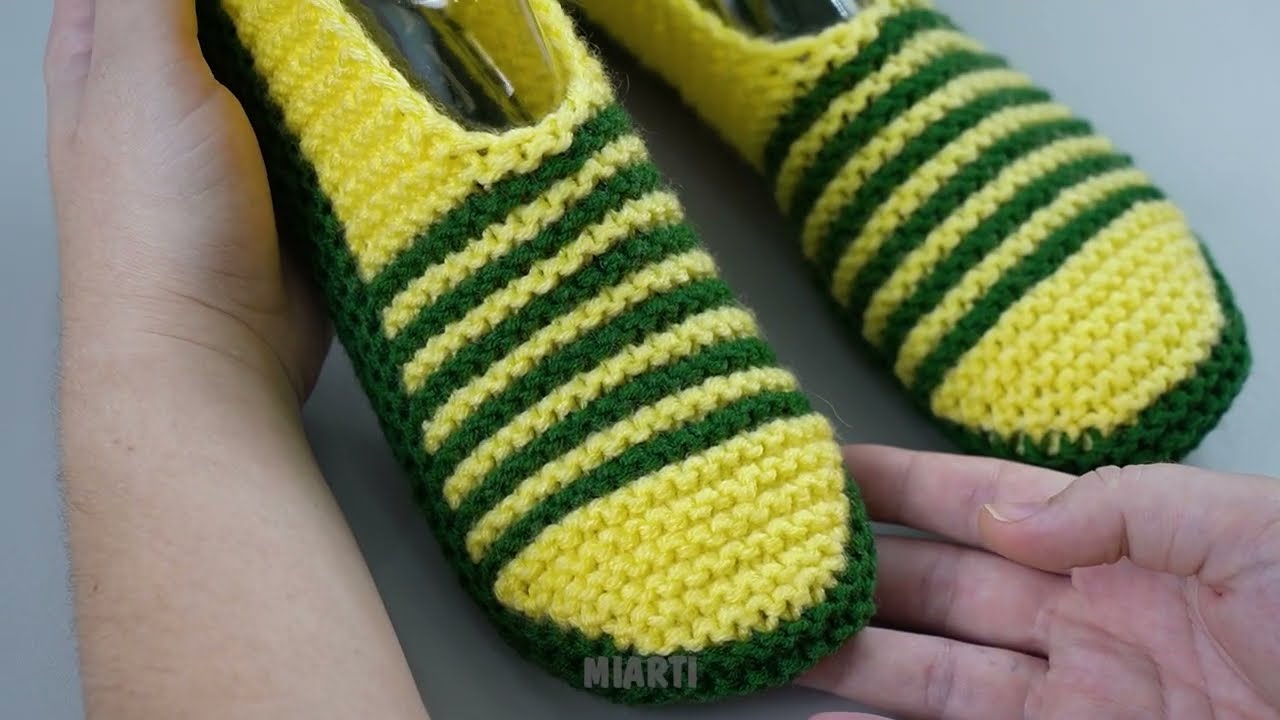
2. Knit the Ribbed Cuff (Top of Slipper)
Work K2, P2 ribbing for about 12–14 rows.
This makes the slipper snug around the ankle and gives a nice stretchy top.
Rows 1–14:*K2, P2* repeat to end.
3. Knit the Foot Section
Switch to garter stitch (knit every row).
Knit 20–26 rows, depending on foot length.
-
Shorter foot: 18–20 rows
-
Average foot: 22–24 rows
-
Longer foot: 26–28 rows
This piece will wrap around the top and bottom of the foot.
4. Shape the Toe (Still Very Simple)
Knit 8–12 more rows in garter stitch, but gradually decrease:
Decrease Row (repeat every 2 rows):
-
Knit 2 stitches together at the beginning of the row
-
Knit to the end
Repeat this decrease on only one side for 4–6 decreases.
This gently curves the toe without complex shaping.
5. Bind Off
Bind off loosely so the edge does not tighten the toe.
🪡 6. Assembly (Sewing Your Slippers)
Lay your knitted piece flat.
Sew in this order:
-
Toe seam
-
Fold the toe in half.
-
Sew the short edge closed.
-
-
Top of Foot seam
-
Sew from the toe upward to about halfway.
-
-
Heel seam
-
Fold the back edges and sew the heel closed.
-
You now have a slipper shape!
🌺 7. Add Decorations (Optional)
Make your slippers even more beautiful:
-
Knit or crochet a flower and sew it on
-
Add small pom-poms
-
Sew on cute buttons
-
Make stripes by changing yarn colors
-
Add a ribbon around the ankle cuff

👟 Repeat for the Second Slipper
Make another one the same way (but try to keep your tension similar).
🎉 You’re Done!
These slippers are:
-
Warm
-
Stretchy
-
Super easy to knit
-
Perfect for gifts
-
Great for using leftover yarn
If you want, I can also create:
✔ a printable pattern
✔ video-style instructions
✔ a diagram of the slipper layout
✔ a version for children
✔ a version made only in garter stitch (even simpler!)
Just let me know!
Watch video: