 by
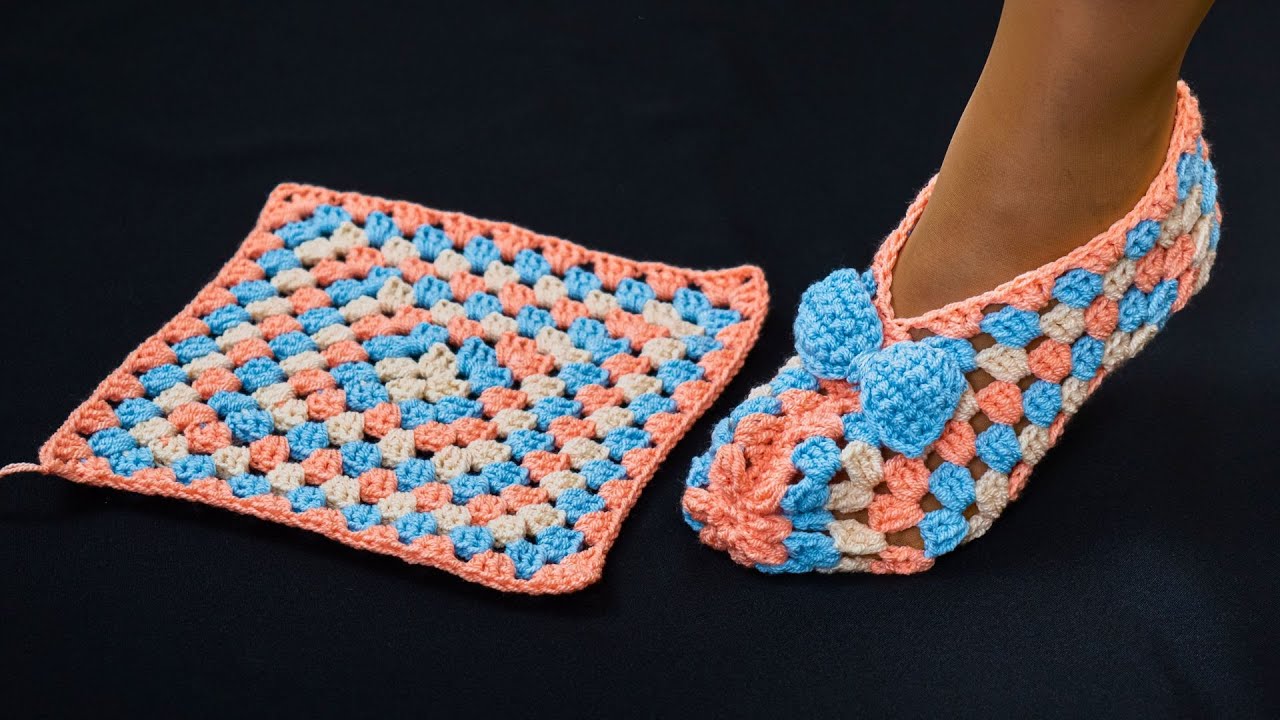
by Below is a clear, friendly, step-by-step tutorial on how to make easy crochet granny square slippers. You can use any standard granny square pattern — the magic lies in how you join and shape them into slippers.
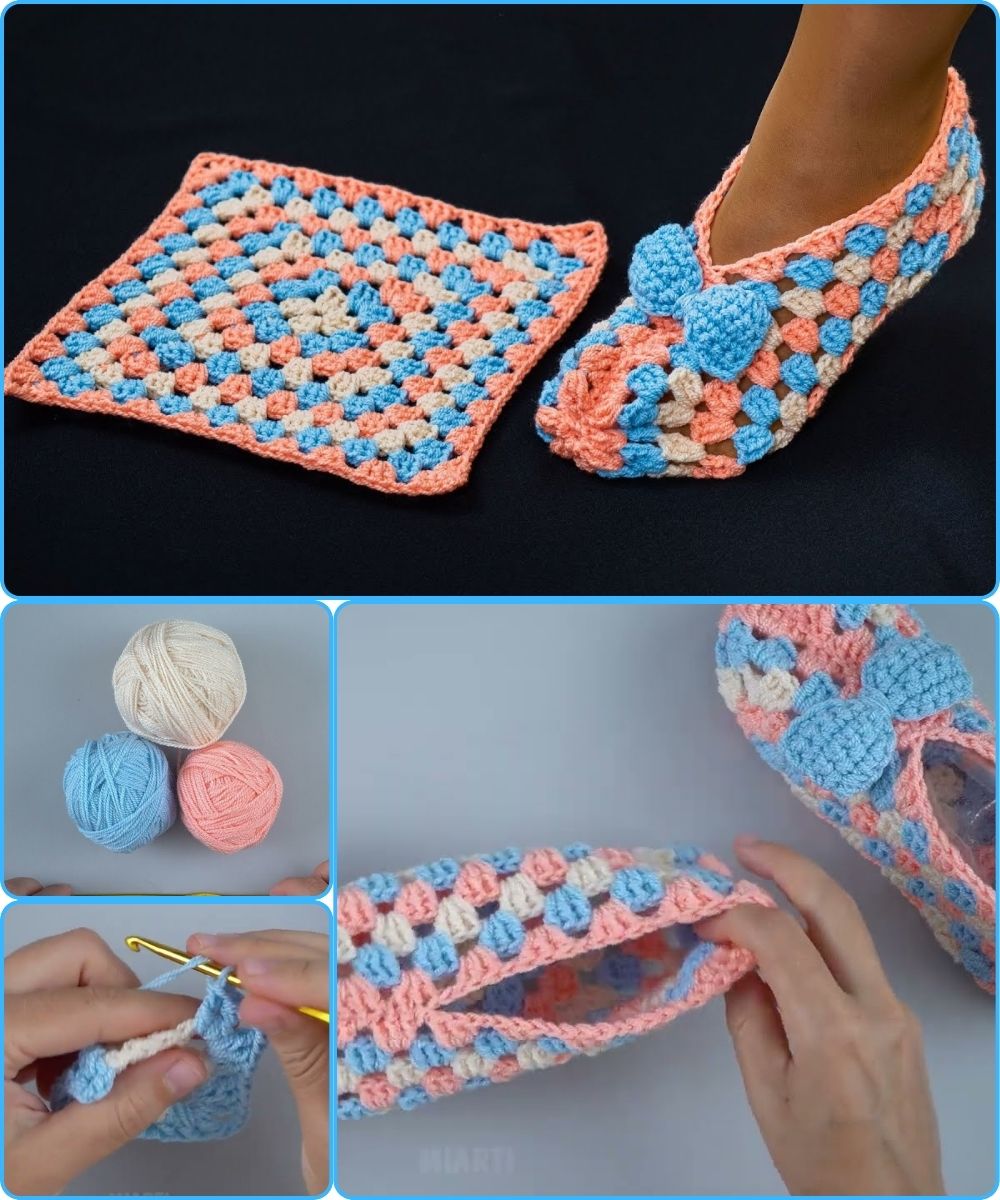
🧶 Easy Crochet Granny Square Slippers – Step-by-Step Tutorial
These slippers are perfect for beginners: simple construction, minimal shaping, and customizable for any size!
⭐ Materials Needed
-
Medium weight (Category 4) yarn – ~150–200 yards total
-
Crochet hook size H/5.0 mm (or size needed for gauge)
-
Yarn needle for sewing
-
Scissors
-
Optional: stitch markers, decorative buttons, pom-poms
🟩 STEP 1 — Make the Granny Squares
You need:
-
3 squares per slipper (6 total)
-
All squares should be the same size (usually 4–5 inches/10–12 cm).
Basic Granny Square Pattern (simple version):
Round 1
-
Make a magic ring (or ch 4, join to form ring).
-
Ch 3 (counts as dc), 2 dc into ring.
-
(Ch 2, 3 dc into ring) repeat this 3 more times.
-
Ch 2, sl st to top of beginning ch-3.
Tighten ring.
Round 2
-
Sl st to first ch-2 space.
-
Ch 3, 2 dc, ch 2, 3 dc into same corner.
-
(3 dc, ch 2, 3 dc) in next corner space repeat around.
-
Sl st to first ch-3.
Round 3 (and more)
-
Work (3 dc, ch 2, 3 dc) in every corner,
-
Work 3 dc in each side space.
Continue until your squares reach the desired size (typically 3–5 rounds).
Make 6 identical squares.

👣 STEP 2 — Arrange the Squares
Each slipper uses:
1 Square for the Toe
This sits centered at the front of the foot.
2 Squares for the Sides/Heel
These wrap around the foot and are joined at the heel.
Layout description (top view):
The three squares fold up like a bowl to form the slipper shape.
🧵 STEP 3 — Join the Toe to the Two Side Squares
Use whip stitch or slip-stitch crochet.
How:
-
Place the toe square in the center.
-
Align one edge of a side square to the left side of the toe square.
Sew the edges together. -
Repeat on the right side with the second side square.
You now have three squares attached in a row.
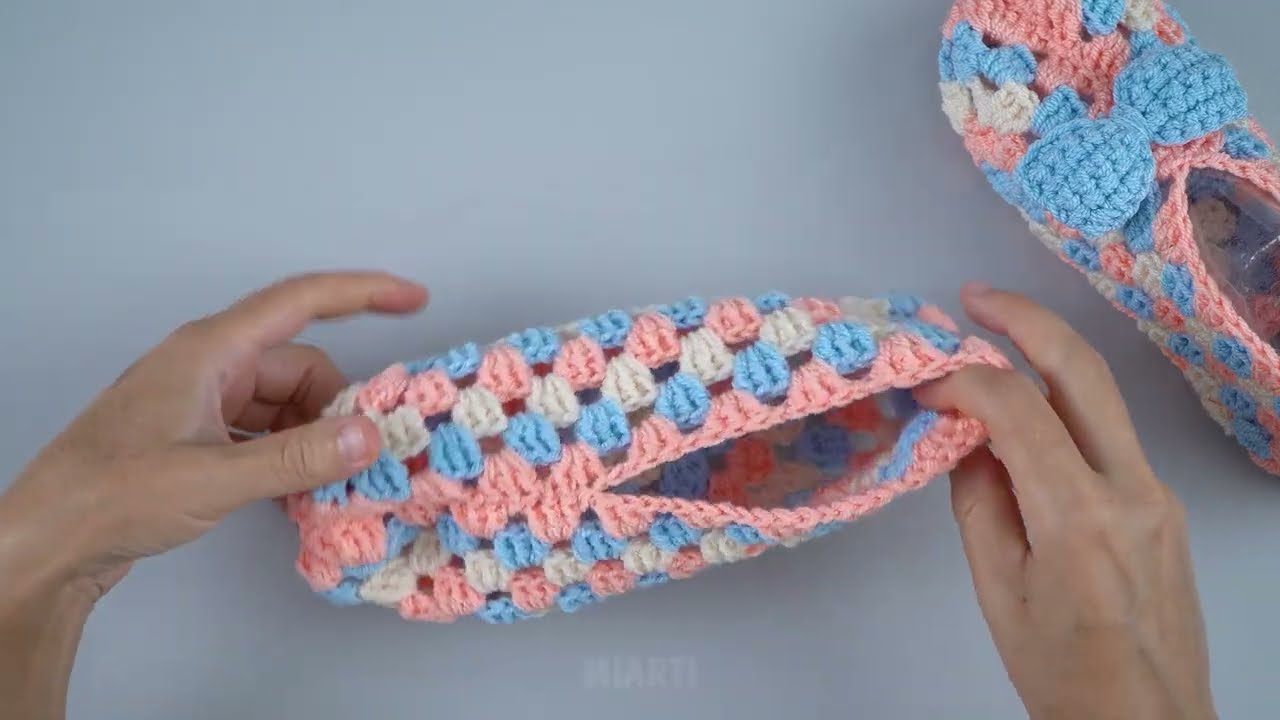
👟 STEP 4 — Fold and Sew the Heel
This is where the slipper takes its shape!
-
Fold the two side squares upward like wrapping around your foot.
-
Bring their back edges together to form the heel seam.
-
Sew the heel seam from bottom to top.
You now have a slipper shape with an open top.
🌼 STEP 5 — Sew the Top of the Foot
Depending on how snug you want them:
-
Sew about ⅓ to ½ of the top front edges together
(this closes the slipper over the top of your foot). -
Leave a comfortable opening for slipping your foot inside.
🧶 STEP 6 — Add a Border (Optional but Recommended)
Work sc (single crochet) around the entire opening:
-
Join yarn at heel opening.
-
Sc evenly around the edge.
-
Sl st to first sc to finish.
-
Optionally add another round in a contrasting color.
This helps stabilize the slipper and makes it look neat.

💡 Adjusting Size
You can change the size of your slippers by:
-
Using larger or smaller squares
-
Adding extra rounds to your squares
-
Using thicker or thinner yarn
-
Adjusting the amount you sew at the top opening
🎀 Optional Decorations
-
Pom-poms on the toes
-
Buttons at the sides
-
Embroidery on each square
-
A double-thick sole using felt or extra squares
🎉 You’re Done!
You now have cozy, customizable granny square slippers!
They make great gifts and are perfect for using up leftover yarn.
If you want, I can also create:
-
A printable PDF pattern
-
A beginner-friendly written pattern with photos
-
A video-style script or TikTok tutorial
-
A sizing chart for kids–adult
Just tell me!
Watch video: