 by
by Below is a clear, detailed, beginner-friendly guide for making the easiest and fastest knitted socks using only 2 straight needles (flat-knit socks, later seamed). No double-pointed needles, no circulars—perfect for beginners!
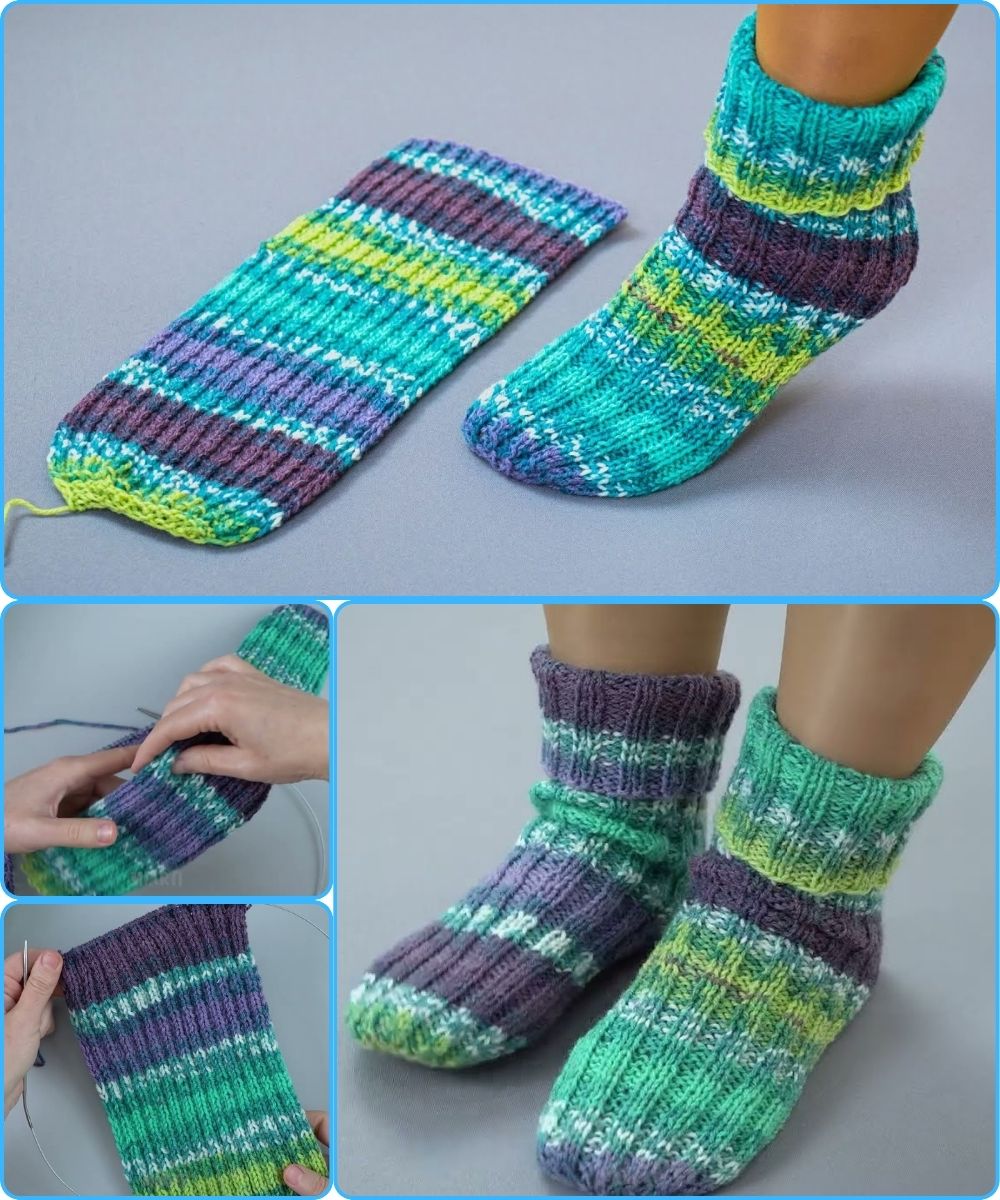
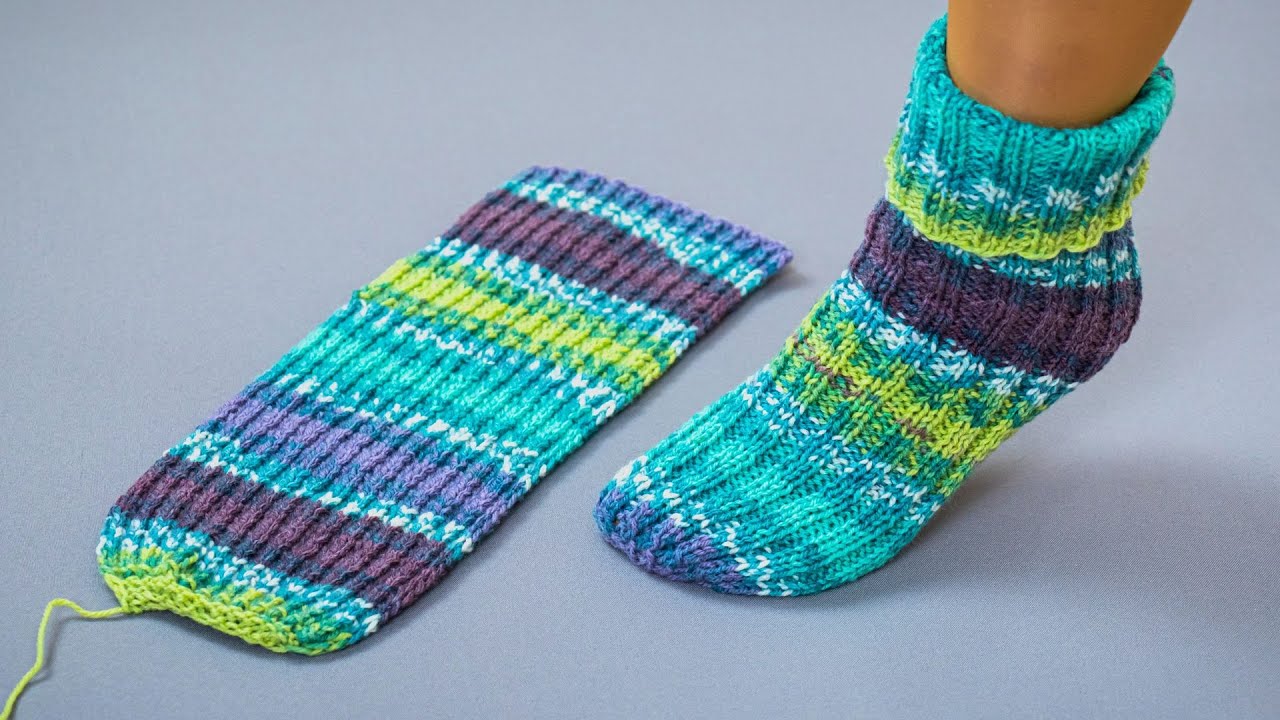
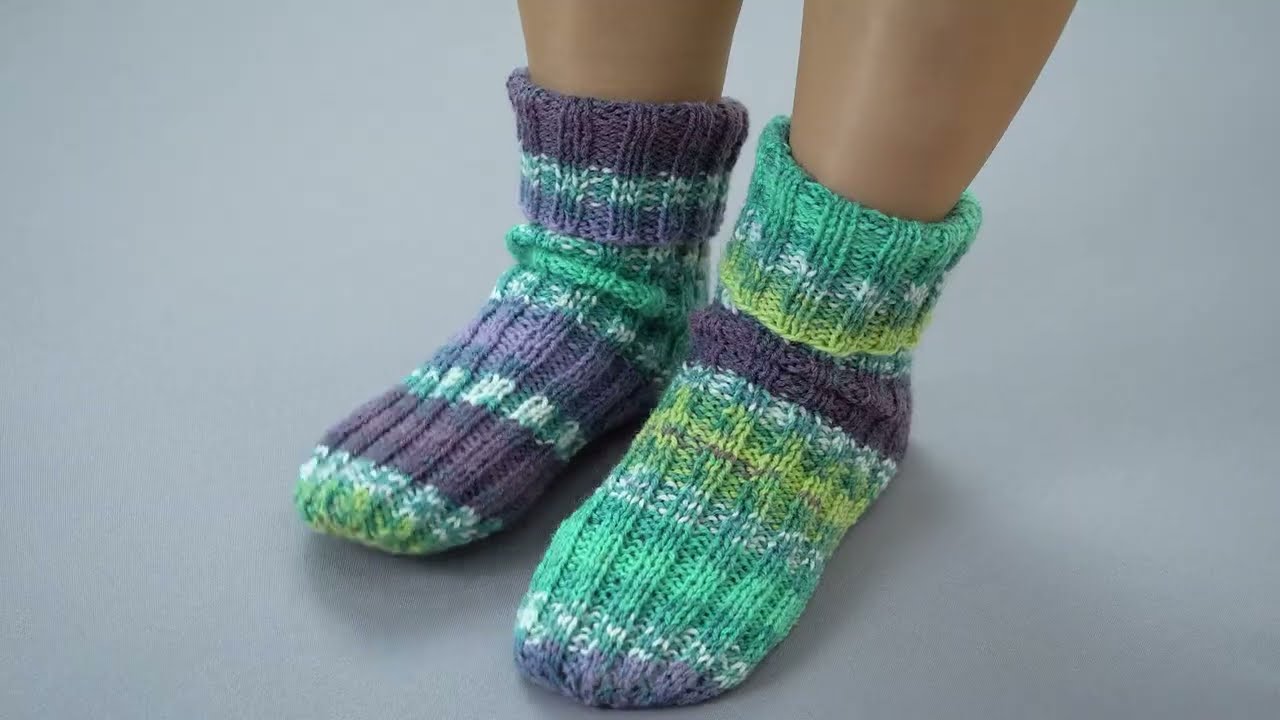
🧦 How to Make the Easiest and Fastest Knitted Socks Using Only 2 Needles
These socks are knit flat (back-and-forth) and then sewn together at the end. The pattern is simple, flexible, and suitable for all sizes.
⭐ Materials You’ll Need
-
Yarn: Worsted weight (#4) or chunky (#5) for faster socks
-
Needles: 2 straight needles matching your yarn (US 7–9 / 4.5–5.5 mm for worsted)
-
Tapestry needle for sewing seams
-
Scissors
-
Stitch markers (optional)
📌 Sizing Guide (Very Simple!)
These socks are knitted as a rectangle with shaping.
To size the socks:
-
Width = circumference of the foot or ankle
-
Length = from heel to toe
For an average adult:
-
Cast on 32–40 stitches (depending on yarn and foot size)
-
Knit until length is around 9–10 inches before toe decreases
🧶 Step-by-Step Instructions
🔹 1. Cast On
Cast on enough stitches to comfortably wrap around the foot or ankle.
Example (adult small/medium with worsted yarn):
➡️ Cast on 36 stitches
🔹 2. Knit the Cuff (Optional)
For stretchy ribbing:
Row 1: K1, P1 repeat
Row 2: same as Row 1
Work 1–2 inches for the cuff.
(Or simply knit garter stitch for a rolled cuff.)
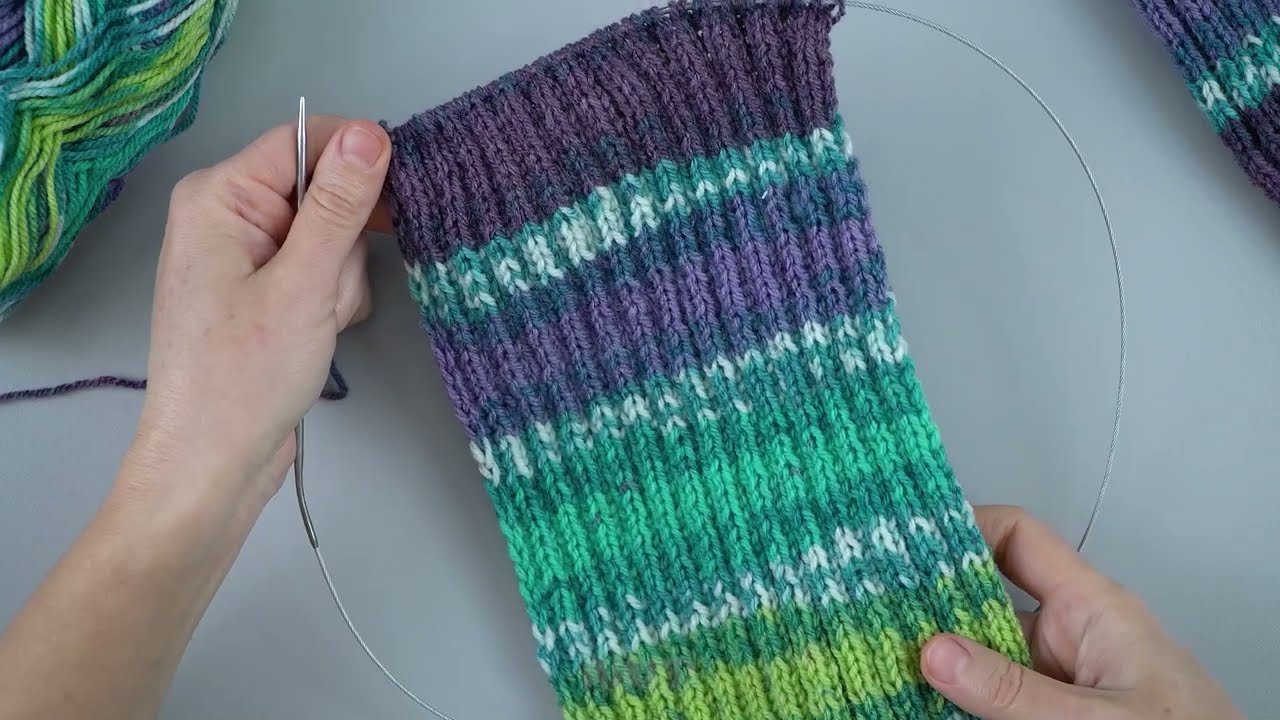
🔹 3. Knit the Leg
Switch to plain knitting:
Option A: Stockinette
-
Knit 1 row
-
Purl 1 row
(repeat)
Option B: Garter Stitch (super beginner-friendly)
-
Knit every row
Work until the leg is desired length (usually 4–6 inches).
🔹 4. Shape the Heel (Still Flat!)
We create a little square of fabric for the heel.
Row 1: Knit half the stitches, turn
Row 2: Purl back
Repeat for 12–16 rows to form a heel flap.
🔹 5. Shape the Heel Turn
Now we curve the heel:
Divide stitches into:
-
Left side
-
Center ⅓
-
Right side
Example: 36 stitches → 12 left / 12 center / 12 right
Work short rows:
-
Knit across the center stitches, K2tog with one from the right side → turn.
-
Purl across center stitches, P2tog with one from the left side → turn.
-
Repeat until all side stitches are consumed and you’re left with just the center.
You now have a small cupped heel.
🔹 6. Pick Up for the Foot
Go back to knitting full rows.
-
Knit across your heel turn
-
Pick up stitches along the sides of heel flap
-
Knit across the original stitches
Now you simply knit straight for the foot.
Work until it measures from heel to the start of your toes (about 6–7 inches for adults).
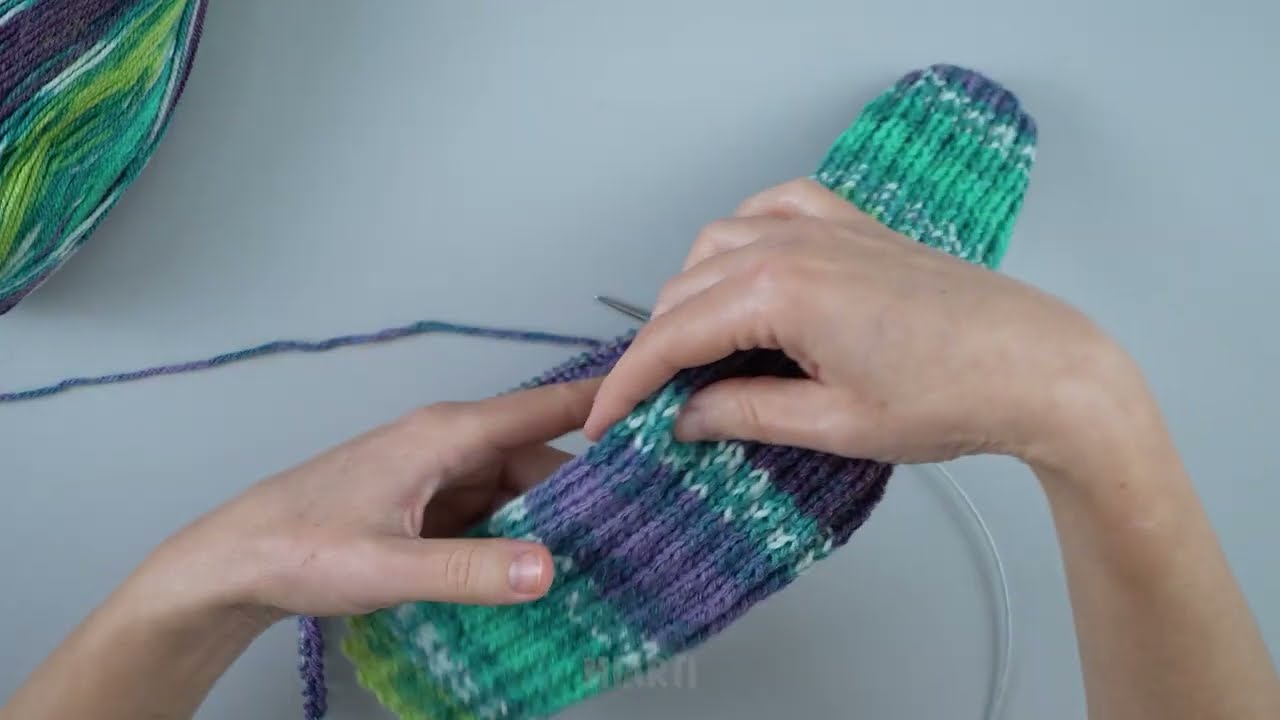
🔹 7. Shape the Toe (Still Flat!)
Decrease every other row:
Row A:
-
K1, K2tog
-
Knit across to last 3 stitches
-
SSK, K1
Row B:
-
Knit
Repeat A and B until about 10–12 stitches remain.
Cut yarn, leaving a long tail.
🔹 8. Finishing the Toe
Thread yarn through remaining stitches and pull tight like a drawstring.
🔹 9. Sew the Sock Seam
Using mattress stitch:
-
Seam the leg and foot edges together
-
Seam the toe edge closed
-
Seam the back of the heel
This creates a beautifully shaped sock… made flat!
🥳 You’re Done!
You have created the easiest 2-needle sock possible—simple, fast, and perfect for beginners.
Repeat the whole process for the second sock.
💡 Tips for Faster, Easier Socks
-
Use chunky yarn and larger needles to finish a pair in a day.
-
Use garter stitch for no-purl speed knitting.
-
Add stripes by changing colors at row ends.
-
Use self-striping yarn for fancy-looking socks with zero effort.
If you’d like, I can also provide:
✅ a printable pattern
✅ a beginner chart
✅ children’s sizes version
✅ video-style step-by-step instructions
Just tell me!
Watch video: