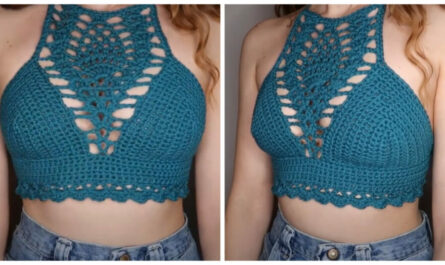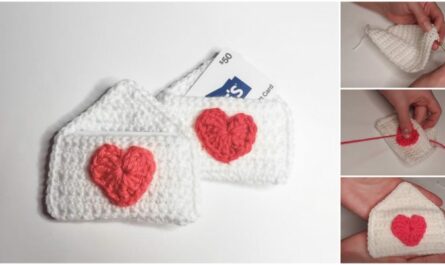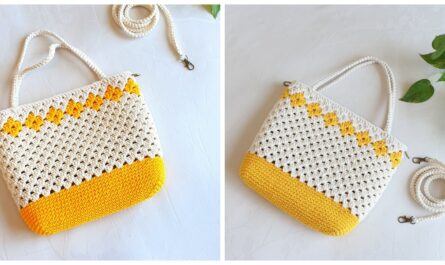
 by
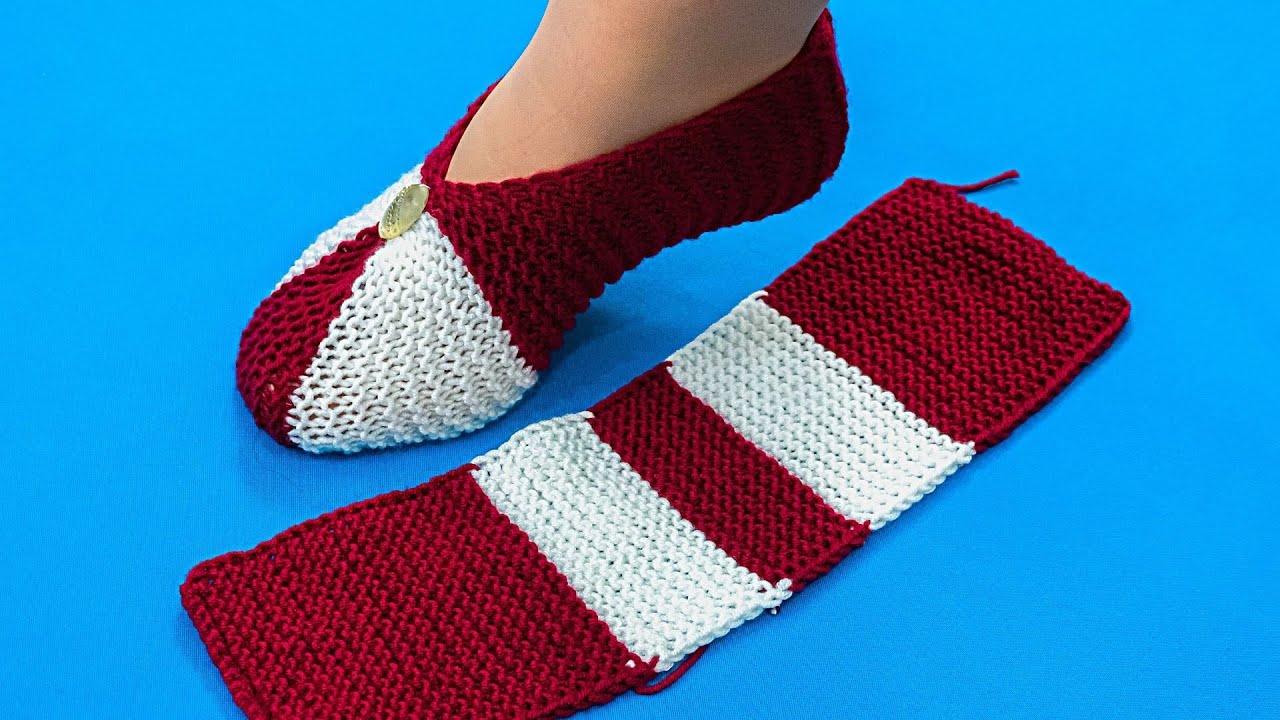
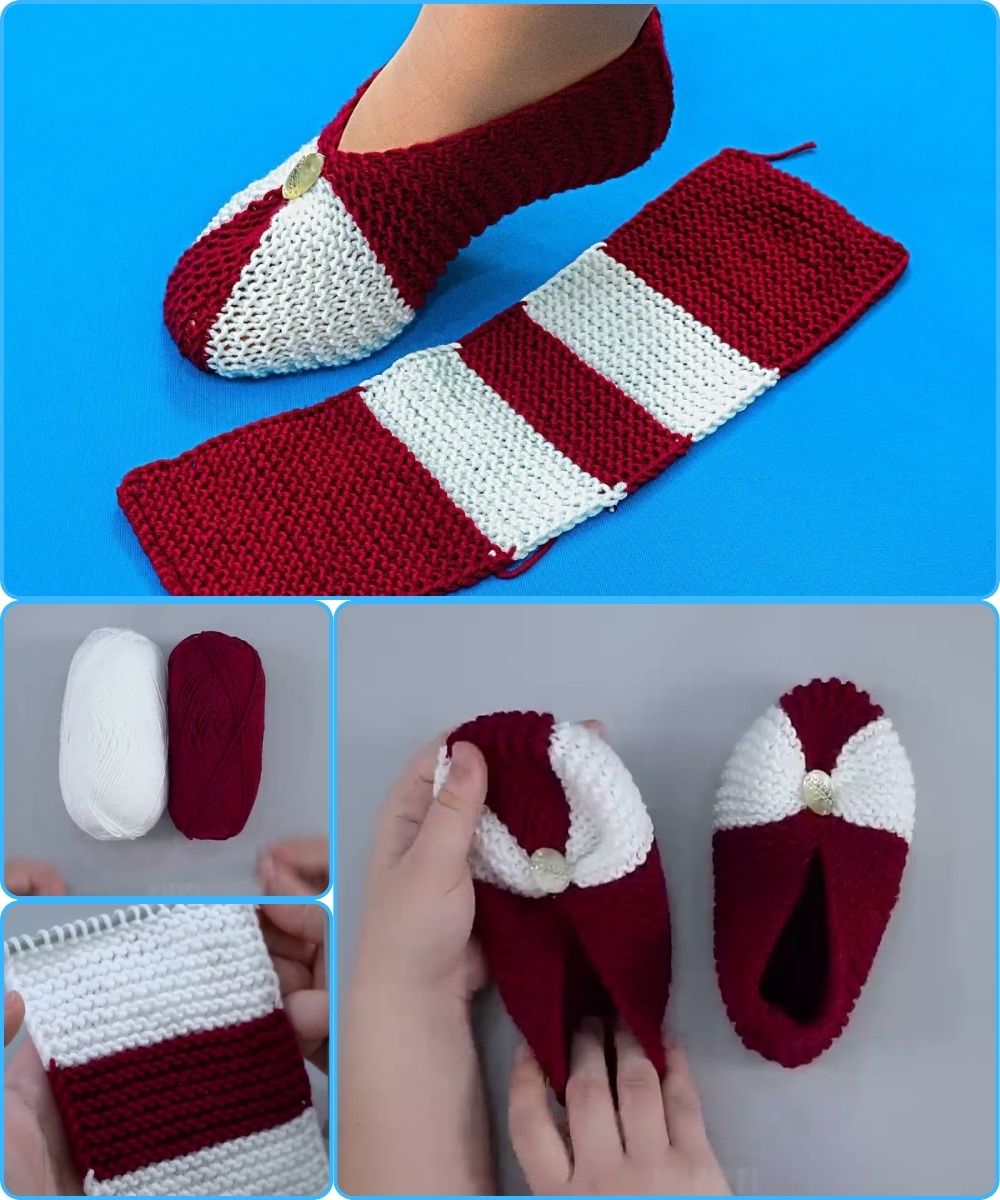
by Absolutely! Let’s go step by step. I’ll give you a detailed tutorial on how to make simple slippers using just 2 knitting needles. This pattern is beginner-friendly and works for basic adult sizes, but you can easily adjust it for kids or different sizes.
Materials Needed
-
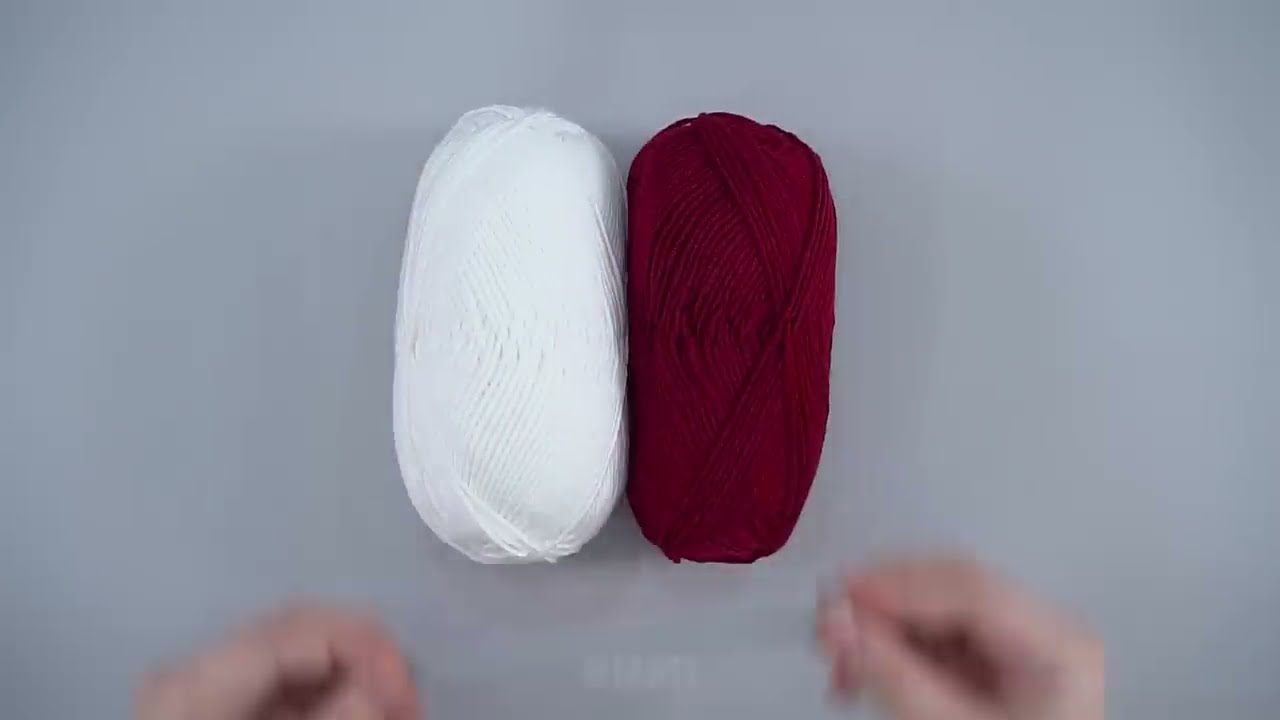
Yarn: Medium-weight (worsted weight) yarn. Soft acrylic or wool blends are good for slippers.
-
Knitting needles: 2 straight needles (size appropriate for your yarn; usually US 8 / 5mm).
-
Scissors
-
Tapestry needle for sewing and weaving in ends.
Step 1: Gauge & Size
-
For adult slippers, gauge isn’t super strict, but for a standard size:
-
Cast on 30–36 stitches depending on your foot size.
-
You can check your foot width and adjust stitch count to match.
-
Step 2: Cast On
-
Cast on the required number of stitches using the long-tail cast-on method.
-
Example: For a medium adult size slipper, 32 stitches is a good starting point.
Step 3: Knit the Sole
-
Knit flat in garter stitch (knit every row) until the piece measures the length of your foot from heel to toe.
-
Example: 25–28 cm (10–11 inches) for medium adult size.
-
-
This piece will become the sole of the slipper.
Step 4: Shape the Sides
-
Once the sole reaches the desired length, increase stitches for the sides:
-
Row 1: Knit 1, make 1 (M1) at the beginning and end of the row. Repeat every row until you have 10 extra stitches on each side.
-
-
Knit in garter stitch for another 5–6 cm (2 inches) to form the sides.

Step 5: Shape the Toe
-
To shape the front (toe):
-
Decrease: Knit 2 together (K2tog) at the beginning and end of every other row until about 10 stitches remain in the center.
-
-
Cut the yarn, leaving a long tail, and thread it through the remaining stitches. Pull tight to close the toe.
Step 6: Shape the Heel
-
Fold the slipper so the heel is at the back.
-
Using the tapestry needle, sew the back seam from heel to ankle using mattress stitch or whip stitch.
Step 7: Finishing the Edges
-
Pick up stitches along the top edge of the slipper (optional) and knit 2–3 rows in garter or rib stitch to create a neat cuff.
-
Weave in all loose ends with the tapestry needle.
Optional Customizations
-
Add a strap: Knit a small strip and sew across the top for a secure fit.
-
Decorate: Embroider initials or add a pom-pom.
-
Non-slip sole: Sew small dots of hot glue or puffy paint on the bottom.
Summary
-
Cast on → Knit the sole → Increase for sides → Knit sides → Decrease for toe → Sew heel → Finish edges.
-
Simple garter stitch makes slippers soft, stretchy, and beginner-friendly.
If you want, I can draw a step-by-step diagram showing the slipper shape and where to increase/decrease stitches—it’s much easier to visualize that way.
Watch tutorial: