 by
by Sure! Here’s a detailed guide on how to make a crochet baby hoodie. This step-by-step tutorial is ideal for beginners to intermediate crocheters. We’ll go over materials, stitches, sizing, and how to assemble the hoodie.
🧶 How to Make a Crochet Baby Hoodie
✨ Overview
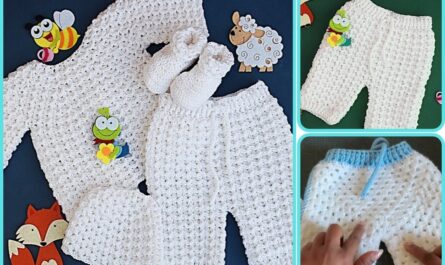
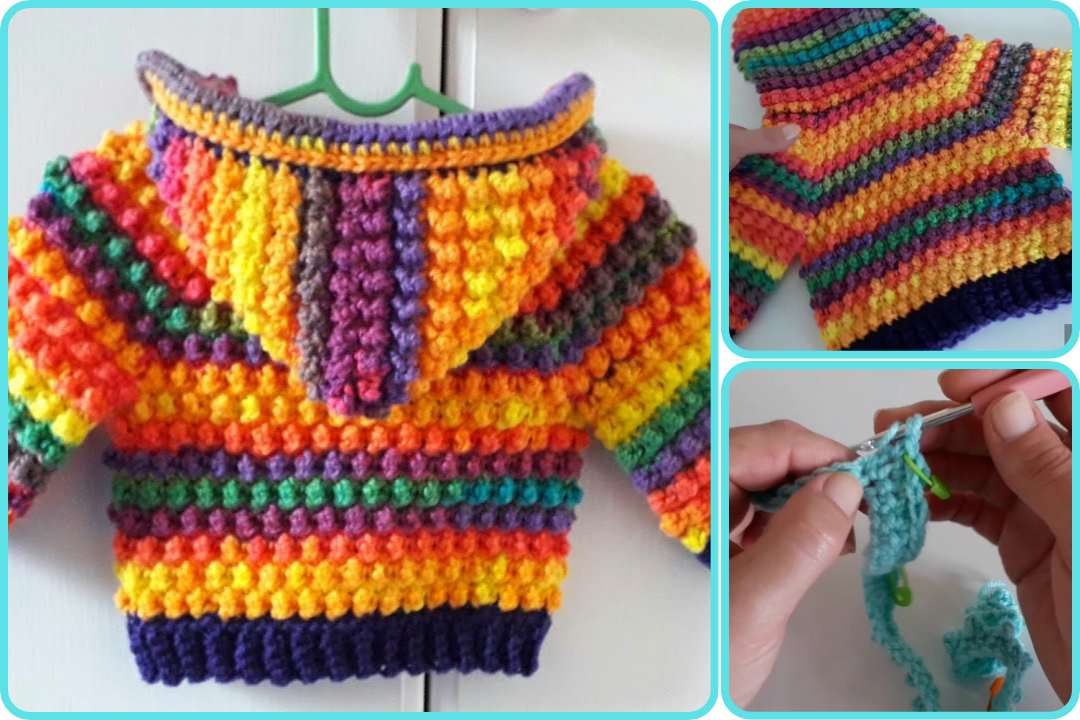
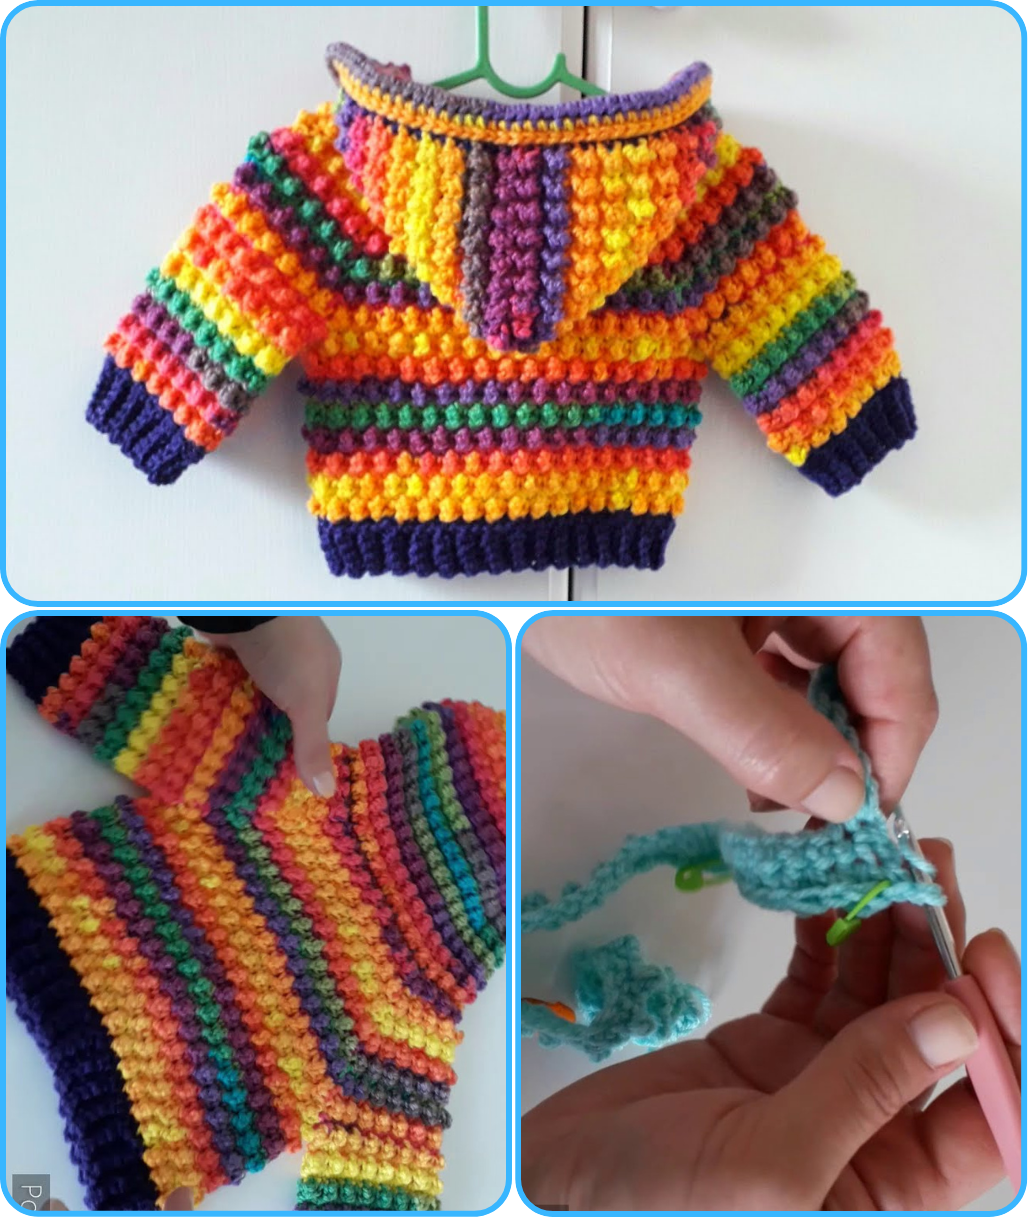
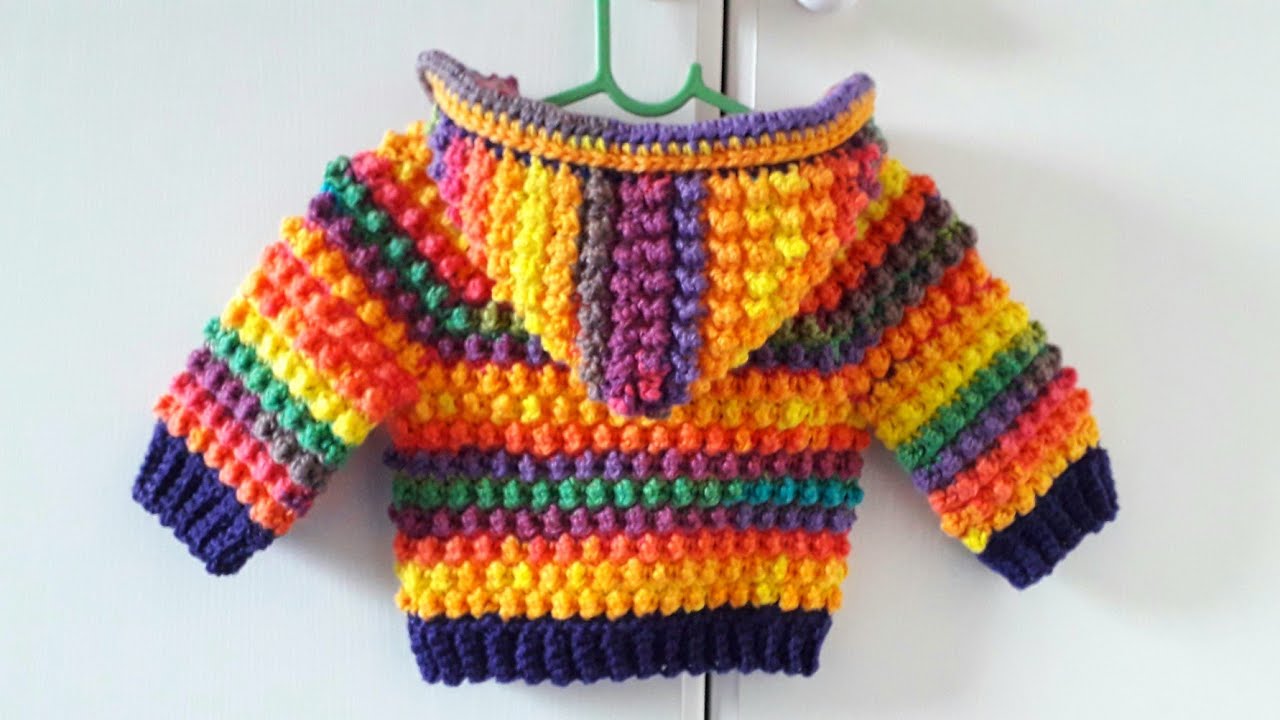
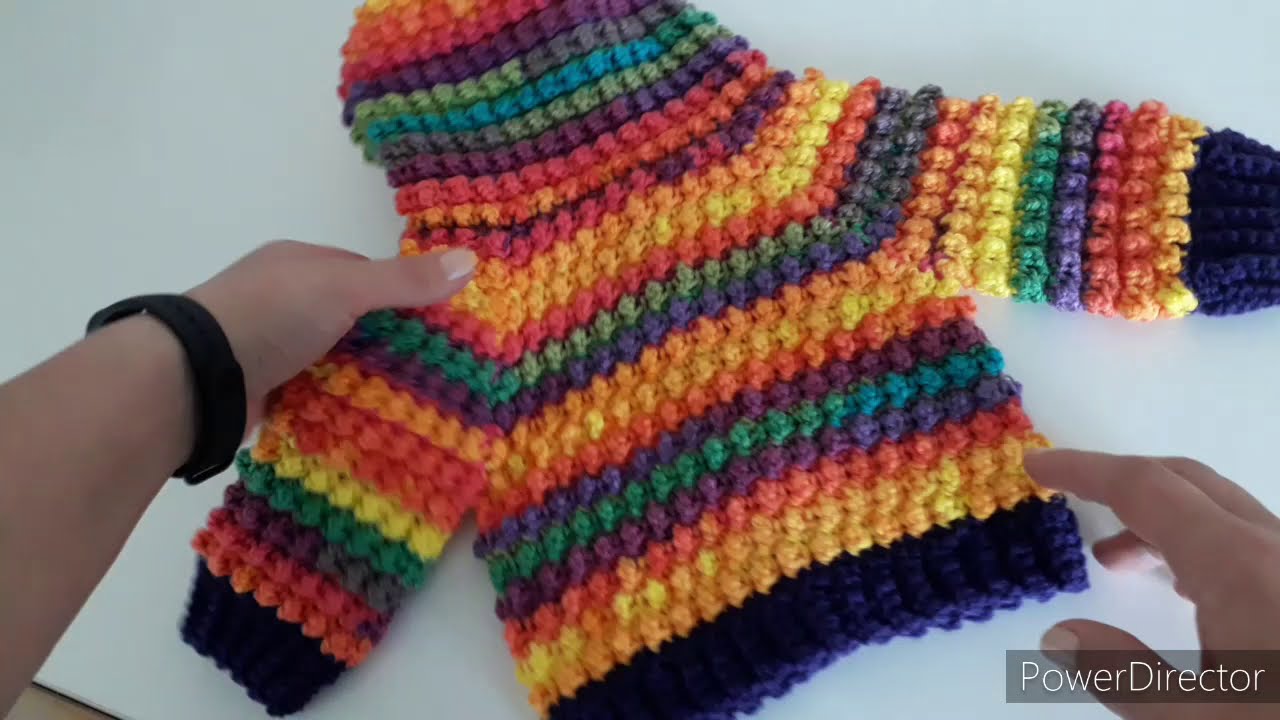
A crochet baby hoodie is a cozy and adorable handmade garment perfect for gifting or keeping your little one warm. This guide will help you create a simple pullover-style hoodie with a front pocket and hood.
🧵 Materials Needed
-
Yarn: Worsted weight (category 4); soft baby yarn or cotton-acrylic blend.
-
Approx. 300–500 yards depending on size.
-
-
Hook: Size H/5.0 mm or as needed for gauge
-
Tapestry needle: For weaving in ends
-
Scissors
-
Stitch markers
-
Buttons (optional): If you want to make a buttoned front or accent
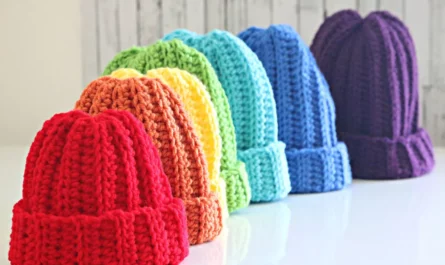
📏 Sizes (0–3, 3–6, 6–12 months, 1–2 years)
You can adjust sizing by:
-
Adding or reducing stitch counts
-
Adding rows to the body and sleeves
-
Using larger or smaller hook/yarn
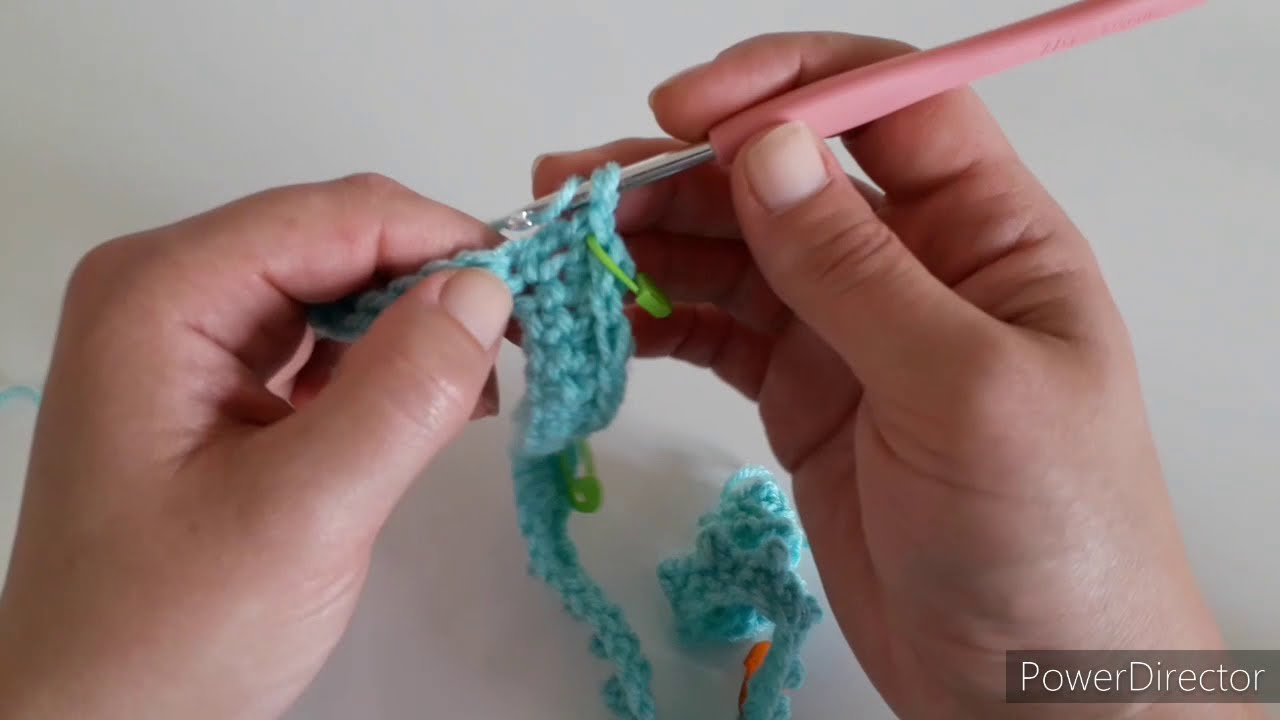
🧵 Basic Stitches Used
-
Ch – Chain
-
Sl st – Slip stitch
-
Sc – Single crochet
-
Hdc – Half double crochet
-
Dc – Double crochet
-
Inc – Increase (2 sts in one)
-
Dec – Decrease (crochet 2 sts together)
🪡 Construction Breakdown
The hoodie is made in four main parts:
-
Body (front & back in one piece or two panels)
-
Sleeves (worked in rounds or flat)
-
Hood
-
Assembly + edging
🪢 Step-by-Step Instructions
1. Create the Body (Bottom Up)
You can work it in the round or in rows.
Example for 6–12 months:
-
Chain 50 (or your desired width).
-
Work hdc rows back and forth for approx. 10 inches or until it reaches underarm height.
-
Split for front and back:
-
Work half the stitches for back panel and finish straight for 3–4″.
-
Repeat for front, but shape the neck:
-
Leave 6–8 center stitches unworked and work shoulders separately.
-
-
2. Join at Shoulders
-
Seam front and back at the shoulders using sl st or whip stitch.
3. Sleeves
-
Attach yarn to armhole and work in rounds or make separately and sew on.
-
Begin with 24–30 hdc stitches around the armhole.
-
Continue in hdc or dc rounds, decreasing gradually.
-
Sleeve length for 6–12 months: ~6.5–7 inches.
4. Make the Hood
-
Attach yarn at neckline and ch 1.
-
Work hdc or sc across the back and front of neck (approx. 50–60 sts).
-
Work in rows, not rounds, for 6–8 inches.
-
Fold the rectangle and seam the top to form the hood.
5. Front Pocket (Optional)
-
Ch 15, hdc in rows for 10–12 rows.
-
Sew onto front of hoodie.
6. Add Edging
-
Work sc around edges: bottom hem, sleeve cuffs, hood border.
-
You can add ribbing using front post/back post double crochet (FPdc/BPdc).
7. Finishing Touches
-
Weave in all ends.
-
Add buttons or ties to the hood if desired.
-
Lightly block the garment for better shape.
🎨 Optional Modifications
-
Add stripes or color blocks
-
Use bobble stitches for texture
-
Add ears to hood for extra cuteness
-
Use button flap instead of pullover style
🧼 Care Instructions
-
Use baby-safe, machine-washable yarn
-
Wash cold, gentle cycle
-
Lay flat to dry to maintain shape
Watch video: