 by
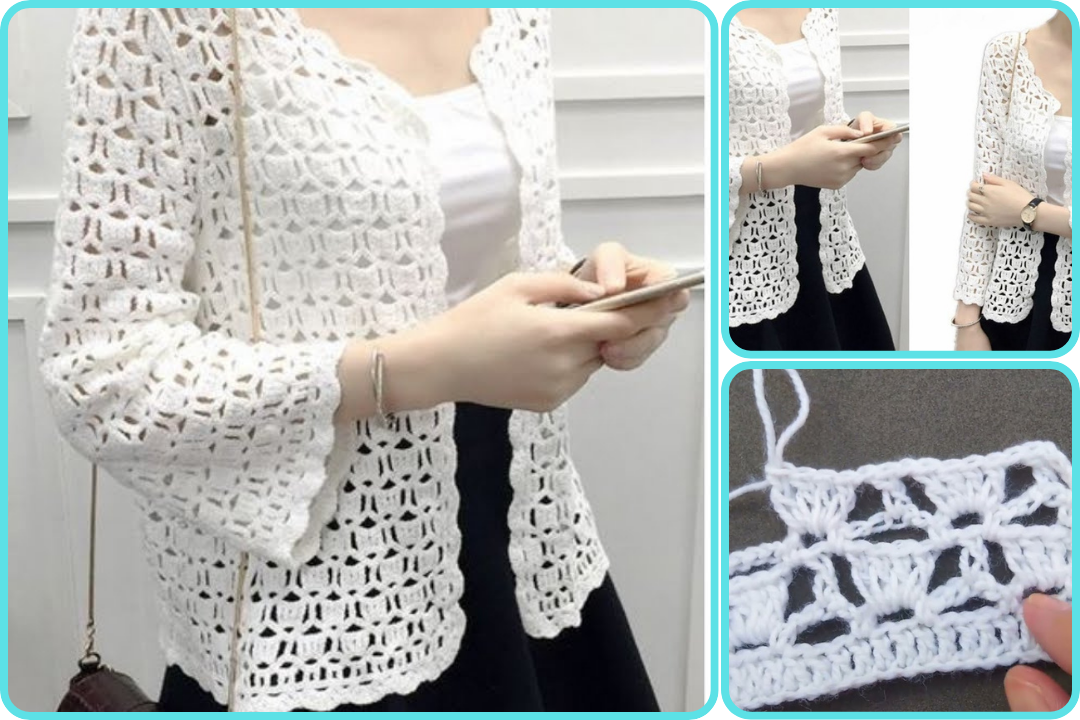
by Sure! Here’s a detailed guide on “How to Make a Super Easy Crochet Sweater Pattern” — perfect for beginners or anyone looking for a quick and stylish women’s top pattern. This pattern is customizable, beginner-friendly, and doesn’t require advanced shaping techniques.
🧶 Super Easy Crochet Sweater Pattern (Women’s Top)
✨ Skill Level: Beginner/Easy
No complex shaping, just basic stitches and rectangles!
📏 Sizing Information:
This pattern can be easily adjusted for Small (S), Medium (M), Large (L), XL, and 2XL.
Measure your bust and desired length before starting. Use this chart to guide:
-
S: 34-36 in bust
-
M: 38-40 in bust
-
L: 42-44 in bust
-
XL: 46-48 in bust
-
2XL: 50-52 in bust

🧵 Materials Needed:
-
Worsted weight yarn (#4) – approx. 1000–1500 yards depending on size
-
Crochet hook: 5.5mm (I-9) or size needed to obtain gauge
-
Tapestry needle
-
Scissors
-
Measuring tape
-
Stitch markers (optional)
🧶 Stitches Used:
-
Chain (ch)
-
Slip Stitch (sl st)
-
Single Crochet (sc)
-
Half Double Crochet (hdc) (Main stitch used)
🧥 Pattern Overview:
This top is made by crocheting two rectangles (front and back) and two sleeves, then seaming them together.
✅ Step 1: Gauge Swatch
To ensure a good fit, make a swatch:
-
Gauge: 13 hdc stitches x 10 rows = 4″x4″
Adjust hook size if needed.
✅ Step 2: Create Body Panels (Make 2)
(Front and Back are identical rectangles)
Foundation Chain:
-
Ch enough to match your desired width:
-
S: 60 ch
-
M: 66 ch
-
L: 72 ch
-
XL: 78 ch
-
2XL: 84 ch
(Each chain = ~0.5 inches)
-
Row 1: Hdc in 2nd ch from hook and in each ch across. Turn.
Row 2 – X: Ch 1, hdc in each st across. Turn.
➡️ Continue until your panel reaches desired length (e.g., 20–25 inches for cropped to full-length).
✅ Step 3: Create Sleeves (Make 2)
Foundation Chain:
-
Ch ~36 (or desired sleeve width – measure bicep)
Row 1: Hdc in 2nd ch and across. Turn.
Repeat rows until sleeve reaches desired length (e.g., 16–20 inches)
To create a slight taper:
-
Optional: Decrease 1 stitch at the beginning and end every 6 rows.
✅ Step 4: Assembly
-
Seam Shoulders:
-
Place panels together (right sides facing).
-
Use mattress stitch or whip stitch to seam shoulders, leaving a head hole in the center.
-
-
Attach Sleeves:
-
Pin sleeves to arm openings and seam them across the shoulders.
-
-
Side Seams:
-
Fold sweater in half, right sides facing.
-
Seam from underarm to bottom edge on both sides.
-
Seam sleeves closed from underarm to cuff.
-
✅ Step 5: Finishing Touches
Neckline (Optional):
-
Join yarn at neckline and sc or hdc around for 2–3 rounds to create a neat edge.
Bottom Hem & Sleeves:
-
Work 1–2 rounds of sc or hdc around for a clean edge.
Weave in all ends. Block if desired.
🎉 You’re Done!
You now have a cozy, stylish, and completely handmade crochet sweater top. This pattern is endlessly customizable — try stripes, color blocking, or different yarn textures!
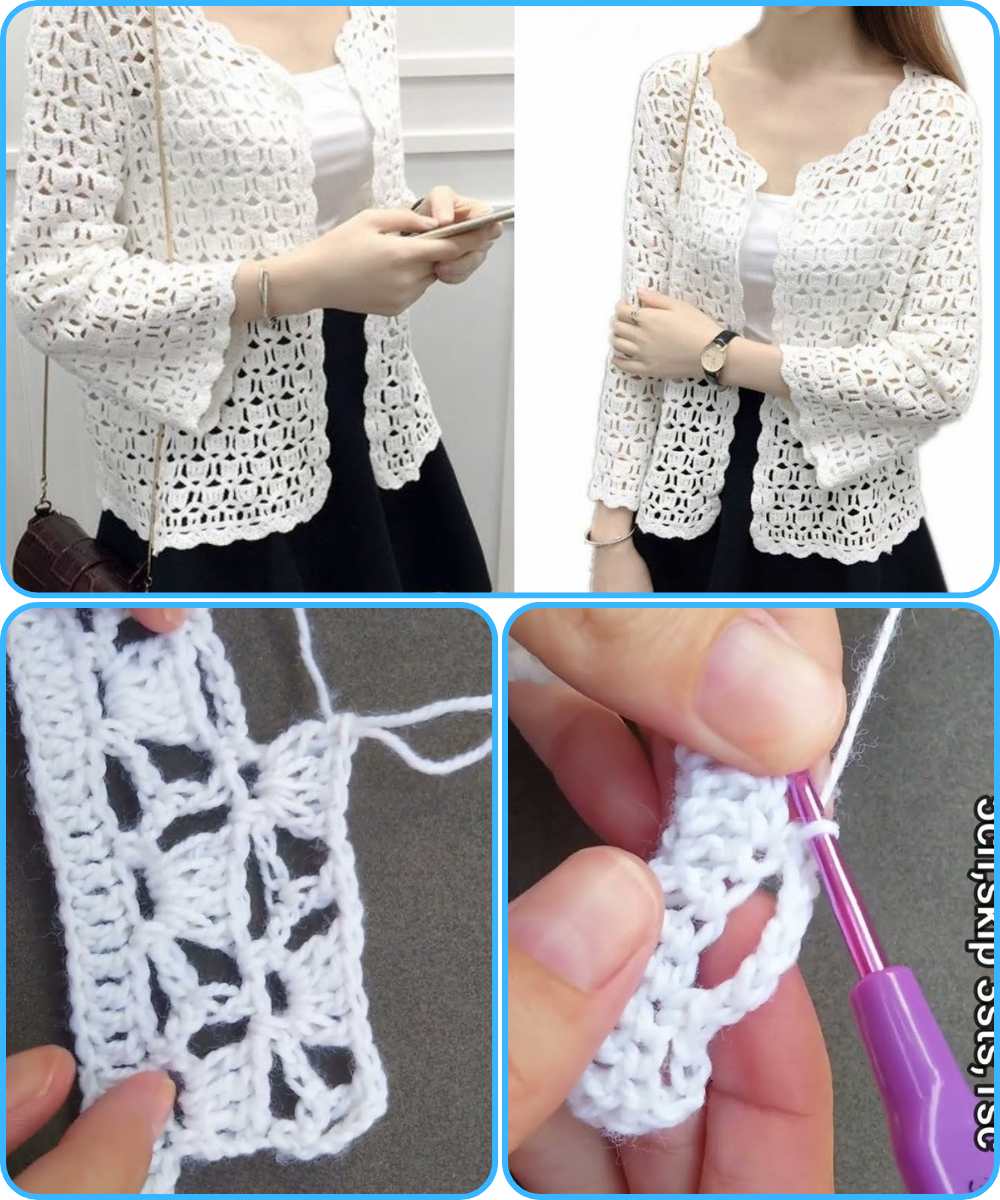
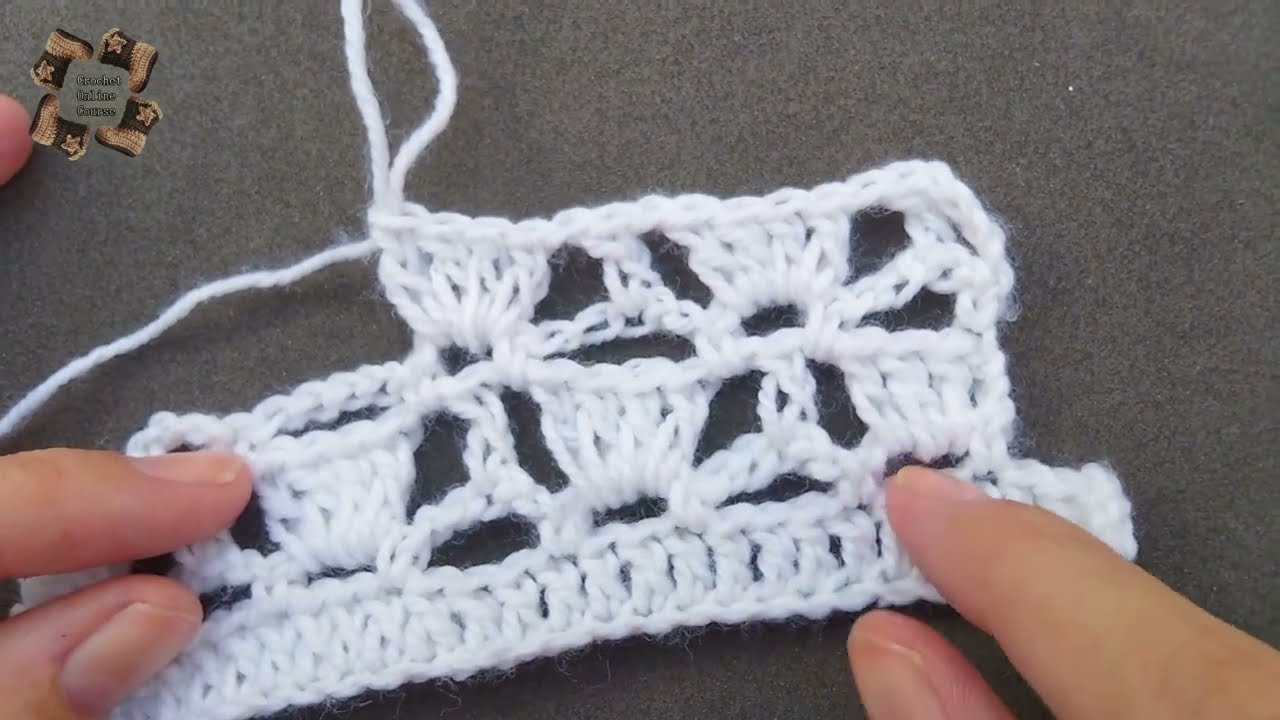
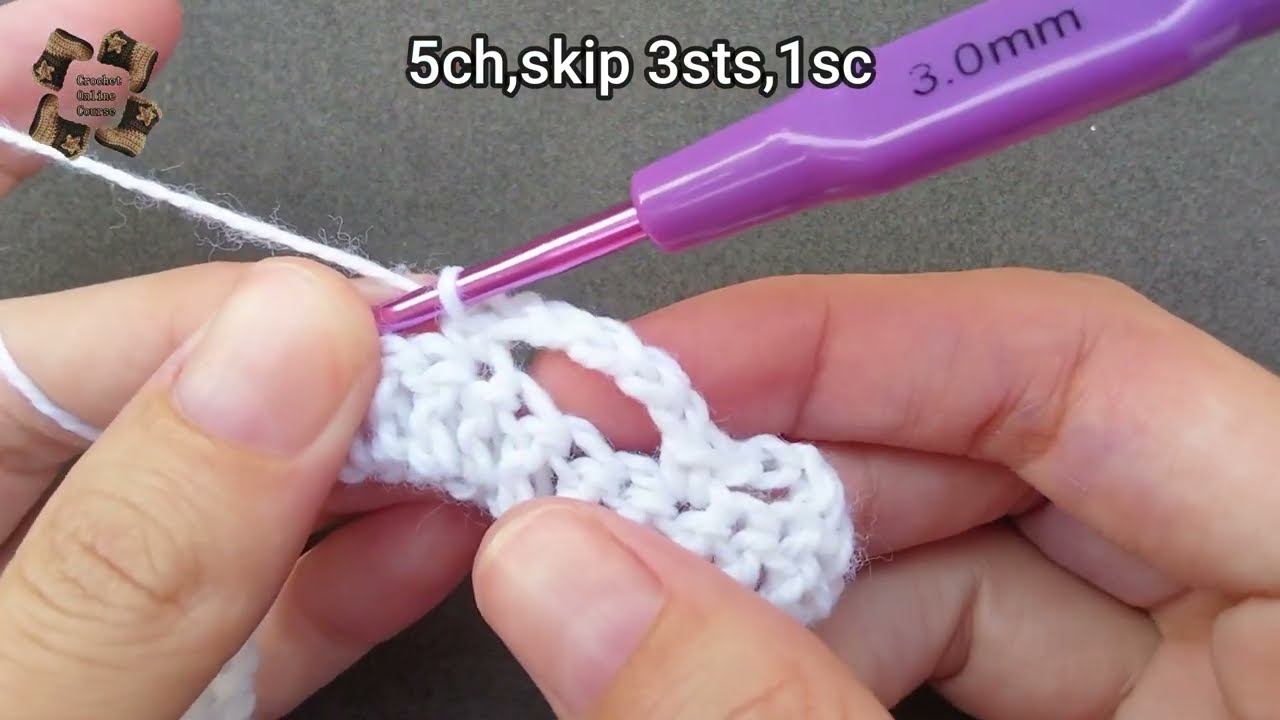
Watch video: