 by
by Here’s a clear, detailed, beginner-friendly guide on how to make knitted slippers from a simple rectangle—often called the easiest knitted slippers. This method is perfect for beginners because it uses only basic knitting skills and simple shaping.
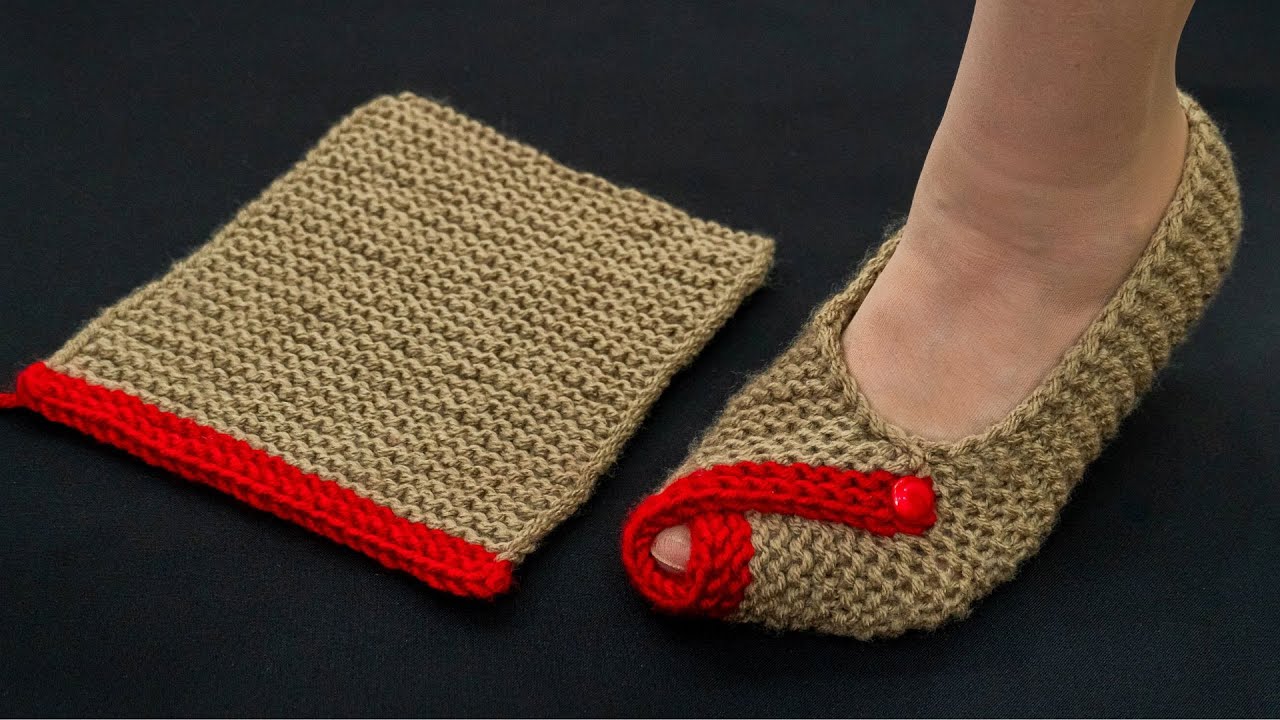
How to Make Knitted Slippers from a Rectangle (The Simplest Slippers!)
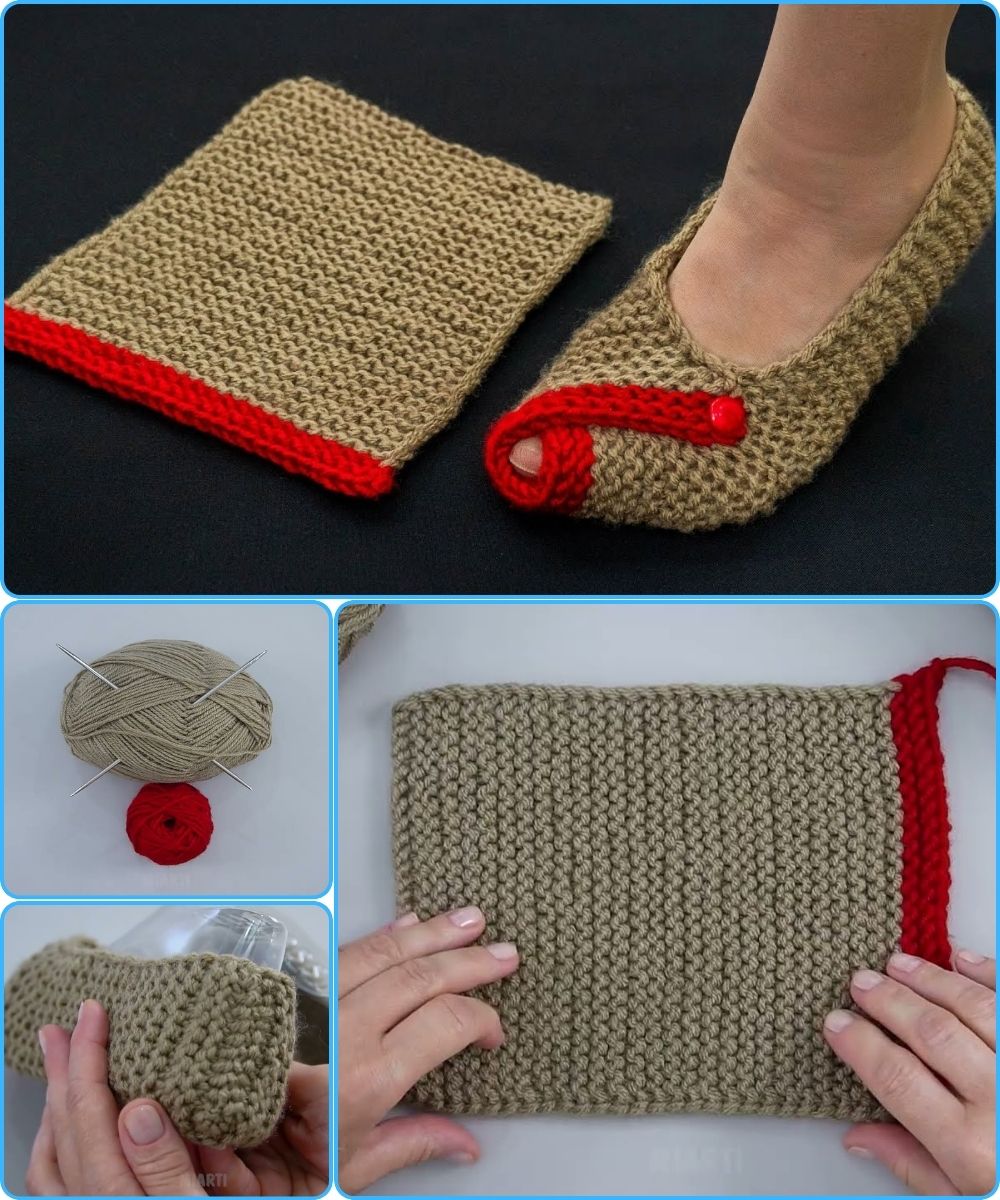
Knitted slippers made from a rectangle are one of the easiest knitting projects you can try. There is no complicated shaping, no heel turning, and no toe decreases. You simply knit a rectangle, fold it, sew a few seams, and your slippers are ready to wear!
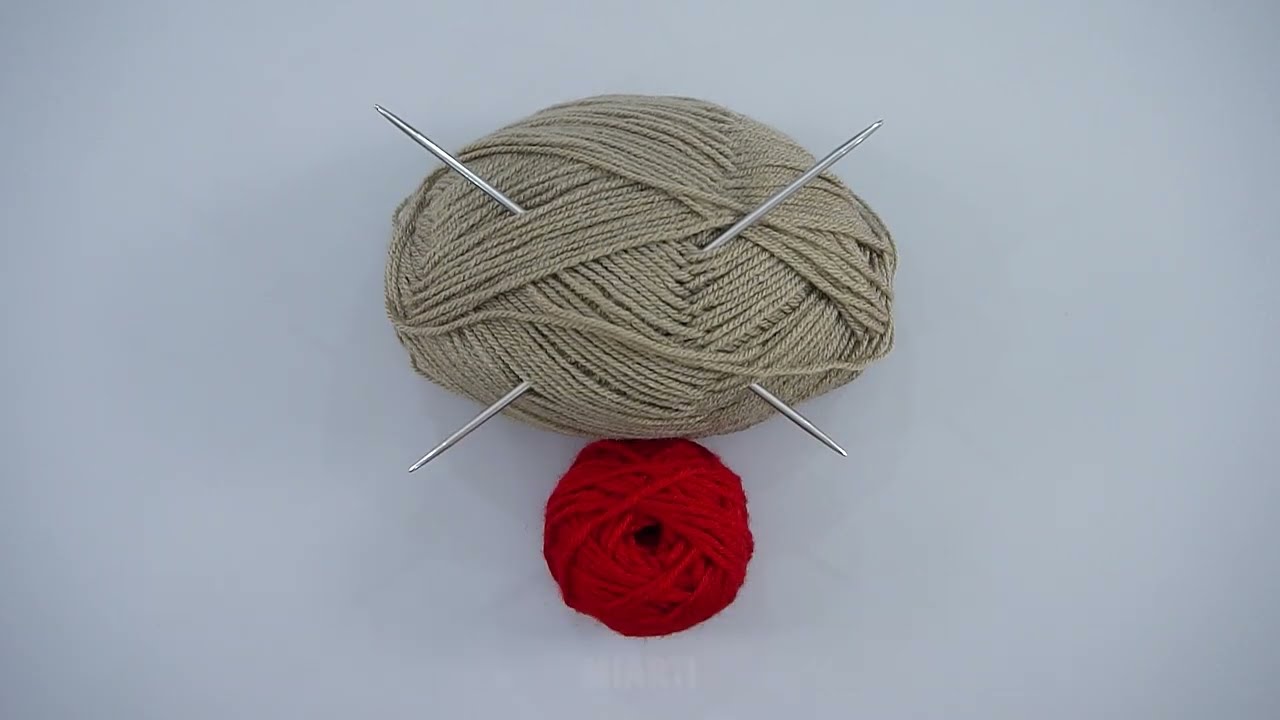
Materials Needed
-
Medium-weight yarn (worsted weight works best)
-
Knitting needles (size recommended on your yarn label, usually 4–5 mm)
-
Yarn needle (for sewing seams)
-
Scissors
-
Optional: buttons, pom-poms, or non-slip sole material
Basic Skills Required
-
Cast on
-
Knit stitch (or garter stitch)
-
Bind off
-
Simple sewing (whip stitch or mattress stitch)
Tip: Garter stitch (knitting every row) is best for beginners and gives a stretchy, cozy slipper.
Step 1: Measure Your Foot
To size your slippers correctly:
-
Measure the length of your foot (heel to toe)
-
Measure the width around the ball of your foot
The rectangle should be:
-
Length: Foot length + about 2–3 cm (for comfort)
-
Width: About twice the width of your foot
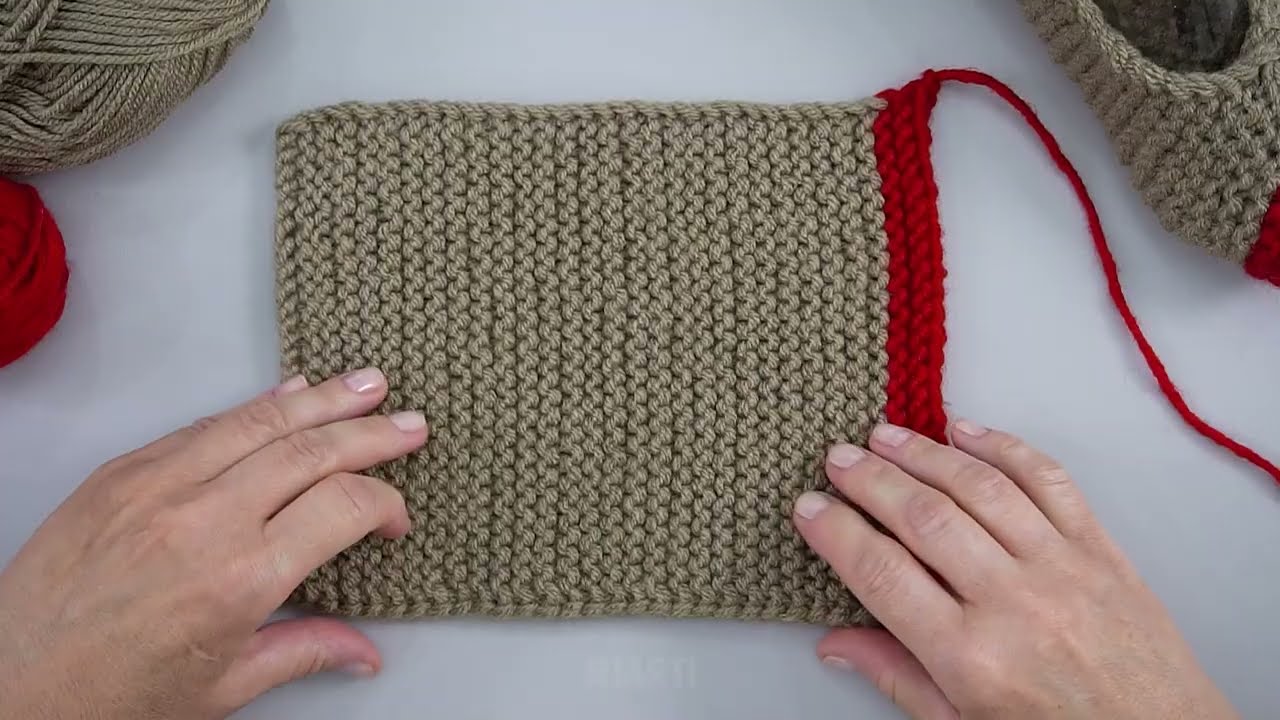
Step 2: Knit the Rectangle
-
Cast on enough stitches to match the width measurement.
-
Knit every row until the piece matches the length measurement.
-
Bind off loosely.
You now have a flat rectangle of knitted fabric.
Step 3: Fold the Rectangle
Lay the rectangle flat:
-
Fold one short edge inward to form the toe
-
Fold the other short edge upward to create the heel
The fabric will naturally form a slipper shape when folded correctly.

Step 4: Sew the Seams
Using a yarn needle:
-
Sew the toe seam first by gathering or stitching the folded edge.
-
Sew the heel seam up the back.
-
Secure all ends tightly.
Turn the slipper right side out.
Step 5: Shape and Adjust
-
Try the slipper on
-
Adjust seams if needed for comfort
-
Repeat the process for the second slipper
Optional Add-Ons
-
Add pom-poms or bows to the toe
-
Sew on buttons for decoration
-
Attach non-slip pads to the bottom for safety
-
Use thicker yarn for extra warmth
Why This Method Is Perfect for Beginners
-
No complex patterns
-
No shaping calculations
-
Quick to finish
-
Easy to customize
-
Great for gifts
Final Thoughts
Knitted rectangle slippers are a fantastic project for anyone learning to knit. With just one simple shape and basic stitches, you can create warm, cozy slippers that look impressive and feel comfortable. Once you master this method, you can experiment with different yarns, stitches, and decorations to make each pair unique.
If you want, I can also:
-
Simplify this for kids
-
Turn it into a step-by-step pattern
-
Add sizing charts
-
Rewrite it for a school project or blog
Watch video: