 by
by Here’s a simple, beginner-friendly guide you can use to explain how to crochet mittens using just one swatch. This method is great because it avoids complicated shaping and works up fast.
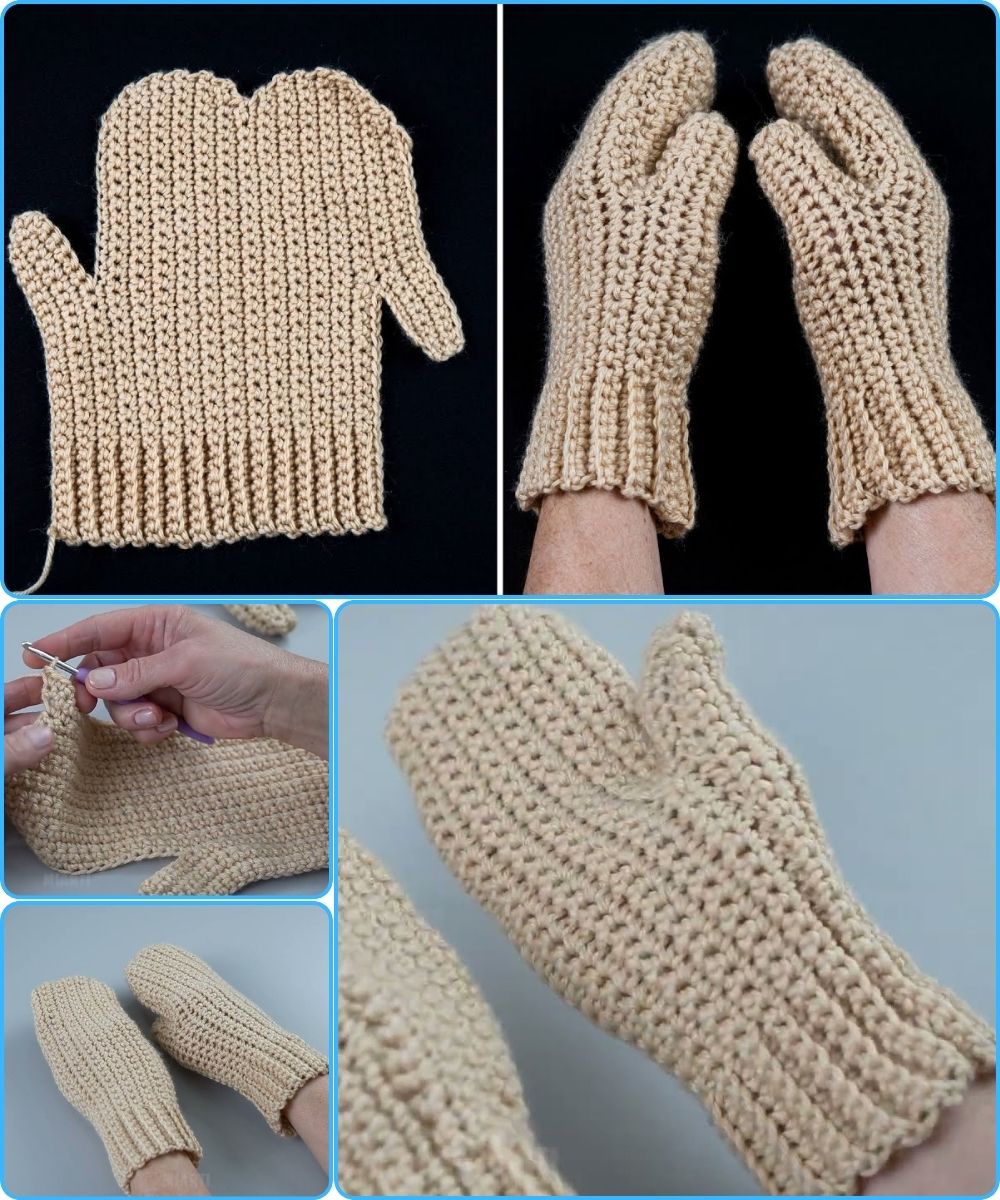
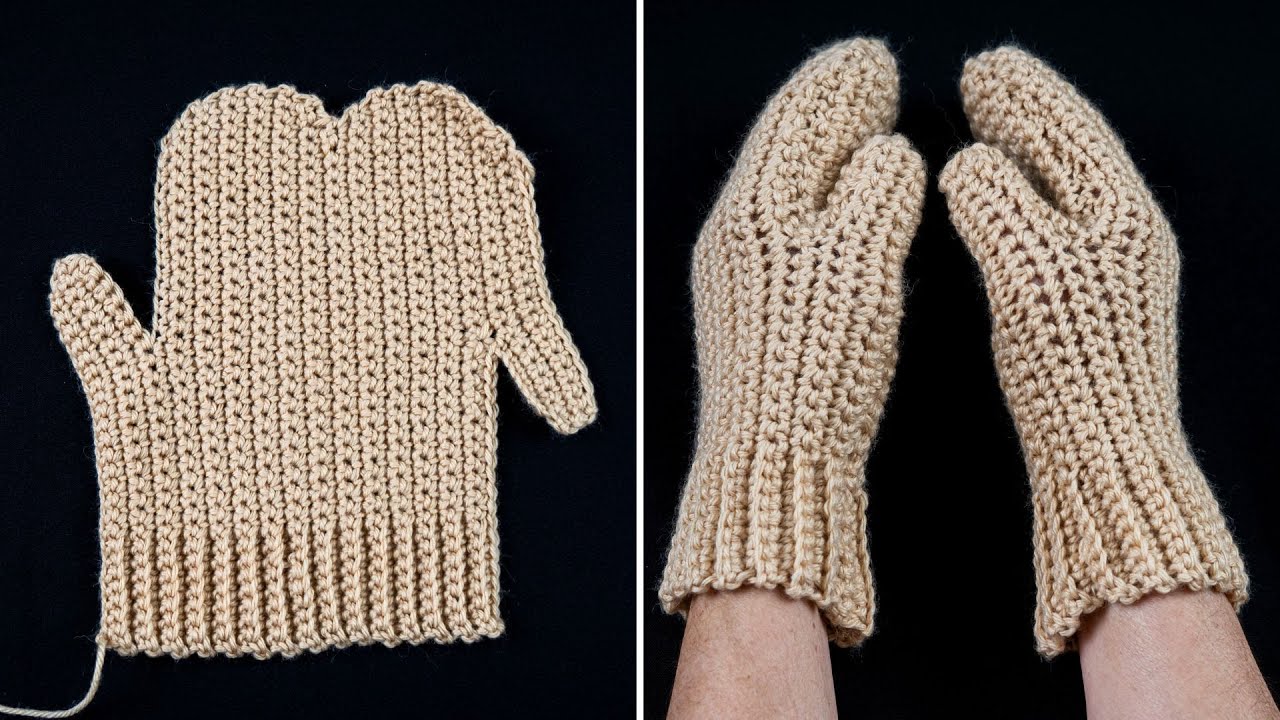
How to Crochet Mittens in a Simple Way (One-Swatch Method)
Crocheting mittens doesn’t have to be difficult. With the one-swatch method, you create a single flat piece and fold it into a mitten shape. This makes it perfect for beginners who are still learning how crochet pieces come together.
Materials Needed
-
Medium-weight yarn (worsted weight is easiest)
-
Crochet hook that matches your yarn (usually 5–6 mm)
-
Scissors
-
Yarn needle for sewing
Basic Stitches You Should Know
-
Chain (ch)
-
Single crochet (sc) or half double crochet (hdc)
-
Slip stitch (sl st)
You can choose single crochet for a tighter mitten or half double crochet for a softer, stretchier feel.
Step 1: Make the Swatch
-
Start by chaining enough stitches to match the width of your hand, from the base of your fingers to just before your wrist.
-
Add one extra chain for turning.
-
Crochet across the row using single crochet or half double crochet.
-
Turn your work and continue crocheting rows until the rectangle is long enough to wrap around your hand.
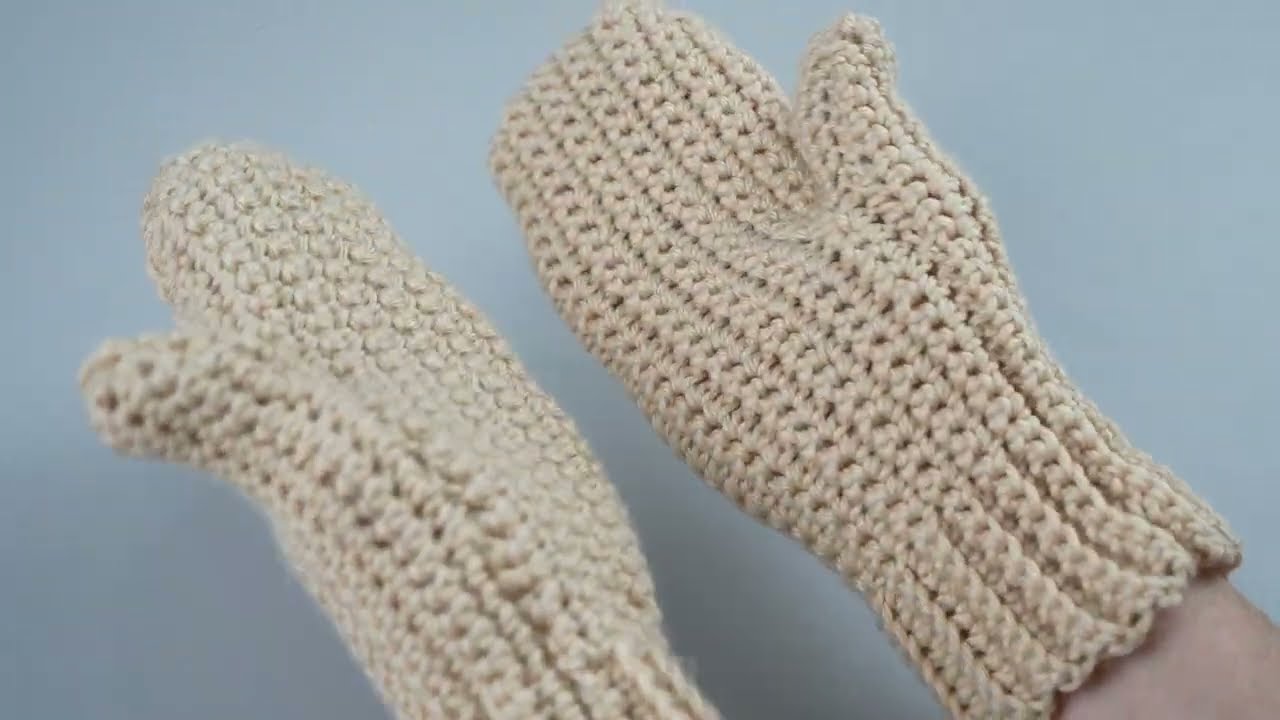
👉 This rectangle (swatch) will form the entire mitten.
Step 2: Fold the Swatch
-
Fold the rectangle in half lengthwise, with the right sides facing together.
-
Decide where your thumb will go by leaving a small opening on one side (about 1.5–2 inches).
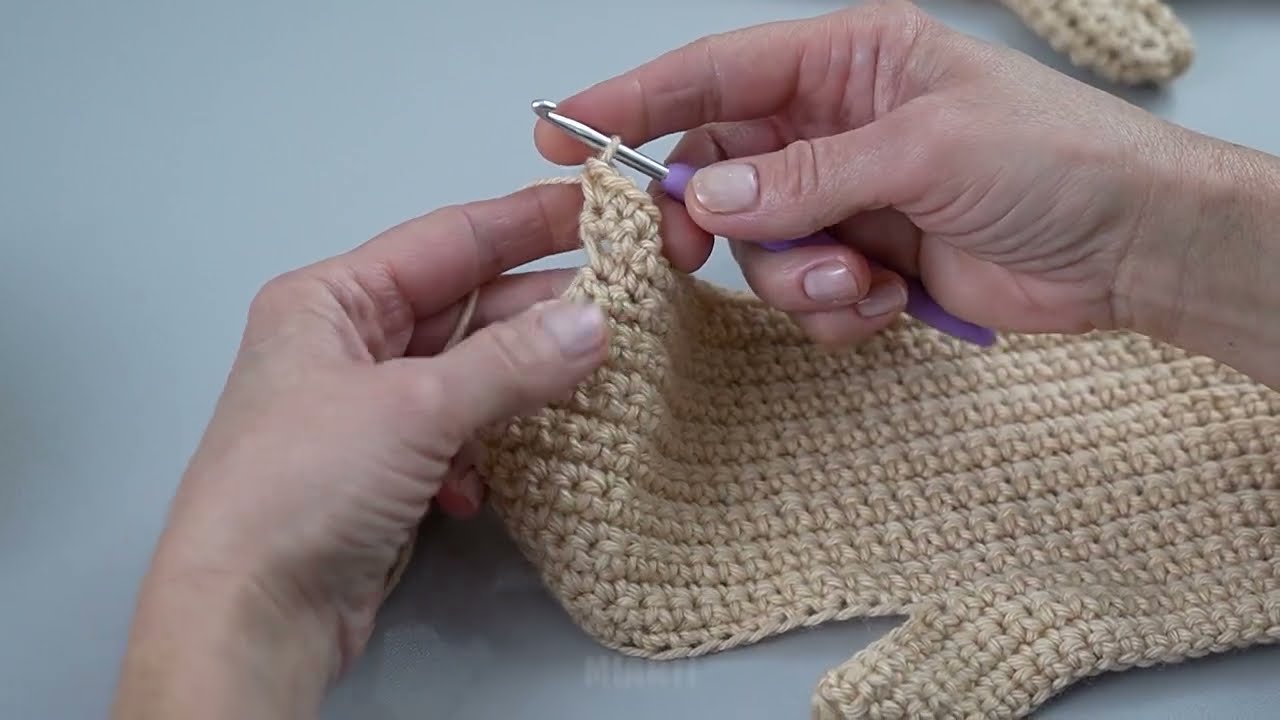
Step 3: Seam the Mitten
-
Use a yarn needle or slip stitches to sew up one side from the wrist to the thumb opening.
-
Skip the thumb opening.
-
Continue sewing from the top of the mitten down toward the fingers.
-
Sew across the top to close the mitten.
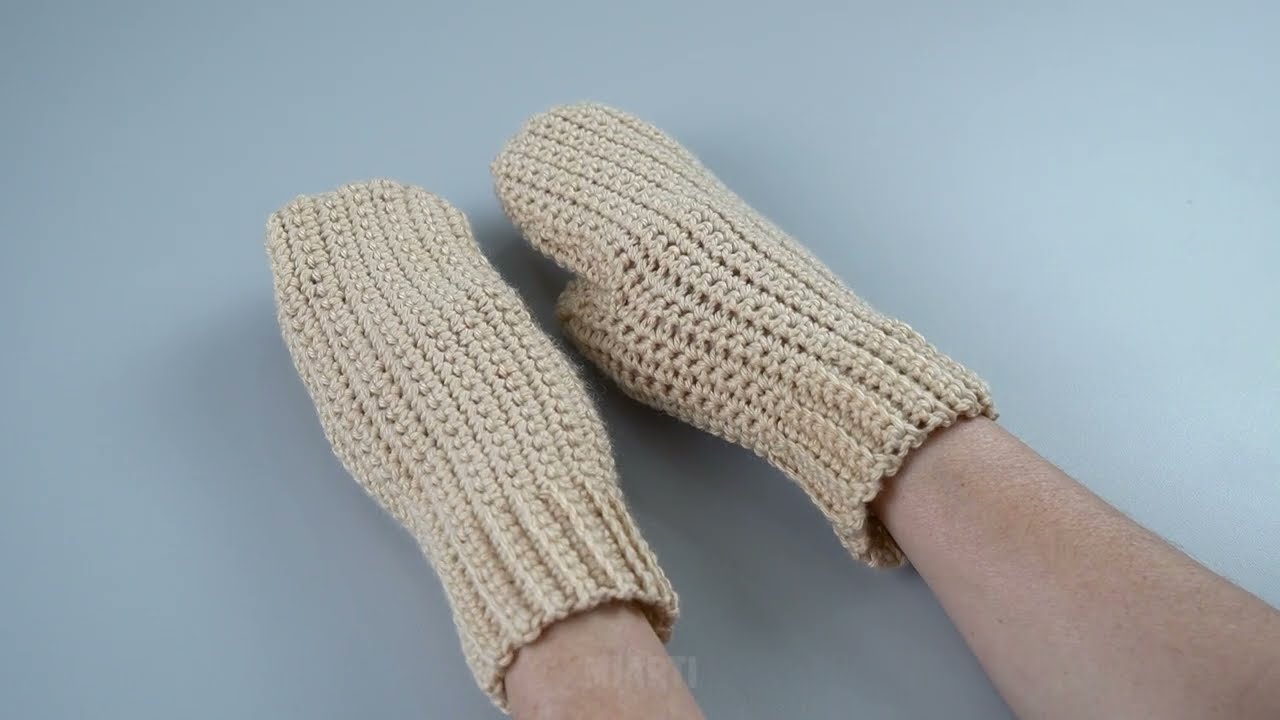
Turn the mitten right side out once finished.
Step 4: Shape the Thumb (Optional but Easy)
-
You can leave the thumb opening as it is for a simple mitten.
-
Or, attach yarn and crochet a few rounds of single crochet around the opening to create a short thumb.
Step 5: Finish the Wrist
-
Crochet a few rows of single crochet or ribbing around the wrist opening for a snug fit.
-
Fasten off and weave in all loose ends.
Why This Method Is Great
-
Uses only one flat piece
-
No complicated patterns
-
Easy to adjust for different hand sizes
-
Perfect for beginners and quick gifts
Final Tip
Once you make one mitten, simply repeat the same steps for the second. After practicing once, you’ll be able to make cozy mittens quickly and confidently!
If you want, I can also:
-
Simplify this even more for kids
-
Turn it into a school project write-up
-
Add pictures descriptions or sizing tips 😊
Watch video: