by
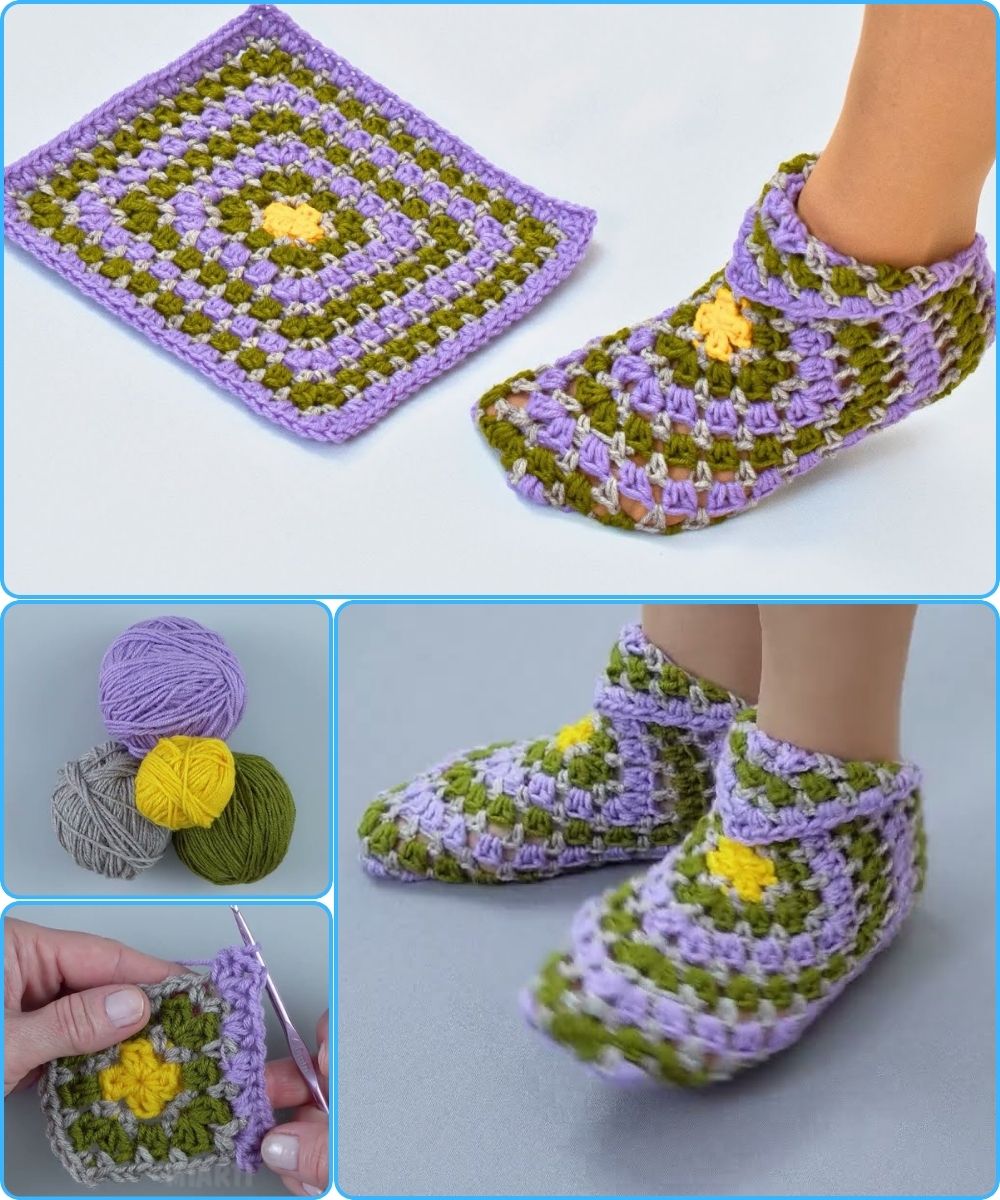
by Absolutely! I can guide you step by step on how to crochet granny square slippers easily. Granny square slippers are cozy, customizable, and a fun project for beginners who know basic crochet stitches. Here’s a detailed breakdown:
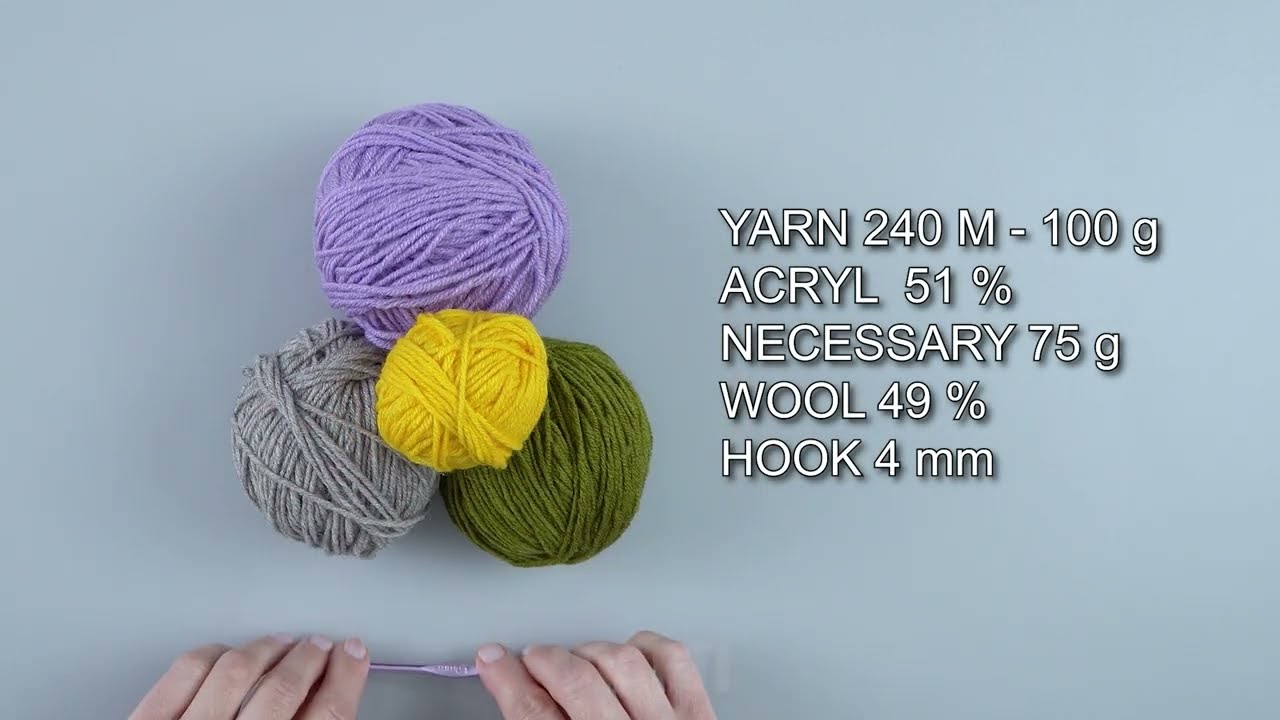
Materials Needed
-
Yarn: Medium weight (worsted) yarn in your favorite colors. You can choose one color or multiple for a patchwork look.
-
Crochet Hook: Usually size H/8 (5 mm) works for worsted yarn.
-
Scissors
-
Yarn Needle (for weaving in ends)
-
Optional: Non-slip fabric paint or sole pads if you plan to wear them indoors.
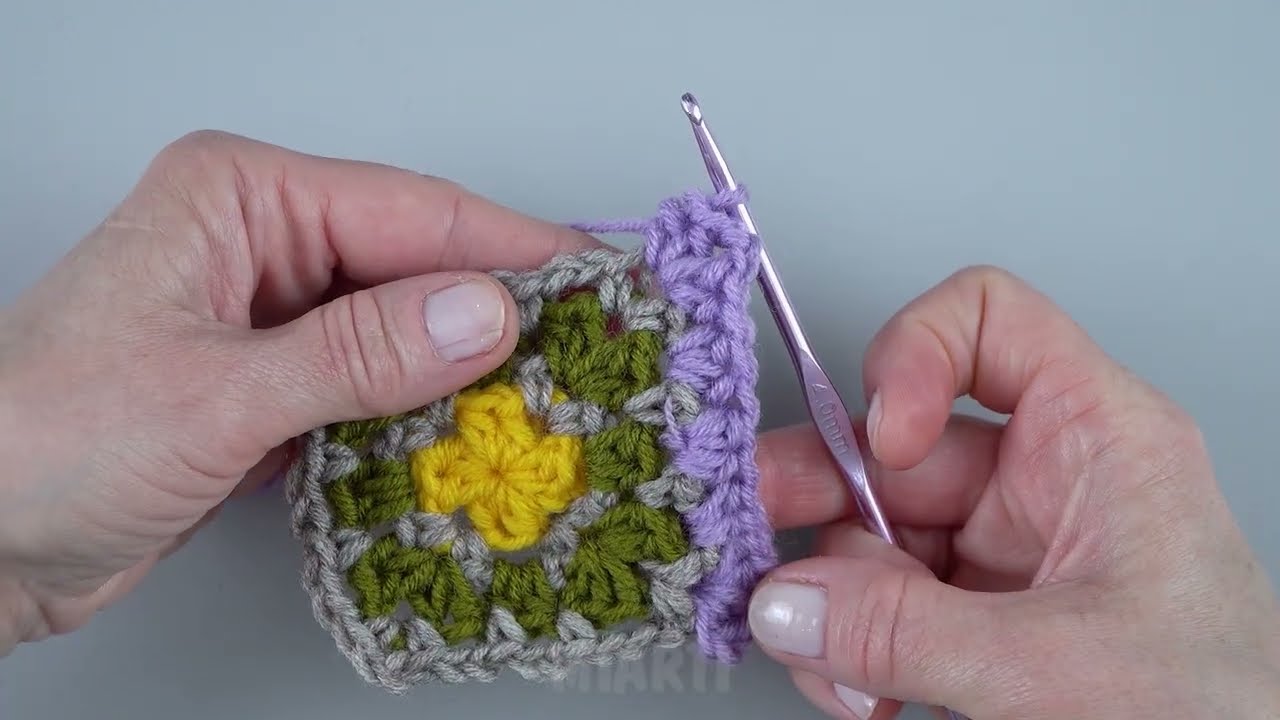
Step 1: Make Granny Squares
Granny squares are the building blocks of your slippers.
Basic Granny Square Pattern
-
Start with a magic ring (or chain 4 and join to form a ring).
-
Round 1: Chain 3 (counts as first double crochet), then work 2 double crochets into the ring. Chain 2, work 3 double crochets into the ring. Repeat twice more. Join with slip stitch to top of starting chain-3. You now have 4 clusters of 3 double crochets with chain-2 corners.
-
Round 2: Slip stitch into corner space. Chain 3, 2 dc in the same corner space, chain 2, 3 dc in the same corner. Move to next corner space: 3 dc, ch 2, 3 dc. Repeat around. Join with slip stitch.
-
Round 3: Repeat Round 2 until your square is the desired size for your slipper. Usually, about 3–4 inches per square works for adult slippers.
Tip: You can make the squares as colorful or as uniform as you like.
Step 2: Make Enough Squares
-
You need 4 squares for one slipper (2 for top, 2 for bottom/sole), or more if you want a patchwork style.
-
Size tip: Measure your foot. Granny squares can be joined and shaped to match foot length and width.
Step 3: Join the Squares
-
Use slip stitch or single crochet to join squares together.
-
Shape the slipper:
-
Join two squares side by side for the top of the foot.
-
Join two squares for the sole.
-
Sew or crochet the edges together so the top part fits over the sole like a shoe.
-
Optional: You can slightly overlap the top on the sole for a snug fit.
Step 4: Make the Slippers Comfortable
-
Edges: Crochet a round of single crochet around the opening of the slipper to make it neat.
-
Add trim: You can make a little scalloped edge for style.
-
Optional lining: Use soft yarn inside for extra comfort.

Step 5: Add Non-Slip Soles (Optional)
-
If you want to wear slippers on smooth floors, use non-slip fabric paint, adhesive grips, or felt pads on the bottom.
Tips for Easy Success
-
Start simple: Use fewer colors if you’re new.
-
Check sizing: Compare your granny squares to your foot as you go.
-
Use stretchy yarn: Makes slippers easier to put on and comfy.
-
Weave in ends carefully: Granny squares have many ends; secure them neatly to last longer.
✅ Summary:
-
Crochet granny squares for top and bottom.
-
Join squares to form slipper shape.
-
Add edging and optional non-slip sole.
-
Customize colors, trim, and comfort.
If you want, I can make a step-by-step diagram showing exactly how the squares are joined to form a slipper, which makes it much easier to visualize than words alone.
Do you want me to make that diagram?
Watch video: