by
by Here’s a clear, beginner-friendly, detailed guide you can use as a blog post, handout, or pattern explanation.
How to Make Crochet Slippers Out of a Rectangle (Beginner-Friendly Guide)
Crochet slippers made from a simple rectangle are perfect for beginners. There is no complicated shaping, no working in the round, and no increasing or decreasing. If you can crochet a straight rectangle, you can make cozy slippers!
Materials You’ll Need
-
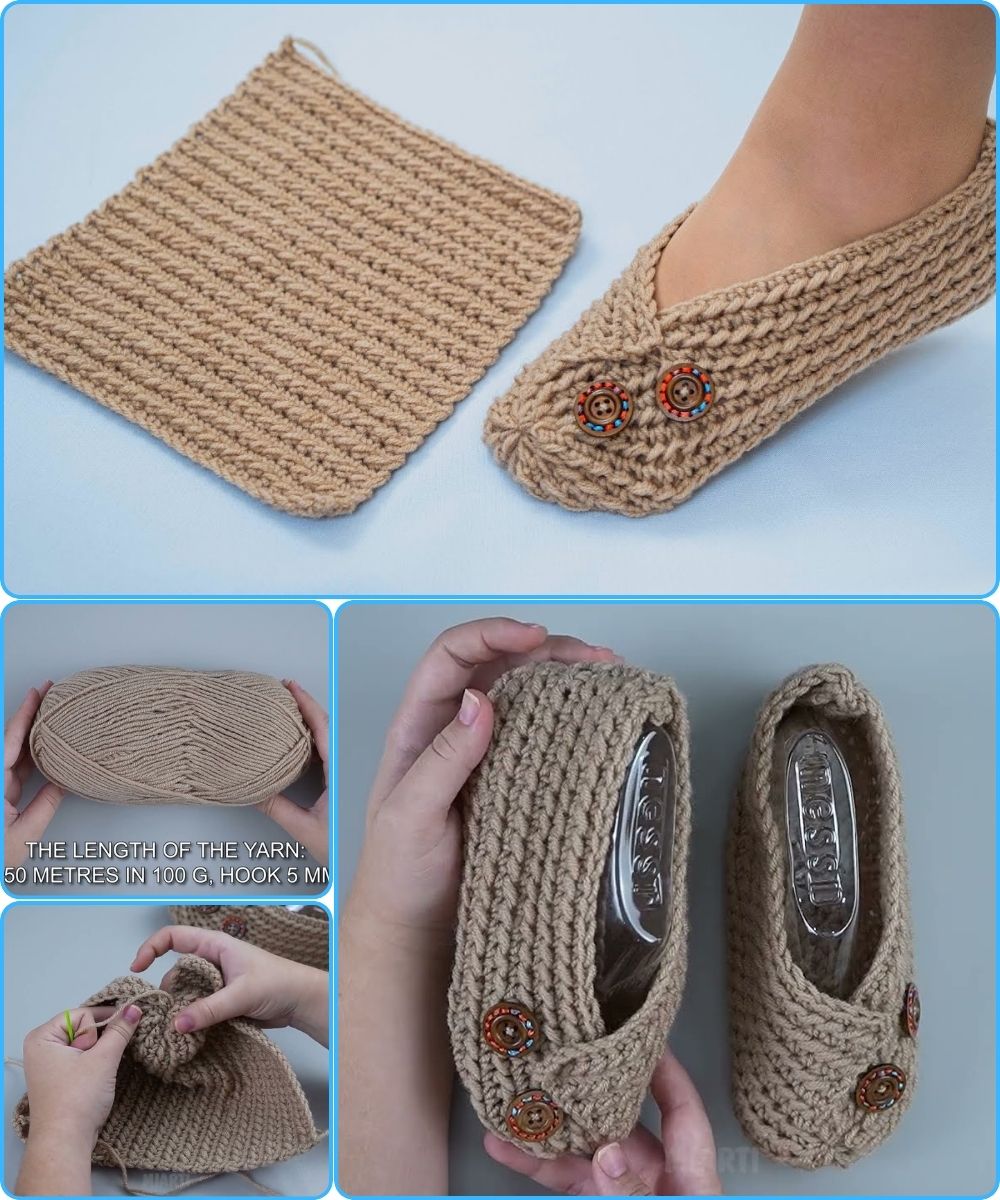
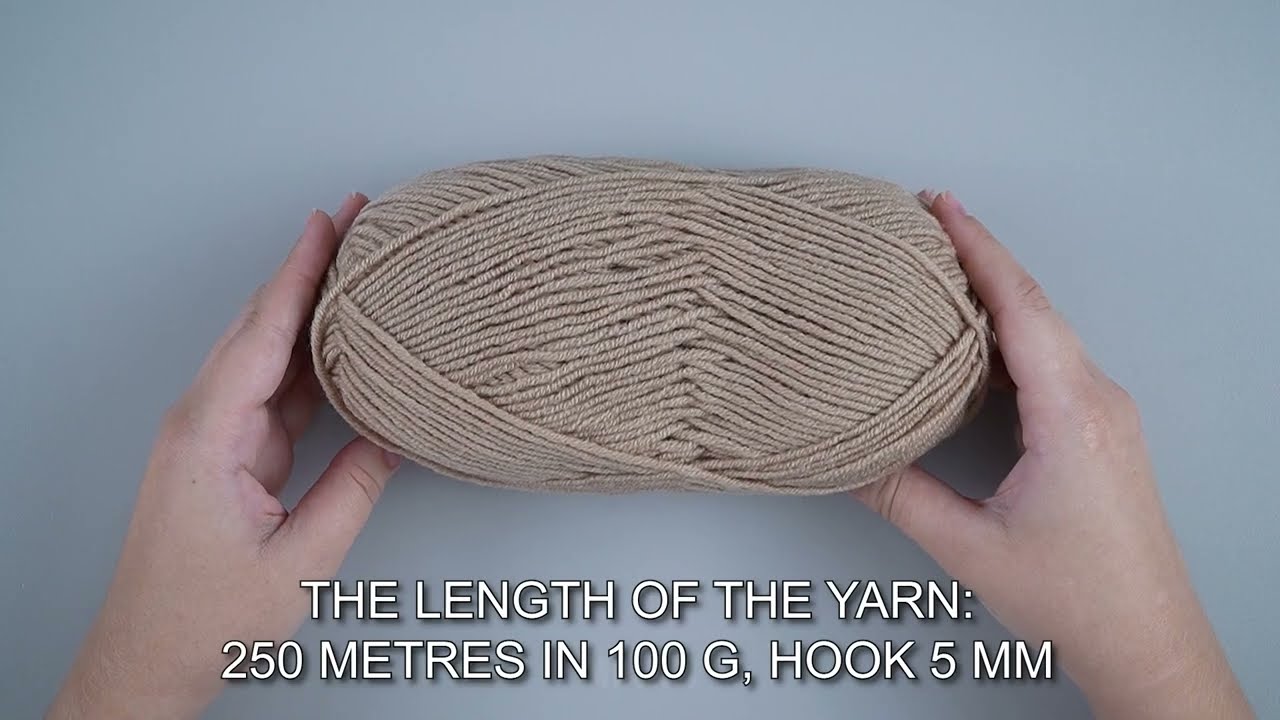
Yarn:
Medium-weight (worsted weight / #4) yarn works best.
Acrylic or wool blends are cozy and durable. -
Hook:
5.0 mm (H/8) crochet hook (or size recommended on your yarn label) -
Other Supplies:
-
Scissors
-
Yarn needle (for sewing seams)
-
Measuring tape
-
Crochet Skills Required
This pattern is beginner-friendly. You should know how to:
-
Make a slip knot
-
Chain (ch)
-
Single crochet (sc) or half double crochet (hdc)
-
Turn your work
-
Fasten off
-
Sew with a yarn needle
Step 1: Measure Your Foot
Measure the length of your foot from heel to toe.
To find the rectangle length:
-
Foot length + about 1 inch (2–3 cm) for comfort
Example:
-
Foot length: 9 inches
-
Rectangle length: about 10 inches
Step 2: Crochet the Rectangle
Foundation Chain
-
Chain until your work measures the length of your foot (about 9–10 inches for an adult).
Row 1
-
Insert your hook into the second chain from the hook.
-
Work single crochet (sc) or half double crochet (hdc) in each chain across.
-
Chain 1 (for sc) or Chain 2 (for hdc), then turn.
Rows 2 and Onward
-
Crochet 1 sc or hdc into each stitch across.
-
Turn at the end of each row.
Continue Until Width Is Right
The width of the rectangle should wrap comfortably around the widest part of your foot.
Typical widths:
-
Small foot: 4–4.5 inches
-
Medium foot: 4.5–5 inches
-
Large foot: 5–5.5 inches
Once your rectangle reaches the desired width, fasten off, leaving a long tail for sewing.
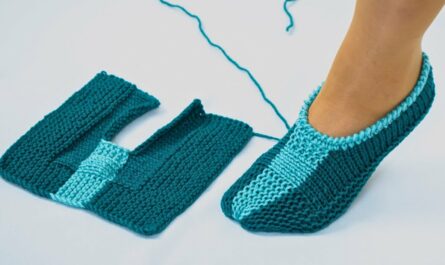
Step 3: Fold the Rectangle
Lay your rectangle flat.
-
Fold the rectangle in half lengthwise (hotdog style).
-
One short end will form the toe, and the long edge will form the sole.
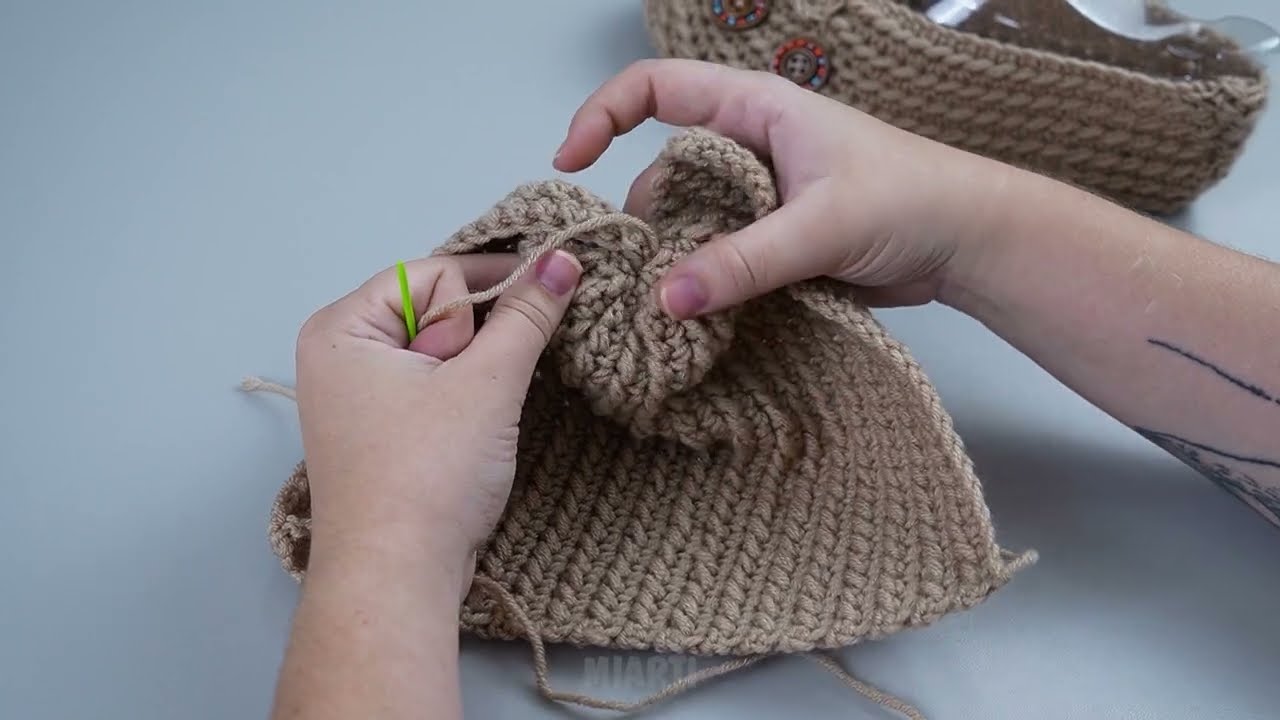
Step 4: Sew the Toe
-
Using your yarn needle, sew along one short edge.
-
Pull the yarn tight to create a gathered toe.
-
Secure with a knot.
This forms the front of your slipper.
Step 5: Sew the Heel
-
Fold the other end of the rectangle around your heel.
-
Sew up the back seam from the bottom toward the ankle.
-
Stop sewing where the slipper feels comfortable around your heel.
Fasten off and weave in all ends.
Step 6: Turn Right Side Out & Try On
-
Turn the slipper right side out.
-
Try it on to check the fit.
-
Make adjustments if needed (tighter or looser seams).
Repeat all steps to make the second slipper.
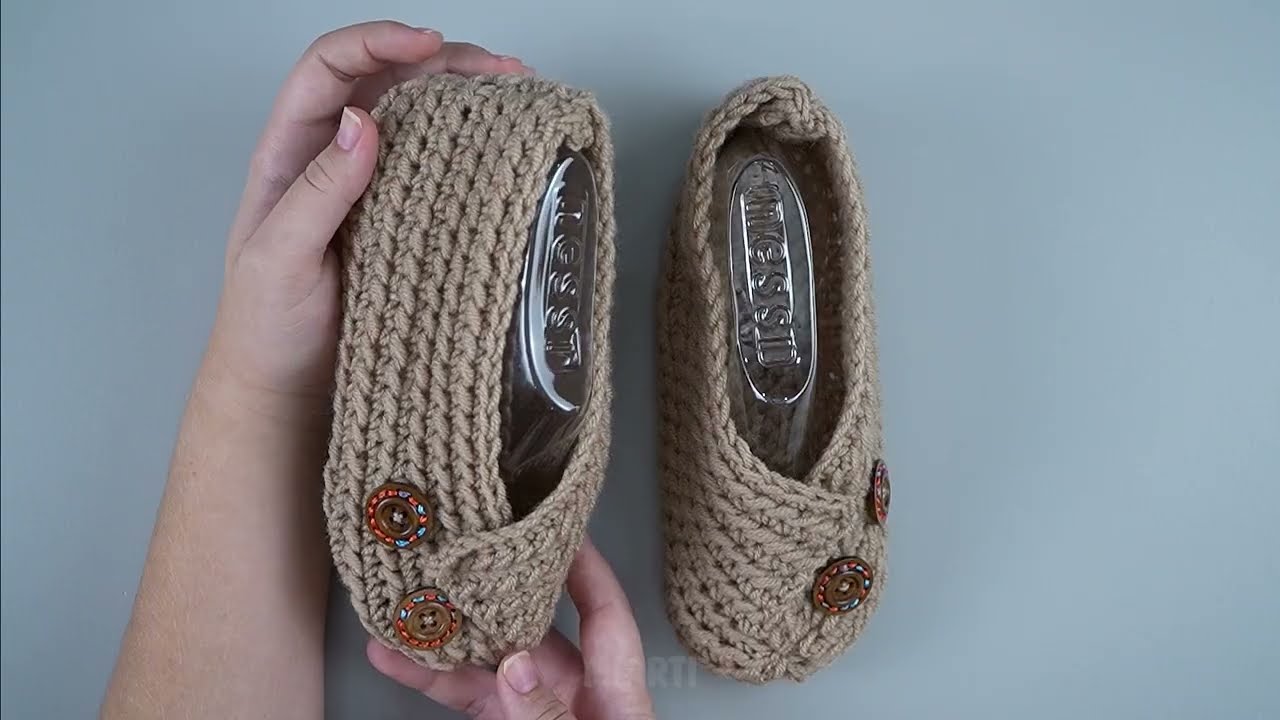
Optional Finishing Touches
You can customize your slippers by adding:
-
A single crochet border around the opening
-
A cuff (crochet a few rows around the ankle)
-
Buttons or bows
-
Non-slip dots on the sole
Tips for Beginners
-
Keep your stitches loose and even for comfort.
-
Use soft yarn for indoor slippers.
-
Make a small swatch first if you’re unsure about sizing.
-
Slippers stretch slightly with wear, so don’t make them too loose.
Why This Method Is Great for Beginners
✔ No complicated shaping
✔ No counting increases or decreases
✔ Easy to resize
✔ Quick and satisfying project
With just a rectangle, you can crochet warm, cozy slippers in under an hour once you get the hang of it!
If you’d like, I can also:
-
Simplify this into a printable pattern
-
Convert it into step-by-step bullet instructions
-
Adjust it for kids or men’s sizes
-
Add photos descriptions or stitch counts
Just tell me! 😊
Watch tutorial: