 by
by Here’s a clear, step-by-step, easy-to-follow guide on How to Crochet a Bobble Stitch Cosmetic Bag/Clutch — perfect for beginners who want a cute, textured project!
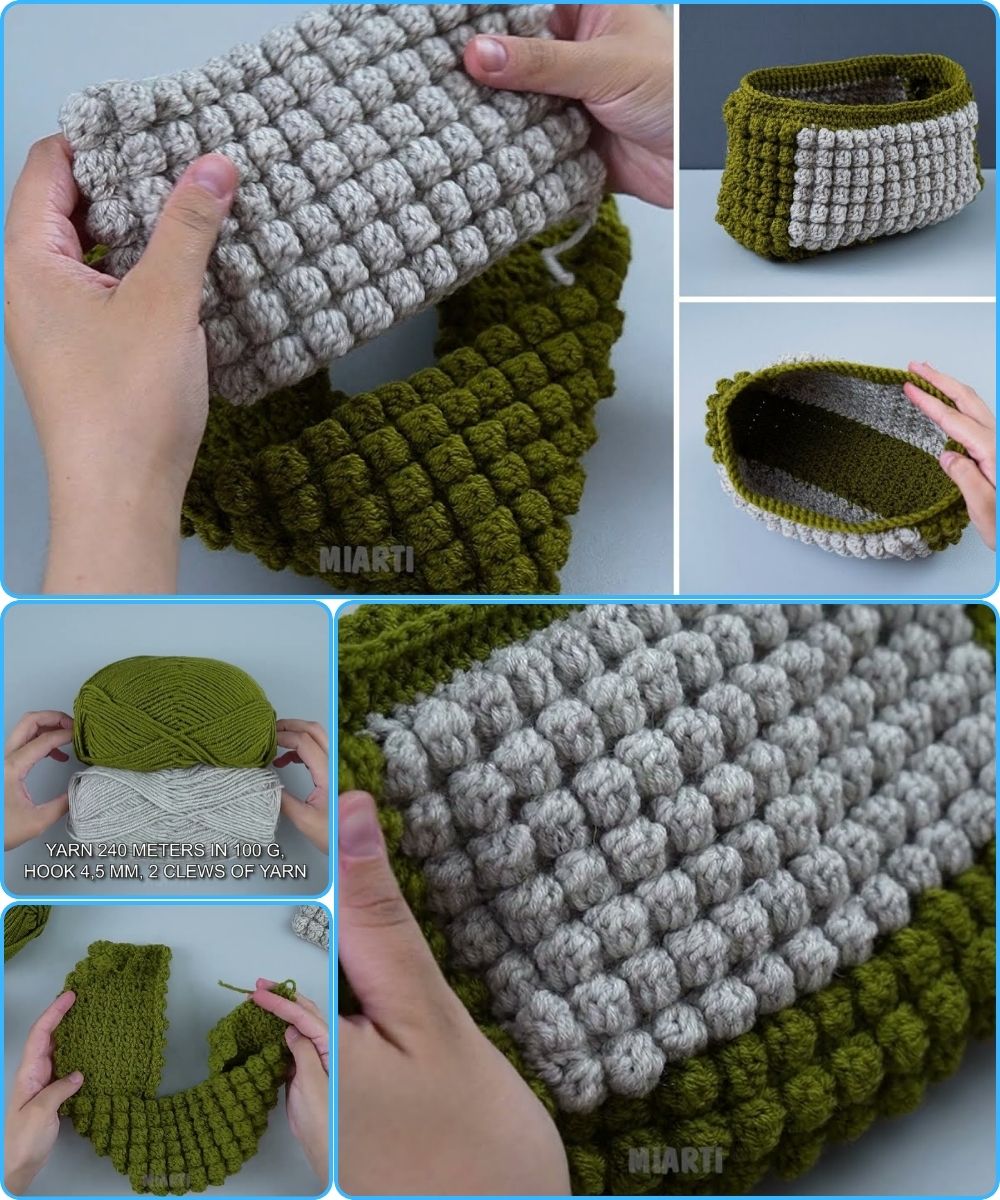
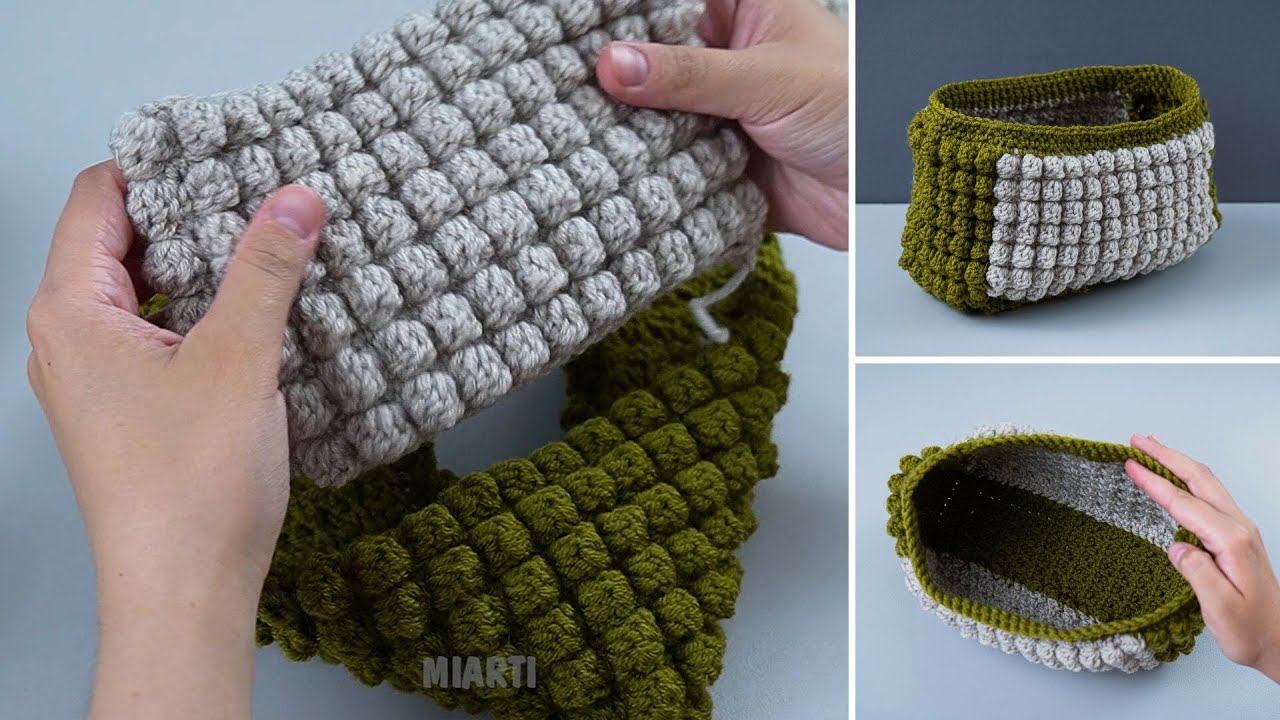
🌼 How to Crochet a Bobble Stitch Cosmetic/Clutch Bag (Easy Tutorial!)
Crocheting a cosmetic pouch with bobble stitches creates a fun, textured look that feels luxurious and handmade. Below is a simple beginner-friendly pattern, plus tips and materials so you can finish your clutch quickly and confidently.
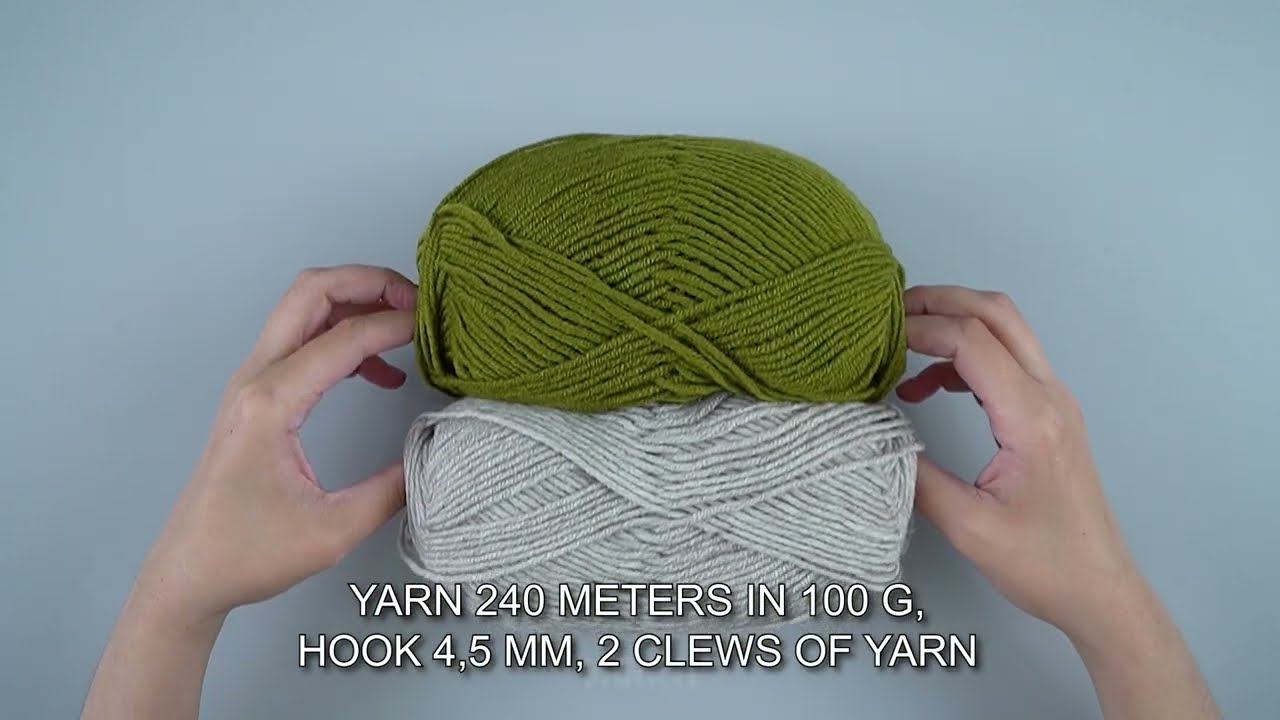
🧵 Materials You’ll Need
-
Medium weight (Category 4) cotton yarn — cotton gives structure to the clutch
-
4.0 mm or 4.5 mm crochet hook
-
Tapestry needle (for weaving ends)
-
Scissors
-
Zipper (optional) — 7–9 inches, depending on your size
-
Stitch markers (optional but helpful)
-
Lining fabric and sewing needle (optional)
✨ Stitches & Abbreviations
-
ch – chain
-
sc – single crochet
-
dc – double crochet
-
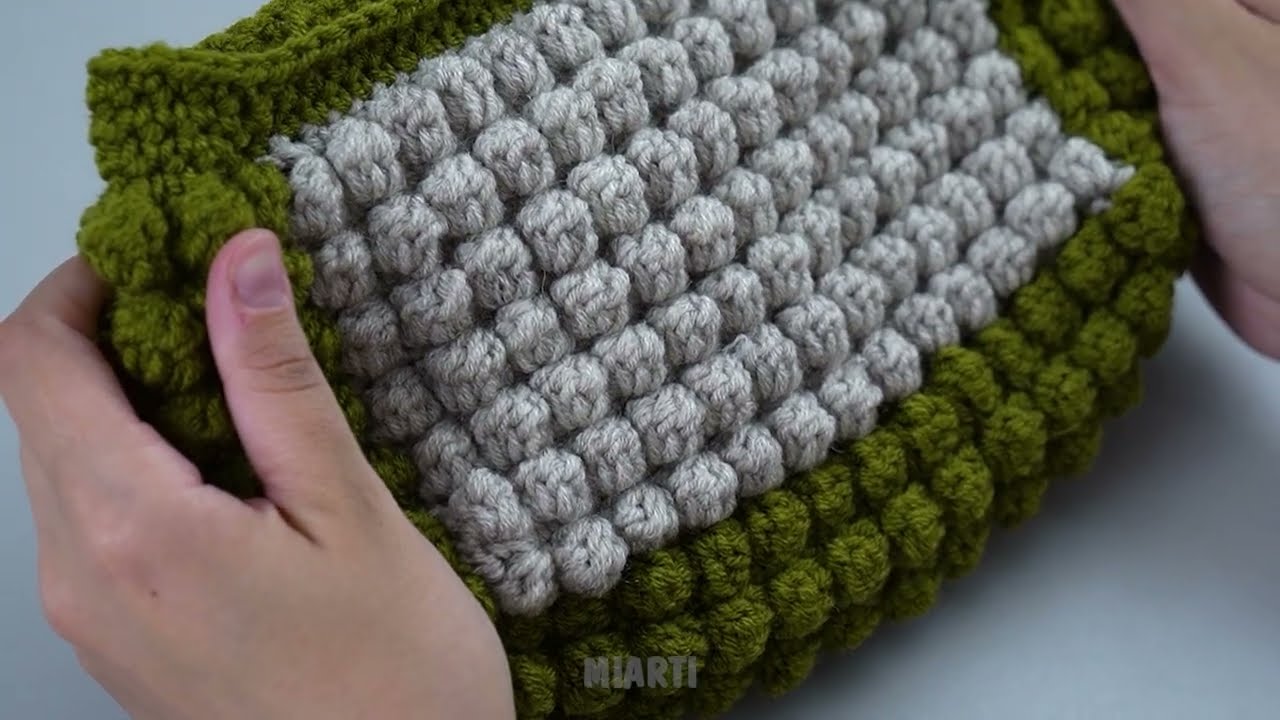
BO (bobble stitch) – 5 dc worked together in the same stitch
-
sl st – slip stitch
-
rep – repeat
💡 How to Crochet a Bobble Stitch (Beginner Friendly)
-
Yarn over, insert hook into stitch, pull up loop (3 loops on hook)
-
Yarn over, pull through 2 loops (2 loops left)
-
Repeat steps above 4 more times in same stitch
-
You will have 6 loops on hook
-
Yarn over, pull through all 6 loops
-
Tighten your stitch
‼️ Tip: The bobble pops to the wrong side, so you’ll turn your work accordingly.
📏 Sizing
You can customize the clutch to any size.
Basic size suggestion: 9 inches wide × 6 inches tall
🪡 Step-by-Step Instructions
1. Foundation Row
-
Ch 31 (or any odd number to adjust width).
-
Row 1: Sc in second ch from hook, sc across. Turn.
2. Start Bobble Rows
Row 2 (Bobble Row):
-
Ch 1, sc in first stitch,
-
BO in next stitch, sc in next stitch
-
Repeat (BO, sc) across
-
Ensure you end with a sc.
-
Turn.
Row 3:
-
Ch 1, sc in every stitch across.
-
Turn.
🌀 Repeat Rows 2 & 3 until your bag reaches your desired height (usually 15–18 rows).
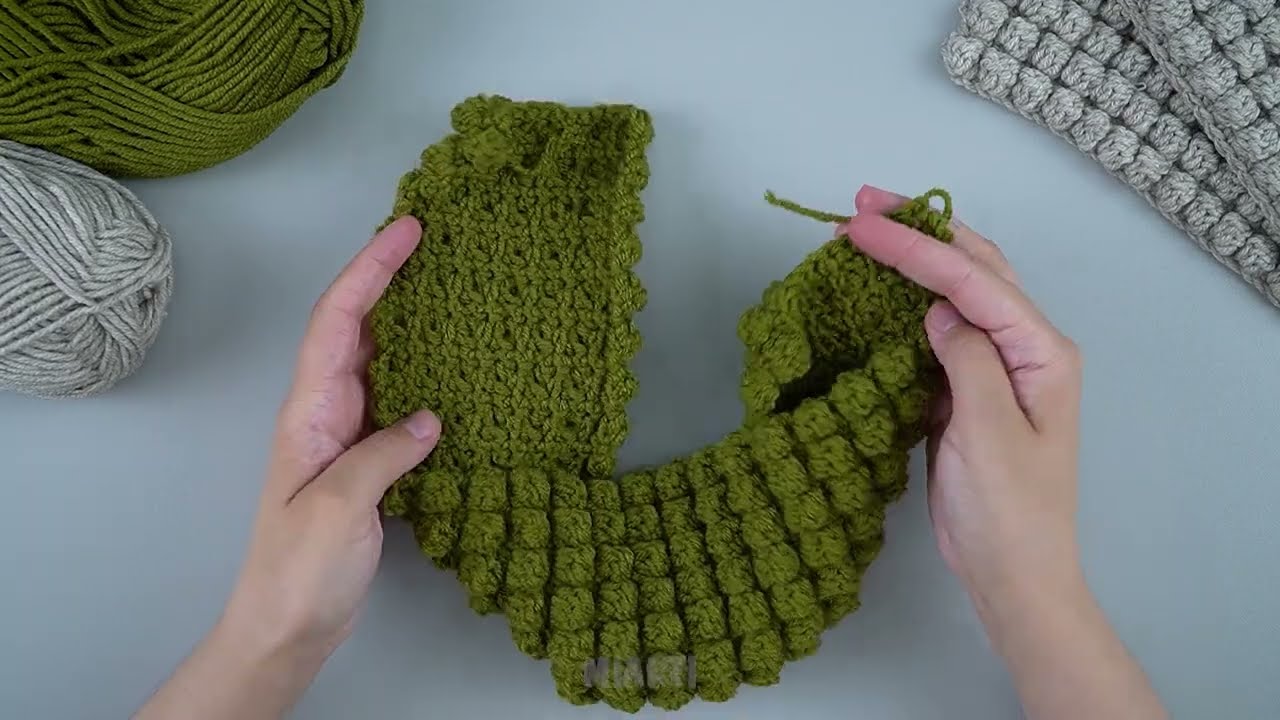
🧵 3. Finish the Panel
-
Once the height is complete, fasten off.
-
You should have one textured panel.
🟪 If you want a lined clutch, cut a rectangle of fabric the same size and hand-sew it to the inside later.
👜 4. Fold & Seam
-
Fold panel in half, bobble sides out.
-
Use a whip stitch or slip stitch to seam the sides.
🔒 5. Add Closure
You can choose one:
Option A: Add a Zipper
-
Hand-sew or machine-sew zipper along top edges.
Option B: Button Loop
-
Ch 10, attach securely to inside of clutch, sew button on the outside.
Option C: Magnetic Snap
-
Attach before adding lining fabric.
🎉 Your Bobble Clutch is Ready!
You now have a cute, structured, beautifully textured bobble cosmetic bag perfect for:
-
travel
-
makeup
-
small crochet tools
-
gifting
🌟 Extra Tips
-
Cotton yarn holds bobbles better and keeps the clutch from stretching.
-
Make it larger to turn into a tablet case or evening purse.
-
Use variegated yarn for a fun marble effect.
-
Add a tassel or wrist strap!
If you’d like, I can also create:
✔ A printable PDF version
✔ A diagram/chart
✔ A video-style script
✔ A beginner version with fewer bobbles
Just let me know!
Watch video: