by
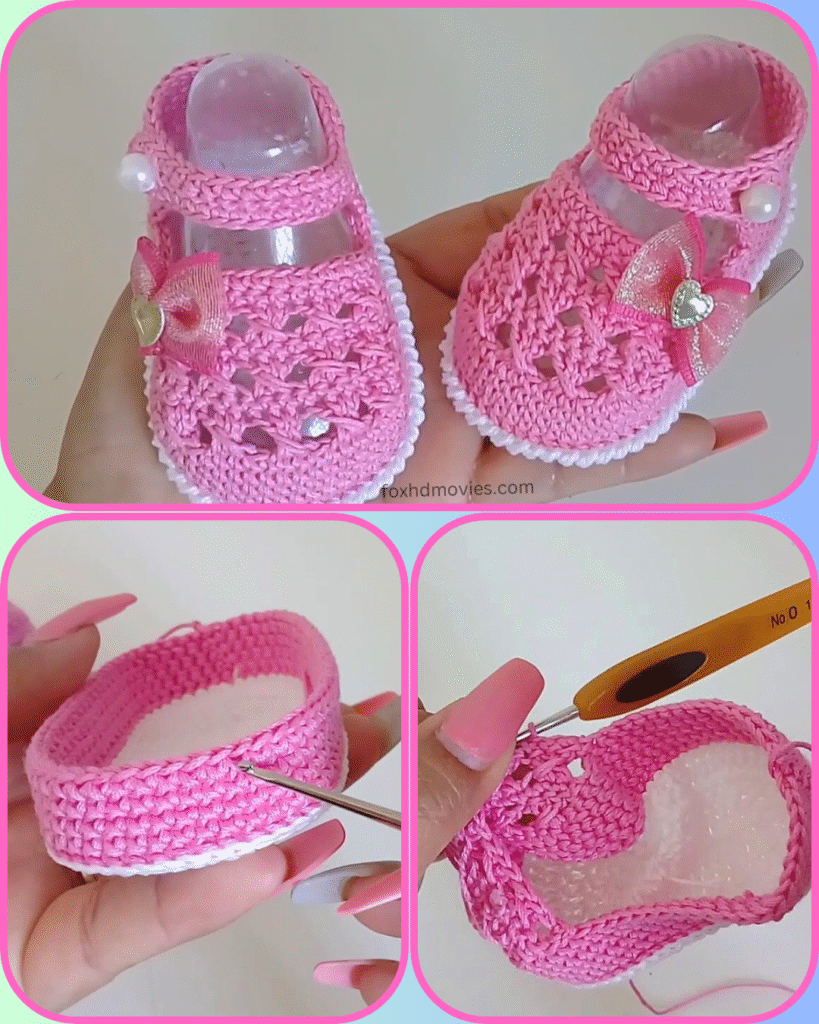
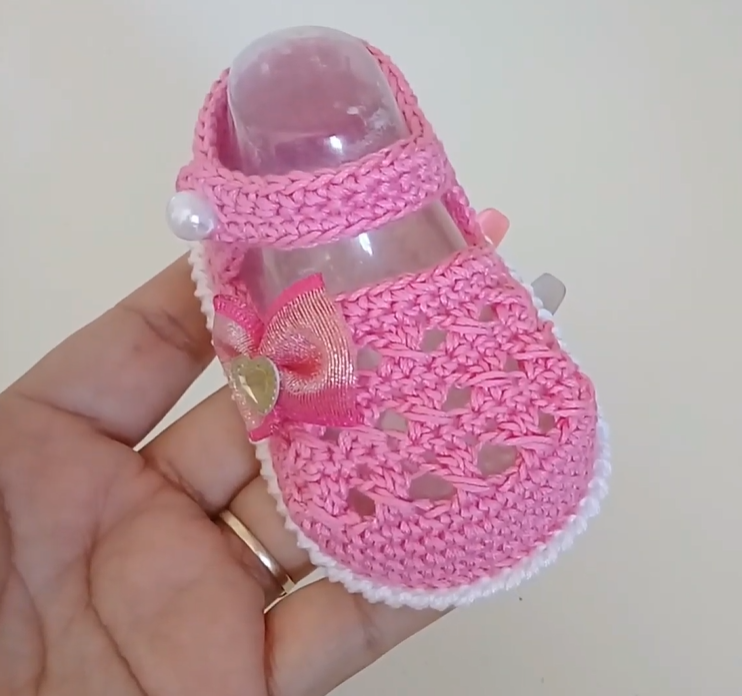
by Get ready to dress tiny feet in the most adorable handmade footwear – these enchanting pink crochet baby sandals! Featuring a delicate openwork lace pattern, a charming strap with a pearl accent, and a sweet organza bow, they are absolutely perfect for warm weather, special occasions, or simply adding a touch of handmade elegance to any baby’s outfit.
The vibrant pink in the picture is wonderfully cheerful, but imagine these sandals in soft pastels, bright blues, or classic white for a truly versatile pair!
Before we grab our hooks, let’s get ready:
- Skill Level: Intermediate. Working an openwork lace pattern, shaping the sandal, and precise placement of embellishments requires some attention to detail.
- Yarn Choice: For baby’s delicate skin, especially for sandals, a soft, lightweight baby yarn is ideal. Cotton or a cotton blend (Sport weight #2 or DK weight #3) is recommended for breathability and stitch definition.
- Hook Size: This will depend on your chosen yarn. Aim for a hook size that creates a slightly looser fabric for the lace body to maintain its airy feel, but still firm for the sole. (e.g., 3.0mm – 4.0mm).
- Gauge is Crucial! For baby shoes, gauge determines the finished size. Make a swatch of the sole section to ensure your sandals will fit perfectly!
Let’s Gather Our Supplies!
Materials You’ll Need:
- Approx. 30-50 grams of baby yarn in your main color (e.g., pink)
- Approx. 5-10 grams of baby yarn in your contrasting color (e.g., white for edging)
- Crochet hook (e.g., 3.5mm, adjust for gauge)
- Stitch markers (helpful for sole shaping!)
- Yarn needle
- Scissors
- 2 small pearl beads (for the strap closures)
- 2 small organza bows with heart charms (as pictured, or similar tiny ribbon bows/charms)
- Sewing needle and matching thread (to attach beads/bows)
Crochet Language Decoder (Abbreviations):
- ch: chain
- st(s): stitch(es)
- sl st: slip stitch
- sc: single crochet
- dc: double crochet
- V-st: V-stitch (dc, ch 1, dc) in indicated stitch or space
- sk: skip
- sp: space
- BLO: back loop only
- sc2tog: single crochet 2 stitches together (decrease)
- [ ]: repeat instructions within brackets
- ( ): number of stitches at the end of the round/row
Gauge:
- Work the first few rounds of the sole with your pink yarn.
- Example Gauge: 16 sc and 16 rows = 4 inches (10 cm). Adjust hook size to match gauge.
Pattern Instructions (Bottom-Up Construction):
This pattern starts with the sole and works upwards. Size: 0-3 Months (Approx. 3.5 – 3.75 inches / 9-9.5 cm sole length) (Adjust starting chain and increase rounds for larger/smaller sizes)
Part 1: The Sole (Main Color Yarn – e.g., Pink)
- Ch 13.
- Rnd 1: Sc in 2nd ch from hook. Sc in next 10 ch. 3 sc in last ch. Working along the other side of the starting chain: Sc in next 10 ch. 2 sc in last ch. Join with sl st to first sc. (26 sts)
- Rnd 2: Ch 1 (does not count as st). 2 sc in first st. Sc in next 10 sts. 2 sc in next 3 sts. Sc in next 10 sts. 2 sc in next 2 sts. Join with sl st to first sc. (32 sts)
- Rnd 3: Ch 1. Sc in first st. 2 sc in next st. Sc in next 11 sts. 2 sc in next st. Sc in next st. 2 sc in next st. Sc in next 11 sts. 2 sc in next st. Sc in next st. Join with sl st to first sc. (38 sts)
- Rnd 4: Ch 1. Sc in first 2 sts. 2 sc in next st. Sc in next 12 sts. [2 sc in next st, sc in next 2 sts] twice. 2 sc in next st. Sc in next 12 sts. 2 sc in next st. Sc in last st. Join with sl st to first sc. (44 sts)
- Check your sole length here. It should be approximately 3.5 inches for 0-3 months.
- Do NOT fasten off.

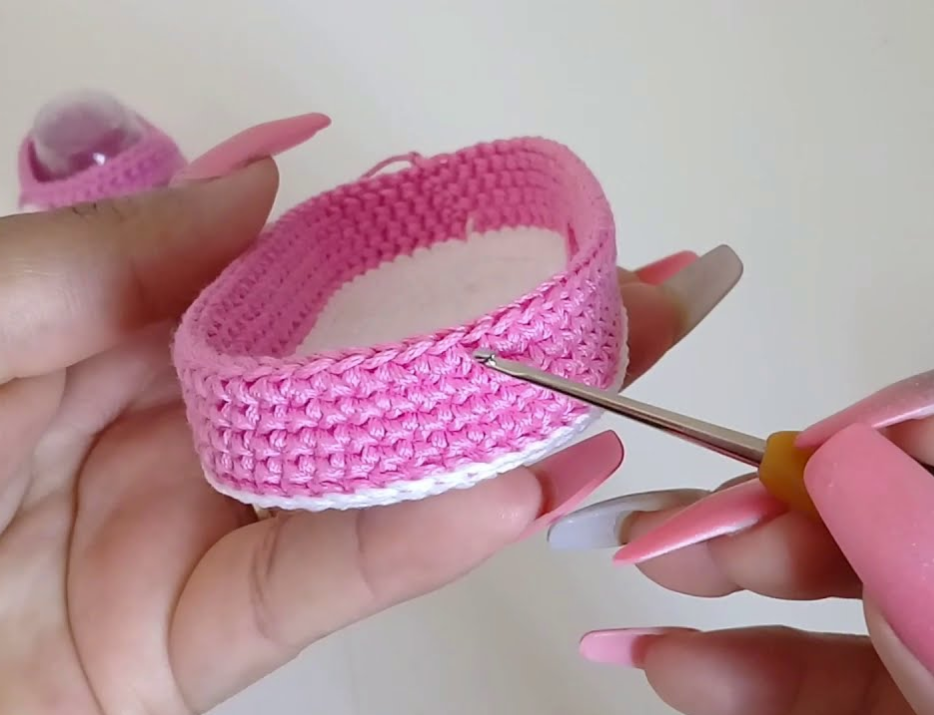
Part 2: The Sandal Body (Lace Pattern – Main Color Yarn)
- Rnd 1 (Sides Set-up): Ch 1. Sc in the back loop only (BLO) of each st around. Join with sl st to first sc. (44 sts)
- This creates a neat ridge separating the sole from the upper.
- Rnd 2 (Lace Pattern): Ch 3 (counts as dc). Dc in same st. [Sk 3 sts, V-st (dc, ch 1, dc) in next st]. Repeat [ ] around. Adjust skips at the end if needed to maintain pattern. Join with sl st to top of beg ch 3.
- You should have approx. 11 V-stitches.
- Rnd 3: Ch 3. Work V-st in each ch-1 sp of V-st from previous round. Join with sl st.
- Rnd 4 (Toe Shaping): Ch 1. Sc in next 12 sts. [Sc2tog over V-st] 6 times (working over the entire V-stitch or into the ch-1 sp). Sc in next 12 sts. Join with sl st. (34 sts)
- Rnd 5 (Sandal Opening): Ch 1. Sc in next 7 sts. Sl st in next 20 sts. Sc in last 7 sts. Join with sl st to first sc. (This creates the U-shaped opening for the instep).
- Fasten off main color yarn. Weave in ends.
Part 3: The Strap (Main Color Yarn – e.g., Pink)
- Ch 15.
- Row 1: Sc in 2nd ch from hook, sc in next 12 ch. Ch 3 (this forms the button loop). Sk next 2 ch. Sl st in last ch. (13 sc + ch-3 loop)
- Adjust ch length for loop if your pearl bead is larger/smaller.
- Fasten off, leaving a long tail for sewing.
Part 4: The White Scalloped Edging (Contrasting Color Yarn – e.g., White)
- Attach white yarn with a sl st to the back center of the sole (Rnd 4 of sole).
- Rnd 1 (Scallops): Ch 1. Sc in same st. [Sk 1 st, (sc, 3 dc, sc) in next st, sk 1 st, sc in next st]. Repeat [ ] around. Adjust skips at the end if needed to finish the last scallop. Join with sl st to first sc.
- Fasten off white yarn. Weave in ends.
Part 5: Finishing & Assembly
- Attach the Strap:
- Place the sandal on a flat surface. Position the strap across the top of the foot, with the button loop end on the outside of the shoe.
- Using your yarn needle, securely sew the non-loop end of the strap to the inside top edge of the sandal on one side.
- Using a sewing needle and matching thread, securely sew a small pearl bead to the opposite side of the sandal, aligning with the strap’s loop.
- Attach the Bow & Charm:
- Securely sew the organza bow (with its heart charm) to the center front of the sandal’s toe. Ensure the charm is securely attached for baby safety.
- Weave in all remaining loose ends neatly.
- Repeat all steps for the second sandal!