 by
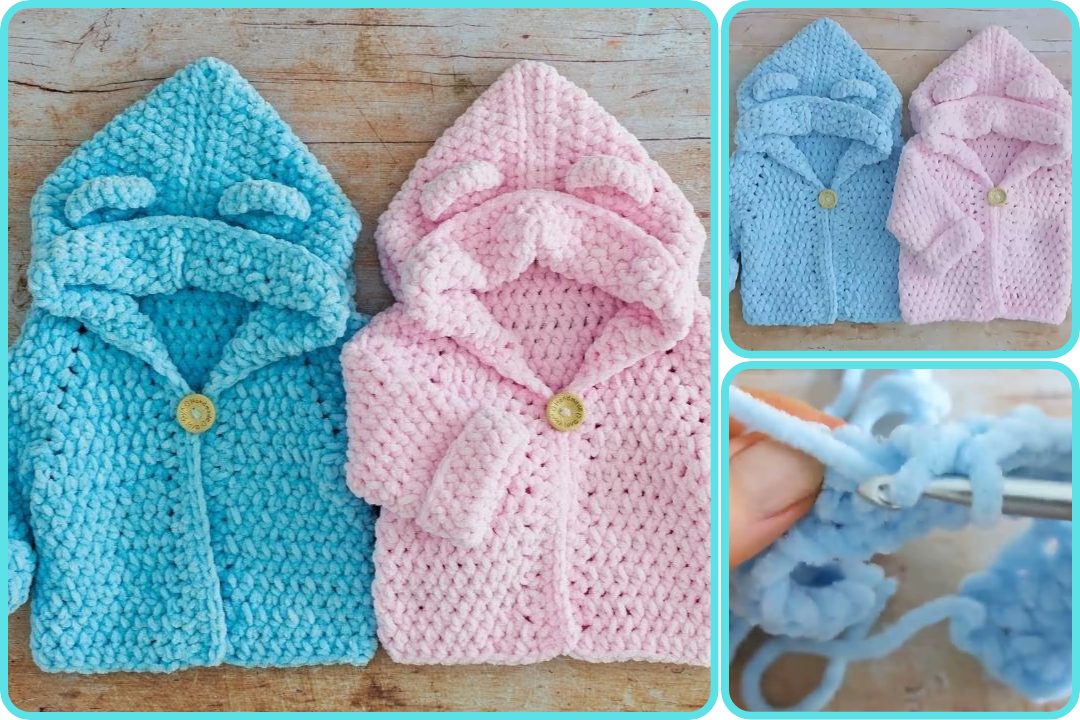
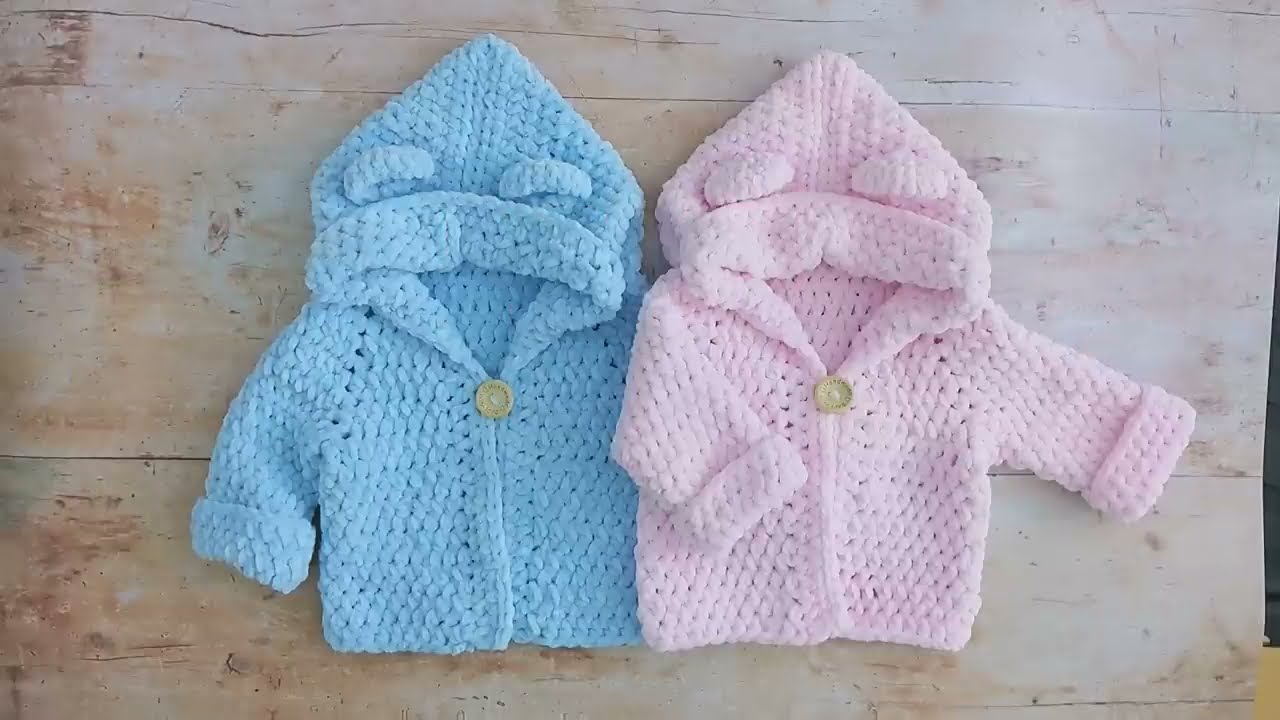
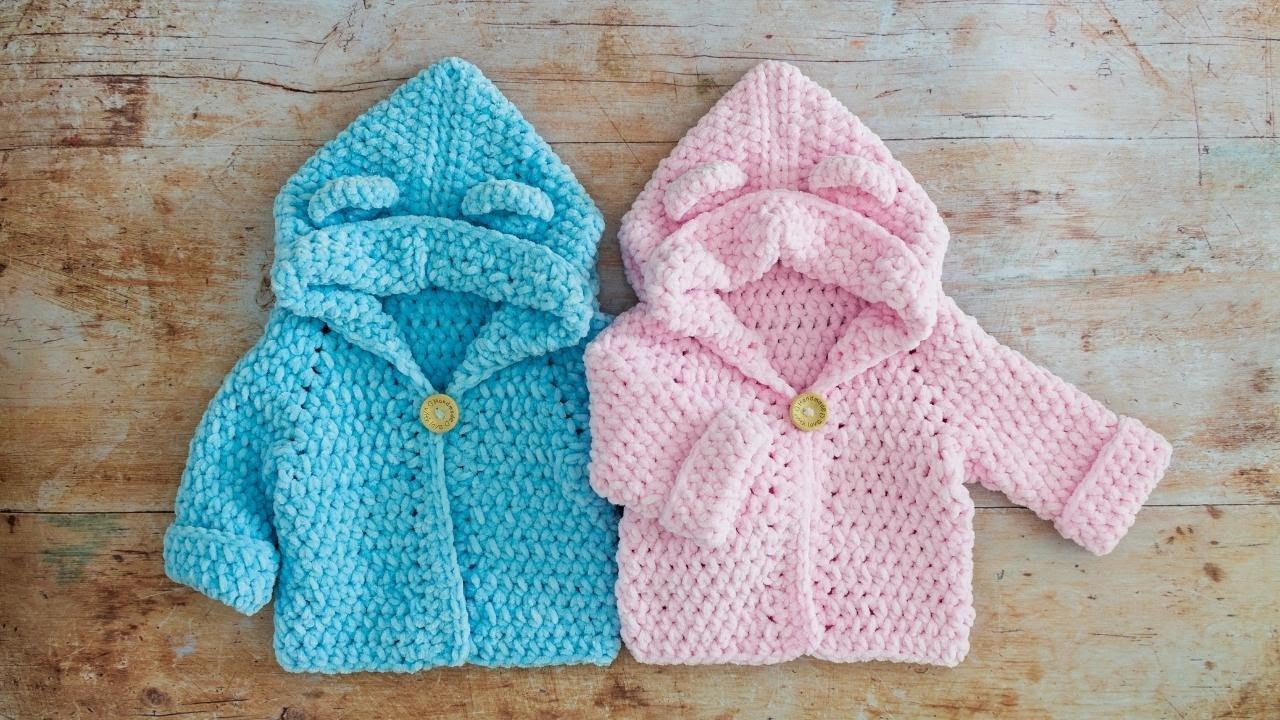
by Sure! Here’s a detailed guide on How to Make a Crochet Baby Hoodie, including materials, instructions, and tips for success. This tutorial is suitable for an advanced beginner to intermediate crocheter.
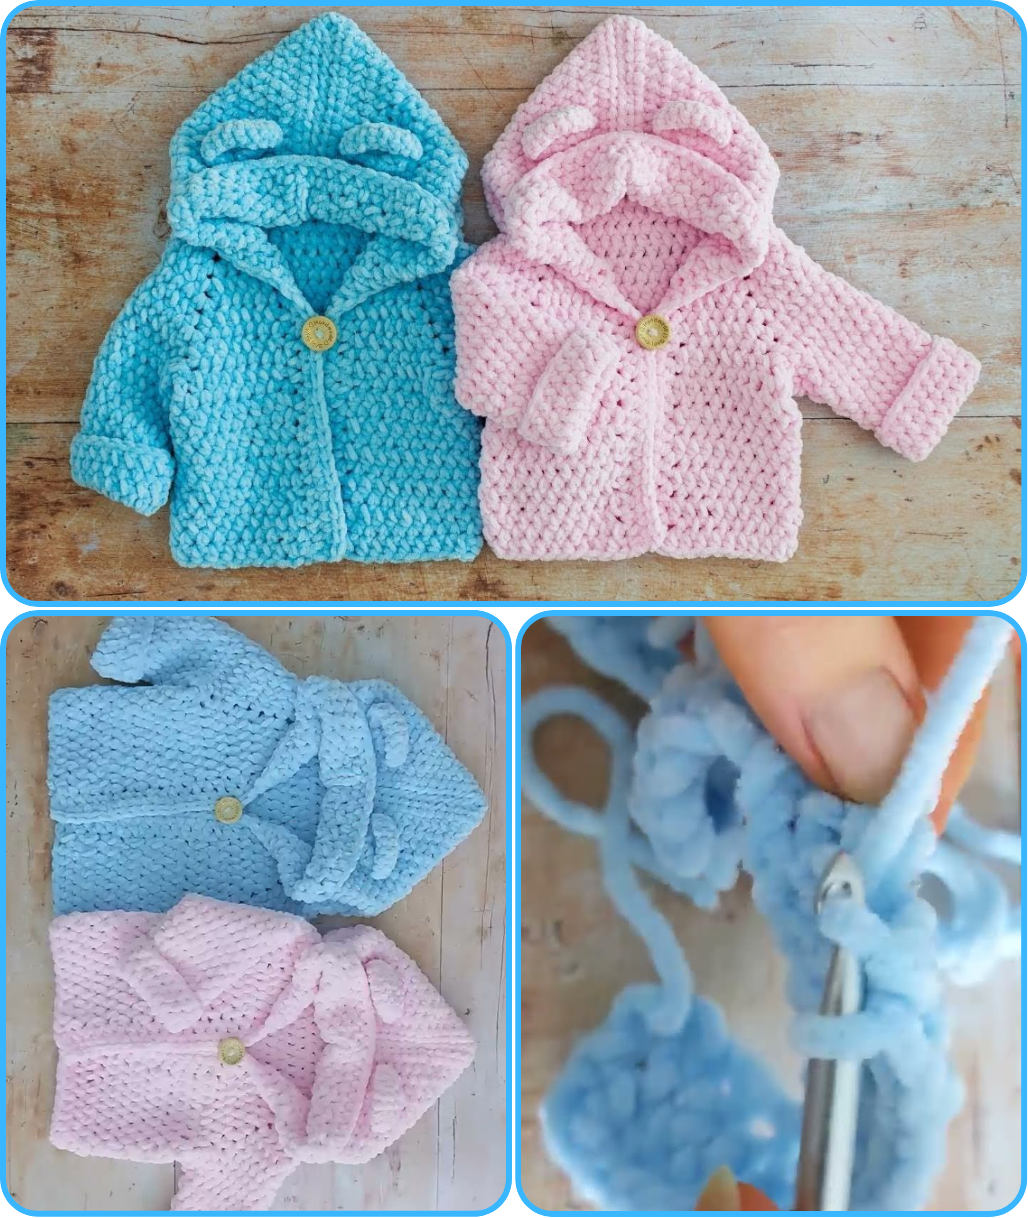
🧶 How to Make a Crochet Baby Hoodie
🧵 Materials Needed:
-
Yarn: Soft, baby-friendly yarn (e.g., worsted weight or DK cotton/acrylic blend)
-
Approx. 400–600 yards depending on size
-
-
Crochet hook: Size H/8 (5.0mm) or size recommended by your yarn
-
Tapestry needle
-
Scissors
-
Stitch markers
-
Buttons (optional): 3-5 for front closure
📏 Sizing:
This tutorial is based on an average 6-12 months baby size. Adjustments for other sizes are noted.
Chest Circumference: ~18–20 inches
Length from shoulder to hem: ~12 inches
Sleeve Length: ~7–8 inches
🧶 Stitches & Abbreviations:
-
ch – chain
-
sl st – slip stitch
-
sc – single crochet
-
hdc – half double crochet
-
dc – double crochet
-
inc – increase (2 sts in same stitch)
-
dec – decrease (combine 2 sts into 1)
📘 Pattern Overview:
The hoodie is constructed in these steps:
-
Yoke (worked top-down in rows)
-
Body
-
Sleeves
-
Hood
-
Edging and buttons (optional)
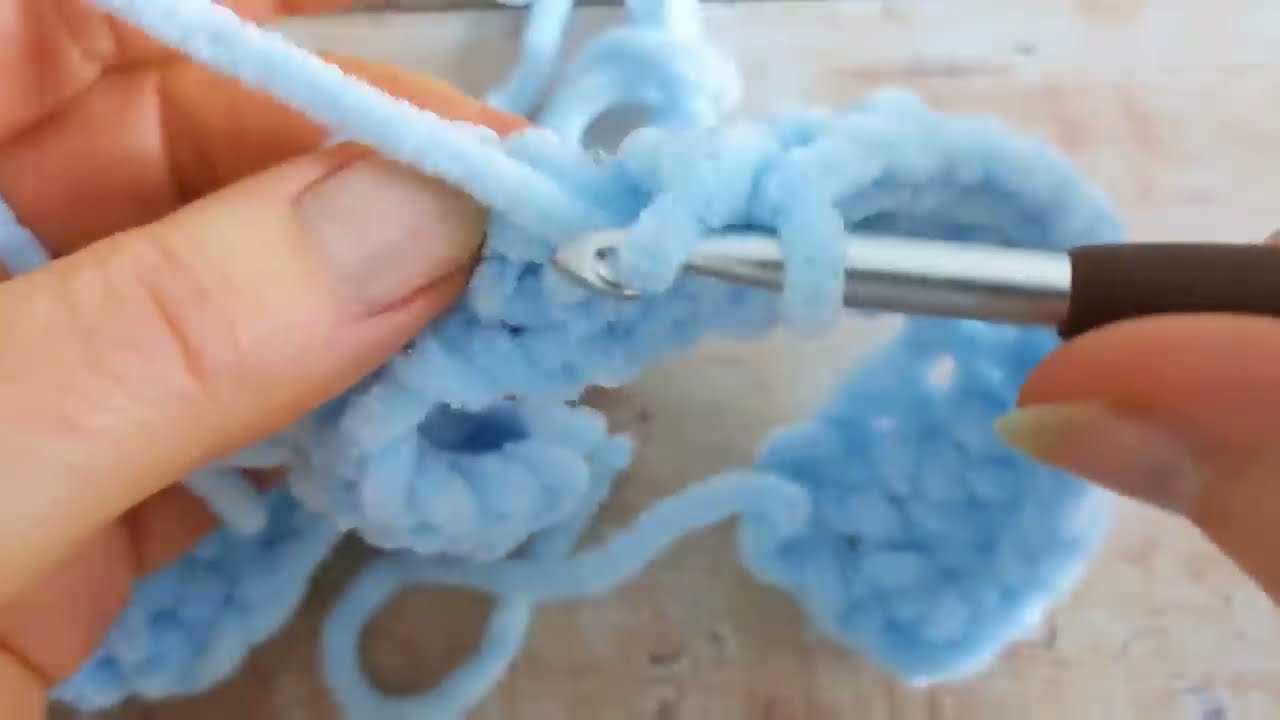
🧵 Step-by-Step Instructions:
1. Yoke (Top Down)
-
Ch 60 (or adjust in multiples of 10 for size)
-
Row 1: Dc in 4th ch from hook and in each ch across. (57 dc)
-
Divide for yoke shaping:
-
Place markers to divide into 4 sections: 10 front | 9 sleeve | 19 back | 9 sleeve | 10 front
-
-
Rows 2–8:
-
Ch 2, turn, dc across, increasing by placing (dc, ch 1, dc) in each marked stitch.
-
Move stitch markers up to the ch-1 spaces.
✅ After Row 8, you should have ~100+ stitches (more rows = bigger hoodie).
-
2. Divide for Body & Sleeves
-
Skip sleeve sections and join front and back with a chain under the arm.
-
Example:
-
Dc across front panel, ch 6 (underarm), skip sleeve section, dc across back, ch 6, skip sleeve, dc across last front panel.
-
-
Continue working in dc rows for the body for 8–10 more rows or until desired length.
3. Sleeves (Worked in the Round)
-
Attach yarn to underarm and dc around sleeve opening.
-
Work in continuous or joined rounds.
-
Optional: decrease 2 sts every 2–3 rounds to taper sleeve.
-
Total sleeve length: ~7–8 inches
-
Fasten off, weave in ends.
4. Hood
-
Reattach yarn at neckline.
-
Work in rows across back neckline (pick up 40–50 dc across).
-
Row 1–14: Ch 2, turn, dc across.
-
Fold hood in half and seam across top using whip stitch or sc.
5. Edging and Finishing
-
Sc evenly around front edges and hood for clean border.
-
Optionally, add 3–5 buttons and make chain loops or buttonholes.
-
Weave in all ends securely.
🧸 Tips for Success:
-
Use stitch markers generously—especially at the corners of the yoke.
-
Always check gauge if following specific measurements.
-
Try using a hood lining (soft cotton fabric) for extra warmth.
-
Choose hypoallergenic yarn if baby has sensitive skin.
🧶 Optional Embellishments:
-
Crochet ears on the hood for a bear or bunny look
-
Stripes or color blocks
-
Pockets on the front
-
Embroidered initials or motifs
Watch video: