 by
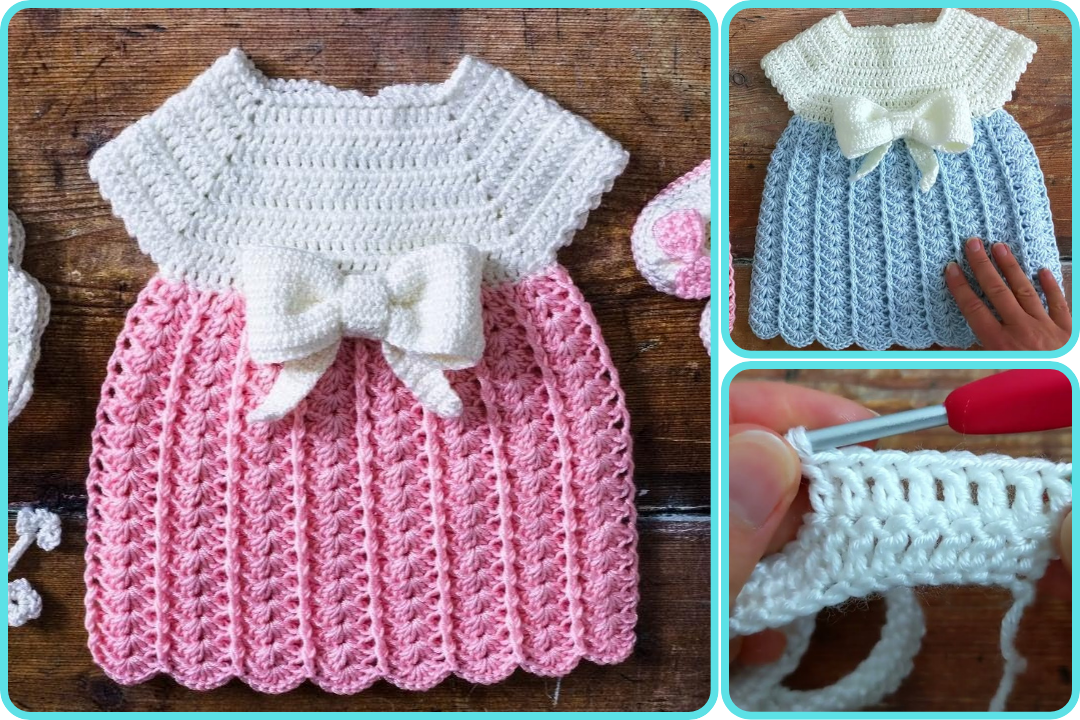
by Sure! Here’s a detailed step-by-step guide on how to make an easy crochet baby dress – perfect for beginners and sure to make any baby look adorable 😍. I’ll include materials, stitches, and instructions. Let’s go! 🧶👶💕
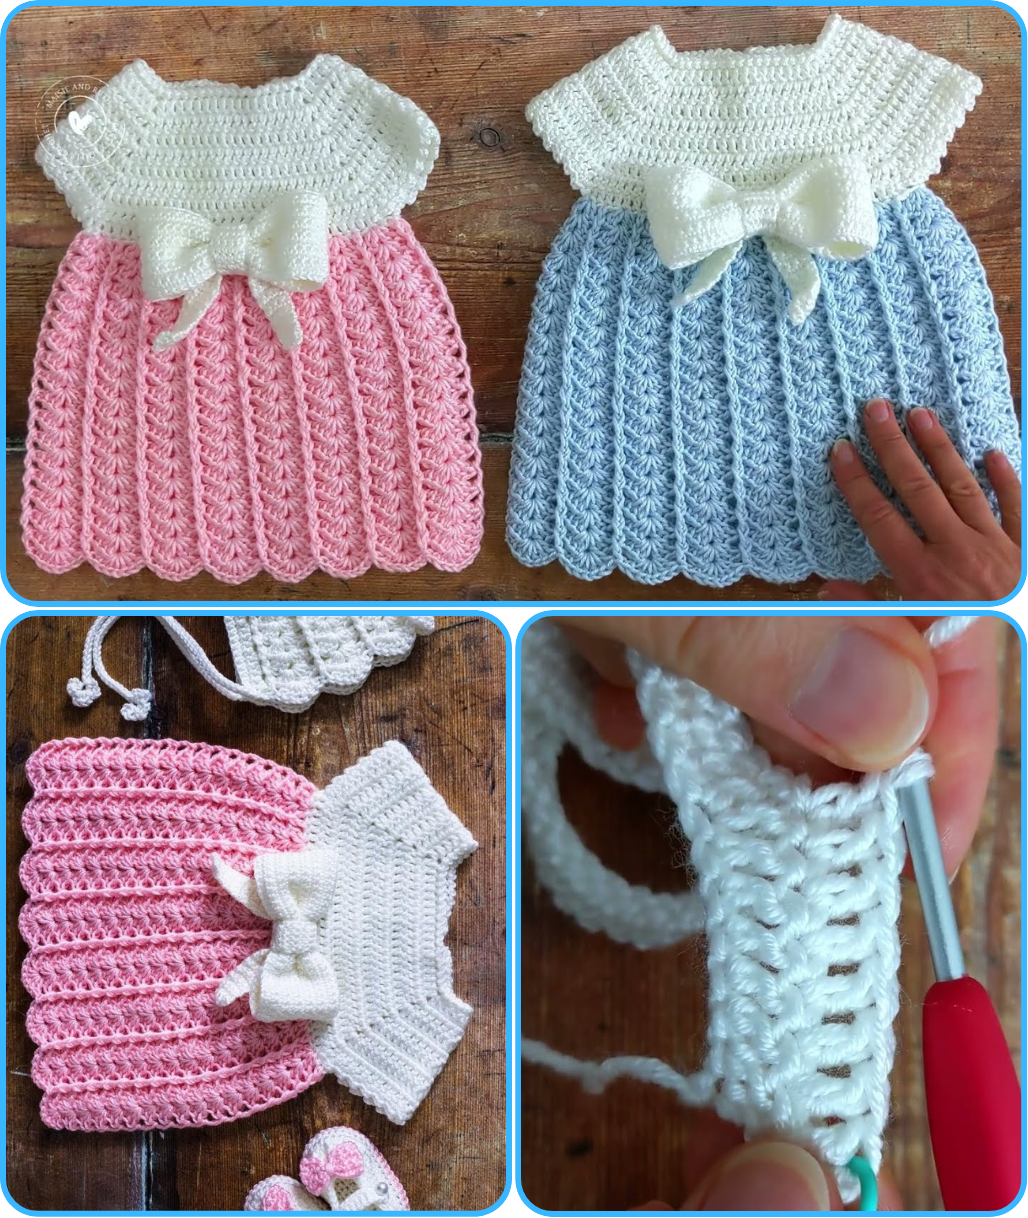
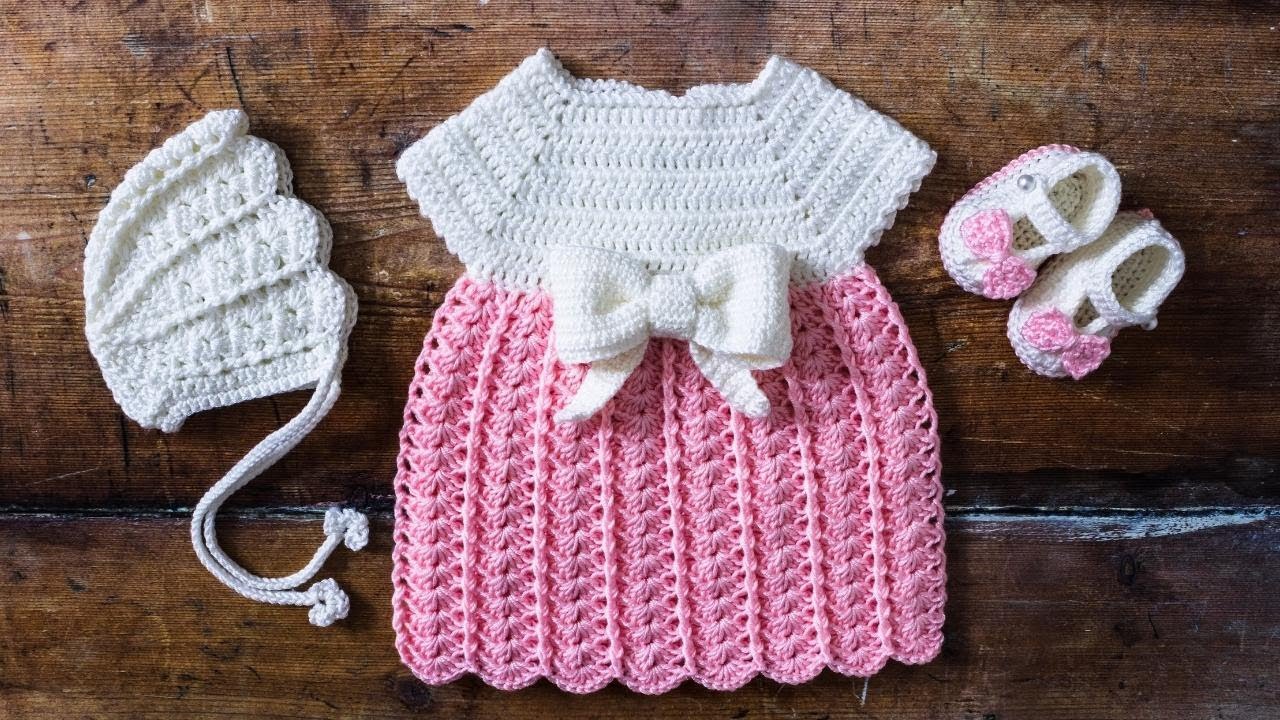
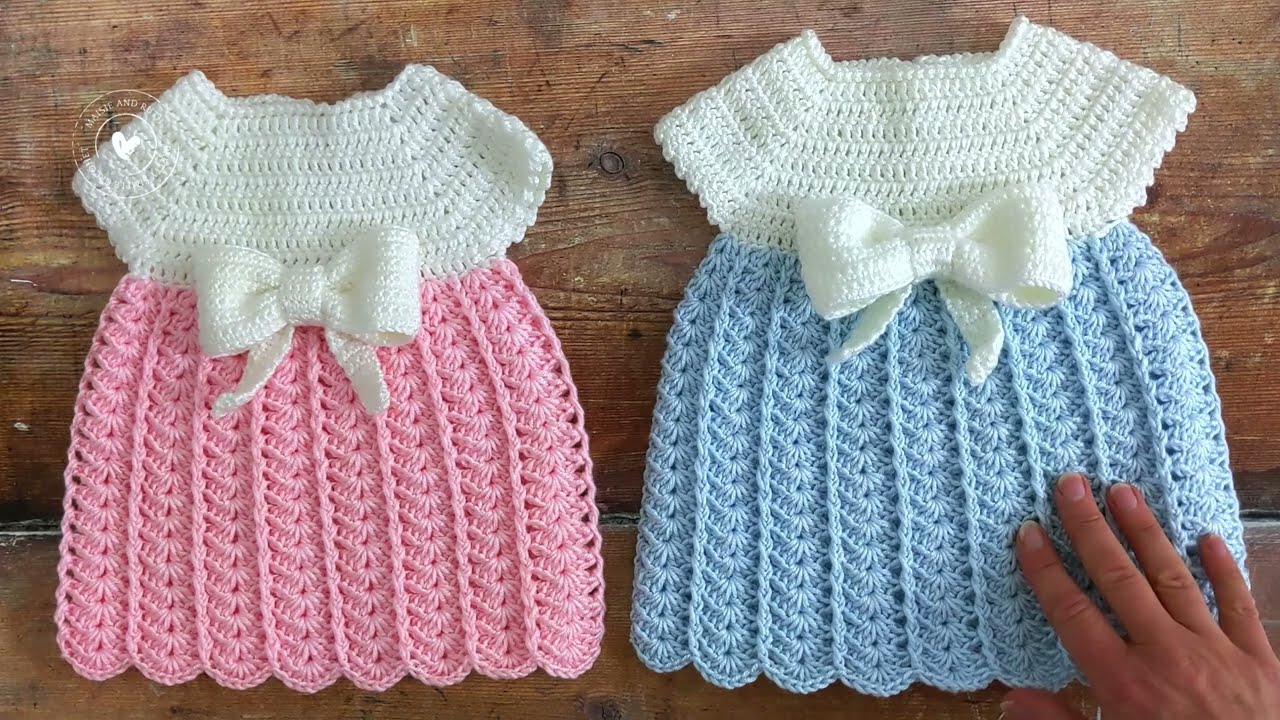
🧶 How to Make an Easy Crochet Baby Dress 😍 (For Beginners)
📏 Size:
This tutorial is for a 0–3 month old baby. You can adjust the size by changing hook size or increasing stitch count.
✨ Materials Needed:
-
Yarn: Soft, baby-friendly yarn (e.g., DK or Light worsted weight / Category 3)
-
Approx. 150–200g
-
-
Hook: 4.0 mm (G) crochet hook
-
Tapestry needle (for weaving ends)
-
Scissors
-
Buttons (optional, for closure on the back)
-
Stitch markers (optional but helpful)
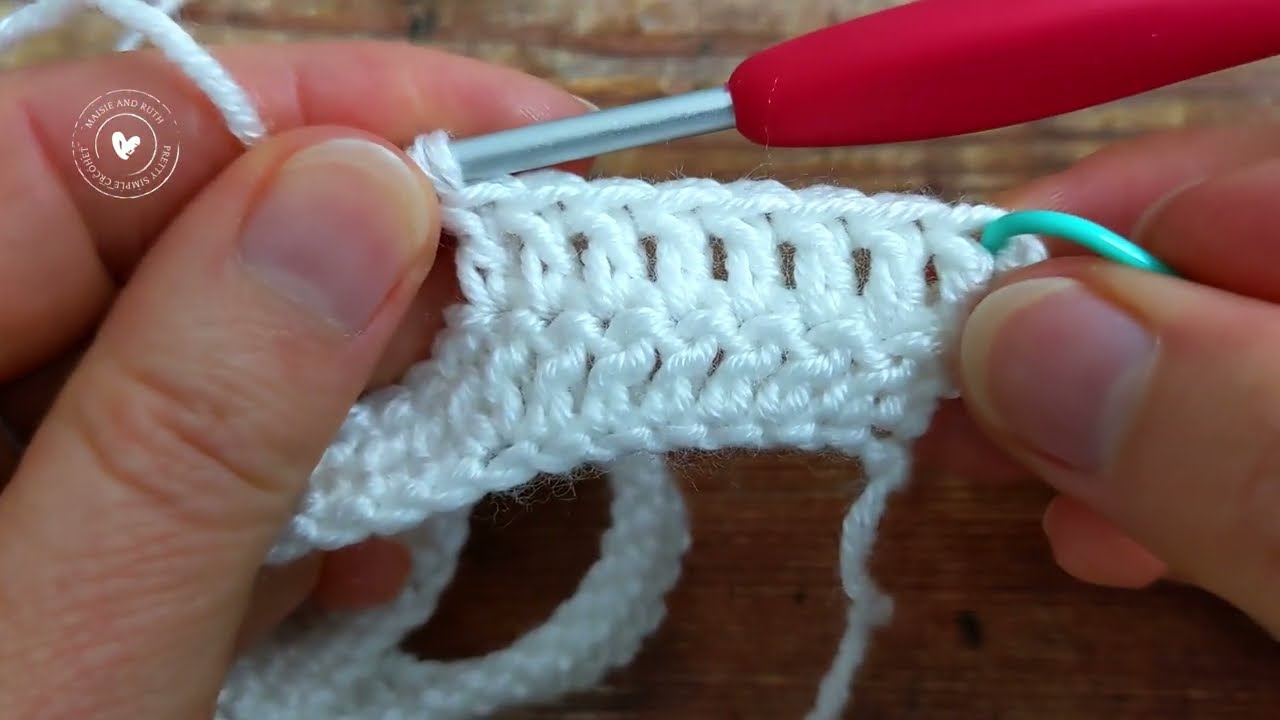
🧵 Basic Stitches Used (US Terminology):
-
CH – Chain
-
SC – Single Crochet
-
DC – Double Crochet
-
SL ST – Slip Stitch
-
INC – Increase (2 DC in one stitch)
If you need visuals, let me know—I can guide you to pictures or videos!
🪡 Construction Overview:
-
Start with a yoke (neckline) in rounds
-
Create armholes
-
Work down for the skirt
-
Finish with edging & optional embellishments
🧷 Instructions
👕 1. Yoke (Top Part)
-
Foundation Chain: CH 60. (Adjust in multiples of 10 if you want to resize.)
-
Round 1: DC in 4th CH from hook and in each CH across (you should have 58 DC).
-
Round 2: DC in next 8 ST, INC (2 DC in one stitch) — repeat to end. You’ll get a wider neckline.
-
Round 3–6: Continue increasing every 8–10 stitches to widen for the chest.
-
Place stitch markers at 4 corners to divide front, back, and sleeves.
-
💪 2. Armhole Separation
-
Round 7:
-
DC up to the first stitch marker (this is the front),
-
CH ~6–8 to form underarm,
-
Skip stitches for the sleeve,
-
DC across back,
-
CH ~6–8 again,
-
Skip next sleeve,
-
Finish with DC to end of round.
-
-
You now have a circular bodice!
👗 3. Skirt (Bottom Part)
-
From here, work in continuous rounds or rows depending on design preference.
-
Round 8–20 (or desired length):
-
DC in each stitch around.
-
Optional: Do a Shell Pattern or V-Stitch for texture.
-
To make the skirt flare out: increase 1 DC every 10–12 stitches.
-
🎀 4. Edging & Finish
-
Add SC or shell edging at the bottom hem.
-
Optional: Add edging to neckline and sleeves for neatness.
-
Add 1–2 buttons at the back top for closure if needed.
-
Weave in all ends neatly with the tapestry needle.
💡 Tips for Success:
-
Always count your stitches to ensure symmetry.
-
Use soft yarn safe for sensitive baby skin.
-
Test the dress for size using a store-bought baby shirt for comparison.
🎨 Optional Embellishments:
-
Crochet flowers or bows 🎀
-
Contrast-colored stripes
-
Ribbon woven into waist
-
Add a little tulle under the skirt for flair (sew in gently)
Watch video: