 by
by Here’s a detailed, beginner-friendly guide on making simple knitted slippers or socks with braids (cable patterns)—cozy, stylish, and fun to knit!
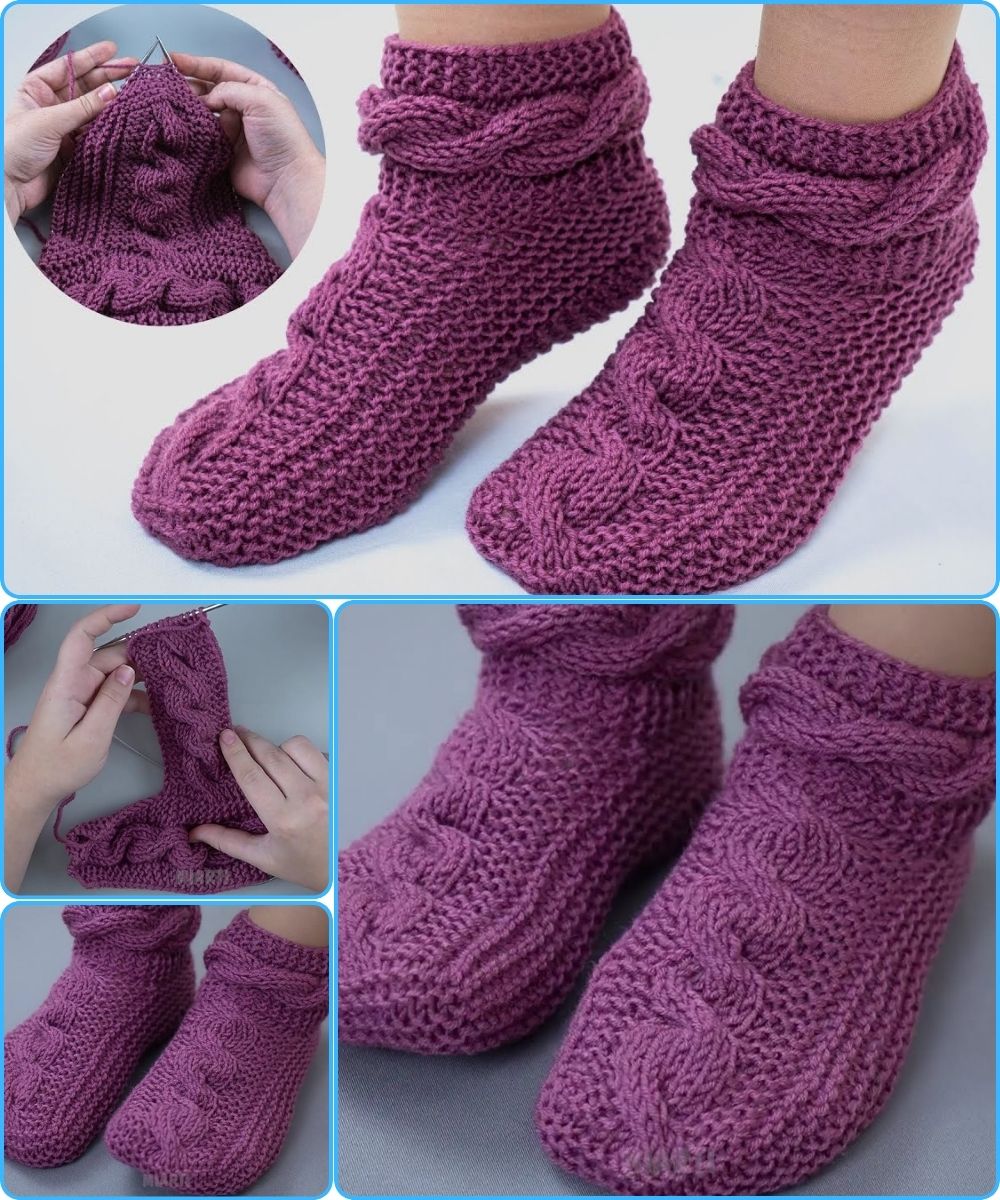
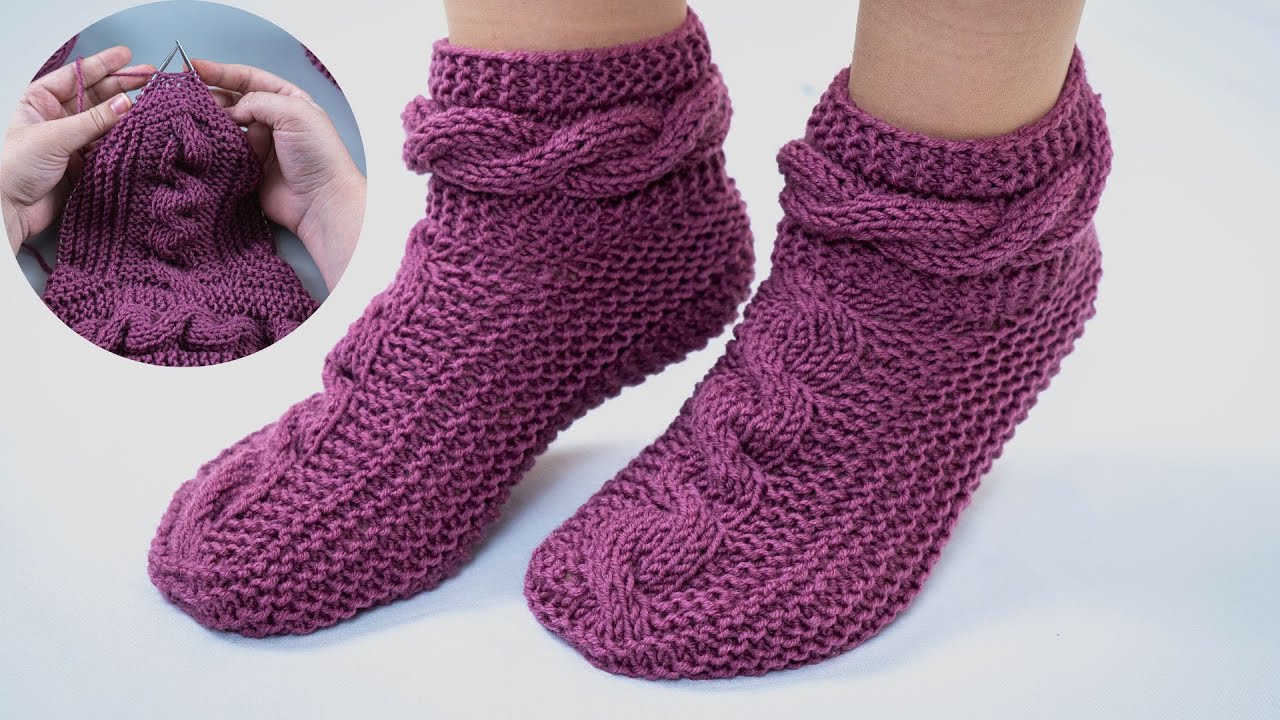
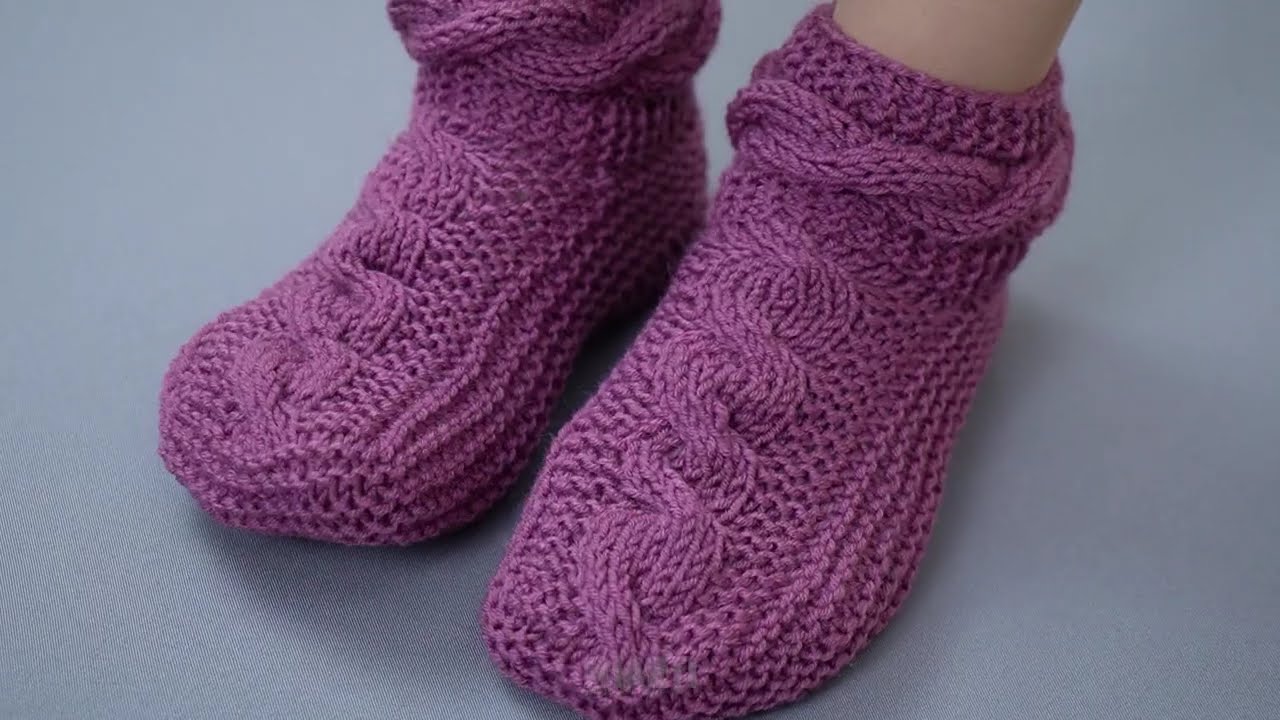
How to Make Simple and Easy Knitted Slippers/Socks with Braids – A Detailed Tutorial
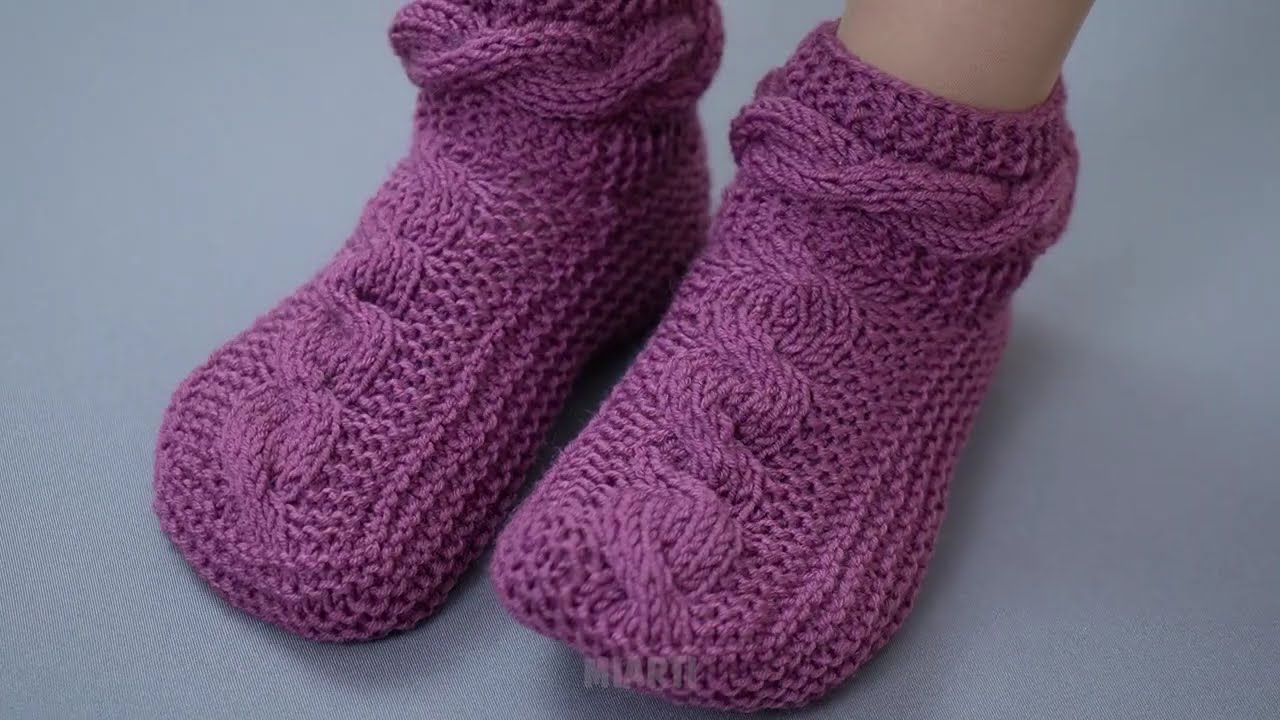
Knitted slippers or socks with a braided (cable) design combine comfort and style. Even if you’re a beginner, you can create a beautiful pair by using basic cables—these are easy to follow and make your slippers look more professional.
This tutorial focuses on simple construction, minimal sewing, and comfortable fit.
Why Braided Slippers/Socks Are Perfect 🧶
-
✔ Stylish: braided cable adds texture
-
✔ Comfortable: soft and warm
-
✔ Fun and satisfying to knit
-
✔ Minimal sewing required
-
✔ Perfect for gifts or home wear
Materials You’ll Need
-
Yarn: Medium/worsted weight or bulky yarn for warmth
-
Knitting needles: Straight or circular, 5–6 mm (US 8–10)
-
Cable needle (optional; can use double-pointed needle or stitch holder)
-
Tapestry needle for finishing
-
Scissors
Knitting Skills Required
-
Cast on
-
Knit stitch (k)
-
Purl stitch (p)
-
Basic cable (C4F or C4B for a 4-stitch braid)
-
Knit two together (k2tog)
-
Increasing stitches (kfb)
-
Binding off
-
Simple sewing for toe or heel
Even beginners can handle this with patience, as cables are just crossed knit stitches.
Step-by-Step Instructions
Step 1: Cast On
-
Cast on 32–36 stitches (adjust for foot size).
-
Small: 32 stitches
-
Medium: 34 stitches
-
Large: 36 stitches
-
-
Optional: Place a stitch marker in the middle to mark the center of the cable.
Step 2: Knit the Toe/Foot Base
-
Work 1–2 cm in garter stitch (knit every row) for a soft, cushioned sole.
-
Then switch to stockinette stitch (k on right side, p on wrong side).
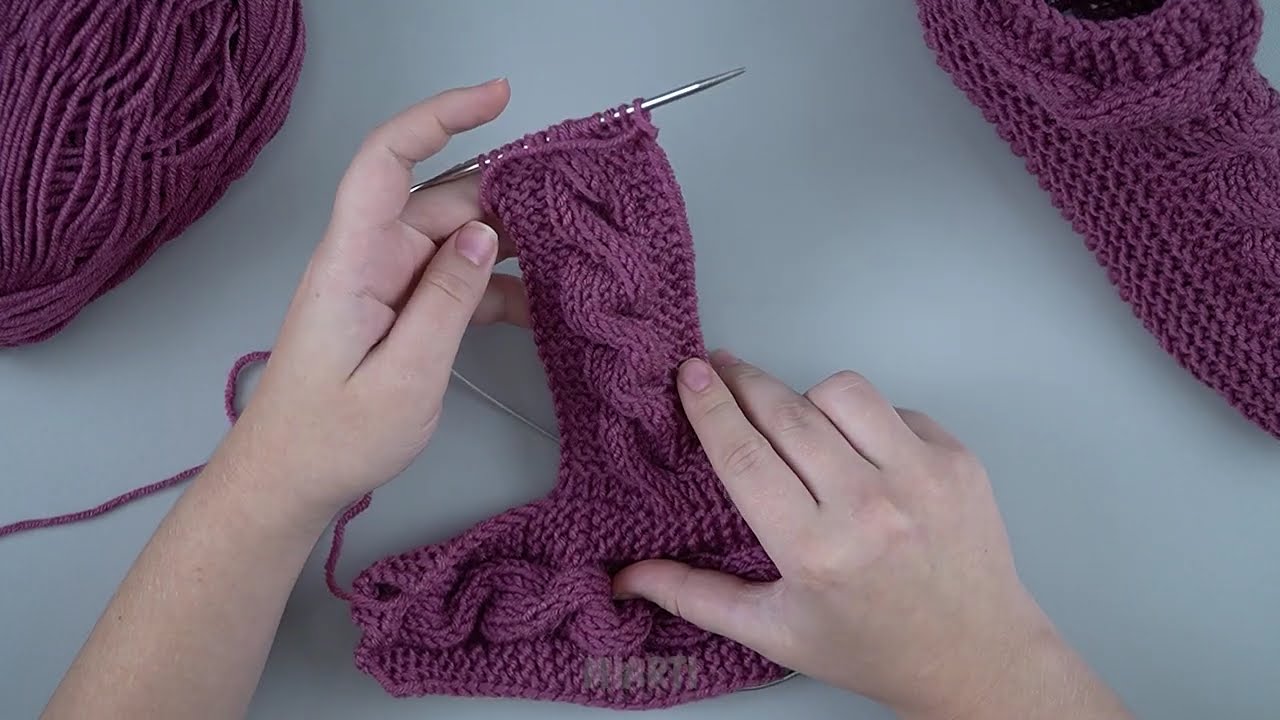
Step 3: Add the Cable/Braid
-
Decide where the cable will go (usually center of the foot).
-
Work a simple 4-stitch cable (C4F or C4B) every 4–6 rows:
-
C4F: Slip 2 stitches to cable needle and hold in front, knit next 2 stitches, then knit 2 from cable needle
-
C4B: Slip 2 stitches to cable needle and hold in back, knit next 2 stitches, then knit 2 from cable needle
-
-
Continue cabling every few rows while knitting the rest of the foot in stockinette stitch.
Tip: Use purl stitches on either side of the cable to make it stand out.
Step 4: Shape the Heel
-
Divide the stitches in half for short-row shaping.
-
Knit back and forth to create a small heel flap.
-
Pick up stitches along the sides and continue knitting in stockinette stitch for the instep.
The cable continues along the top of the foot for a stylish look.
Step 5: Knit the Cuff
-
Work in ribbing (k1, p1 or k2, p2) for 2–5 cm, depending on how snug you want the cuff.
-
Bind off loosely.
Step 6: Finish the Slippers
-
Seam the heel if needed using mattress stitch.
-
Weave in all ends neatly.
Optional Finishing Touches ✨
-
Use contrasting yarn for the cable to make it pop
-
Add a small pom-pom or bow on the cuff
-
Make stripes or textured stitches along the sole for extra interest
Tips for Sizing
-
Longer foot: Knit more rows before shaping the heel
-
Wider foot: Cast on extra stitches
-
Thicker slippers: Use bulky yarn or double strands
This simple cable design works for children, women, and men with minimal adjustments.
Final Thoughts
These simple knitted slippers or socks with braids are cozy, stylish, and beginner-friendly. The cable braid adds a touch of elegance, while the flat, seamless construction ensures comfort.
They’re perfect for home use, gifts, or weekend knitting projects. Even if it’s your first time making cables, this project is easy to follow and satisfying.
If you want, I can also create a full stitch-by-stitch beginner-friendly pattern with exact row counts, cable instructions, and sizes for women, men, and kids so you can knit your braided slippers perfectly.
Watch video: