 by
by Here is a detailed, clear, and beginner-friendly guide you can use for a blog post, pattern description, or tutorial.
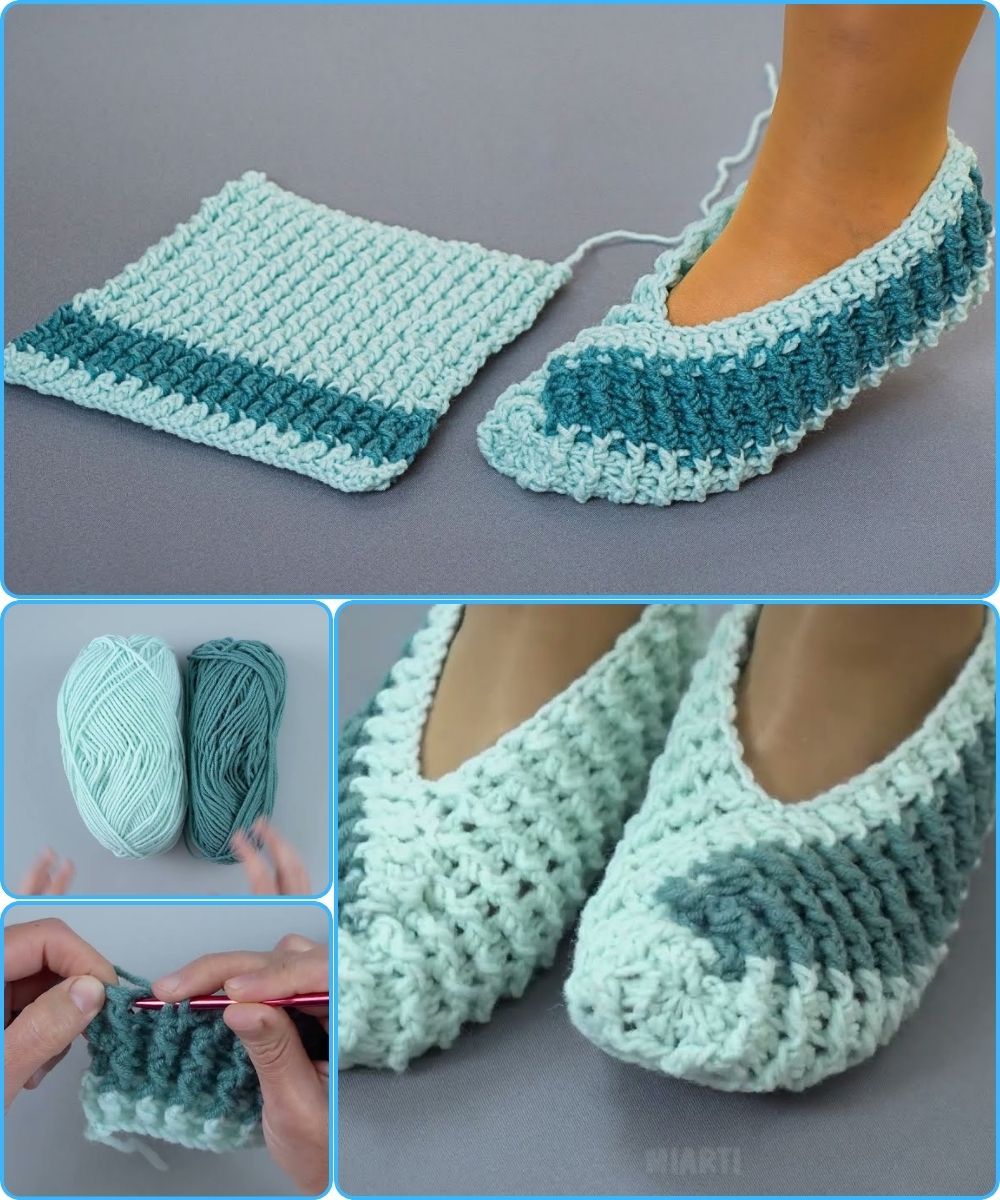
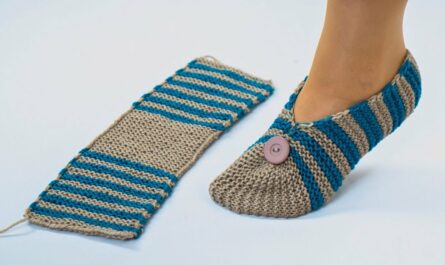
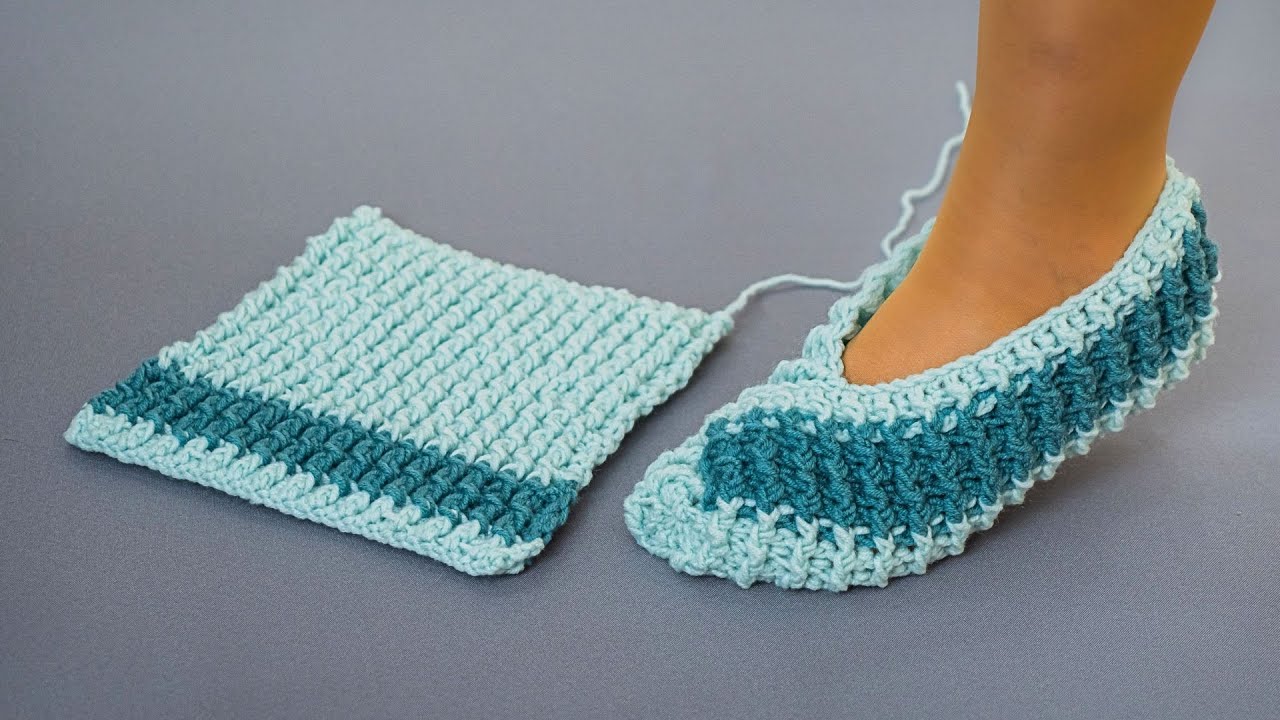
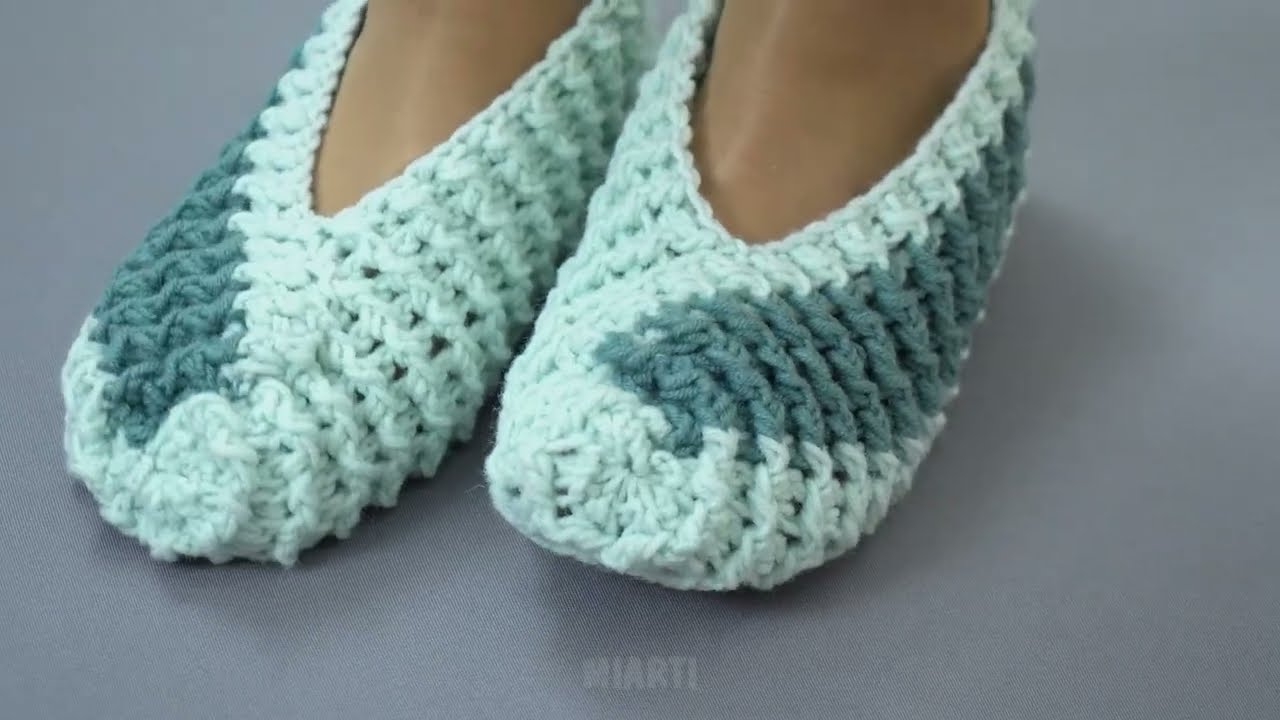
How to Make a Very Easy Crochet Slipper from a Rectangle
If you’re looking for a super easy crochet slipper pattern, this rectangle slipper is perfect! It’s one of the simplest slipper designs you can make—no shaping, no complicated stitches, and no counting rows carefully. You simply crochet a rectangle, fold it, and seam it into a cozy slipper.
This pattern is ideal for beginners, last-minute gifts, or anyone who wants fast and satisfying crochet projects.
Why This Rectangle Slipper Is So Popular 🧶
-
✔ Only basic crochet stitches
-
✔ Made from a single rectangle
-
✔ Very quick to finish
-
✔ Easy to resize for any foot
-
✔ Perfect for leftover yarn
Despite its simplicity, the finished slipper looks neat, stylish, and comfortable.
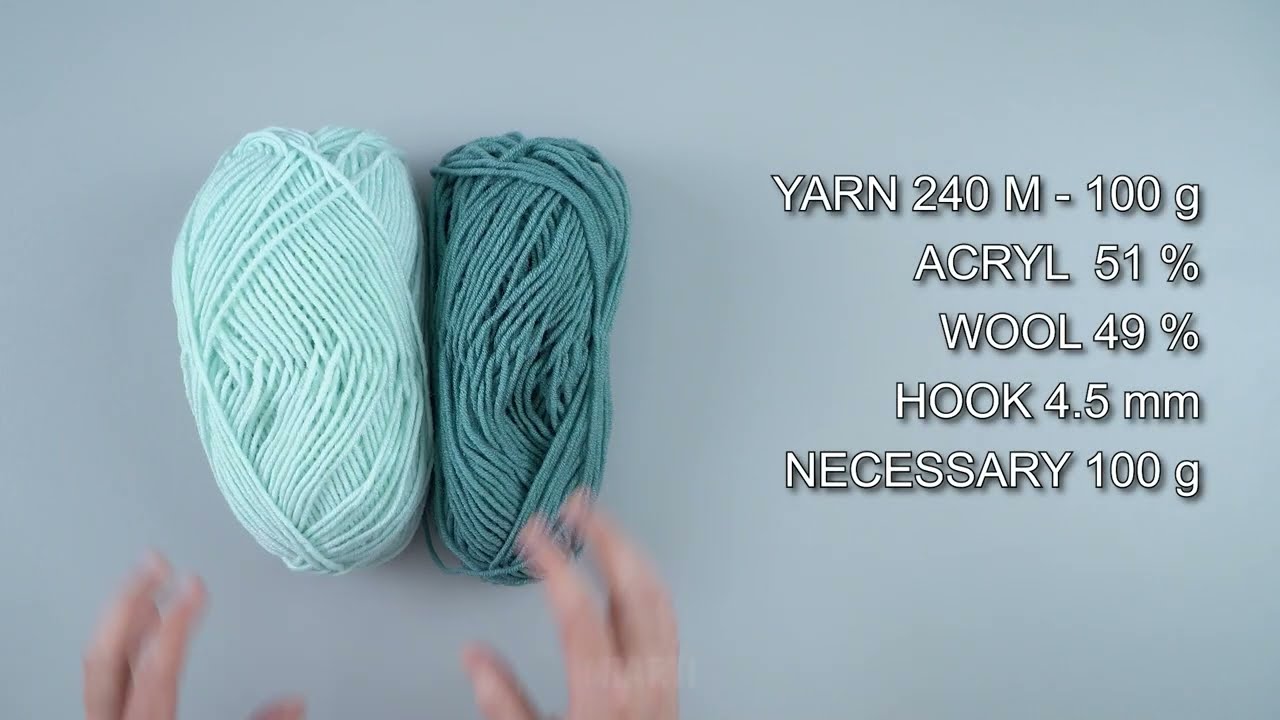
Materials You’ll Need
-
Yarn: Medium (worsted) or bulky yarn
(Wool or acrylic blends work well) -
Crochet hook: 5 mm (H/8) or size recommended for your yarn
-
Yarn needle (for sewing)
-
Scissors
-
Optional: Non-slip fabric paint or rubber sole
Crochet Skills Required
-
Chain (ch)
-
Single crochet (sc) or Half double crochet (hdc)
-
Slip stitch (sl st)
-
Fastening off
This project is great for absolute beginners.
Step-by-Step Instructions
Step 1: Crochet the Rectangle
Chain enough stitches to match the length of your foot.
Approximate sizes:
-
Small: 22 cm (8.5 inches)
-
Medium: 24 cm (9.5 inches)
-
Large: 26 cm (10.5 inches)
Add 1 extra chain for turning.
Step 2: Work the Rows
-
Single crochet (or half double crochet) into each stitch across
-
Chain 1 and turn
-
Repeat until the rectangle reaches the width of your foot
(usually 8–10 cm / 3–4 inches)
Tip: Using half double crochet makes the slipper softer and warmer.
Step 3: Fold the Rectangle
Lay your rectangle flat:
-
Fold it lengthwise
-
The short edges will form the toe and heel
This simple fold is the secret to the slipper shape!
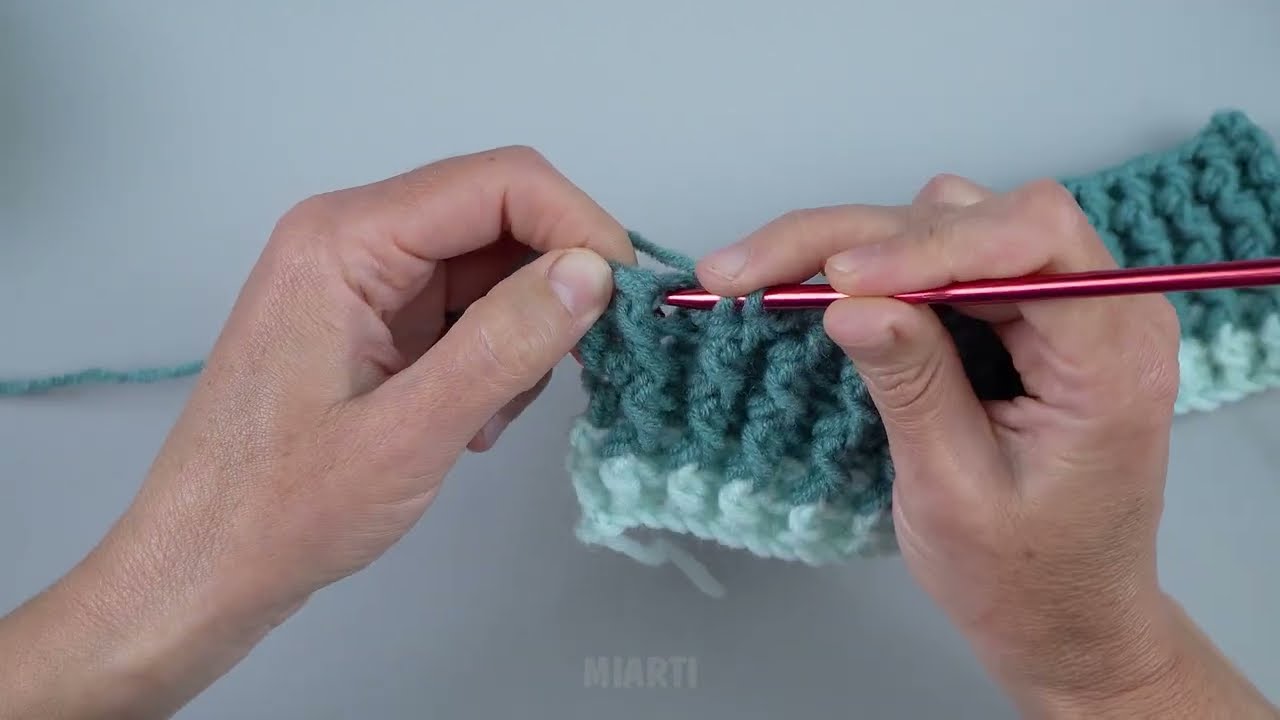
Step 4: Seam the Toe
-
Sew one short edge closed using a yarn needle
-
Gather slightly at the top to create a rounded toe
-
Secure tightly and fasten off
Step 5: Seam the Heel
-
On the opposite short edge, sew only halfway up
-
Leave an opening for the heel
-
Fasten off securely
Turn the slipper right-side out—you’ll see the slipper shape instantly!
Optional Finishing Touches ✨
-
Add a single crochet border around the opening
-
Attach a button, bow, or flower
-
Use a contrasting color for edging
-
Apply non-slip dots to the sole
Easy Sizing Adjustments
-
Longer foot: Start with a longer chain
-
Wider foot: Add more rows
-
Thicker slipper: Use bulky yarn and a larger hook
This rectangle method works for women, men, and children—just change the size.
Final Thoughts
This very easy crochet slipper from a rectangle proves that simple can be beautiful. With just one rectangle and a few seams, you can create cozy, stylish slippers in under an hour. It’s the perfect project for relaxing evenings, thoughtful handmade gifts, or even beginner crochet classes.
If you’d like, I can also:
-
Turn this into a printable pattern
-
Adapt it for children or baby slippers
-
Create a video tutorial script
-
Add decorative stitch variations
Watch video: