 by
by Absolutely! Let’s create a detailed, beginner-friendly guide for making cute bunny-themed knitted slippers. These are fun, cozy, and perfect for gifting or adding a playful touch to your home slippers.
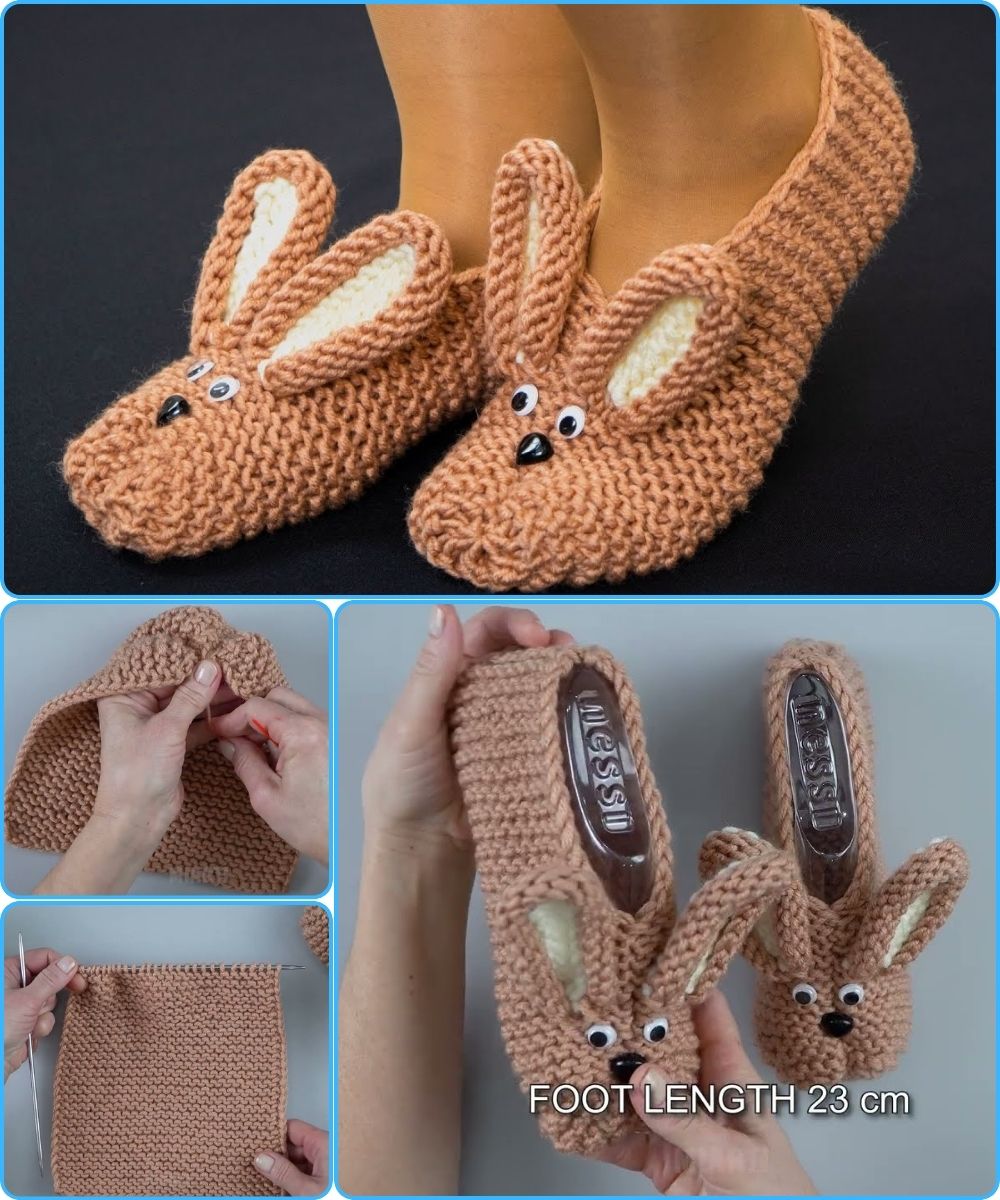
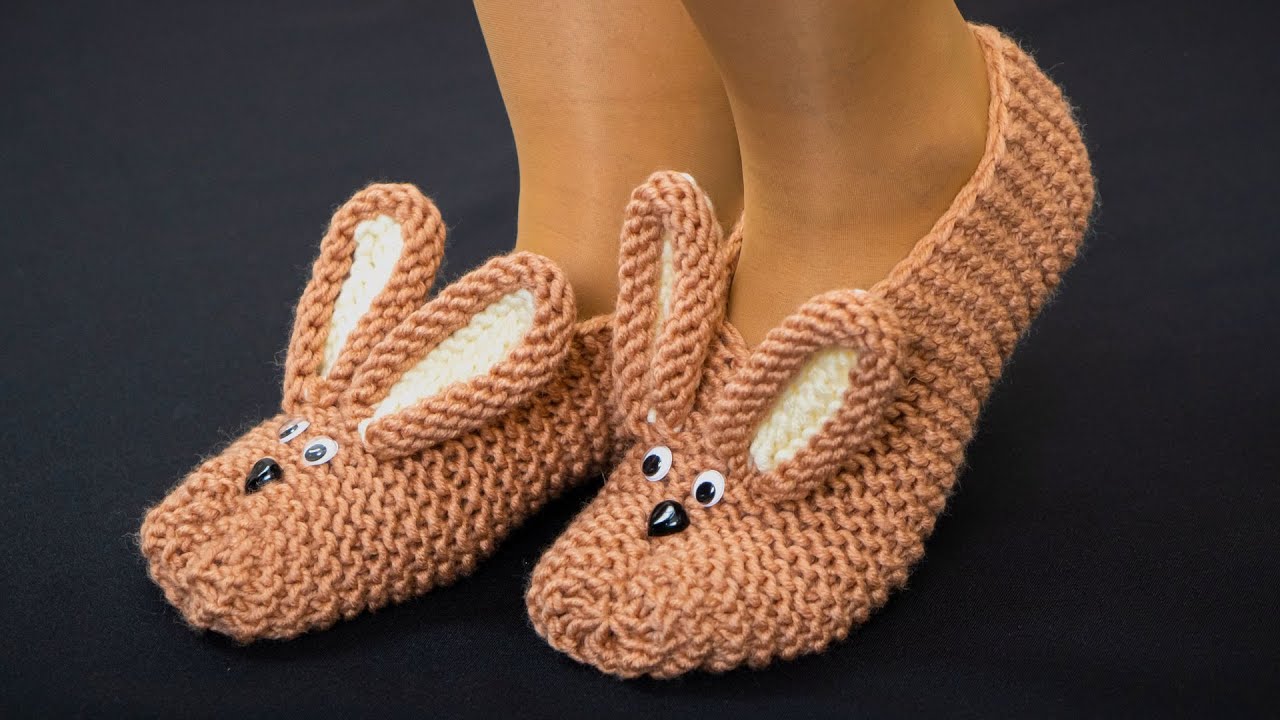
How to Make Cute Bunny Knitted Slippers – Easy and Simple
These slippers are worked flat on two needles and then seamed. The bunny details are added at the end, making them playful but easy for beginners.
Materials You’ll Need
-
Yarn: Medium weight (worsted) yarn in two colors:
-
Main color for slippers (e.g., white, gray, or pink)
-
Accent color for bunny details (e.g., pink for ears, nose)
-
-
Knitting needles: 4–5 mm (US 6–8), depending on your yarn.
-
Tapestry needle for sewing seams and attaching details.
-
Scissors
-
Optional: Small buttons or felt pieces for eyes
Basic Stitches You Should Know
-
Cast on (CO)
-
Knit stitch (K) – garter stitch will be used
-
Bind off (BO)
-
Basic sewing stitches for finishing (mattress stitch or whip stitch)
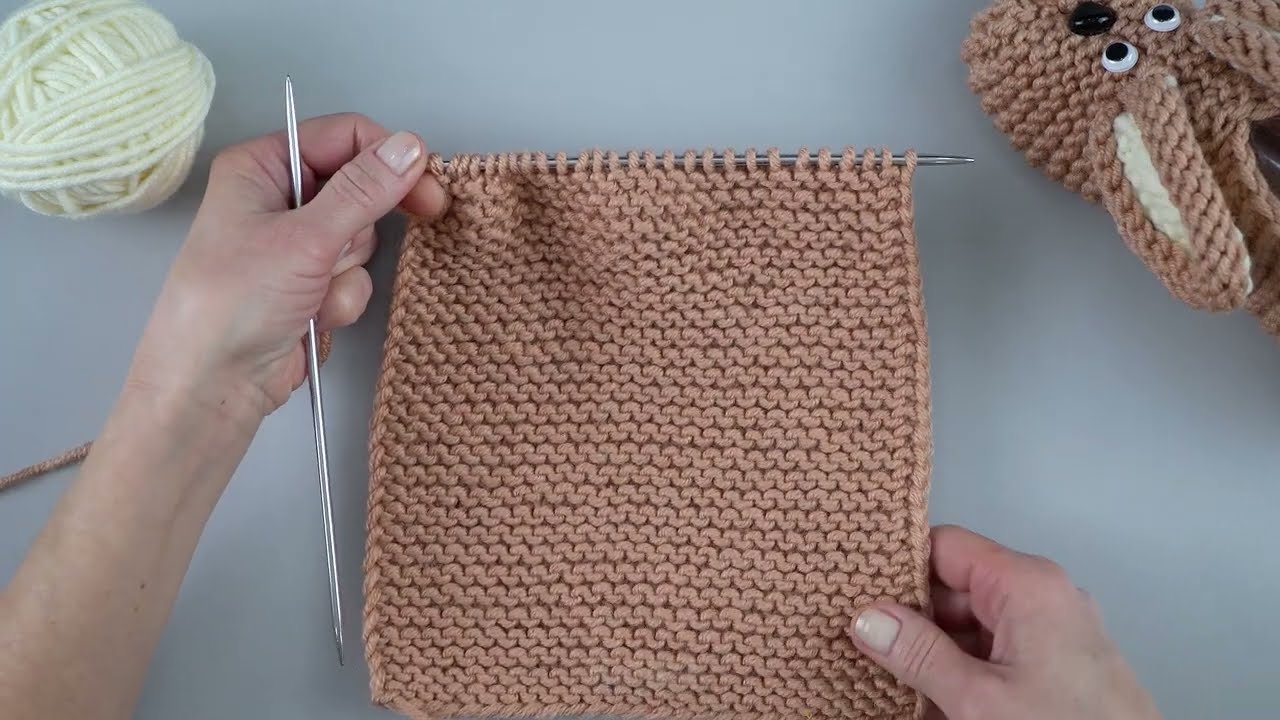
For simplicity, we’ll use garter stitch for the main slipper, which is stretchy and forgiving for beginners.
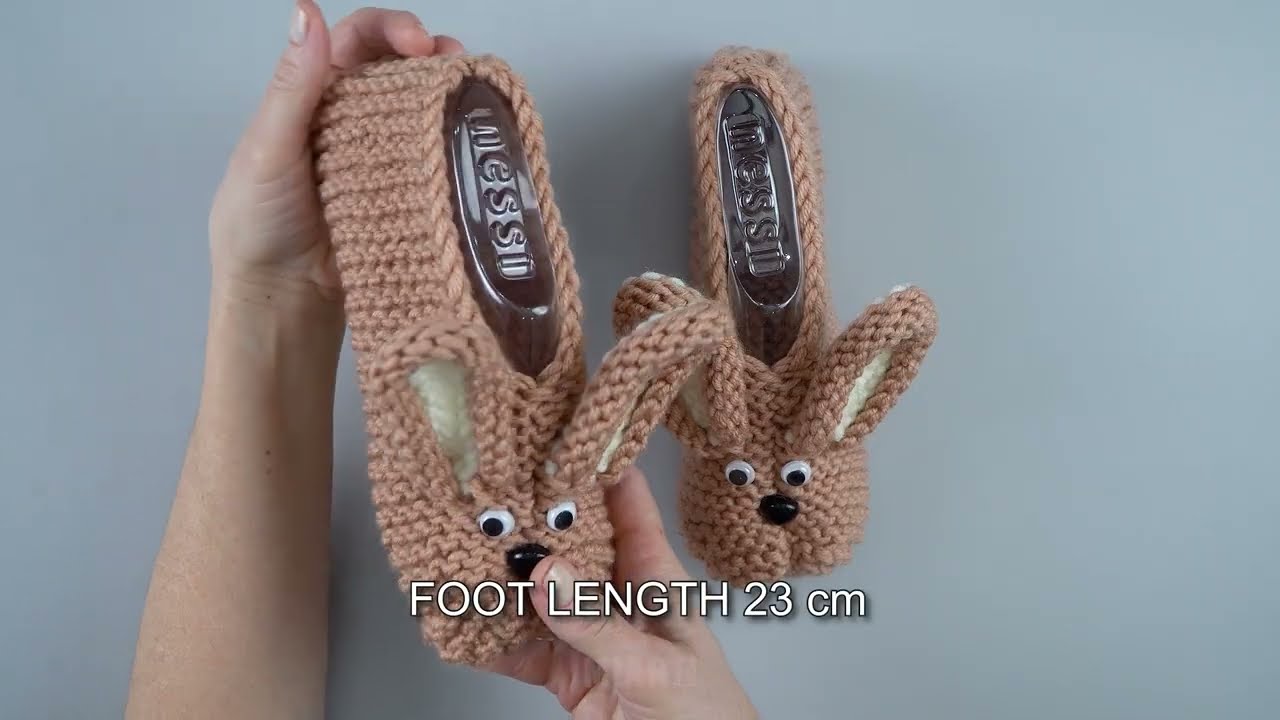
Step 1: Measure Your Foot
-
Foot length: Heel to tip of toes
-
Foot width: Around the widest part (ball of foot)
These measurements help you determine how many stitches to cast on and how long to knit the slipper.
Step 2: Cast On
-
Cast on enough stitches to fit the width of your foot comfortably.
-
Example for adult medium size: 30–35 stitches
Step 3: Knit the Sole
-
Work in garter stitch (knit every row).
-
Knit back and forth until your piece reaches the length of your foot sole, from heel to ball of foot.
Optional: Slightly taper the toes by decreasing 1 stitch at each end every few rows for a snug fit.
Step 4: Knit the Top of the Slipper
-
Knit a rectangle that will cover the top of the foot.
-
Keep it slightly narrower than the sole for a snug fit.
-
Continue knitting until it reaches just past the toes.
Tip: You can add ribbing (K1, P1) or a row of seed stitch for a more textured, stylish look.
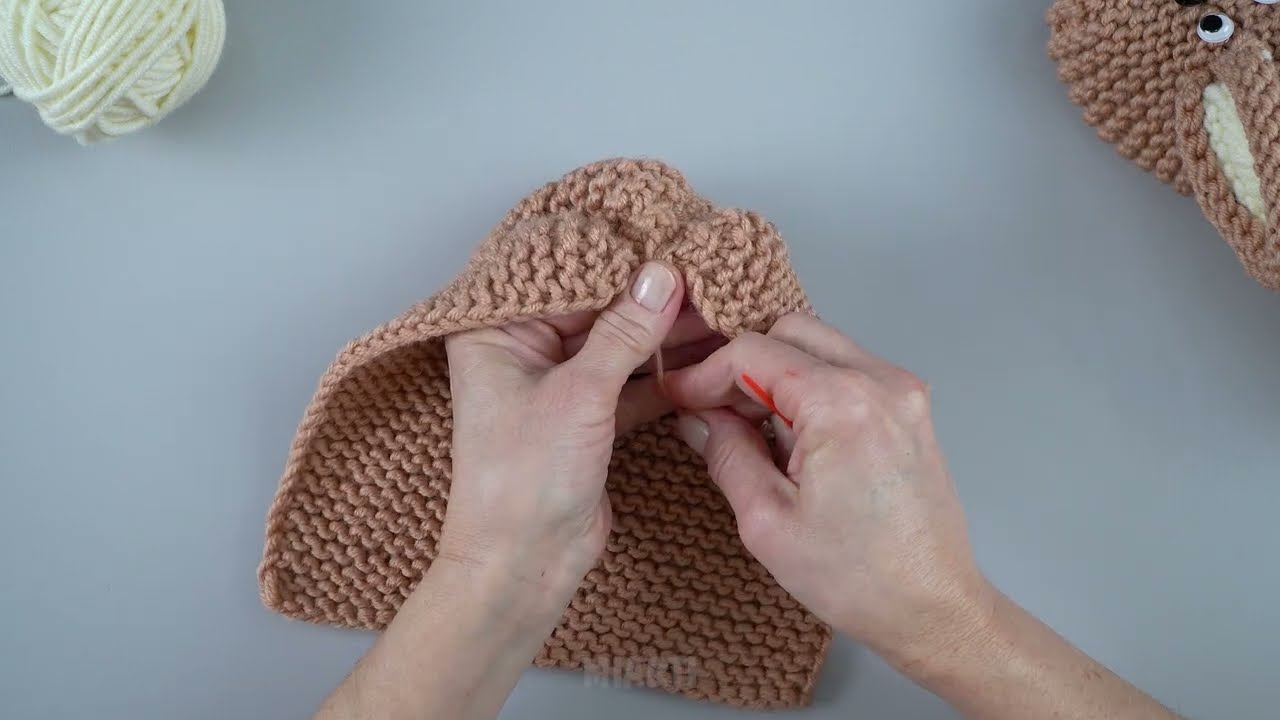
Step 5: Fold and Seam
-
Fold the slipper in half with the wrong side inside, aligning heel and toe.
-
Use a tapestry needle and yarn to seam the sides and heel with mattress stitch.
-
Leave the top open for your foot.
Step 6: Make the Bunny Details
Ears:
-
Cast on 6–8 stitches with contrast color.
-
Work in garter stitch for 8–10 rows, then decrease 1 stitch at each end every other row until 2 stitches remain.
-
Bind off and sew the ear to the top of the slipper.
Face:
-
Use yarn or embroidery thread to stitch eyes, nose, and mouth.
-
Optional: Sew small buttons or felt pieces for eyes.
Attach the ears and face securely to the front/top of the slipper.
Step 7: Finish
-
Weave in all loose ends neatly.
-
Optional: Add non-slip pads or felt on the soles.
-
Repeat for the second slipper.
Tips for Beginners
-
Use chunky yarn and larger needles to make knitting faster.
-
Keep stitches loose so the slippers stretch over the foot.
-
Use garter stitch for forgiving, cozy slippers.
-
Bunny details don’t have to be perfect—cute irregularities make them charming!
✅ And that’s it! You now have a pair of cute bunny slippers that are cozy, fun, and simple to make, even for beginners.
I can also make a step-by-step visual diagram showing the slipper construction and bunny details, so it’s super easy to follow and assemble.
Watch video: