 by
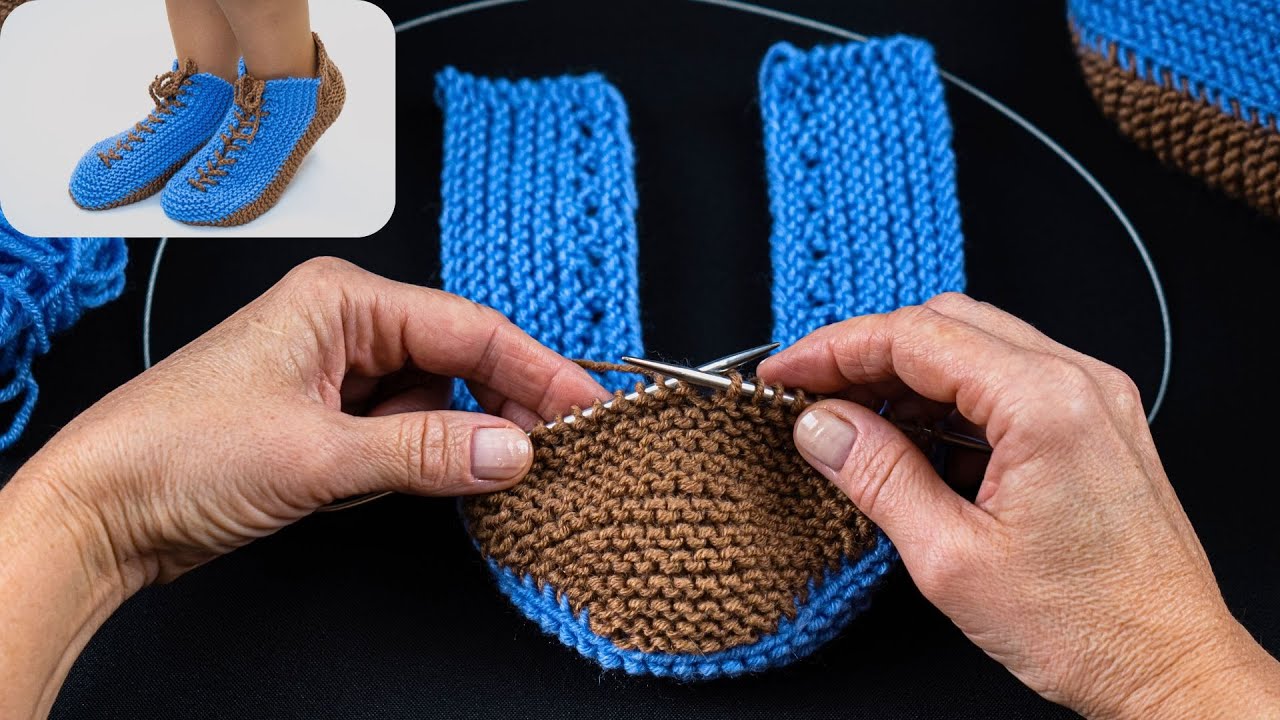
by Here is a clear, detailed, and beginner-friendly tutorial for making very simple knitted slippers. This pattern is worked flat on two needles, uses basic stitches only, and is perfect even if you are new to knitting 🧶👣
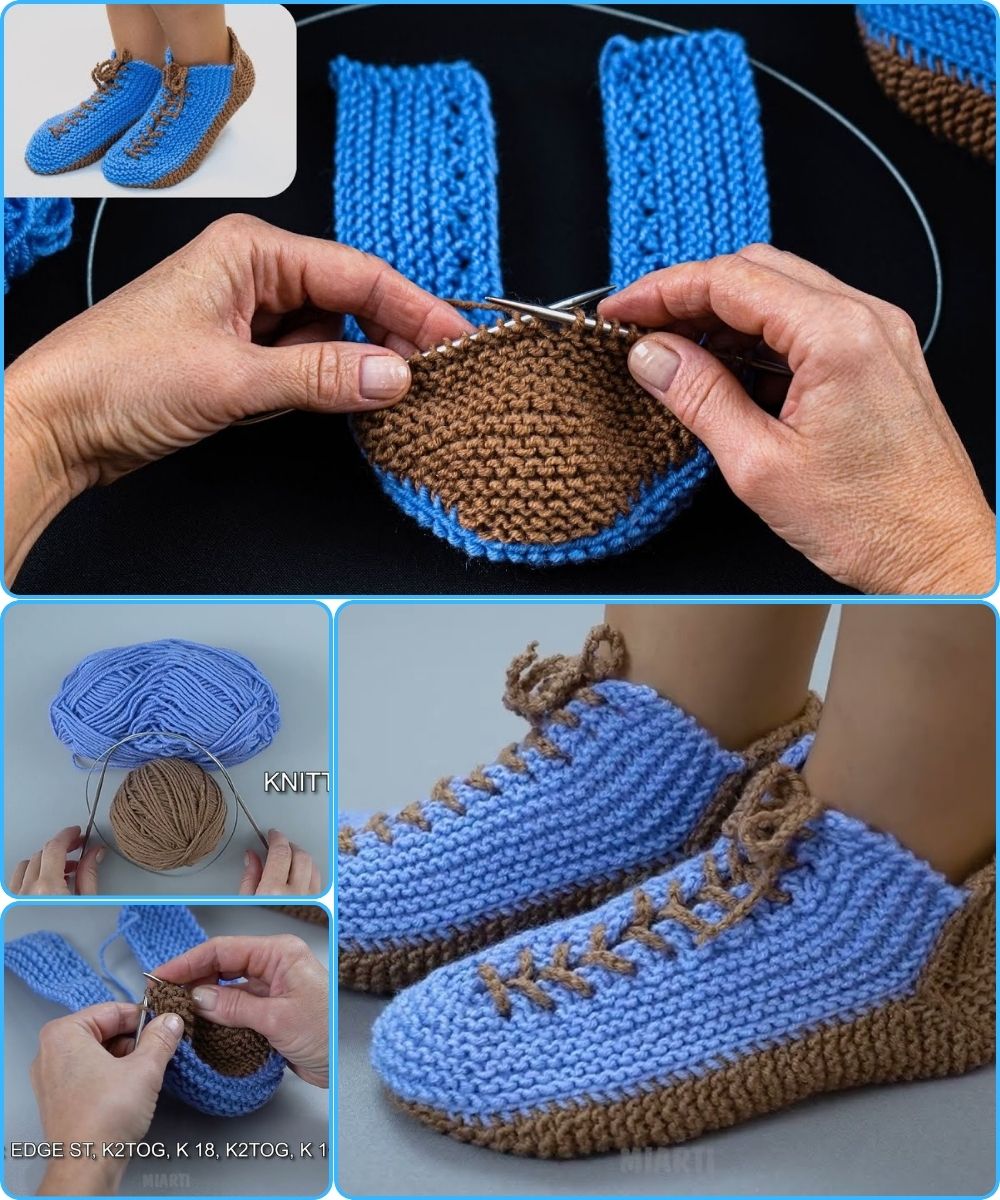
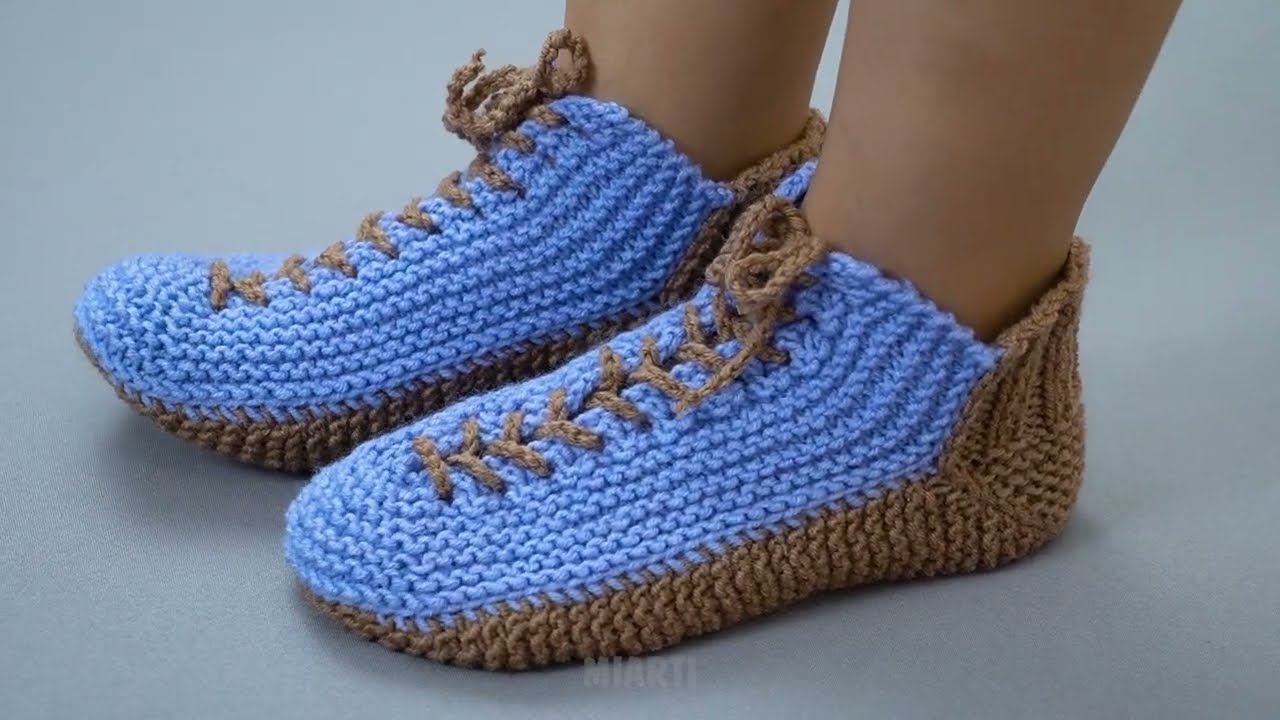
How to Make Very Simple Knitted Slippers
A Detailed Step-by-Step Tutorial
Skill Level
Beginner
Finished Size
Adult medium (easy to adjust for any foot size)
Materials Needed
-
Yarn: Medium-weight yarn (Category 4 / worsted weight)
👉 Choose soft, warm yarn; wool or acrylic blends work well -
Knitting needles: Two straight needles, size US 7–8 (4.5–5 mm)
-
Yarn needle (for sewing seams)
-
Scissors
Basic Knitting Skills Used
-
Cast on
-
Knit stitch (k)
-
Purl stitch (p)
-
Knit two together (k2tog – simple decrease)
-
Bind off
-
Sewing seams

Knitting Abbreviations
-
k – knit
-
p – purl
-
k2tog – knit two stitches together
-
st(s) – stitch(es)
Stitch Pattern
Garter Stitch (knit every row)
✔ Does not curl
✔ Easy to count
✔ Perfect for slippers
Step-by-Step Instructions
Step 1: Cast On
Cast on 36 stitches.
Tip: For wider feet, cast on 40 stitches. For smaller feet, cast on 32 stitches.
Step 2: Knit the Sole
-
Knit every row (garter stitch)
-
Continue until the piece measures about 9 inches (23 cm) or the length of your foot from heel to toe
This flat rectangle will form the sole of the slipper.
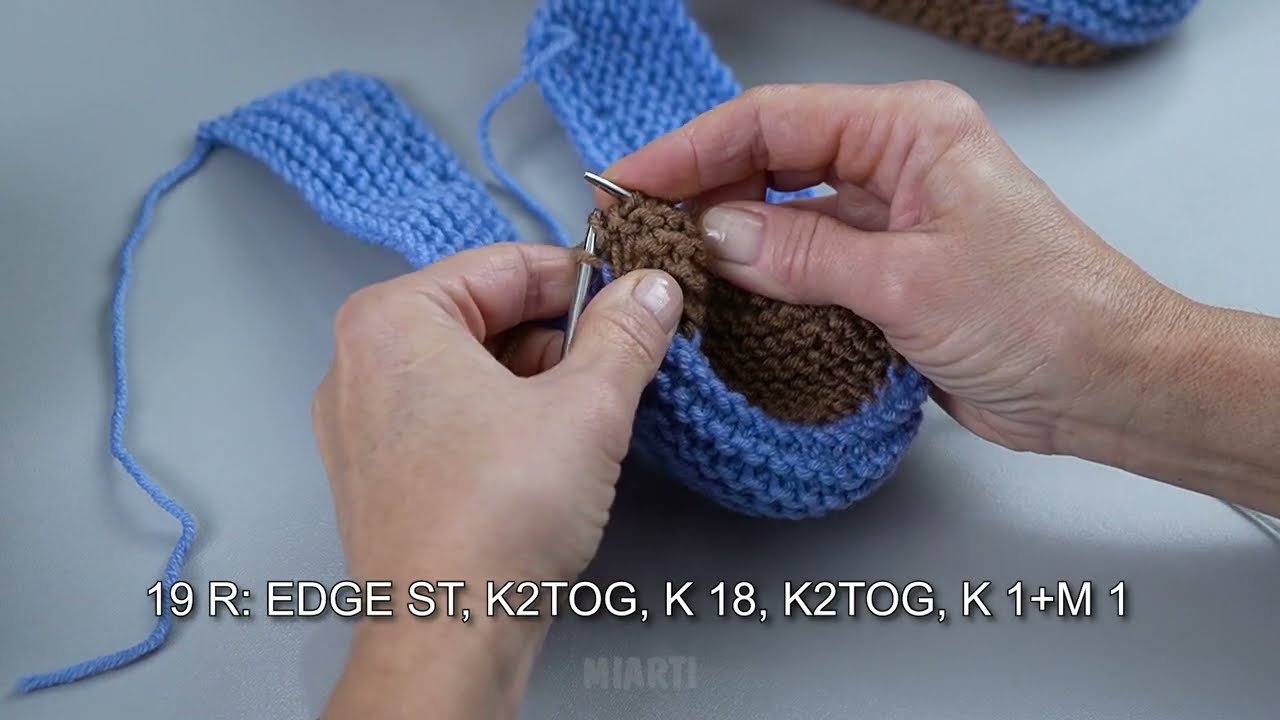
Step 3: Shape the Toe
To shape the front of the slipper:
-
Knit 2 stitches together at the beginning of the row
-
Knit until 2 stitches remain, then knit 2 together
-
Knit the next row normally (no decreases)
Repeat these steps until 20 stitches remain.
Step 4: Knit the Top of the Foot
-
Knit all rows (garter stitch) for 2–2.5 inches (5–6 cm)
This section covers the top of your foot.
Step 5: Shape the Heel
-
Knit across 10 stitches, then turn
-
Knit back across these 10 stitches only
-
Continue knitting back and forth on these stitches for 2 inches (5 cm)
This creates the heel flap.
Step 6: Bind Off
Bind off all stitches loosely.
Cut yarn, leaving a 10–12 inch tail for sewing.
Step 7: Assemble the Slipper
Using a yarn needle:
-
Fold the piece in half
-
Sew the toe seam
-
Sew the heel seam
-
Turn the slipper right side out
Repeat all steps to make the second slipper.
Optional Finishing Touches
-
Pick up stitches around the opening and knit K1, P1 ribbing for a snug cuff
-
Add non-slip fabric dots to the sole
-
Sew on a button, pom-pom, or small bow
Adjusting the Size
-
Smaller feet: Cast on fewer stitches and knit a shorter sole
-
Larger feet: Cast on more stitches and knit a longer sole
Always match the sole length to the foot length for best fit.
Beginner Tips
-
Use light-colored yarn so you can see stitches clearly
-
Keep tension even but relaxed
-
Try the slipper on as you knit
-
Don’t worry about small mistakes—slippers are forgiving!
🎉 Congratulations! You’ve made a pair of very simple, cozy knitted slippers using basic stitches and two needles.
If you’d like, I can:
-
Create a one-page printable pattern
-
Adapt this for kids or babies
-
Show a no-sew version
-
Add pictures or diagrams
Watch video: