 by
by Absolutely! Let’s break down a quick and easy crochet bucket hat tutorial in detail. I’ll provide step-by-step instructions suitable for beginners, including materials, stitches, and tips.
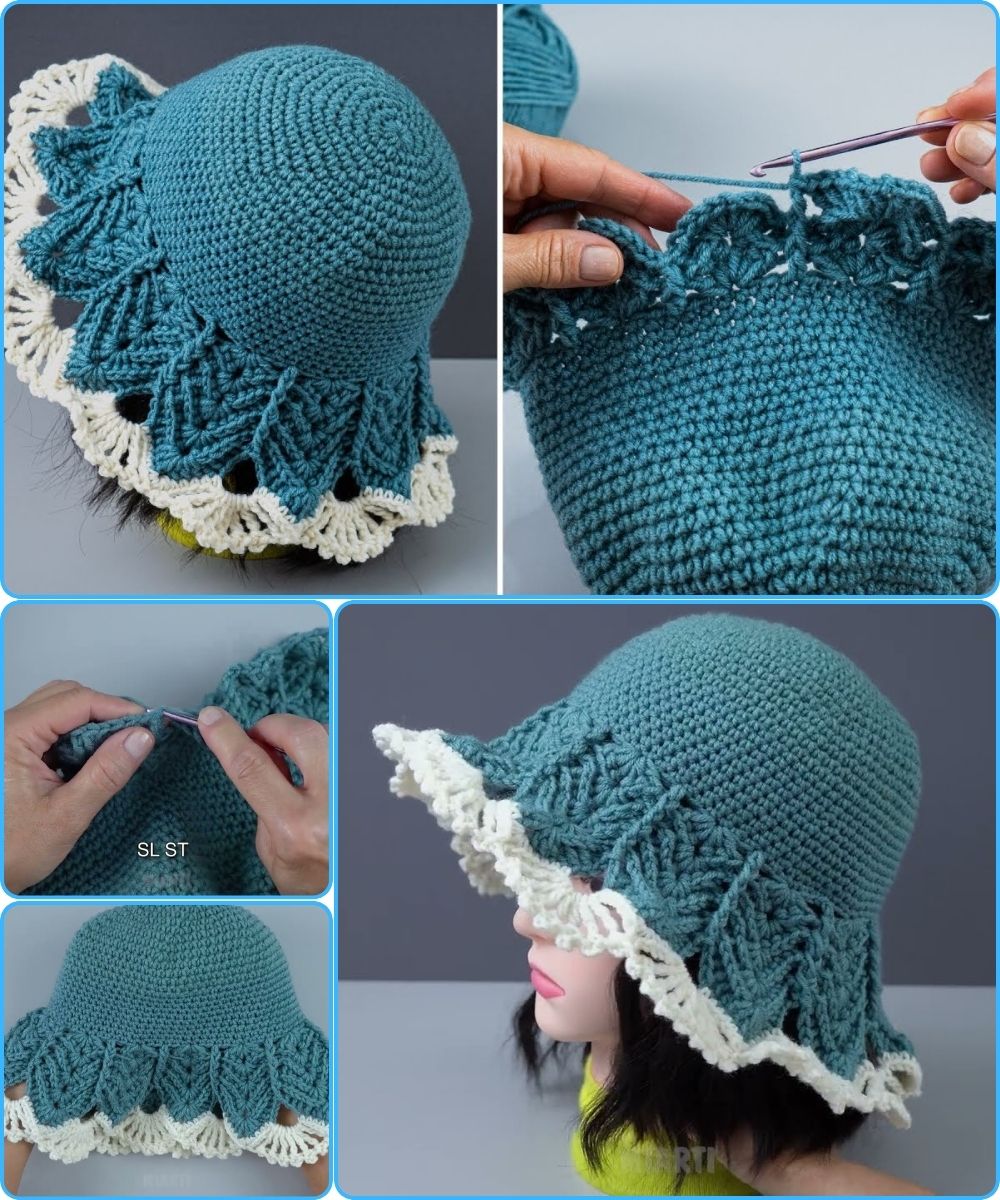
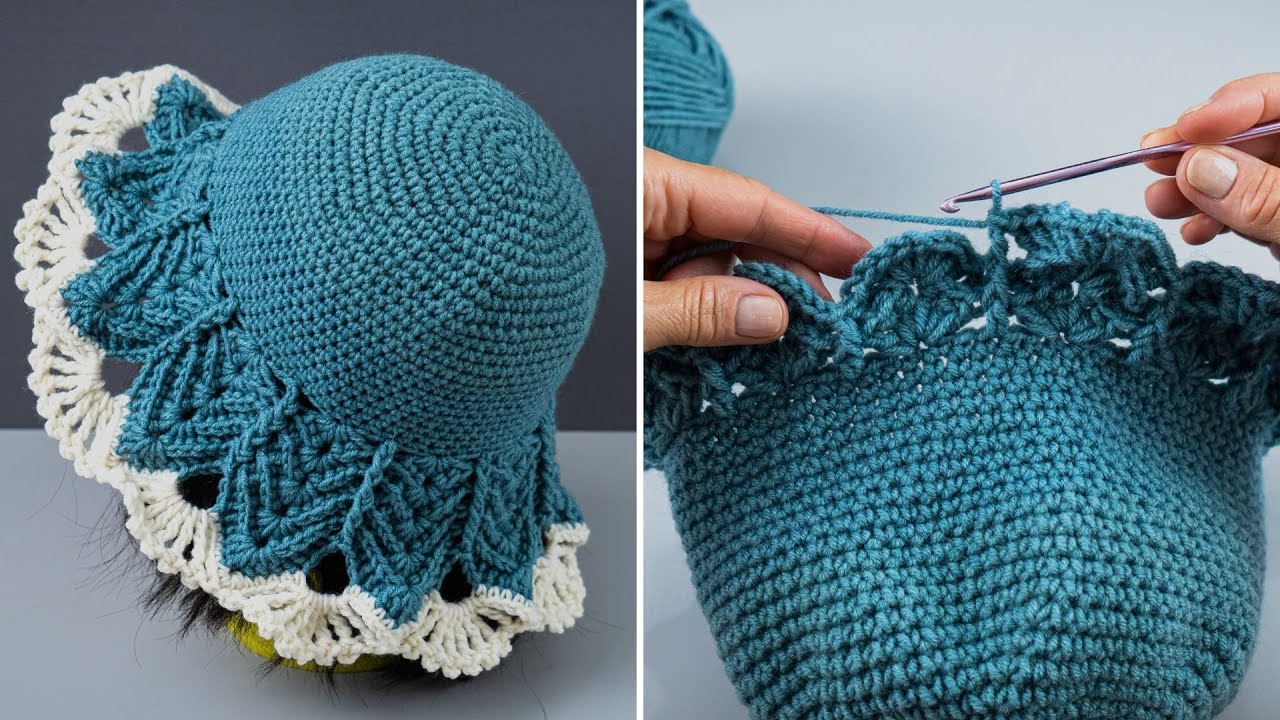
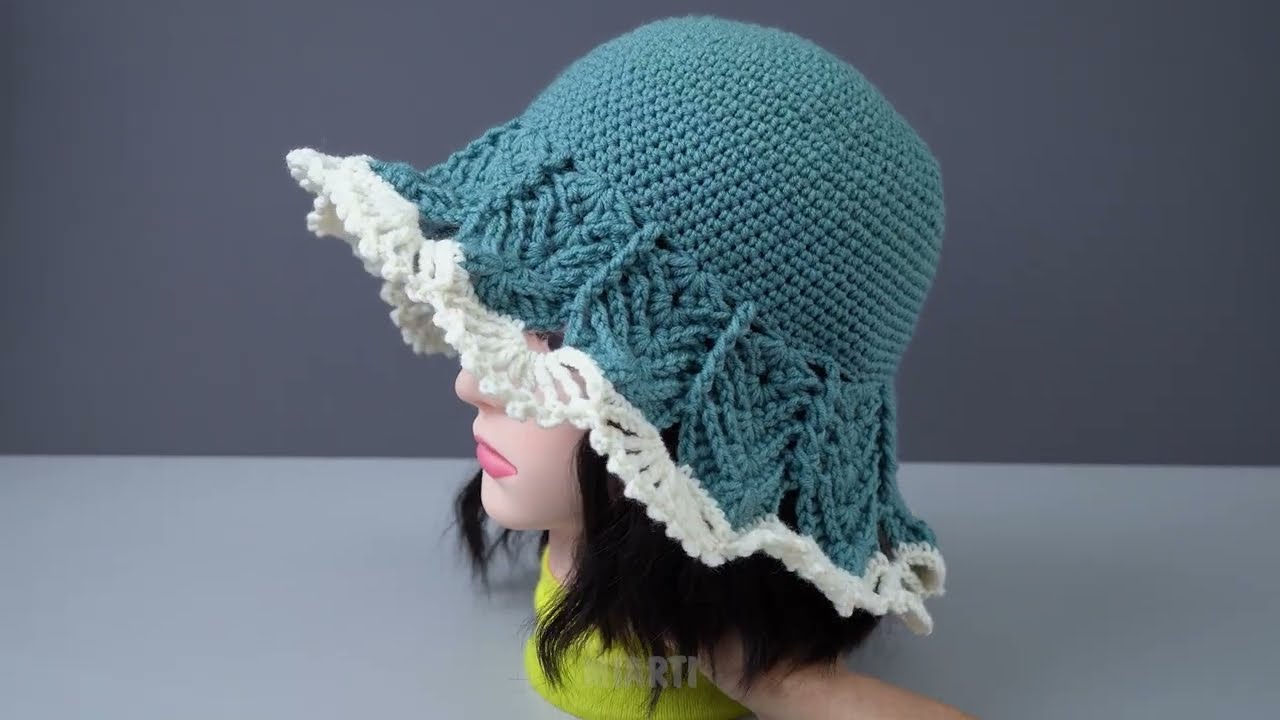
Quick & Easy Crochet Bucket Hat Tutorial
Materials Needed:
-
Yarn: Medium weight (worsted weight) yarn – cotton or acrylic works well.
-
Hook: Size H/8 (5mm) crochet hook (adjust according to your yarn).
-
Scissors
-
Tapestry needle (for weaving in ends)
-
Measuring tape (optional, for head circumference)
Step 1: Measure Head
-
Measure your head circumference. Adult bucket hats are usually 22–23 inches (56–58 cm).
-
Decide on the depth of the crown (top of the hat). A typical depth is 6–7 inches.
Step 2: Make the Crown (Top of the Hat)
-
Magic Ring: Start with a magic ring (or chain 4 and join with a slip stitch to form a circle).
-
Round 1: Crochet 6 single crochets (sc) into the ring. Join with a slip stitch.
-
Round 2: 2 sc in each stitch around (total 12 sc).
-
Round 3: 1 sc in next stitch, 2 sc in next stitch repeat around (total 18 sc).
-
Round 4: 1 sc in next 2 stitches, 2 sc in next stitch repeat around.
-
Round 5: 1 sc in next 3 stitches, 2 sc in next stitch repeat around.
Tip: Keep increasing evenly to make a flat circle for the crown. Continue rounds with the pattern: increase every N stitches (N increases by 1 each round) until the crown reaches your desired head width.
Step 3: Crochet the Sides
-
Once the crown diameter matches the head circumference, stop increasing.
-
Crochet in the back loops only or regular single crochet stitches around to start forming the sides.
-
Continue crocheting evenly in rounds until the sides reach about 5–6 inches (or your preferred depth).
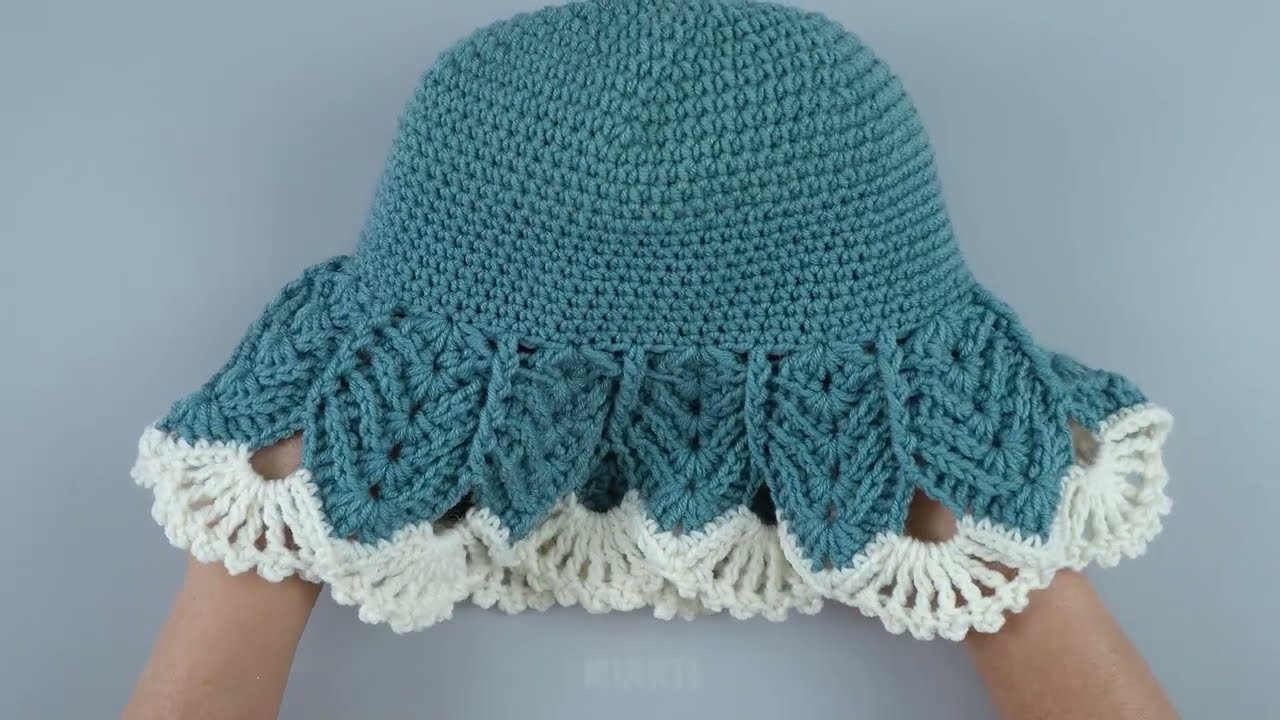
Step 4: Make the Brim
-
Start increasing again slightly to create a flared brim:
-
Round 1: 1 sc in next 4 stitches, 2 sc in next stitch repeat around
-
Round 2: 1 sc in next 5 stitches, 2 sc in next stitch repeat around
-
-
Continue increasing every round until the brim is your desired width (usually 2–3 inches).
-
Crochet 1–2 rounds without increasing for a firm edge.
Optional: For a floppy brim, use larger hooks or half-double crochets (hdc).
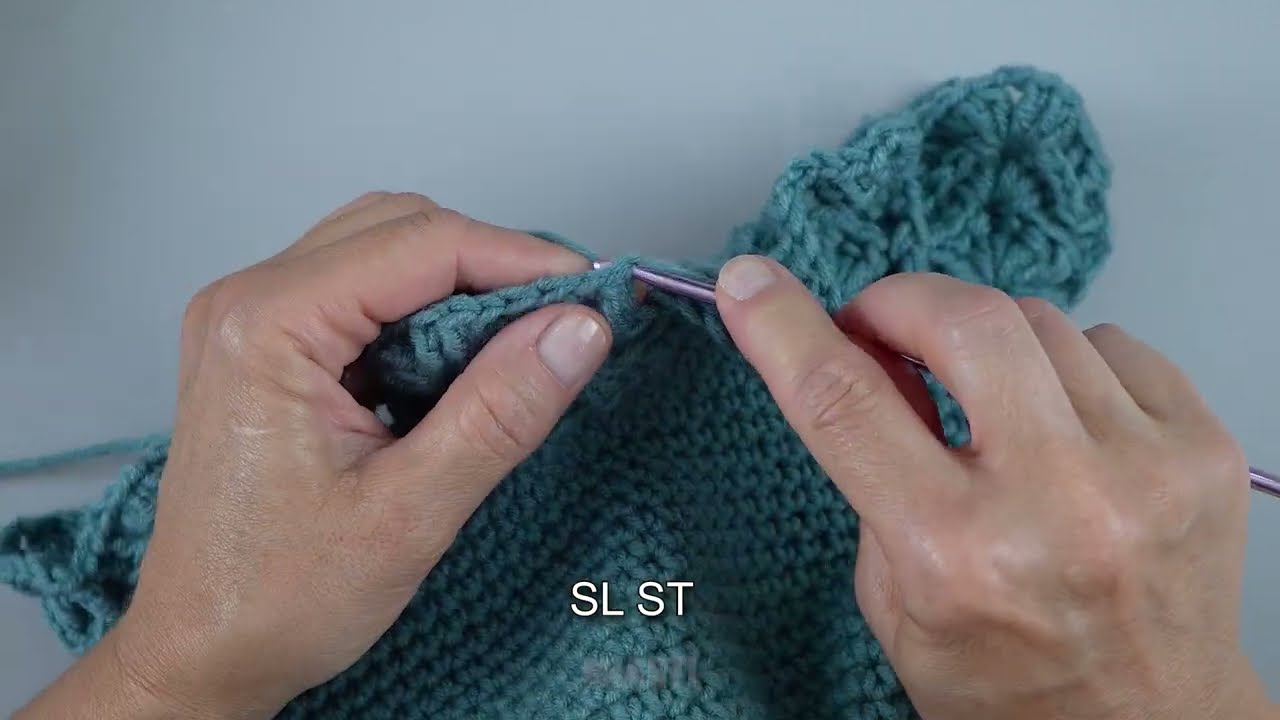
Step 5: Finishing
-
Fasten off and weave in all yarn ends with the tapestry needle.
-
Optional: Block your hat to shape it nicely.
Tips for Quick & Easy Version
-
Use chunky yarn and a bigger hook to make it faster.
-
Work in continuous rounds (spiral) to avoid having to join at each round.
-
Use half-double crochet for a softer, more flexible hat.
-
Add stripes or color changes to make it stylish.
✅ You now have a simple, customizable crochet bucket hat!
If you want, I can also make a super visual step-by-step diagram version that shows exactly how to crochet each round—it’s perfect for beginners who like pictures instead of just text.
Do you want me to do that next?
Watch video: