 by
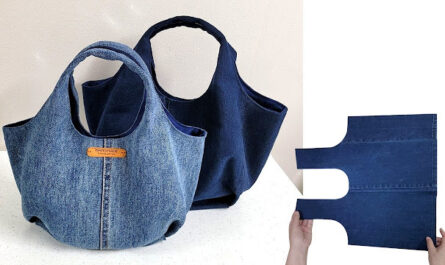
by Imagine creating a perfectly structured, standing tote bag with a clean, fold-line base and a fully reversible lining—all stitched together with minimal effort. This design lives up to its promise of simplicity, relying on one continuous piece of fabric for the exterior and another for the lining to eliminate most side and bottom seams. This detailed tutorial, inspired by the incredibly fast method in the “A few people know that this is the easiest way to sew a bag!” video from Miarti – Reuse, will guide you through creating this highly versatile and elegant shopper.
The brilliance of this design is its hyper-efficient construction, which minimizes cutting and stitching time while maximizing durability and utility.

Why This “Zero-Seam Base Reversible Shopper” Will Be Your New Favorite
This pattern is a true gem of efficiency and function, offering several compelling reasons to make it your next quick-sew project:
- Minimalist Construction: The main body uses a single, folded panel, meaning the bottom of the bag has zero seams—a massive boost to durability.
- Fully Reversible: The clean finish allows you to flip the bag inside out for a quick change in style or pattern.
- Speedy Assembly: By eliminating side and bottom panel pieces, construction is reduced to just four primary seams (two sides, two linings) plus boxing and strap attachment.
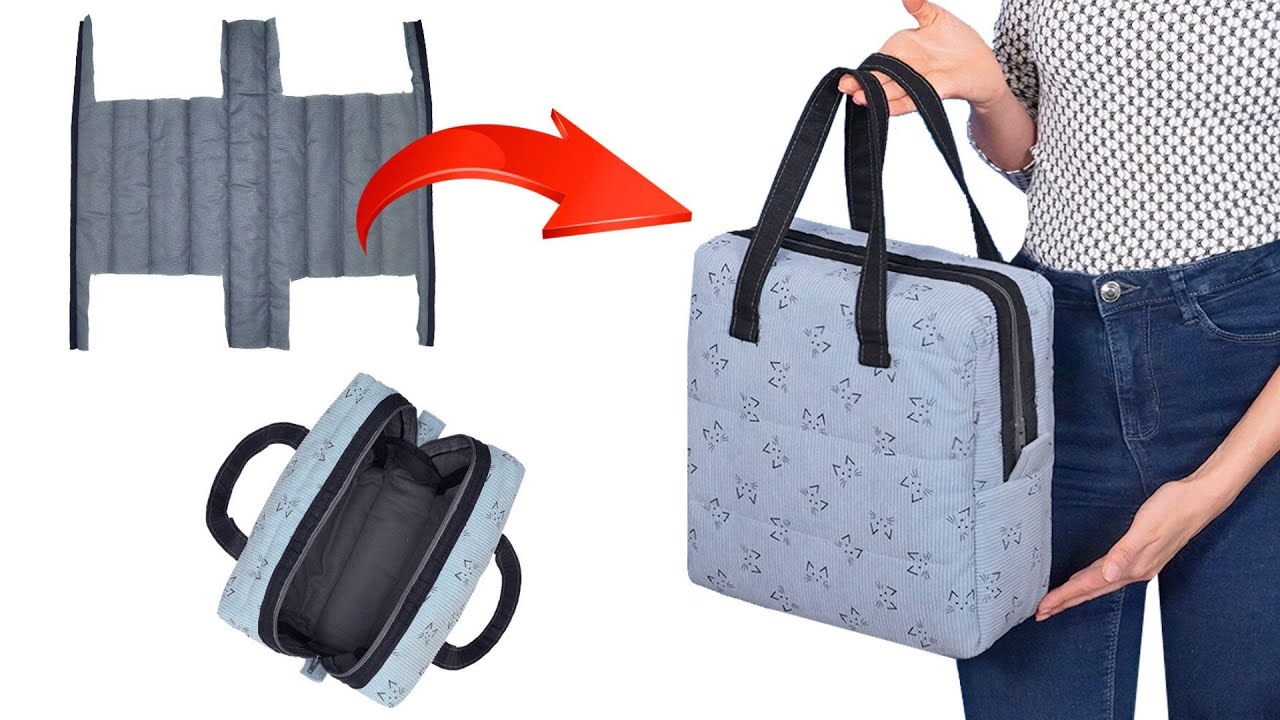
- Structured Shape: The use of interfacing and boxed corners ensures the bag stands freely, giving it a professional, organized look.
- Beginner-Friendly: Excellent for those building confidence, as the sewing involves only straight lines.
Materials & Cutting List:
For a sturdy bag, choose medium-to-heavyweight cotton, canvas, or even upcycled denim. The dimensions below create a medium-to-large shopper.
| Piece | Fabric | Dimensions (W x H) | Notes |
| Main Body Exterior | Canvas/Heavy Cotton | 80 cm x 40 cm | Single large rectangle. |
| Lining Fabric | Contrasting Cotton/Chintz | 80 cm x 40 cm | Single large rectangle (for reversibility). |
| Interfacing/Wadding | Medium-Heavy Fusible | 80 cm x 40 cm | Essential for structure. |
| Straps | Webbing or Exterior Fabric | 2 pieces, 65 cm long x 8 cm wide | Use 3 cm wide webbing for faster assembly. |
| Basic Tools: Sewing machine, ruler, rotary cutter/scissors, fabric marker, pins/clips, and iron. |
Step-by-Step Tutorial: Crafting Your “Zero-Seam Base Reversible Shopper”
This tutorial is broken down into four key phases: preparation and stabilization, constructing the exterior and lining, boxing the corners, and the final assembly. All seam allowances are 1 cm unless otherwise stated.
Phase 1: Preparation and Stabilization
The structure of the bag is established by fusing the interfacing to the exterior panel.
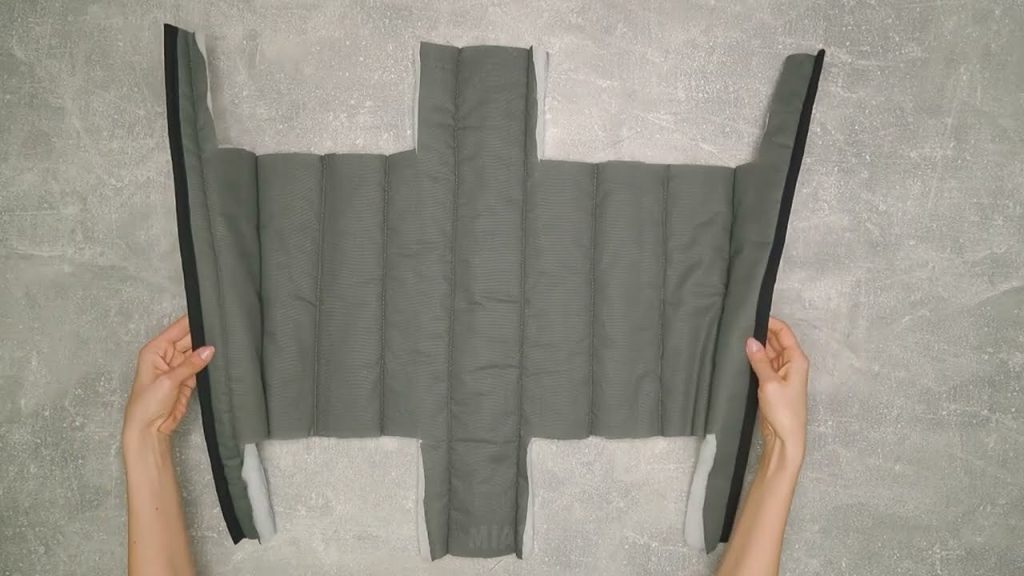
- Stabilize the Exterior: Iron the Medium-Heavy Fusible Interfacing onto the wrong side of the 80 cm x 40 cm Exterior Fabric piece. Fuse it securely to create one rigid panel.
- Prepare Straps: If using fabric straps, take the two 65 cm x 8 cm pieces. Fold them in half lengthwise, right sides together, and stitch the long edge. Turn the straps right side out, press, and topstitch along both long edges. (Skip this step if using webbing.)
- Prepare Main Panels: Fold both the stabilized Exterior panel and the Lining panel in half lengthwise (to 40 cm x 40 cm) and press. This fold will become the seamless bottom of the bag.
Phase 2: Constructing the Exterior and Lining
The two folded panels are stitched into two separate bag shells.
- Sew Exterior Shell: Take the folded Exterior panel. Pin the two 40 cm side raw edges together, leaving the top edge open. Stitch these two 40 cm side seams closed.
- Sew Lining Shell: Take the folded Lining panel. Pin the two 40 cm side raw edges together. Stitch these two 40 cm side seams closed.
- Crucial Step: On one of the lining side seams, leave a 15 cm turning opening along the center. This hole is used to turn the entire bag right side out later.
Phase 3: Boxing the Corners
This step defines the base depth and allows the bag to stand freely. We will create 6 cm boxed corners.
- Mark Exterior Corners: Flatten one bottom corner of the Exterior Shell, aligning the bottom fold line with the side seam you just stitched. Measure and mark a 6 cm x 6 cm square from the point of the corner. Cut out this square. Repeat for the other exterior corner.
- Stitch Exterior Corners: Pinch the cut edges together, aligning the seam and the fold perfectly, and stitch across the open edge. This forms the flat, structured bottom corners.
- Mark and Stitch Lining Corners: Repeat the boxing process (steps 1 and 2) for both bottom corners of the Lining Shell.
Phase 4: Final Assembly and Finishing
The exterior and lining are joined, and the straps are anchored in the top seam.
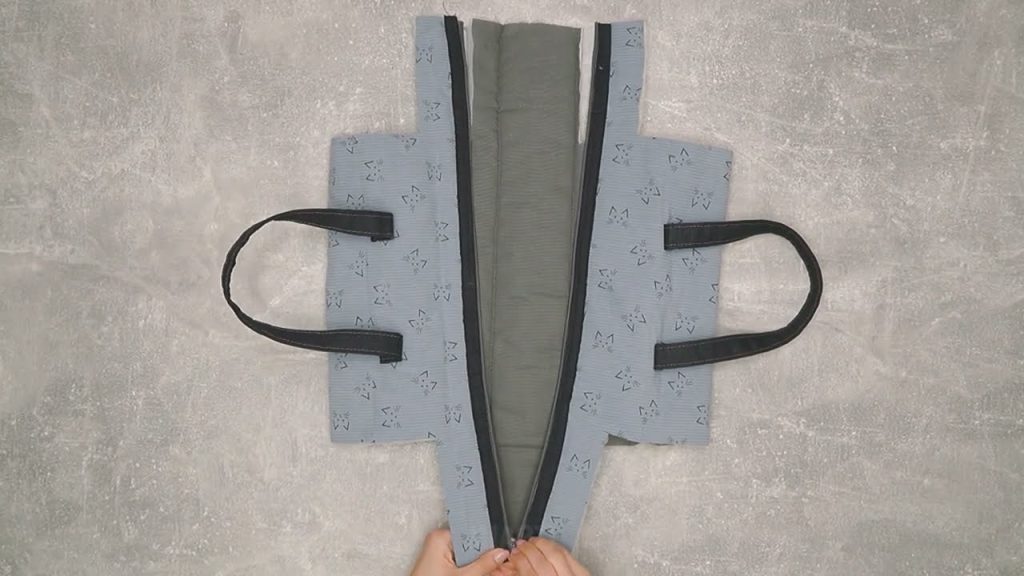
- Baste Straps to Exterior: Turn the Exterior Shell right side out. Position the raw ends of the two straps onto the top raw edge of the bag (one end on the front, one end on the back), centering them or placing them 10 cm in from the side seams. Baste the strap ends to the top raw edge with a 0.5 cm seam allowance.
- Join Exterior and Lining: Keep the Exterior Bag right side out (with straps basted). Turn the Lining Bagwrong side out.
- Slide the exterior bag into the lining bag. The two bags should now be right sides together.
- Align the top raw edges (the 40 cm opening) perfectly. Pin all around the top perimeter.
- Stitch Top Perimeter: Stitch all around the top raw edge to join the exterior and lining, capturing the strap ends securely.
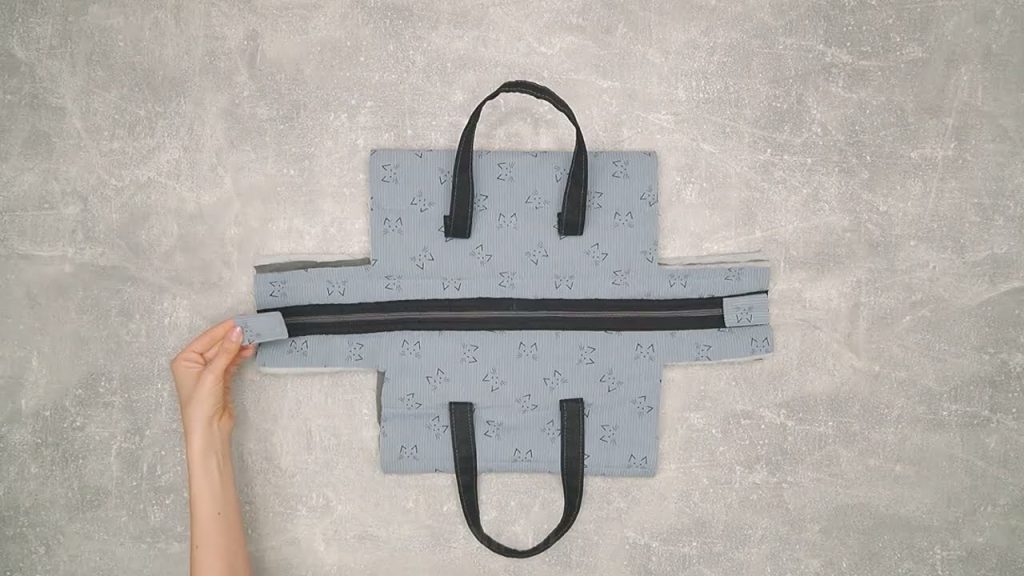
- Turn and Close: Pull the entire bag right side out through the 15 cm turning hole left in the lining side seam. Stitch the lining hole closed (by machine or hand).
- Topstitch: Push the lining neatly inside the exterior bag. Press the top edge flat and topstitch all around the top opening, 0.5 cm from the edge, to give a crisp, professional roll-top finish and reinforce the strap anchors.
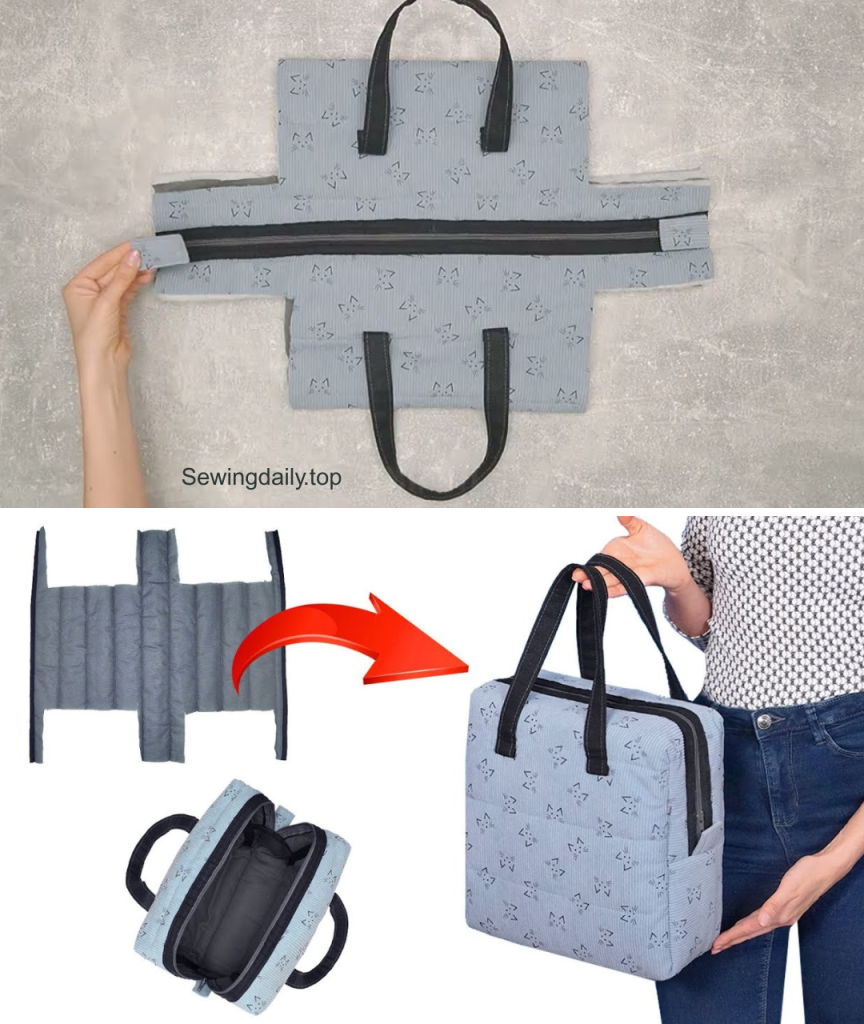
Your unique “Zero-Seam Base Reversible Shopper” is complete! This durable, simple, and versatile bag is ready to be shown off!
Video tutorial: