by
by Here’s a clear, detailed, and beginner-friendly write-up you can use for a blog post, class note, or tutorial description.

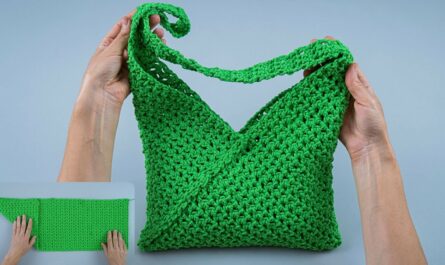
How to Make a Simple and Spectacular Crochet Bag
Even a beginner can handle it!
Crocheting your own bag is one of the most satisfying beginner projects. It’s practical, stylish, and surprisingly easy to make—even if you’ve just learned the basic stitches. This simple crochet bag design uses easy techniques, minimal shaping, and straightforward steps, making it perfect for beginners while still looking modern and impressive.
Why This Crochet Bag Is Perfect for Beginners
-
Uses basic stitches only (chain, single crochet, or double crochet)
-
Requires no complex shaping
-
Works up quickly
-
Can be customized in size, color, and handle length
-
Looks polished and store-bought when finished
Materials You’ll Need
-
Yarn: Medium-weight yarn (worsted weight / size 4)
Cotton yarn is ideal for bags because it’s sturdy and holds its shape well. -
Crochet hook: Size 5 mm (H-8) or recommended size on your yarn label
-
Scissors
-
Yarn needle (for weaving in ends)
-
Stitch marker (optional but helpful)
Basic Crochet Skills Required
You only need a few basic skills:
-
Making a slip knot
-
Chain stitch (ch)
-
Single crochet (sc) or double crochet (dc)
-
Slip stitch (sl st)
If you can do these, you can absolutely make this bag.
Step-by-Step Instructions
Step 1: Create the Base
Start by making a chain long enough for the width of your bag (about 25–35 chains for a small to medium bag).
-
Chain your desired length
-
Crochet into the second chain from the hook
-
Work evenly across the chain
-
Turn and continue crocheting back and forth to form a rectangular base
Keep crocheting rows until the base reaches your desired height.
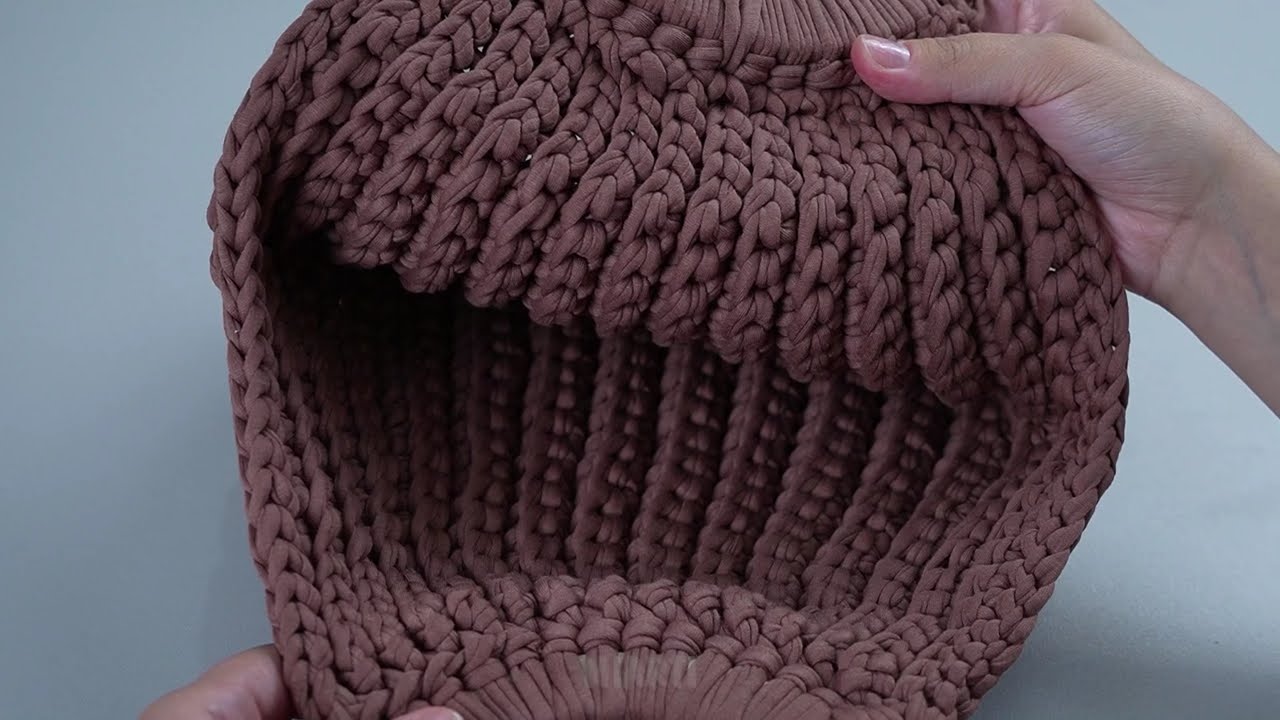
Step 2: Build the Bag Body
Once your rectangle is complete:
-
Crochet evenly around all four sides of the rectangle
-
Place stitch markers at the corners to keep the shape neat
-
Continue working in rounds without increasing
This step transforms the flat rectangle into a bag shape. Keep crocheting until the bag reaches the height you want.
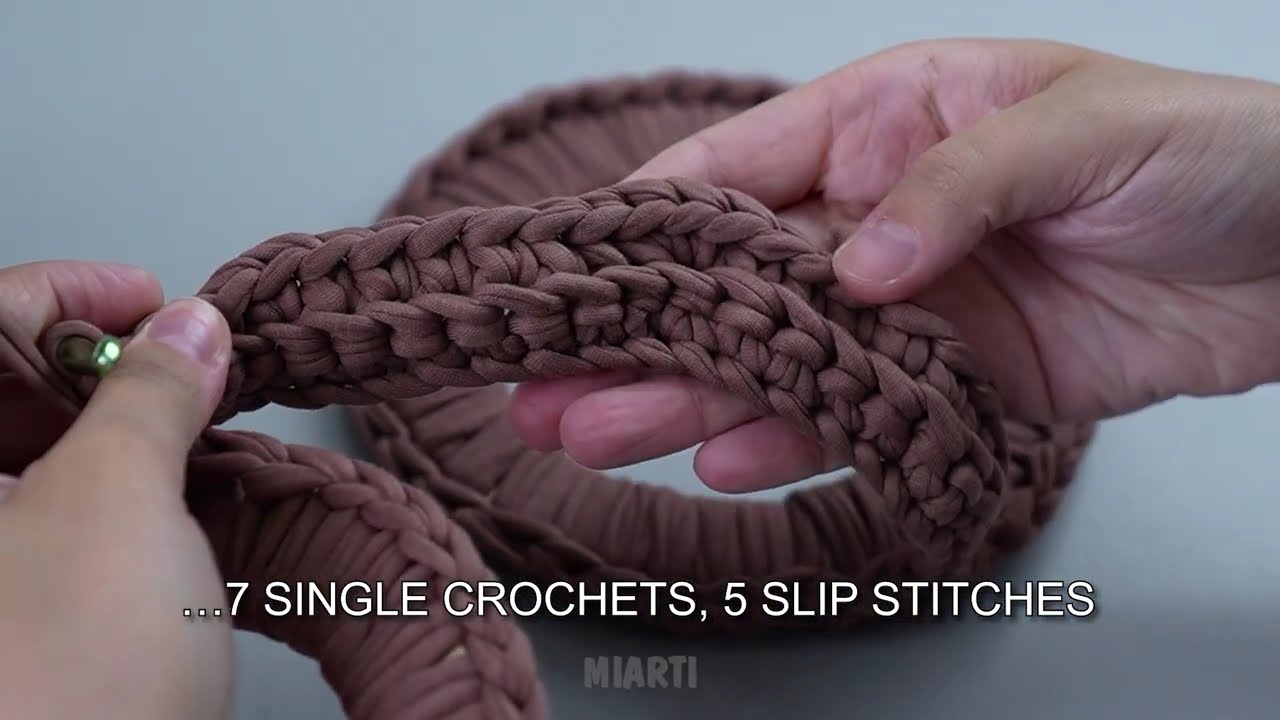
Step 3: Add the Handles
Handles can be made in two easy ways:
Option 1: Built-In Handles
-
Chain a length where you want the handle opening
-
Skip stitches and continue crocheting
-
Crochet around again to strengthen the handle
Option 2: Separate Handles
-
Crochet long strips separately
-
Sew them securely onto the bag using a yarn needle
Both methods are beginner-friendly and strong enough for everyday use.
Step 4: Finish the Bag
-
Slip stitch to close your final round
-
Cut yarn and fasten off
-
Weave in all loose ends neatly
Optional finishing touches:
-
Add a button or magnetic snap
-
Sew in a fabric lining
-
Attach tassels or decorative stitches
Tips for a Spectacular Result
-
Keep your stitches tight and even for a sturdy bag
-
Use cotton yarn for durability
-
Choose neutral colors for a classic look or bright colors for a fun statement
-
Don’t rush—steady stitching makes all the difference
Final Thoughts
This simple crochet bag proves that you don’t need advanced skills to create something beautiful and useful. With just basic stitches and a little patience, beginners can confidently make a stunning handmade bag they’ll be proud to carry or gift.
Once you’ve finished your first one, you’ll probably want to make more—crochet bags are addictive, fun, and endlessly customizable!
If you’d like, I can also:
-
Simplify this further for absolute beginners
-
Turn it into a step-by-step pattern
-
Write a YouTube or Instagram caption
-
Add photos instructions or stitch counts
Just tell me 😊
Watch video: