 by
by Below is a clear, beginner-friendly, detailed tutorial on how to knit slippers easily and simply. This method uses straight needles and basic stitches—perfect if you’re new to knitting.
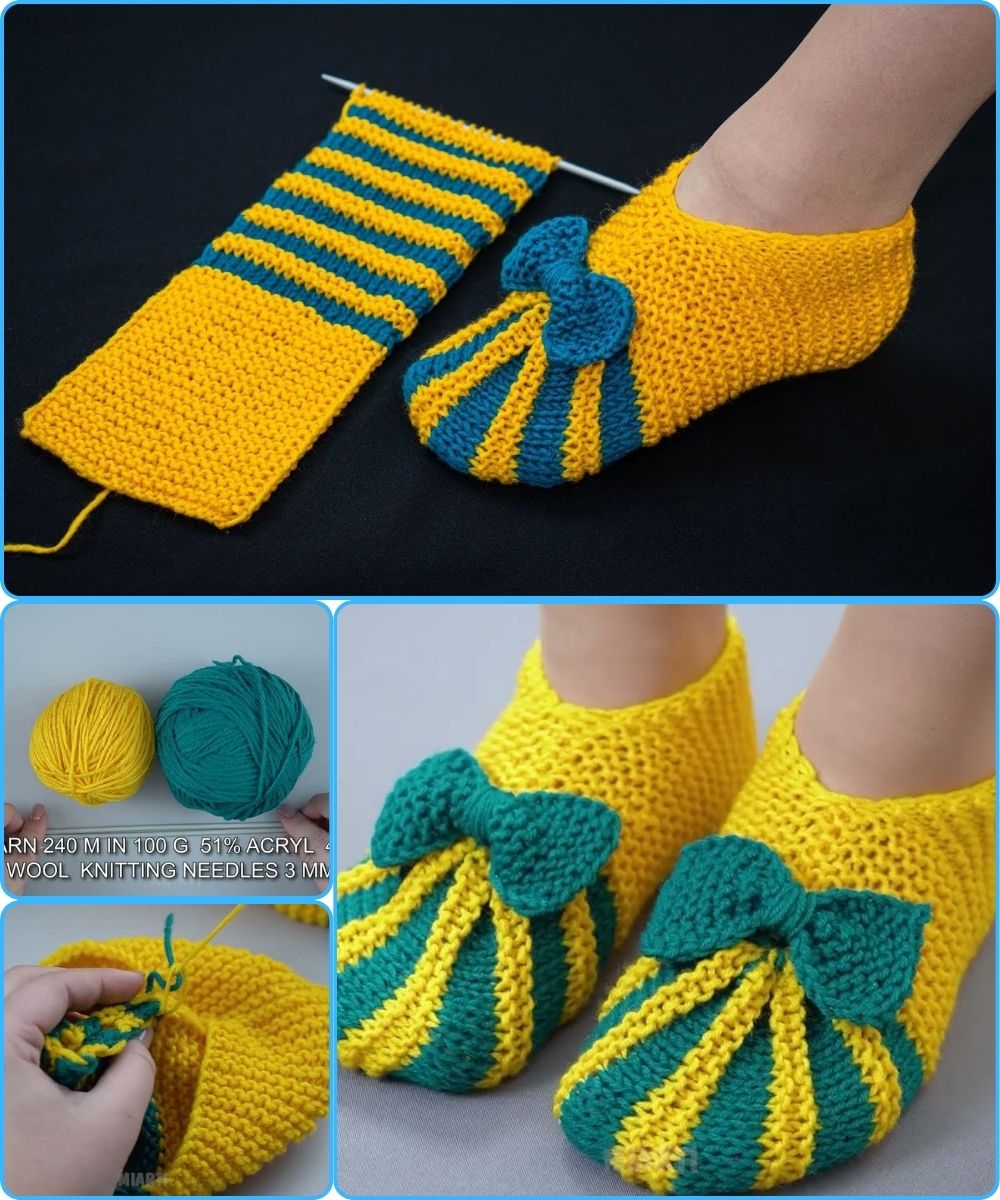
🧶 How to Knit Slippers Easily and Simply — A Detailed Step-by-Step Tutorial
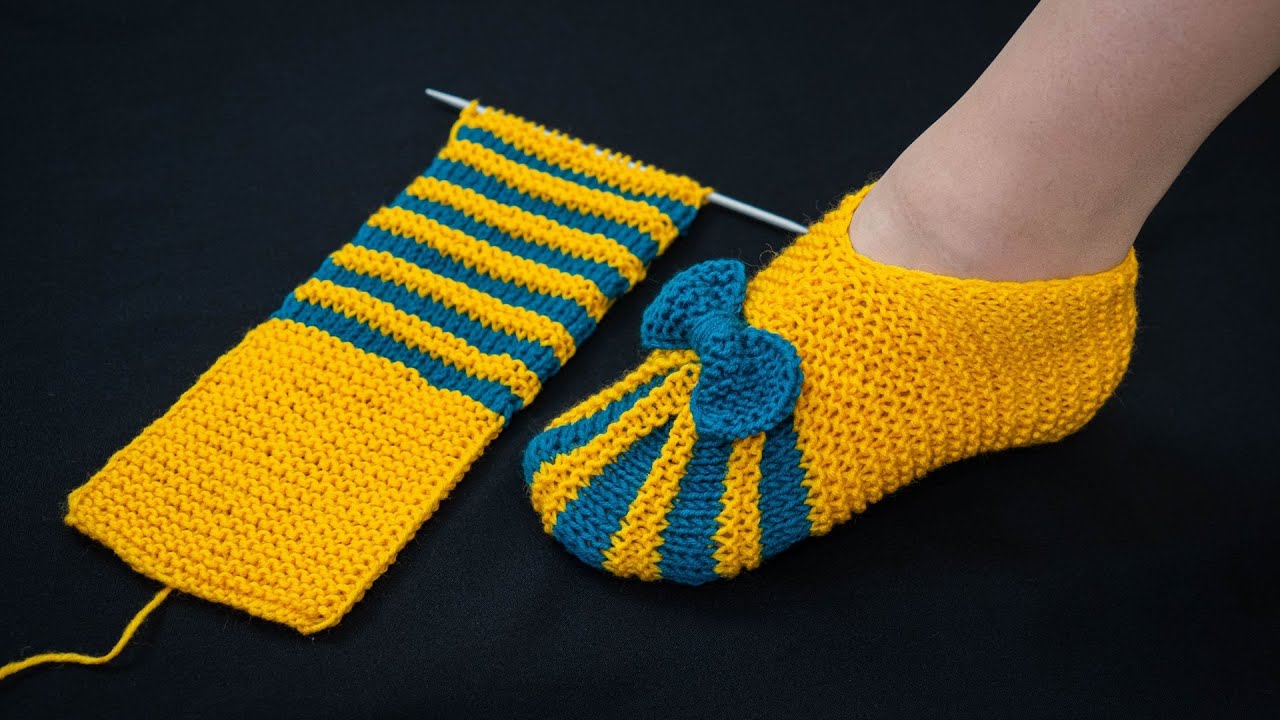
These slippers are made from a single rectangular piece folded and sewn to shape. No complicated heel shaping!
🧵 Materials You Will Need
-
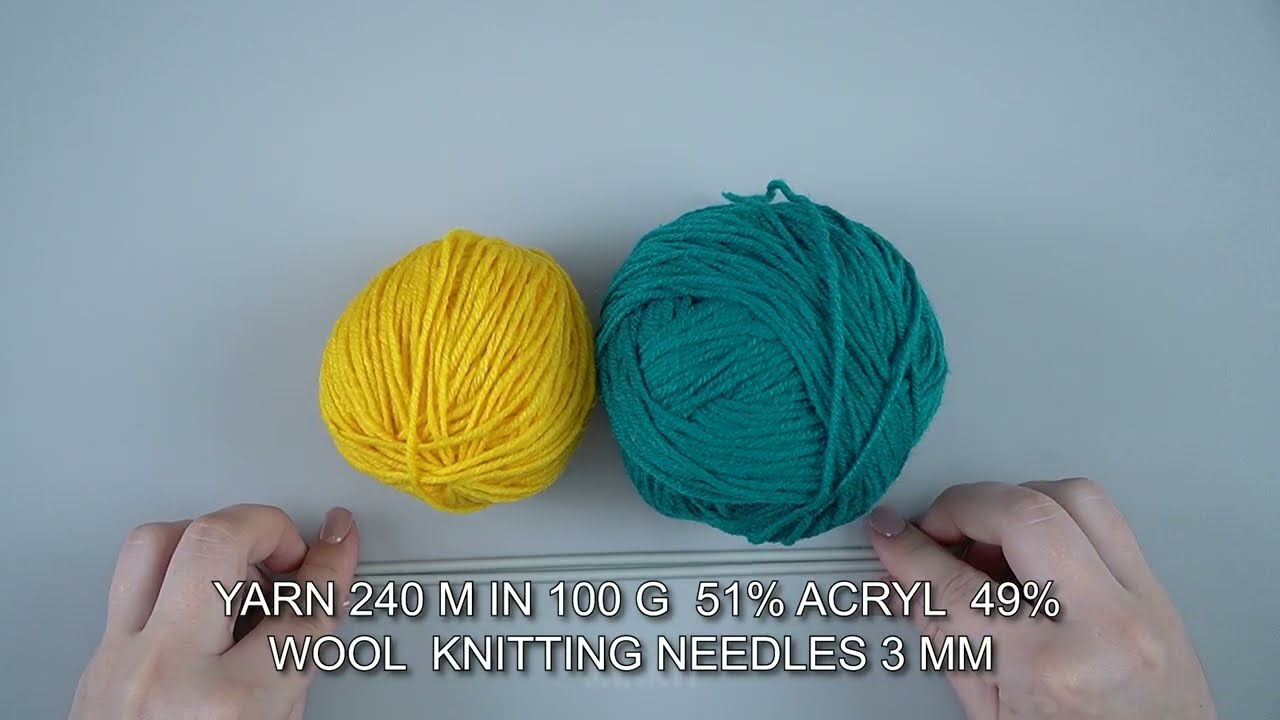
Yarn: Medium-weight (Category 4) yarn; about 100–150 g
-
Knitting needles: Size 4.5–5.5 mm (US 7–9), depending on your yarn
-
Tapestry needle (yarn needle)
-
Scissors
-
(Optional): Stitch markers, pom-poms, buttons for decoration
📏 Step 1 — Measure and Cast On
These slippers are knit flat in a simple rectangle.
Sizing Guide (Adults):
-
Small: 26 stitches
-
Medium: 30 stitches
-
Large: 34 stitches
(If in doubt, measure the widest part of your foot and cast on enough stitches to match that width when knitted.)
🧶 Step 2 — Knit the Main Body
You will knit a long rectangle in garter stitch (knit every row), which is stretchy and comfy.
Instructions
-
Knit every row.
-
Continue until the length equals the length of your foot + 2–3 inches (5–7 cm).
-
Example: If your foot is 24 cm long, knit until piece measures about 29–30 cm.
-
This added length helps with shaping the toe section.
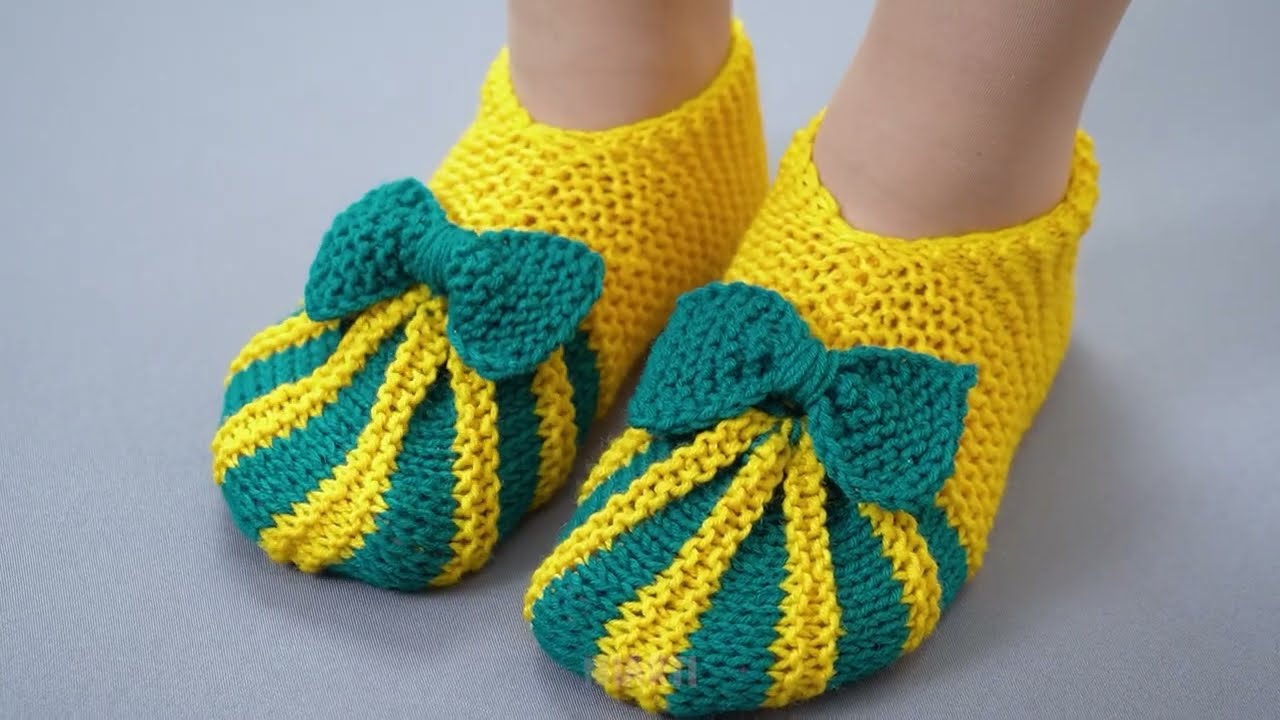
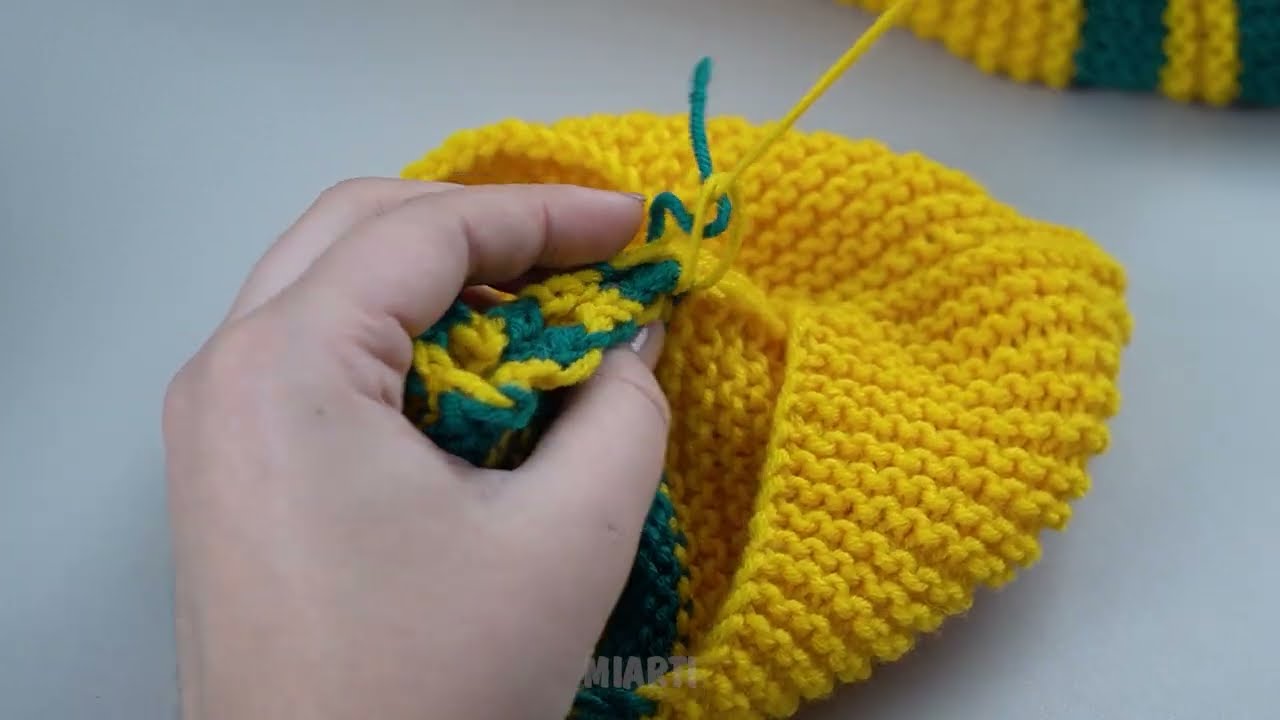
👣 Step 3 — Create the Toe Shaping
The toe area will be gathered, not shaped with decreases.
-
Cut a long tail of yarn (about 40–50 cm).
-
Thread the tail onto your tapestry needle.
-
Run the needle through all stitches on the needle, slipping them off as you go.
-
Pull tight to gather the toe—just like a drawstring.
-
Secure with a knot.
🧵 Step 4 — Sew the Top of the Foot
With the same tail:
-
Fold the piece so the slipper’s top is aligned.
-
Sew about ⅓ of the length from the toe upward along the top of the foot.
-
Stop when you reach where you want the opening to begin.
🦶 Step 5 — Sew the Back of the Slipper
Use your cast-on tail for this part.
-
Fold the heel seam together.
-
Sew the seam straight up until it’s closed.
✨ Step 6 — Turn Right Side Out & Try It On
Flip the slipper so the seams are inside.
Check the fit:
-
Too loose? Knit fewer stitches next time.
-
Too tight? Add stitches or knit more length.
🎀 Optional: Add Decorations
You can customize your slippers with:
-
Pom-poms
-
Buttons
-
Crochet edging around the opening
-
Embroidery
-
A contrasting-color toe cap or heel
📚 Pattern Summary (Quick Version)
-
Cast on 26–34 stitches.
-
Knit every row until piece equals foot length + 2–3 inches.
-
Drawstring the toe by threading yarn through all stitches and pulling tight.
-
Sew top seam (⅓ of length).
-
Sew back seam to close heel.
-
Turn inside out and decorate!
🧶 Tips for Beginners
-
Use chunky yarn for faster knitting and warmer slippers.
-
If edges curl, no worries—once sewn, they flatten.
-
Knit two slippers exactly the same to ensure they match.
If you want, I can also create:
✅ A printable PDF version
✅ A photo-illustrated version
✅ A crochet slipper tutorial
✅ A version using circular needles or double-pointed needles
Would you like any of these?
Watch video: