 by
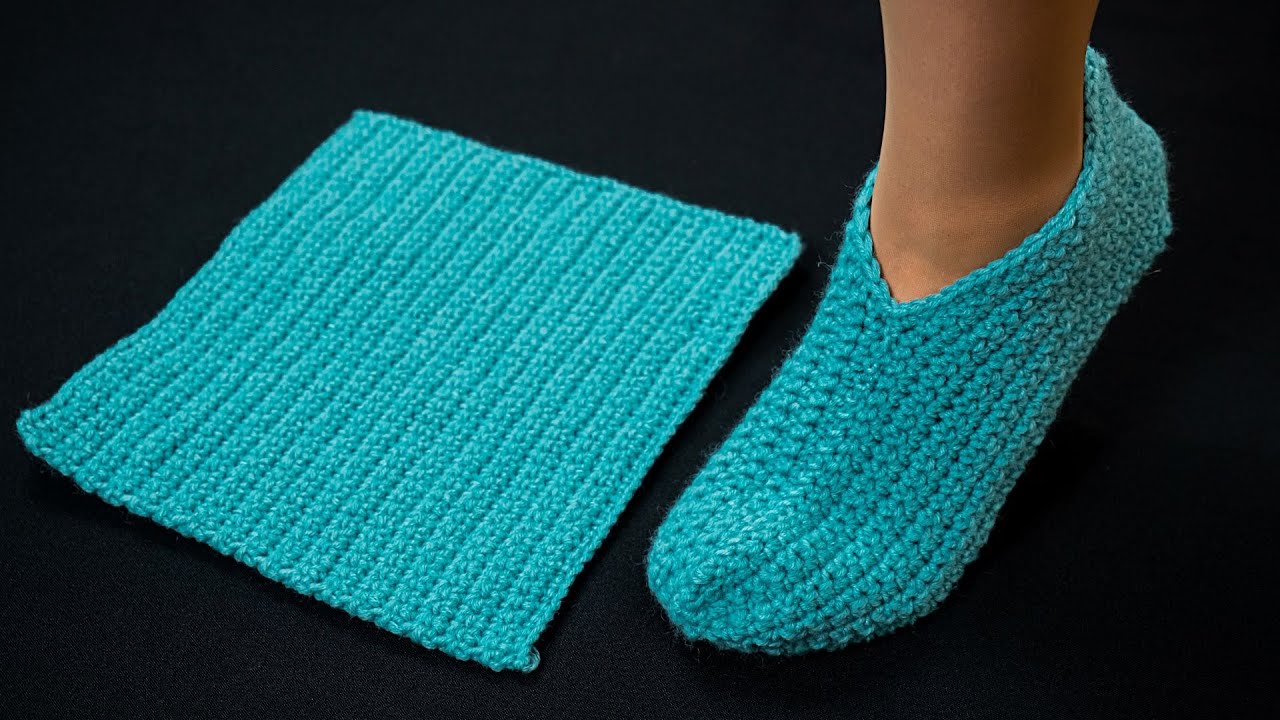
by Below is a clear, beginner-friendly, step-by-step tutorial for making crochet slippers with no seam on the sole. This method is simple, customizable, and works with basic stitches. You can use it to make slippers for any size—adults or kids.
🧶 How to Make Crochet Slippers Without a Seam on the Sole (Beginner Tutorial)
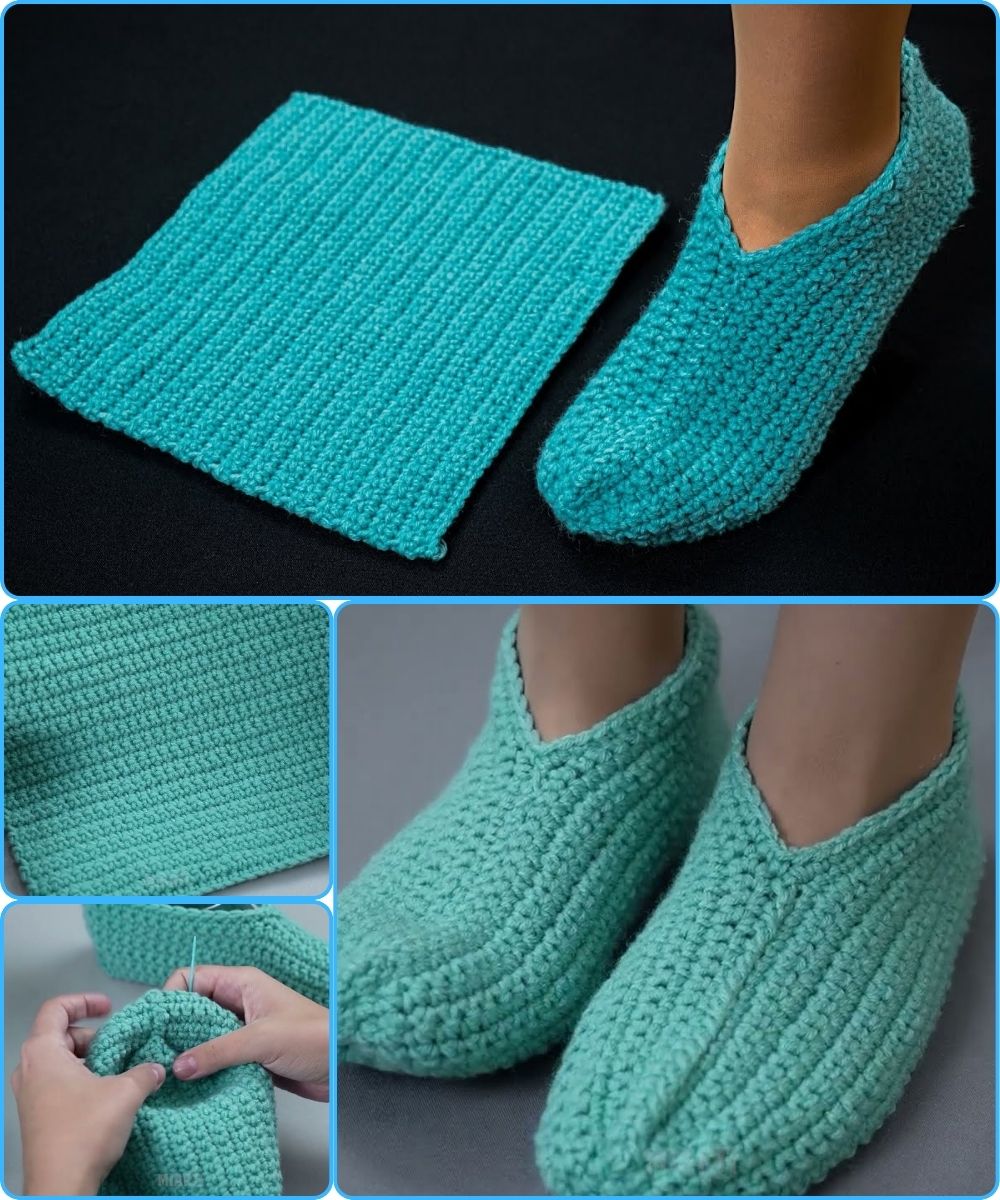
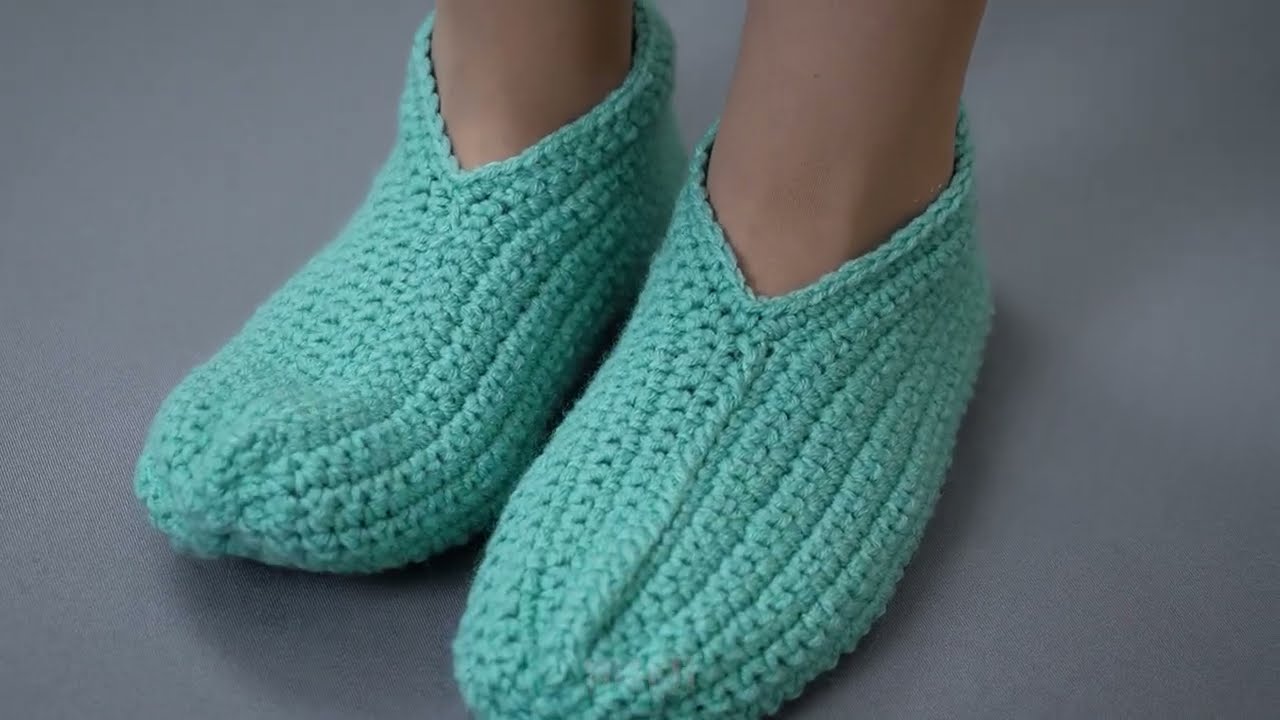
These slippers are made in the round from the toe, so the sole is completely seamless, soft, and comfortable. The pattern uses basic stitches and is very forgiving.
✨ Materials You Will Need
-
Worsted weight yarn (Size 4) – about 150–200g for adult slippers
-
Crochet hook suitable for your yarn (usually 5.0 mm / H hook)
-
Scissors
-
Yarn needle for weaving ends
-
Stitch markers (optional)
📏 Sizing Guide (General)
These slippers are made from the toe outward, so you just try the toe cap against your foot until it fits.
-
Adult Small: 6.5–7.5″ foot length
-
Adult Medium: 8–9″
-
Adult Large: 9.5–10.5″
-
Child sizes: simply stop increasing earlier
🧶 Stitches Used
-
MR – Magic Ring
-
CH – Chain
-
SC – Single Crochet
-
HDC – Half Double Crochet (used after toe)
-
INC – Increase (2 stitches in same stitch)
-
SL ST – Slip Stitch
👣 Construction Overview
-
Start at the toe with a circle.
-
Increase evenly until the toe circle fits the width of your foot.
-
Work straight rounds (no increases) to form the top of the foot.
-
Create the heel using back-and-forth rows, but the sole stays seamless.
-
*Join the back with an invisible seam at the heel only.
🪡 Step-By-Step Instructions
STEP 1 — Start the Toe (Magic Ring)
-
Make a magic ring.
-
Round 1: 6 SC into the ring, pull tight.
-
Place a stitch marker if needed.
STEP 2 — Toe Increases (make a flat circle)
Work in continuous rounds:
-
Round 2: INC in each stitch → 12 SC
-
Round 3: 1 SC, INC around → 18 SC
-
Round 4: 2 SC, INC around → 24 SC
-
Round 5: 3 SC, INC around → 30 SC
👉 Keep increasing in this pattern until the circle covers your toes comfortably.
For adult medium, stop at 42–48 stitches depending on gauge.
Tip: Place the circle on top of your toes. When it fits the width well, stop increasing.
STEP 3 — Begin the Foot (no more increasing)
Switch to HDC for softer fabric:
-
Round 6+: HDC in each stitch around.
Continue until the piece covers your foot up to the start of your ankle.
This is usually 10–14 rounds, depending on your size.
You now have a tube shape.
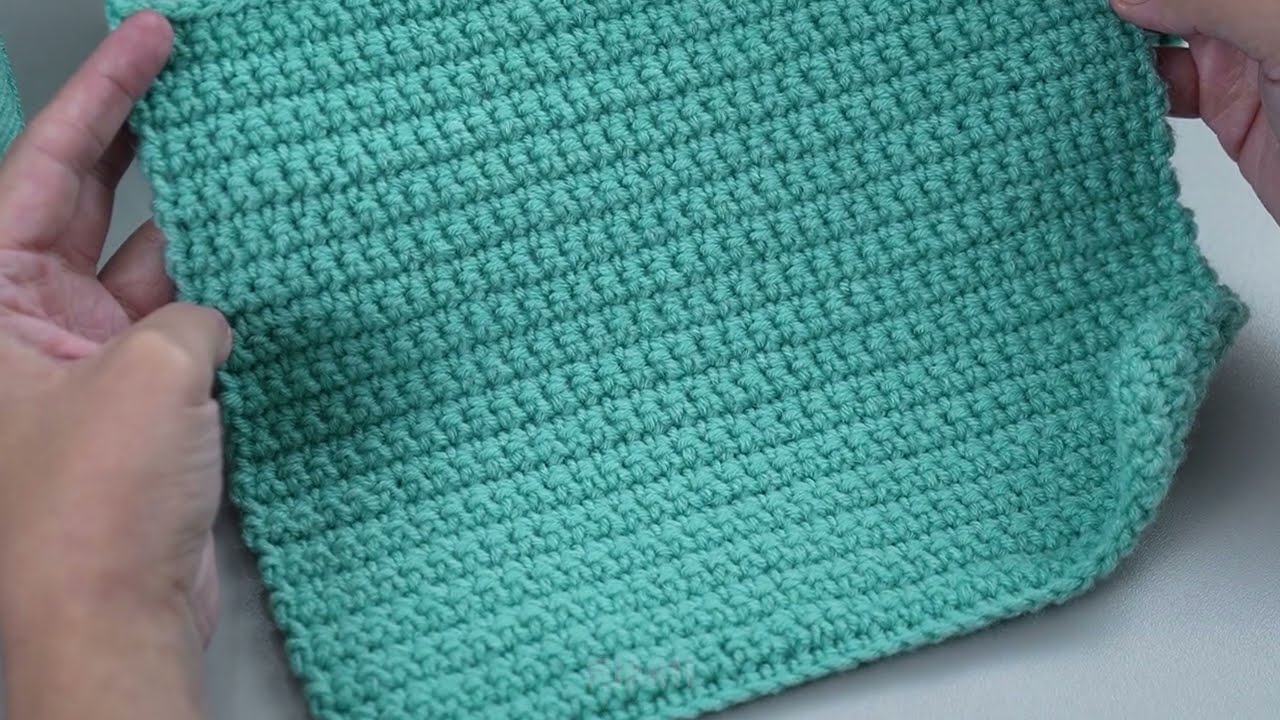
STEP 4 — Shape the Heel (back-and-forth rows)
You’ll now stop working in the round.
-
Flatten the slipper and count the stitches.
-
Mark the heel opening (usually the back 60–70% of stitches).
-
Leave top-of-foot stitches unworked.
Example (for 40-stitch round):
-
Work only 28 stitches, turn.
Rows:
-
Row 1: HDC 28, CH 1, turn
-
Row 2: HDC across, CH 1, turn
-
Repeat until the heel reaches the desired depth
(usually 10–16 rows)
The piece will form a rectangle at the back.
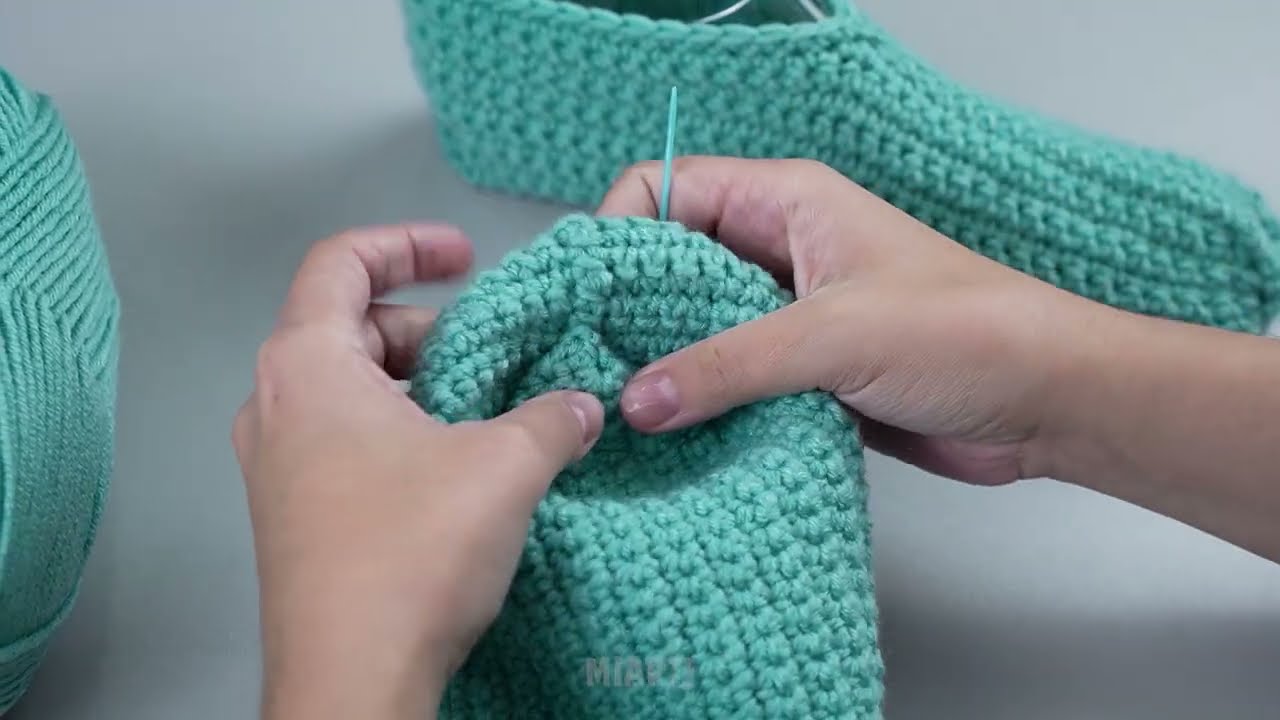
STEP 5 — Close the Heel (no sole seam!)
Now pinch the heel rectangle together.
-
Use SL ST or a whip stitch with a yarn needle to close ONLY the back of the heel.
-
The sole remains completely seamless because we never stitched across the bottom.
STEP 6 — Add a Cuff (Optional)
To make the slippers snug:
-
Attach yarn at the ankle opening.
-
Round 1: HDC around evenly.
-
Round 2–4: Continue HDC in rounds or switch to SC/Front Post/Back Post ribbing.
STEP 7 — Finish
-
Weave in all yarn ends.
-
Try the slipper on and adjust the cuff height if desired.
You’re done!
🧦 Customization Ideas
-
Use chunky yarn for ultra-cozy slippers
-
Add non-slip dots (fabric paint or silicone) to the sole
-
Decorate with buttons, pompoms, or embroidery
-
Change color at the cuff for a stylish accent
🎉 Want me to turn this tutorial into a printable PDF, add photos/diagrams, or create a beginner video script?
Watch video: