 by
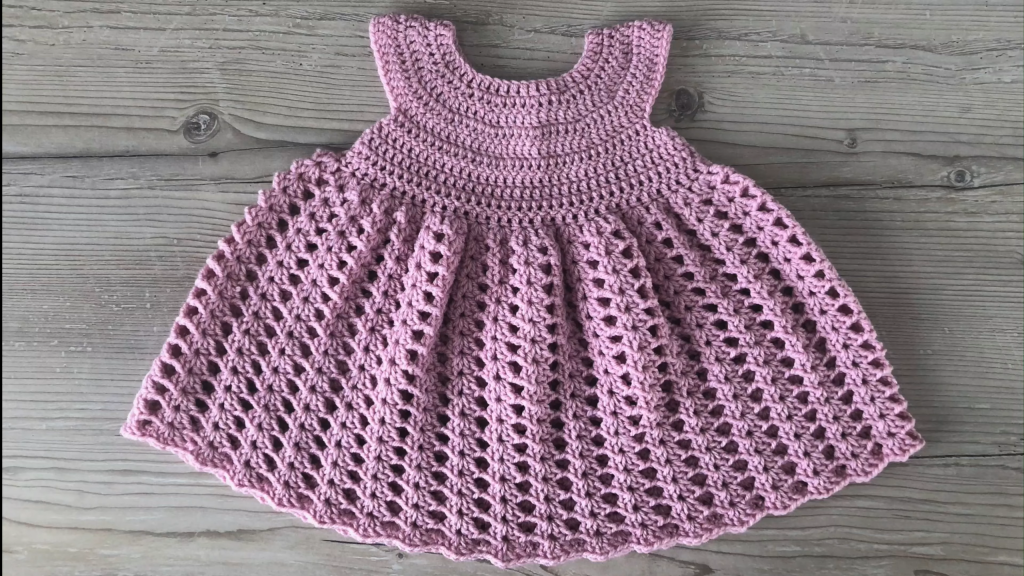
by If you’re looking for a project that combines classic shaping with stunning lace work, you’ve found it! This Dusty Rose Lace Dress is a beautiful example of how simple yarn can be transformed into an elegant garment. The dress is worked top-down, featuring a smooth yoke and a breathtaking flared skirt created with a bold, openwork diamond pattern.
This long, detailed pattern is designed for an Intermediate crocheter who loves watching a beautiful lace repeat take shape.
Materials Needed 
- Yarn: Approximately 350-400 yards of DK Weight (Light Worsted / #3) acrylic or cotton blend yarn. We recommend a soft fiber that has good drape to show off the lace. The color in the image is a beautiful Mauve or Dusty Rose (Main Color – MC).
- Crochet Hook: 3.5 mm (US E-4), or the size needed to obtain gauge.
- Button: One small (1/2 inch) button for the back neck slit.
- Tapestry Needle: For weaving in ends and sewing the button.
- Stitch Markers: 4 markers for the raglan corners.
Skill Level & Notes 
-
- Skill Level: Intermediate. You should be comfortable with raglan shaping, working in the round, and following a multi-row lace repeat.
- Construction: The dress is worked top-down. We will start with a small, flat section to create a back neck slit before joining to work the rest of the dress seamlessly in the round.
- Chains: The starting chain (ch 3) at the beginning of DC rounds always counts as the first DC unless noted otherwise.
Gauge 
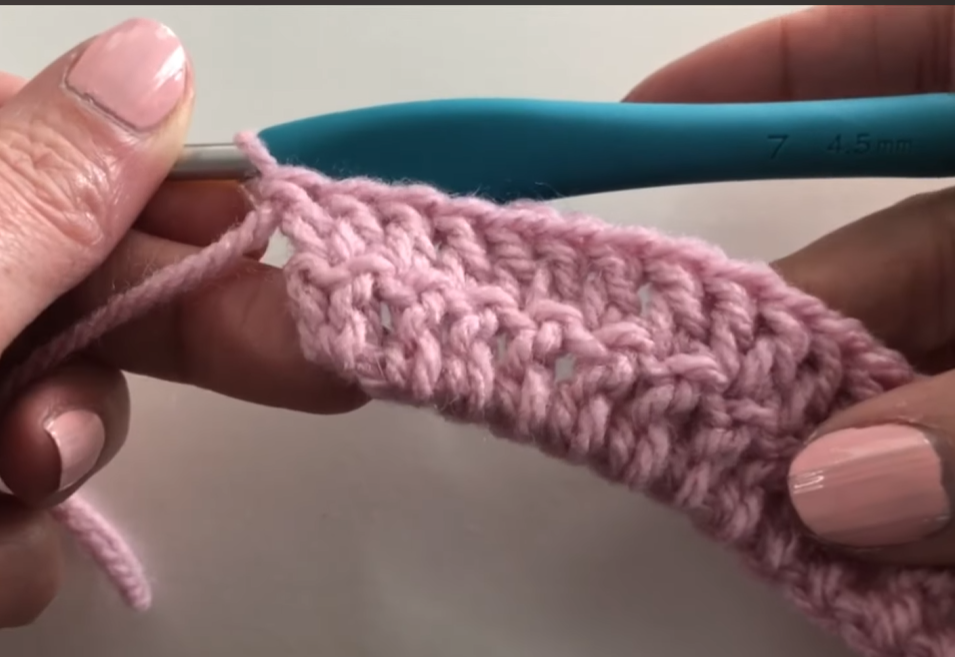
In Double Crochet (DC) (Yoke section) using a 3.5 mm hook: 16 DC stitches and 8 rows = 4 inches (10 cm) square.
Abbreviations 
| Abbreviation | Description |
| ch | chain |
| sl st | slip stitch |
| sc | single crochet |
| dc | double crochet |
| st(s) | stitch(es) |
| rep | repeat |
| PM | Place Marker |
| ch-sp | chain space |
Export to Sheets
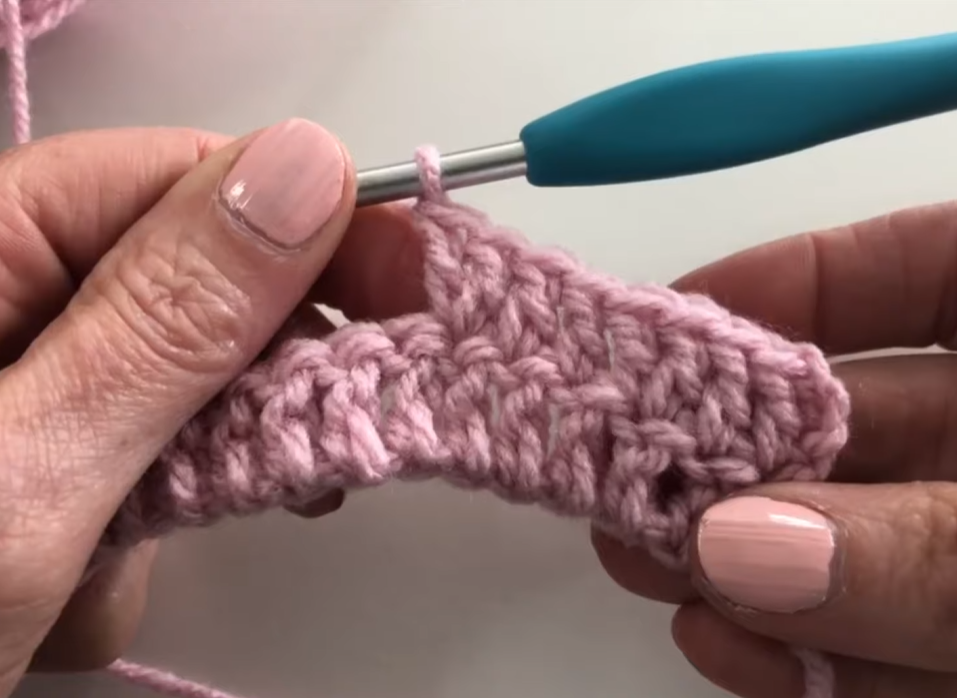
Special Skirt Stitch 
Lace Diamond Stitch (LDS)
This pattern is a two-row repeat that creates the lacy diamond mesh:
- Row A (Shell Row): Creates the solid peak of the diamond.
- Row B (Mesh Row): Creates the space and foundation for the next diamond peak.
- The stitch repeat is over a multiple of 6 stitches.
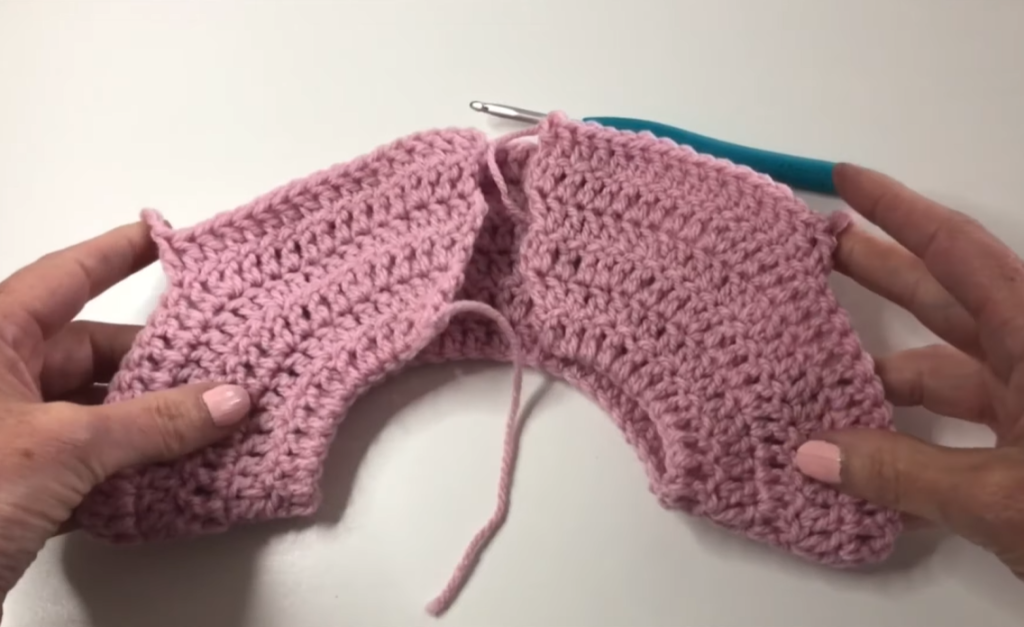
Part 1: The Yoke (Top-Down Raglan) 
Size: 3-6 Months. We begin working flat to create the back neck slit.
Setup Row (Back Slit): Ch 53. Sl st to the first ch, being careful not to twist. Ch 3 (counts as dc). Dc in the next 43 ch. Leave the remaining 9 ch unworked. (44 dc)
Row 1 (Working Flat): Ch 3 (counts as dc), turn. Dc in the next 4 sts. [Dc, ch 2, dc] in the next st (PM in ch-2 sp). Dc in the next 7 sts (Shoulder). [Dc, ch 2, dc] in the next st (PM). Dc in the next 12 sts (Front). [Dc, ch 2, dc] in the next st (PM). Dc in the next 7 sts (Shoulder). [Dc, ch 2, dc] in the next st (PM). Dc in the last 5 sts. (54 dc, 4 ch-2 sps)
Rows 2-6 (Increase Rows): Ch 3, turn. Dc in each st until the first ch-2 sp. [Dc, ch 2, dc] in the ch-2 sp. Rep [Dc in each st to next ch-2 sp, (dc, ch 2, dc) in ch-2 sp] 3 times. Dc in each remaining st. (Increases by 4 dc each row.)
- End of Row 6 Stitch Count: 118 dc, 4 ch-2 sps.
Row 7 (Joining for Body): Ch 3, turn. Dc in each st until the first ch-2 sp. Dc in the ch-2 sp. Ch 2 (skips the sleeve stitches). Dc in the second ch-2 sp. Dc in each st until the third ch-2 sp. Dc in the ch-2 sp. Ch 2 (skips the second sleeve stitches). Dc in the fourth ch-2 sp. Dc in each remaining st. Sl st to the top of the beg ch-3 to join. (66 dc, 4 ch = 70 sts)
Part 2: The Skirt (Lace Diamond Pattern) 
The entire skirt is worked in the round, starting immediately with the lace pattern.
Round 8 (Lace Setup): Ch 3. Dc in each st around. Sl st to join. (70 dc)
- Note: To ensure a successful repeat of the 6-st LDS, we need to adjust the count to 72 stitches (a multiple of 6).
- Adjustment: Work 2 evenly spaced increases (2 dc into one st) in this round. (72 dc)
Round 9 (LDS – Shell Row A): Ch 1 (does not count as st). Sc in the first st. [Sk 2 sts, (2 dc, ch 1, 2 dc) in the next st (Shell made), sk 2 sts, sc in the next st] rep around. Sl st to the beg sc to join. (12 Shells)
Round 10 (LDS – Mesh Row B): Ch 4 (counts as dc, ch 1). Dc in the ch-1 sp of the first shell. [Ch 1, sk 2 dc, dc in the next sc, ch 1, sk 2 dc, (dc, ch 1, dc) in the ch-1 sp of the next shell] rep around. After the last shell, ch 1, sk 2 dc, dc in the last sc. Ch 1. Sl st to the 3rd ch of beg ch-4 to join.
Round 11 (LDS – Shell Row A): Ch 3 (counts as dc). Dc in the first ch-1 sp. [Sc in the next dc, (2 dc, ch 1, 2 dc) in the next dc (over the previous shell’s ch-1 sp)] rep around. End with sc in the last dc. Sl st to the top of the beg ch-3 to join.
Round 12 (LDS – Mesh Row B): Ch 4. Dc in the next dc (creating a V-st over the 2-dc cluster). [Ch 1, sk 2 dc, (dc, ch 1, dc) in the next sc, ch 1, sk 2 dc, (dc, ch 1, dc) in the ch-1 sp of the next shell] rep around. Sl st to the 3rd ch of beg ch-4 to join.
Round 13 (Increase Shell Row A): Ch 1. Sc in the first st. [Increase Shell: (2 dc, ch 1, 2 dc) in the center of the next V-st (over previous sc). Sc in the ch-1 sp of the next shell] rep around. Sl st to the beg sc. (72 sts maintained, but pattern shifted)
Rounds 14-26: Repeat Rounds 10-13, shifting the pattern placement each row. Work 1-2 increases (by repeating a shell twice in one round) every 4th shell round (approx. every 4 rounds) to achieve the necessary flare.
Final Round 27 (Scalloped Hem): Ch 1. Sc in the first st. [Sk 1 st, 5 dc in the next st (shell made), sk 1 st, sc in the next st] rep around. Sl st to the beg sc to join. Fasten off.
Part 3: Edging and Finishing 
- Armhole Edging (Make 2): Attach yarn at the underarm. Work 1 round of sc evenly around the armhole opening. Sl st to join and fasten off.
- Neckline and Back Slit: Attach yarn at the bottom of the back neck slit. Work 1 round of sc evenly around the entire neckline opening and up one side of the back slit. Ch 3 (creates button loop). Sl st back into the last sc. Fasten off.
- Button: Sew the small button onto the neck opening of the opposite back panel, aligning it with the button loop you just created.