 by
by It sounds like you’re looking for some creative and easy keychain gift ideas! Keychains are a fantastic gift because they’re practical, personal, and can be made for just about any occasion. Here are some detailed instructions for a few different types of keychains that are sure to be a hit.
1. Simple Macrame Keychain
This is a great beginner-friendly project that looks stylish and thoughtful.
Materials:
- Macrame cord (3mm or 4mm is a good size)
- A keychain ring or clip
- Scissors
Instructions:
- Cut the cords: Cut two pieces of macrame cord. One should be about 40 inches long and the other about 20 inches long.
- Attach the cords: Fold the longer, 40-inch cord in half. Thread the folded end through the keychain ring, then pull the two loose ends through the loop to create a lark’s head knot. Now, take the shorter, 20-inch cord and fold it in half. Place it under the two main cords, just below the keychain ring.
- Start knotting: The two ends of the shorter cord are your “working” cords. The two main cords from the keychain are your “filler” cords. To create a square knot, take the left working cord and pass it over the filler cords and under the right working cord. Then, take the right working cord and pass it under the filler cords and up through the loop created by the left cord. Pull both working cords tight to form the first half of the square knot.
- Complete the knot: Now, reverse the process. Take the right working cord and pass it over the filler cords and under the left working cord. Take the left working cord and pass it under the filler cords and up through the loop created by the right cord. Pull both working cords tight. You’ve now completed one full square knot.
- Repeat: Continue tying square knots until the keychain is the desired length.
- Finish it off: Once you’re happy with the length, tie a simple overhand knot with all four cords at the bottom. Trim the ends to create a neat fringe. You can leave the fringe as is, or untwist the macrame cord to make it fluffy.
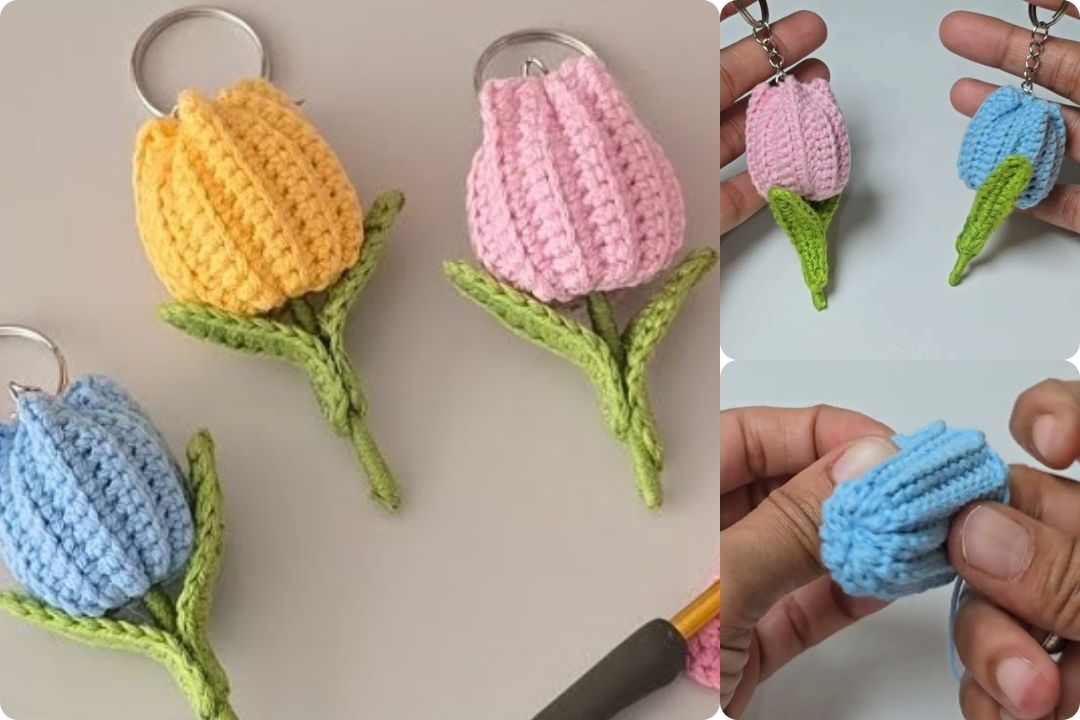
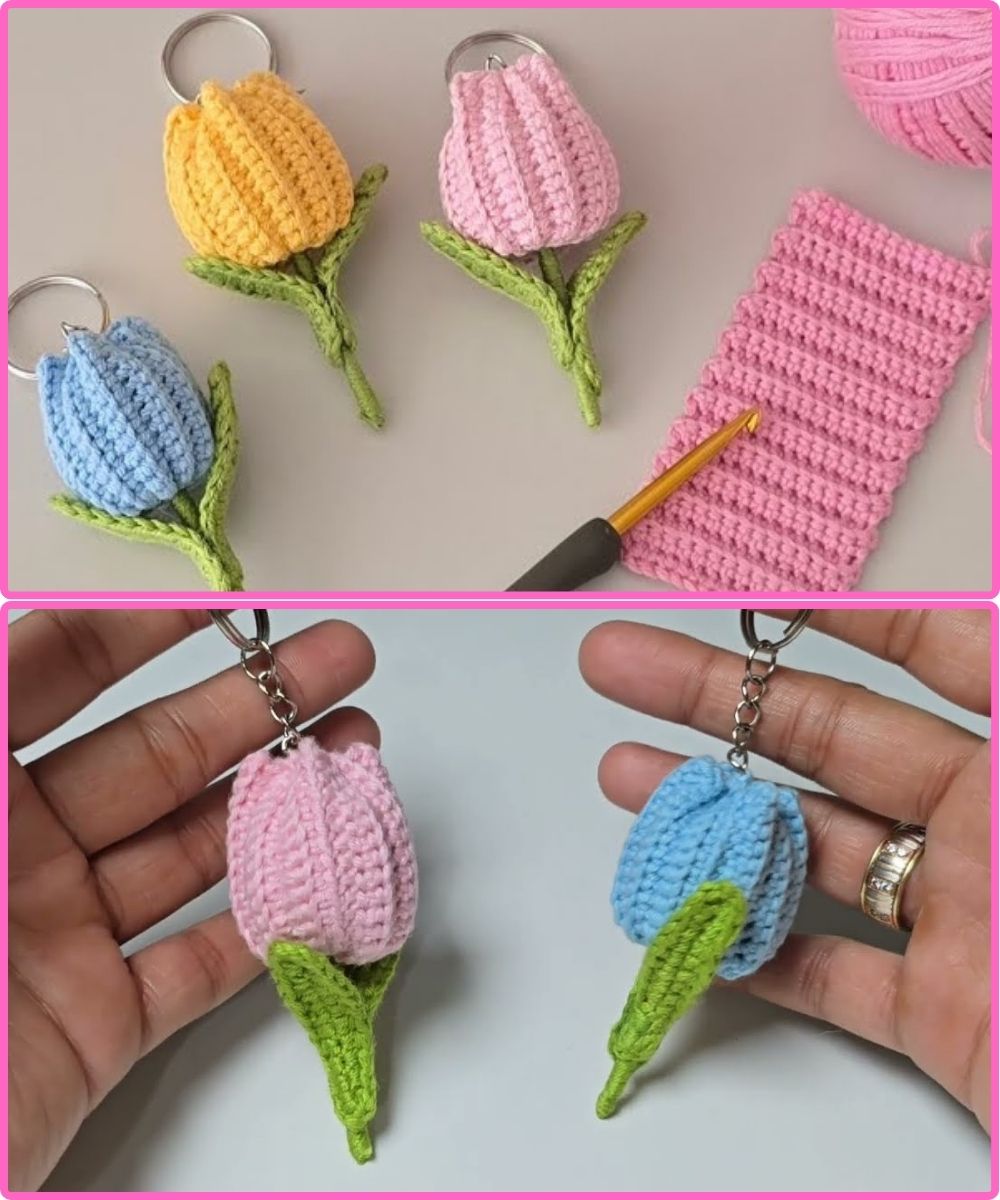
2. Personalized Resin Keychain
Resin keychains are incredibly customizable and allow you to embed small trinkets, glitter, or even photos.
Materials:
- Epoxy resin kit (with part A and part B)
- Silicone keychain mold
- Small disposable cups and stir sticks
- Nitrile gloves and a well-ventilated area
- Keychain rings and screw eyes
- Decorative elements (glitter, dried flowers, small charms, mica powder, etc.)
- A small hand drill or a thumbtack
Instructions:
- Prepare your workspace: Put on your gloves and make sure you’re in a well-ventilated area. Lay down some wax paper or a silicone mat to protect your surface.
- Mix the resin: Following the instructions on your epoxy resin kit, measure and pour equal parts of resin (part A) and hardener (part B) into a disposable cup. Stir slowly and thoroughly for at least 3 minutes, scraping the sides and bottom of the cup. Avoid whipping it to prevent bubbles.
- Add your decorations: Once the resin is mixed, you can add your decorative elements. Mix in some glitter or mica powder, or place dried flowers or charms directly into the mold.
- Pour into the mold: Slowly and carefully pour the resin into the silicone mold. Pour a thin layer first and let it set for a few minutes if you want to place a photo or other flat item on top. Use a toothpick to pop any bubbles that rise to the surface.
- Let it cure: Leave the resin to cure for the time recommended on your kit, which is usually 12-24 hours. Don’t touch it!
- Demold and finish: Once the resin is completely hard, carefully push it out of the mold. If there are any sharp edges, you can sand them down with fine-grit sandpaper.
- Attach the keychain: Use a small hand drill or a thumbtack to carefully create a small pilot hole at the top of the resin piece. Twist a screw eye into the hole. Finally, attach the keychain ring to the screw eye.
3. DIY Photo Keychain
This is a heartfelt and personal gift that’s perfect for family members and close friends.
Materials:
- A blank photo keychain kit (these come with a plastic or metal casing and a blank insert)
- A printer or a photo printing service
- Scissors or a craft knife
Instructions:
- Choose your photo: Select a clear, high-quality photo that you want to use.
- Resize and print: Measure the size of the photo insert in your keychain kit. Use a photo editing program to crop and resize your chosen photo to fit perfectly. Print the photo on high-quality photo paper.
- Cut the photo: Carefully cut out the photo using scissors or a craft knife, making sure it fits snugly into the keychain insert.
- Assemble the keychain: Place the photo face-up into the keychain casing. Snap the clear plastic cover or insert on top to secure the photo.
These three options offer a range of styles and skill levels, so you can choose the one that best fits your time and resources. No matter which one you choose, a handmade keychain is a gift that’s both useful and deeply personal.
Watch video: