by
by Sure! Here is a detailed full-class guide on how to make a long crochet dress, suitable for beginner to intermediate crocheters. This guide includes materials, measurements, pattern overview, step-by-step instructions, and tips for customization.
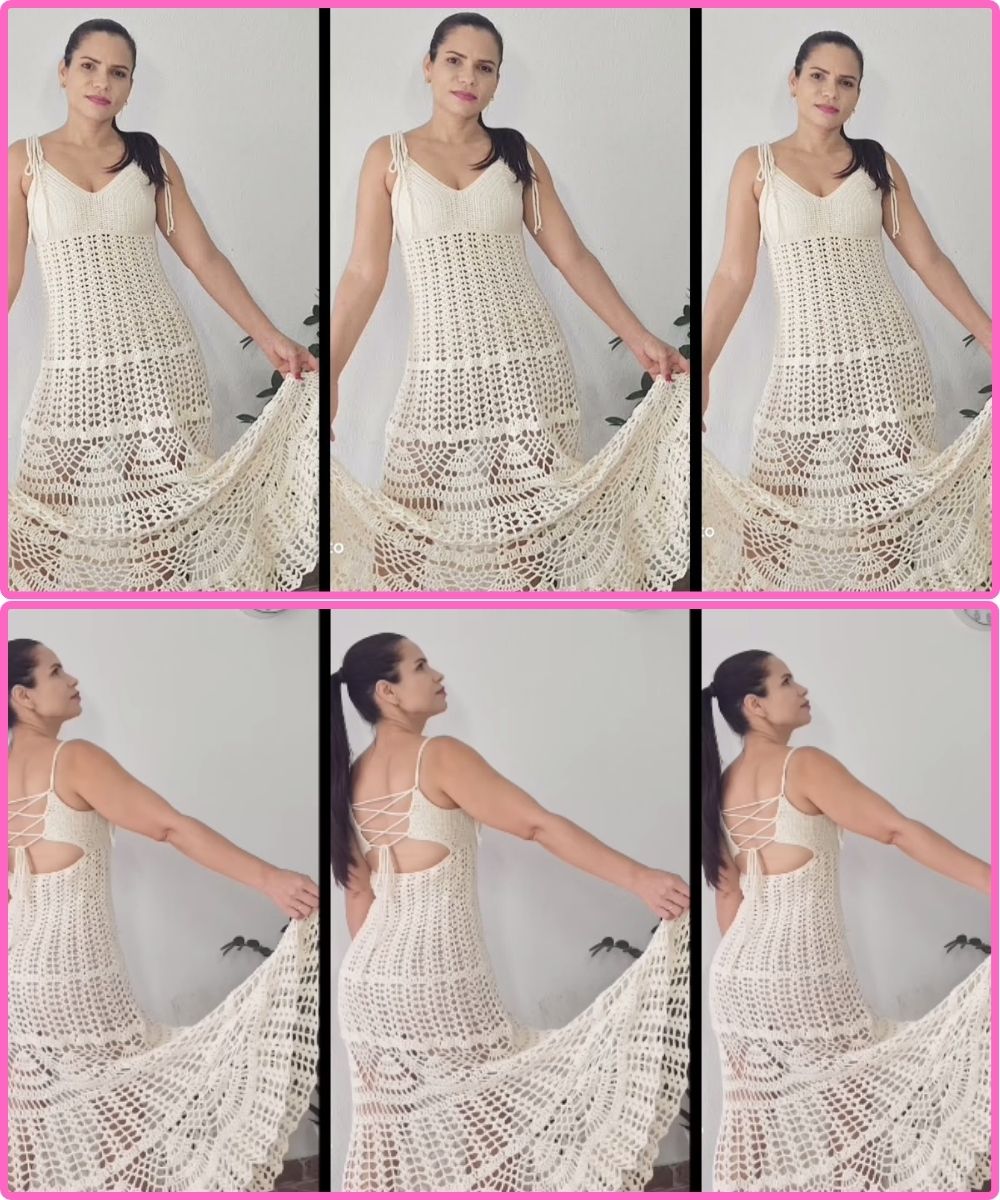
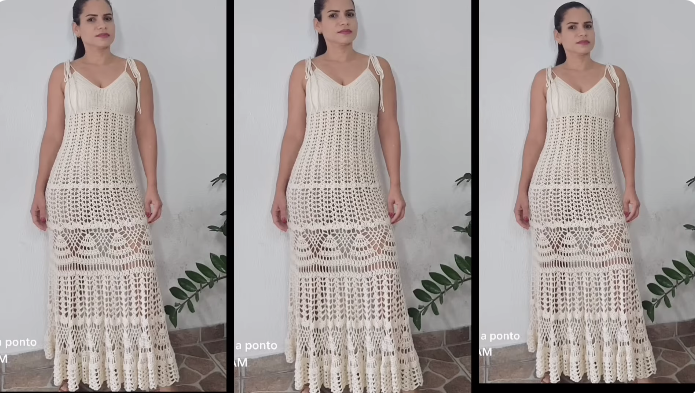
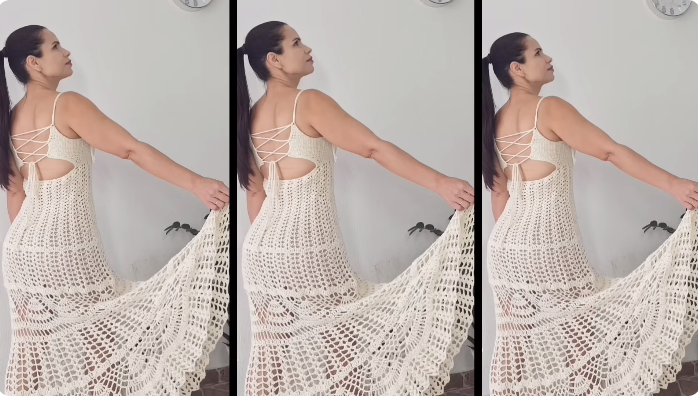
🧶 How to Make a Long Crochet Dress – Full Class Guide
🧰 Materials Needed:
-
Yarn: 1000–1500g of light DK or sport-weight cotton or bamboo yarn (depending on size and length)
-
Recommended: cotton-blend for breathability and comfort
-
-
Hook: Crochet hook size 3.5mm – 4.5mm (check yarn label)
-
Measuring tape
-
Stitch markers
-
Scissors
-
Tapestry needle
-
Optional: Buttons, lining fabric, or slip for modesty
📏 Step 1: Take Measurements
Measure:
-
Bust
-
Waist
-
Hips
-
Length (shoulder to desired hem)
-
Armhole depth
-
Shoulder width
You can base your dress on these or use standard garment sizing charts (S, M, L, etc.).
🧵 Step 2: Choose the Style and Pattern
There are many styles of crochet dresses. For this class, we’ll make a simple fitted long dress with straps, worked in two panels (front and back), then seamed.
You can later adapt the design to include:
-
Sleeves
-
Slits
-
Flared skirt
-
Lace/openwork
📋 Step 3: Swatch & Gauge
Make a 4″x4″ (10x10cm) swatch using your chosen stitch pattern. Count how many stitches and rows per inch. This helps you:
-
Ensure correct sizing
-
Estimate how many stitches to cast on
Example: If gauge = 5 stitches/inch, and your bust = 36″, you need 180 stitches.

🧶 Step 4: Choose the Stitch Pattern
Some beginner-friendly options:
-
Single crochet (sc): dense and simple
-
Double crochet (dc): faster, more flowy
-
Shell stitch or V-stitch: adds lacy detail
-
Mesh/lace stitch: open and airy
For this class, we’ll use a double crochet body with a lacy bottom panel.
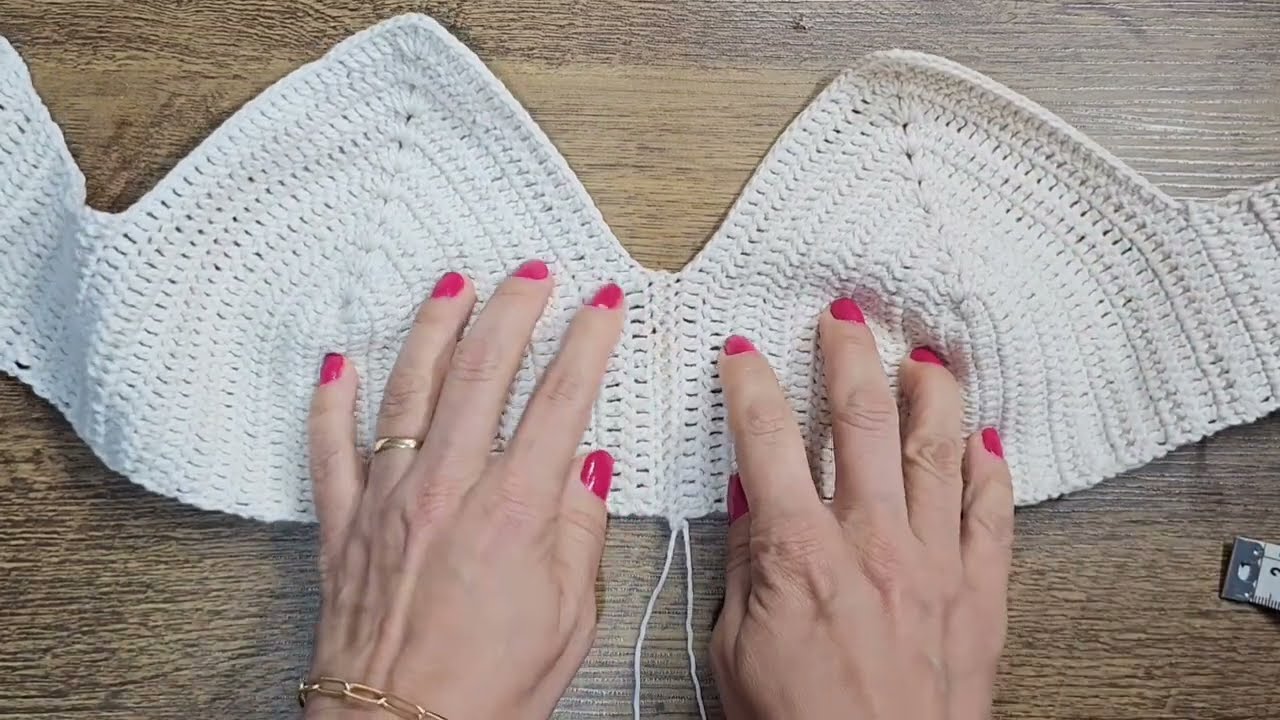
🧍♀️ Step 5: Dress Construction – Overview
You’ll make:
-
Front Panel
-
Back Panel
-
Straps or sleeves
-
Join & Seam
-
Edging / Finishing

👗 Step-by-Step Instructions
🔹 PART 1: Front & Back Panels (same pattern)
Foundation Row:
-
Chain the number of stitches to match your bust + ease.
-
E.g., if gauge is 5 sts/inch, bust = 36″, then chain ~190 (including some ease).
-
Rows 1–50 (Top Bodice):
-
Row 1: DC in 4th ch from hook and across.
-
Row 2–50: Ch 3, turn, DC across.
(Adjust row count for desired top length, ~12-14”)
Rows 51–100 (Waist to Hip):
-
Decrease slightly every 5th row to shape waist
-
Increase again to fit hip measurement
Rows 101–120 (Skirt Expansion – Optional Lace):
Switch to lacy stitch pattern (e.g., Shell stitch):
-
Row 101: 2 dc in one st, skip 1, sc in next, repeat
-
Row 102+: Continue lace pattern, increasing every few rows for flare
Adjust number of rows depending on your desired dress length.
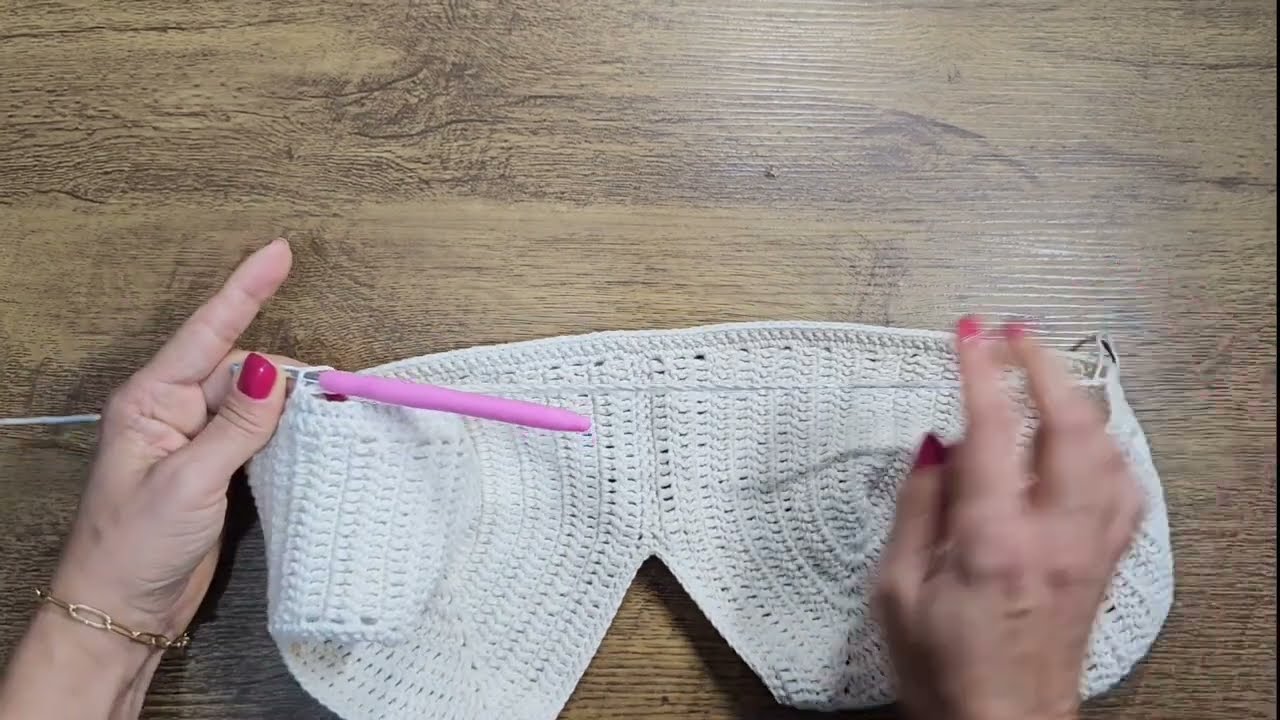
🔹 PART 2: Straps or Sleeves
From top edge of panel:
-
Attach yarn, chain 60–80 (depending on strap length)
-
SC or DC back into the chain for thickness
-
Attach to back panel in correct spot
-
Repeat for second strap
Alternative:
-
Crochet cap sleeves or long sleeves separately, then seam
🔹 PART 3: Assembly
-
Place panels right sides together.
-
Seam sides with whip stitch or mattress stitch from bottom up.
-
Stop at armhole height.
-
-
Seam shoulders (or attach straps).
-
Optional: Add side slit by leaving bottom seam open ~10″
🔹 PART 4: Edging & Finishing
-
SC or reverse SC around neckline and armholes for clean edges
-
Weave in all ends
-
Steam block or wet block to shape and drape
🎨 Customizations
-
Add colorwork (stripes, gradient yarn)
-
Add lace or mesh panels
-
Add ribbons, buttons, or a belt
-
Adjust to halter neck, off-shoulder, or open back
🧼 Care Instructions
-
Hand wash or gentle cycle
-
Lay flat to dry
-
Avoid hanging when wet (can stretch)
🧑🏫 Tips for Success
-
Always check your gauge
-
Use stitch markers to track shaping or lace repeats
-
Use blocking to fix size and shape
-
Try on as you go or use a dress form
📚 Bonus: Stitch Tutorials (Search These)
-
Double Crochet (dc)
-
Shell Stitch
-
Mesh Stitch
-
Mattress Stitch
-
Slip Stitch Join
Would you like a PDF version, video suggestions, or a customized pattern based on your measurements or style (like boho, bodycon, etc.)? I can create that for you too!
Watch video: