 by
by It sounds like you’re looking for a detailed guide on how to crochet a pullover with cables for a child between 1 and 5 years old. This is a fantastic project, but it requires a good understanding of basic crochet stitches and some specific cable techniques.
To give you the most helpful and detailed information, I’ll break it down into several key sections:
Part 1: Understanding Cable Crochet & Essential Stitches
Part 2: Sizing & Gauge
Part 3: Materials Needed
Part 4: Construction (General Pullover Shape)
Part 5: Cable Panel Instructions (General)
Part 6: Assembly & Finishing
Part 7: Tips for Success
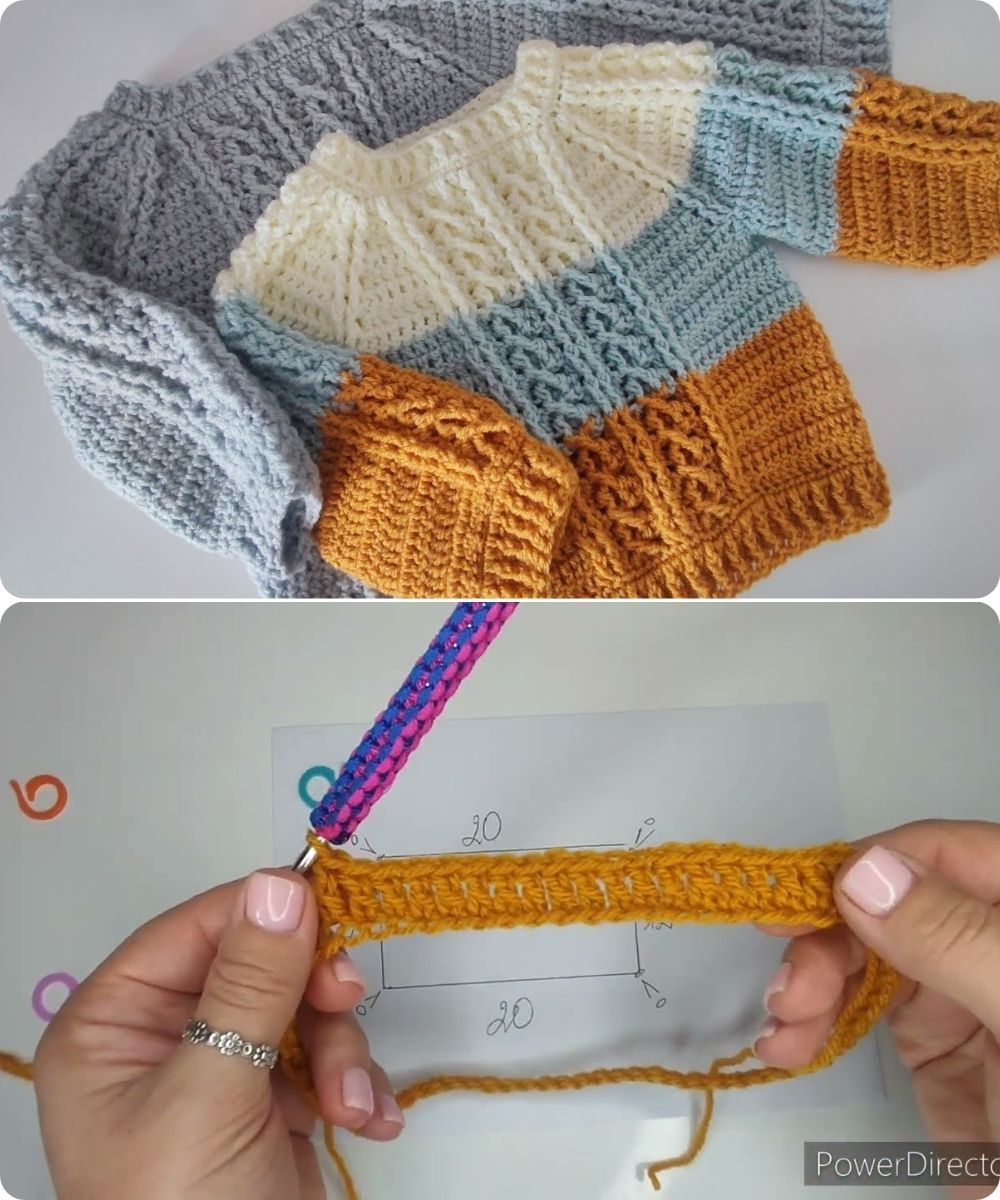
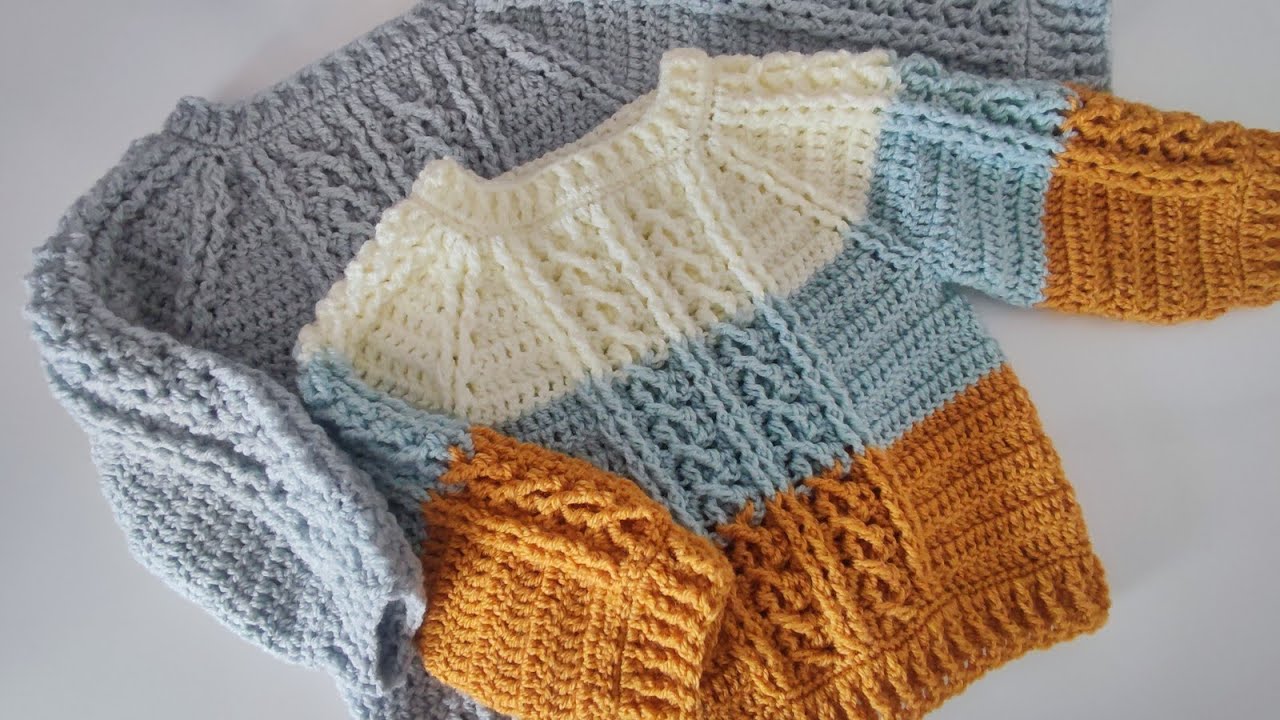
How to Crochet a Pullover with Cables (1-5 Years)
Part 1: Understanding Cable Crochet & Essential Stitches
Before you start, ensure you’re comfortable with these fundamental crochet stitches:
- Chain (ch): The foundation of most crochet projects.
- Slip Stitch (sl st): Used for joining, moving across stitches without adding height, and finishing.
- Single Crochet (sc): A basic, short stitch.
- Half Double Crochet (hdc): Taller than sc, shorter than dc.
- Double Crochet (dc): A common, taller stitch.
- Front Post Double Crochet (fpdc): This is crucial for creating cables. Instead of inserting your hook into the top of the stitch, you insert it around the post of the stitch from the front.
- Back Post Double Crochet (bpdc): Used less often for cables themselves, but important for creating texture and ribbing. Insert your hook around the post of the stitch from the back.
What are Cables in Crochet? Crochet cables are created by working “post stitches” (like fpdc) around previous stitches and then crossing them over each other. This creates a raised, dimensional effect that mimics knitted cables. The number of stitches you cross determines the “width” of your cable.
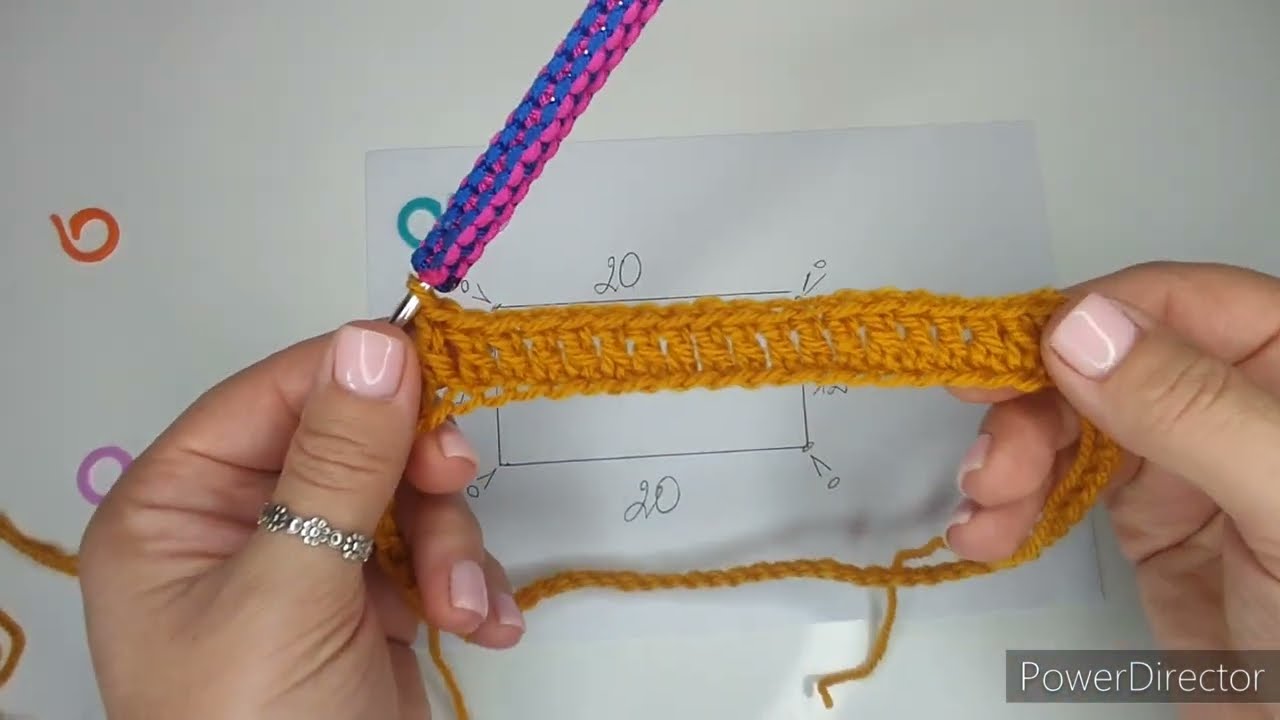
Part 2: Sizing & Gauge
This is the MOST important step for any garment, especially for children! Children’s sizes vary widely, so relying solely on “1-5 years” is not accurate enough.
- Measure the Child:
- Chest Circumference: The most critical measurement. Add 2-4 inches (5-10 cm) for positive ease (room to move and grow).
- Length (Shoulder to Hip): Determine how long you want the pullover to be.
- Arm Length (Shoulder to Wrist): For sleeves.
- Neck Circumference: For the neck opening.
- Choose a Standard Size Chart (Optional but Recommended): If you don’t have the child available for measurements, look up a reliable crochet garment size chart for children (e.g., from yarn companies or reputable pattern designers).
- Create a Gauge Swatch:
- Yarn & Hook: Use the yarn and hook you intend to use for the pullover.
- Pattern: Crochet a swatch in the stitch pattern you plan to use for the body of the pullover (likely hdc or dc) and a small section of your chosen cable pattern.
- Size: Make it at least 6×6 inches (15×15 cm) for accuracy.
- Measure: After blocking (washing and drying as you would the finished garment), measure how many stitches and rows you have in a 4×4 inch (10×10 cm) square.
- Adjust:
- Too many stitches/rows in 4 inches: Your gauge is too tight. Go up a hook size.
- Too few stitches/rows in 4 inches: Your gauge is too loose. Go down a hook size.
- Record: Write down your final gauge! This is essential for calculating your starting chains and stitch counts.
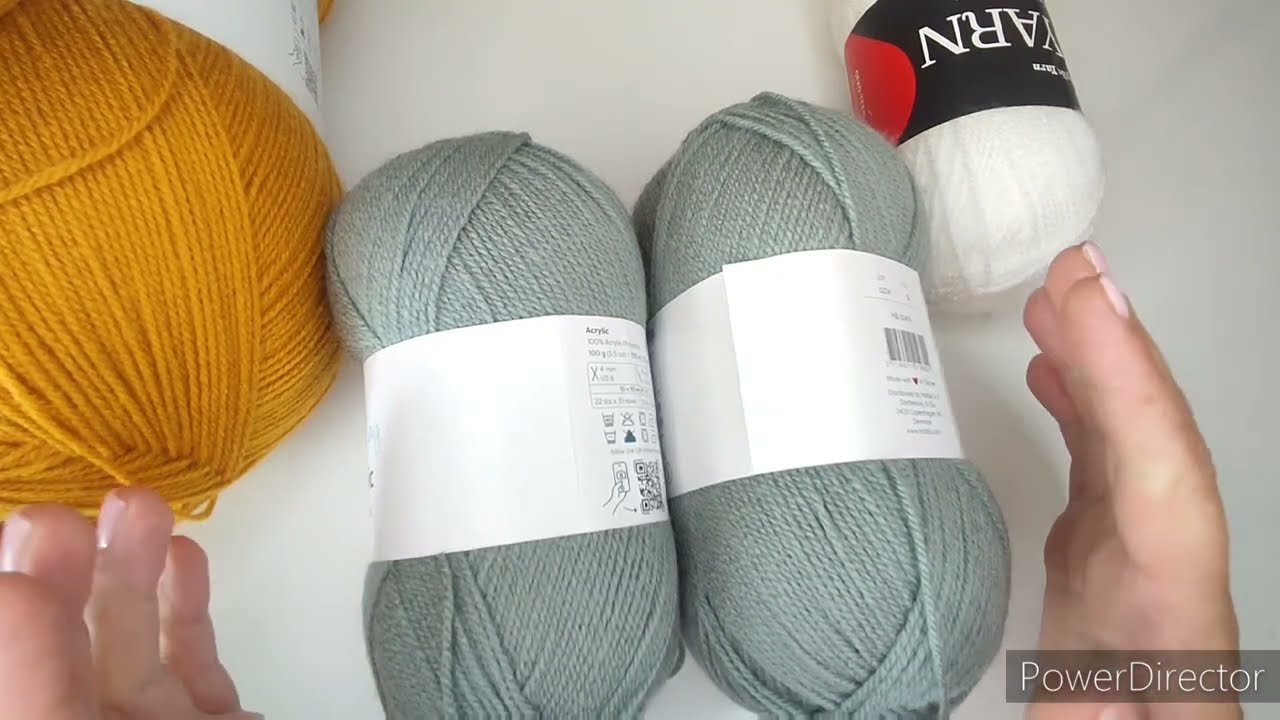
Part 3: Materials Needed
- Yarn:
- Fiber: Choose a yarn suitable for children – soft, washable, and durable. Acrylic, cotton blends, or superwash wool are excellent choices.
- Weight: Medium worsted weight (Aran/10-ply) is generally good for pullovers. Lighter weights will require more stitches and make the project take longer; bulkier weights will work up faster but might be too warm.
- Quantity: This depends entirely on the size, yarn weight, and stitch pattern. Consult yarn label recommendations for similar garment types or err on the side of buying more than you think you’ll need.
- Crochet Hook:
- Start with the size recommended on your yarn label for your chosen yarn weight. Adjust based on your gauge swatch.
- Stitch Markers: Very helpful for marking beginnings of rounds, cable crossings, or specific sections.
- Yarn Needle (Tapestry Needle): For weaving in ends and seaming.
- Scissors: For cutting yarn.
- Measuring Tape: For gauge and sizing.
- Blocking Mats & Pins (Optional but Recommended): For shaping and finishing.
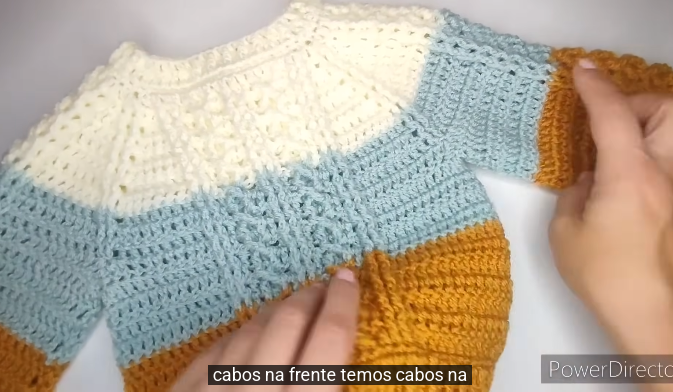
Part 4: Construction (General Pullover Shape)
A basic pullover is typically constructed in pieces and then sewn together, or sometimes worked in the round from the bottom up. For cables, working in pieces is often easier to manage the cable panel placement.
Common Pieces:
- Back Panel: Usually a flat rectangle.
- Front Panel: Similar to the back, but with a neck opening. This is where your cable panel(s) will be.
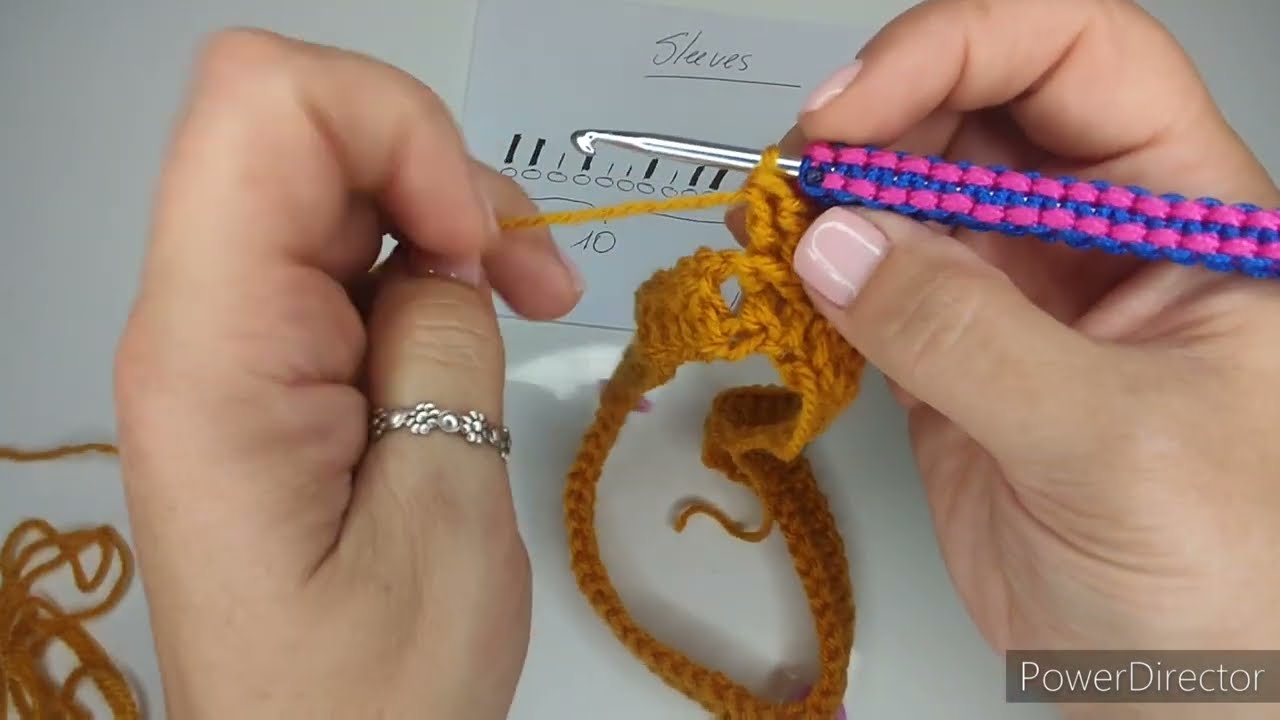
- Sleeves (x2): Tapered tubes.
- Neckband (Optional): Added after assembly.
General Steps for Each Panel:
- Bottom Ribbing (Optional): Usually created with fpdc/bpdc or sc in the back loop only for stretch.
- Body Section: Worked in rows (for flat panels) or rounds (if working in the round). This is where your cable pattern will be incorporated.
- Armhole Shaping: Decreases made at the edges to create armholes.
- Shoulder Shaping: Decreases or leaving stitches unworked at the top to create sloped shoulders.
- Neck Shaping (Front Panel): Decreases and/or leaving stitches unworked to create the neck opening.
Part 5: Cable Panel Instructions (General)
This is where the magic happens! There are many types of cables. Here’s a common 4-stitch or 6-stitch cable as an example.
Terminology for Cables:
- C2F (Cable 2 Front): Skip 2 stitches, fpdc in next 2 stitches. Go back and fpdc in the 2 skipped stitches.
- C2B (Cable 2 Back): Fpdc in next 2 stitches, then go back and fpdc in the 2 skipped stitches. (Less common for simple cables, but good to know.)
- C3F (Cable 3 Front): Skip 3 stitches, fpdc in next 3 stitches. Go back and fpdc in the 3 skipped stitches.
Example: A Simple 6-Stitch Cable (C3F over C3F)
Let’s assume your cable panel is 6 stitches wide. You’ll need “background” stitches around it (often dc or hdc) to make the cables stand out.
Setup Row (e.g., Row 1 of your cable repeat): Work 6 fpdc stitches. (These are the stitches that will be crossed later.)
Rest Rows (e.g., Rows 2, 3, 4 of your repeat): Work 6 fpdc stitches. (These maintain the height of the cable before crossing.) The number of “rest rows” determines how often your cable crosses. More rest rows make a looser, more elongated cable. Fewer rest rows make a tighter, more defined cable.
Cable Crossing Row (e.g., Row 5 of your repeat):
- For a 6-stitch cable crossing to the left (common):
- Skip the next 3 fpdc stitches.
- Work fpdc around the next 3 fpdc stitches (stitches 4, 5, 6 of the cable).
- Now, going behind the stitches you just made, work fpdc around the 3 skipped fpdc stitches (stitches 1, 2, 3 of the cable).
- You’ve just created a left-crossing cable!
Important Cable Considerations:
- Background Stitches: Always surround your cable panel with at least a few regular stitches (hdc or dc) so the fpdc stitches have something to “pop” out from.
- Consistent Tension: Keep your tension even for neat cables.
- Charting Cables: For complex cables, it’s very helpful to draw a chart or find a pattern with one. Each square can represent a stitch, and arrows can show the direction of crossing.
- Practice! Make a small swatch with your chosen cable pattern before incorporating it into the garment.
Part 6: Assembly & Finishing
Once all your panels are crocheted:
- Block All Pieces: This is crucial for crochet garments, especially with cables. It evens out stitches, opens up lacier patterns, and helps the cables truly pop. Pin each piece to its correct dimensions on blocking mats, mist with water (or wet block if your yarn allows), and let dry completely.
- Seam Shoulders: Use a mattress stitch or whip stitch to neatly join the shoulder seams of the front and back panels.
- Set in Sleeves: Lay the pullover flat. Align the center of the sleeve top with the shoulder seam. Pin the sleeve in place around the armhole opening. Seam using mattress stitch or whip stitch.
- Seam Sides & Underarms: Pin the side seams and underarm seams together. Seam from the bottom hem of the body up to the armpit, and then down the sleeve to the cuff.
- Add Neckband (Optional but Recommended):
- Join yarn at a seam or discreet point on the neck edge.
- Work a round of single crochet evenly around the neck opening.
- Then, work several rounds of fpdc/bpdc ribbing or just sc in the back loop only for a neat, stretchy finish. Join and fasten off.
- Weave in All Ends: Use your yarn needle to neatly hide all loose yarn tails.
Part 7: Tips for Success
- Read the Entire Pattern First: If you’re following a specific pattern, read through it completely before starting.
- Use Stitch Markers Liberally: Mark the start/end of cable panels, specific rows, or stitch counts.
- Count Your Stitches! Especially on cable rows, it’s easy to lose track. Count frequently to avoid mistakes.
- Take Notes: Keep a notebook handy to track rows, cable crossings, and any modifications you make.
- Don’t Be Afraid to Undo (Frog): If you make a mistake, it’s always better to undo a few rows than to try and work around it later.
- Watch Video Tutorials: For specific cable techniques (like fpdc/bpdc and the actual crossing of stitches), video tutorials are incredibly helpful. Search for “crochet cable tutorial” on YouTube.
- Practice Swatches: Seriously, they are your best friend. They save you headaches later.
- Enjoy the Process! Crocheting a garment, especially one with cables, is a rewarding experience. Take your time and enjoy creating something special.
This detailed guide should give you a solid framework for how to approach crocheting a cable pullover for a child. Remember, the key is good preparation (gauge, measurements), understanding the techniques, and patience. Happy crocheting!
Watch video: