 by
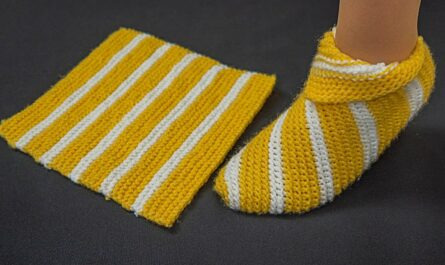
by Below is a clear, detailed, easy-to-follow guide for making slippers on 2 knitting needles using only one swatch (rectangle). This is one of the fastest beginner-friendly slipper methods, because the entire slipper is constructed from one simple knitted piece and then cleverly folded and sewn.
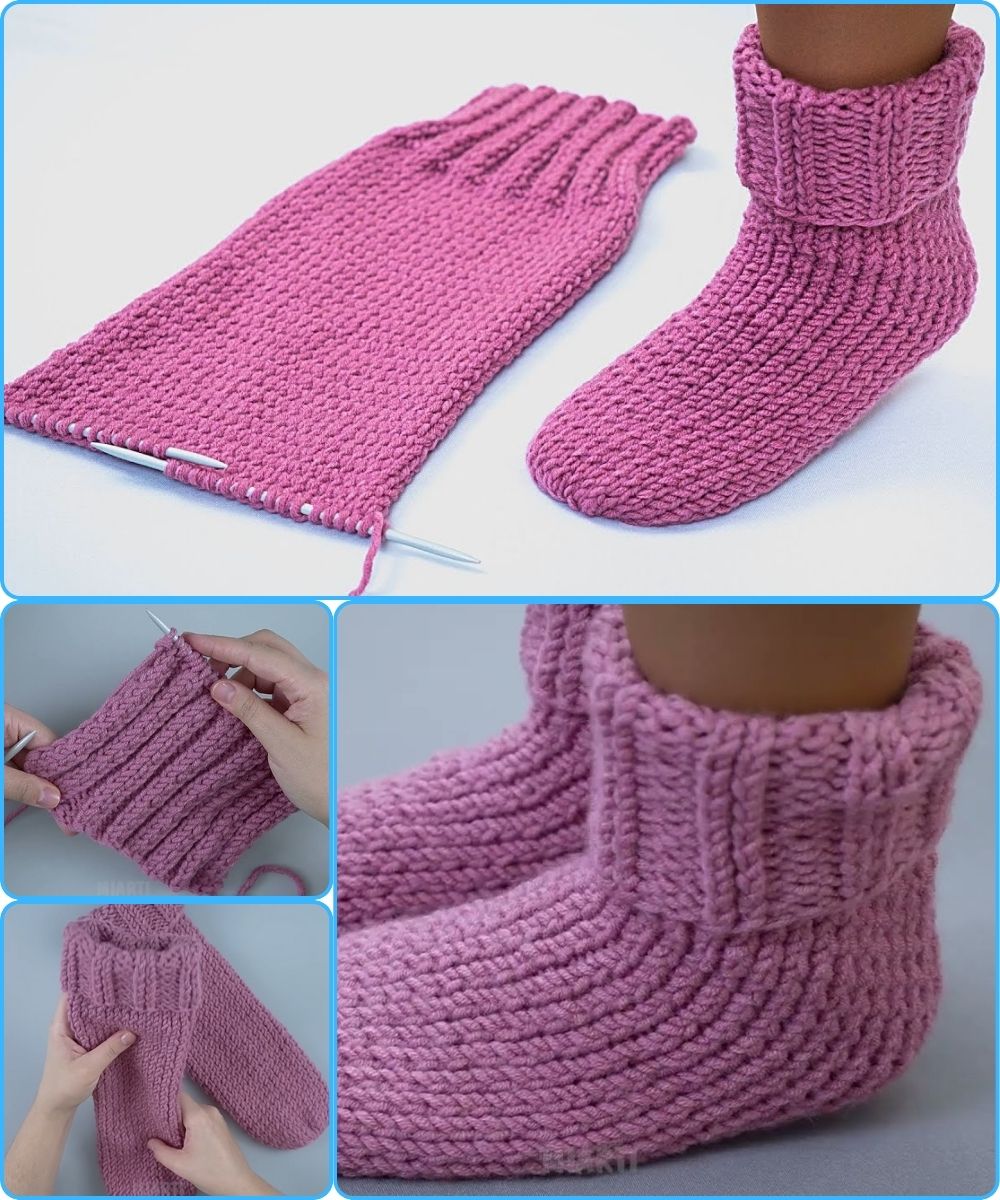
🧶 How to Make Easy & Quick Slippers on 2 Knitting Needles Using One Swatch
⭐ Why This Method Works
These slippers are made from:
-
One rectangular swatch
-
Two straight knitting needles
-
Any yarn you like (medium/worsted is easiest)
Once your rectangle is knitted, you shape the slippers by folding and sewing only 2 seams. Perfect for fast gifts, beginners, or stash-busting.
🧵 Materials
-
Yarn (worsted weight or similar)
-
Knitting needles to match yarn (usually 4–5 mm / US 6–8)
-
Yarn needle (for sewing)
-
Scissors
-
Optional: stitch markers, pom-poms, buttons
📏 Measurements
To make the slippers fit well:
👉 Slipper length = your foot length
Your knitted rectangle will be:
-
Width: approx. 7–8 in (18–20 cm) for adult
-
Length: equal to your foot length × 2 (because you fold it)
For example:
Foot length 9 in → Knit rectangle 18 in long.
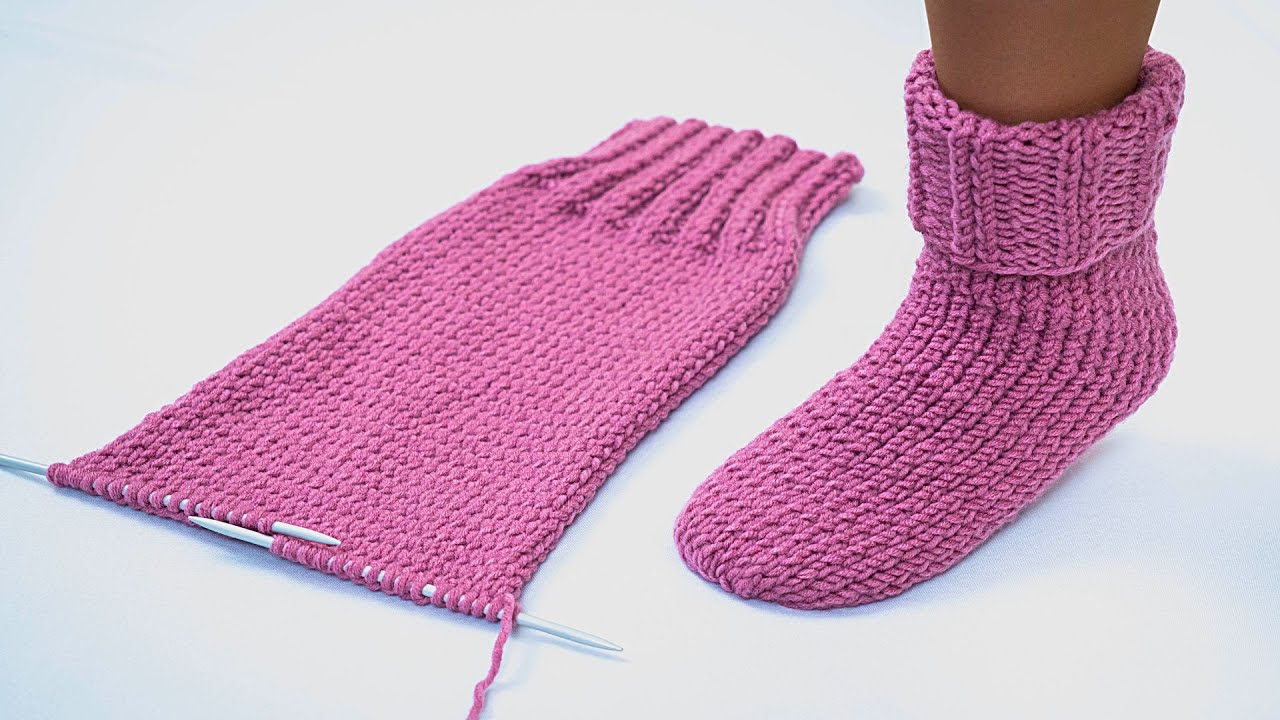
🪡 Step-by-Step Instructions
STEP 1 — Cast On
Cast on 30–40 stitches depending on foot width.
-
Narrow feet: 30 stitches
-
Medium: 34 stitches
-
Wide: 38–40 stitches
This forms the width of your slipper.
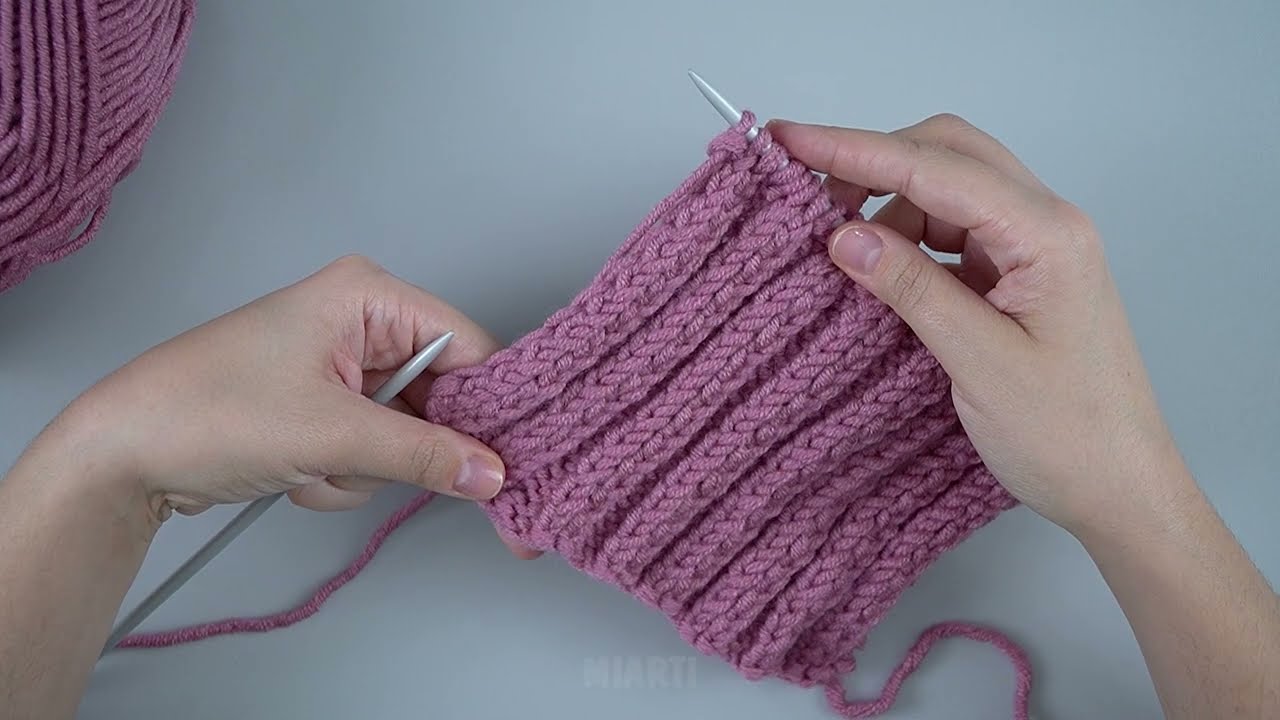
STEP 2 — Knit the Swatch (Rectangle)
Work in your favorite stitch:
-
Garter stitch (knit every row) → stretchiest, easiest
-
Ribbing (K1, P1 or K2, P2) → snug fit
-
Stockinette → smooth look
Knit until the piece measures:
➡️ Twice the length of the foot
(Example: 9″ foot = 18″ swatch)
Bind off loosely.
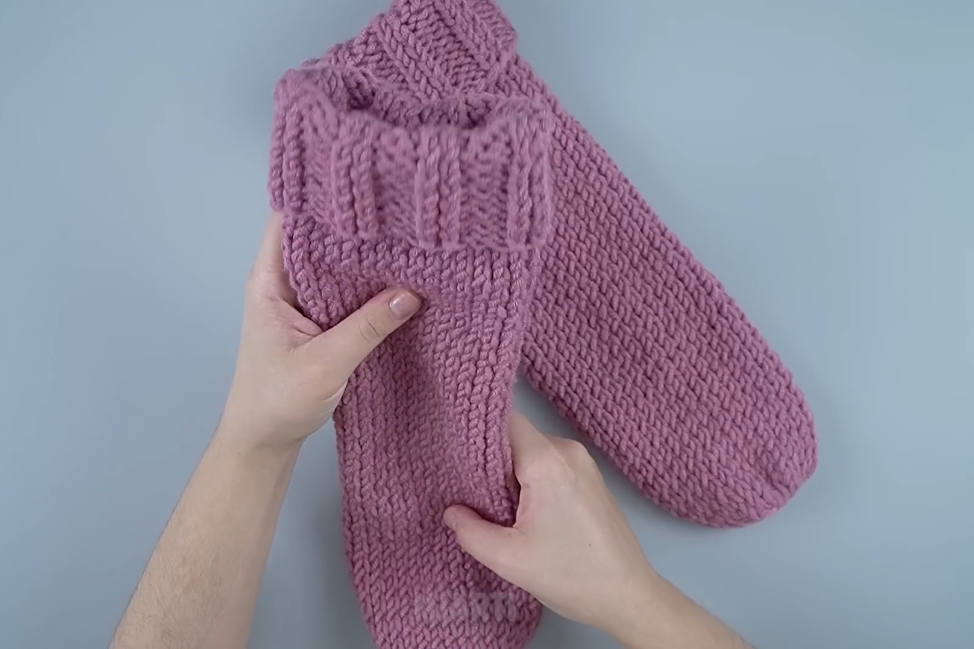
🧩 STEP 3 — Fold and Shape the Slipper
Lay your rectangle flat:
Fold the rectangle in half:
-
One half becomes the toe
-
The other half becomes the heel
🪡 STEP 4 — Sew the Toe
Starting from the folded end, sew about 1/3 of the length closed.
This forms the toe of the slipper.
For example:
Rectangle length 18″ → Sew about 6″ for the toe.
You now have an opening on one side (ankle) and on the other end (heel).
🪡 STEP 5 — Shape the Heel
At the opposite end of the rectangle:
Option A — Gathered Heel (easiest)
-
Run a yarn needle around the open edge
-
Pull tight like a drawstring
-
Secure snugly
Option B — Straight Seam Heel
-
Fold the heel edges together
-
Sew straight across for a firmer heel shape
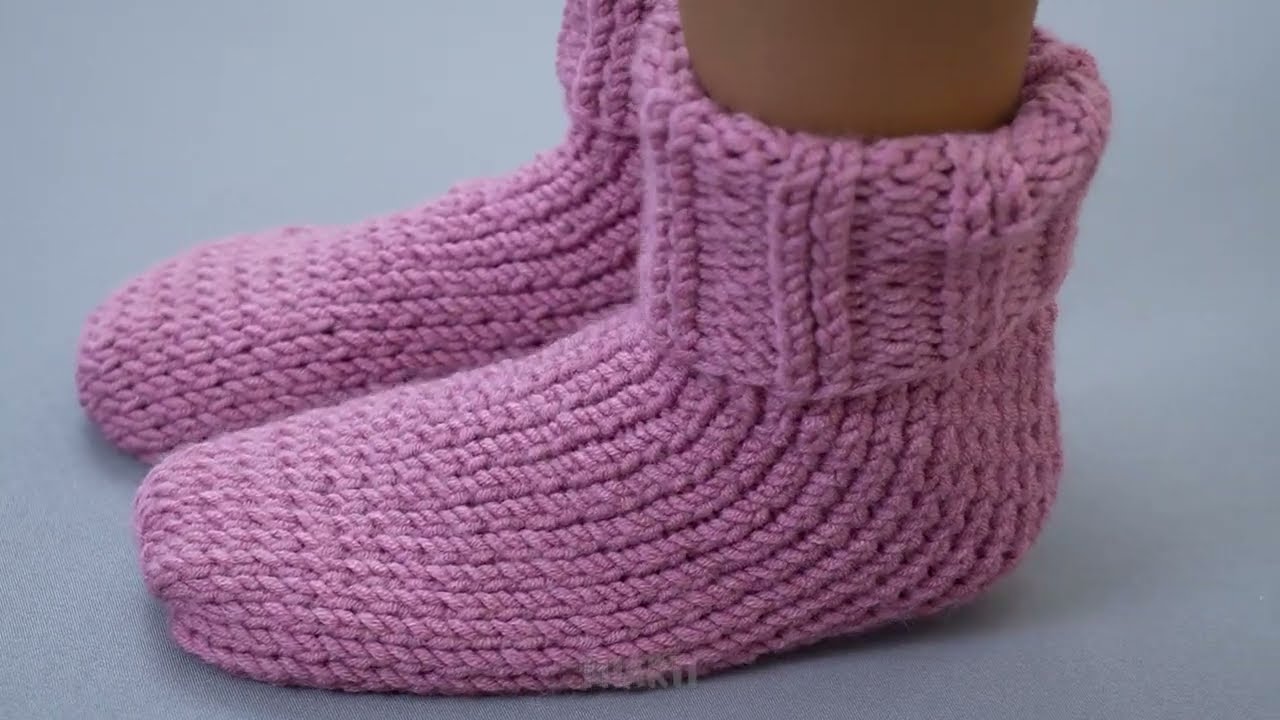
🧦 STEP 6 — Finish & Adjust
-
Try the slipper on and adjust tightness
-
Weave in all yarn ends
-
Add optional:
-
Pom-pom on the toe
-
Button on the cuff
-
Ribbed cuff (pick up stitches around ankle opening and knit 1–2 inches)
-
🎁 Optional Variation: Add Top Decoration
Knit a 2-inch square or small flower and sew it onto the toe for decoration.
📝 Simple Pattern Summary
Cast on: 34 stitches
Stitch: Garter stitch
Knit: 18 inches
Fold in half
Sew toe: 6 inches
Gather or sew heel
Weave in ends → Done!
This makes a comfortable women’s medium slipper.
✨ Tips for Best Results
✔ Use thicker yarn for faster knitting
Bulky yarn = 1–2 hour slippers.
✔ Use ribbing for a tighter fit
Ribbed pieces stretch to the foot nicely.
✔ Add a non-slip sole
Use puffy fabric paint on the bottom for safety.
Want a diagram or a printable pattern?
I can create:
-
ASCII diagrams of the folding and sewing
-
A printable PDF-style pattern
-
Versions for men, kids, or babies
-
A ribbed or textured stitch version
Just tell me!
Watch video: